Do you have some old SOAP services and you have some other applications that want to use them without going back in time to the golden days of SOAP to consume them? Well, we have the perfect solution for you to expose them as a JSON-based RESTful service with no coding involved! We can do this all in the Tyk dashboard, using body transformations to get going in a matter of minutes.
All that you need to get started is a SOAP web service that is up and running, a WSDL, and a working version of Tyk that includes our Tyk dashboard. Let’s get started!
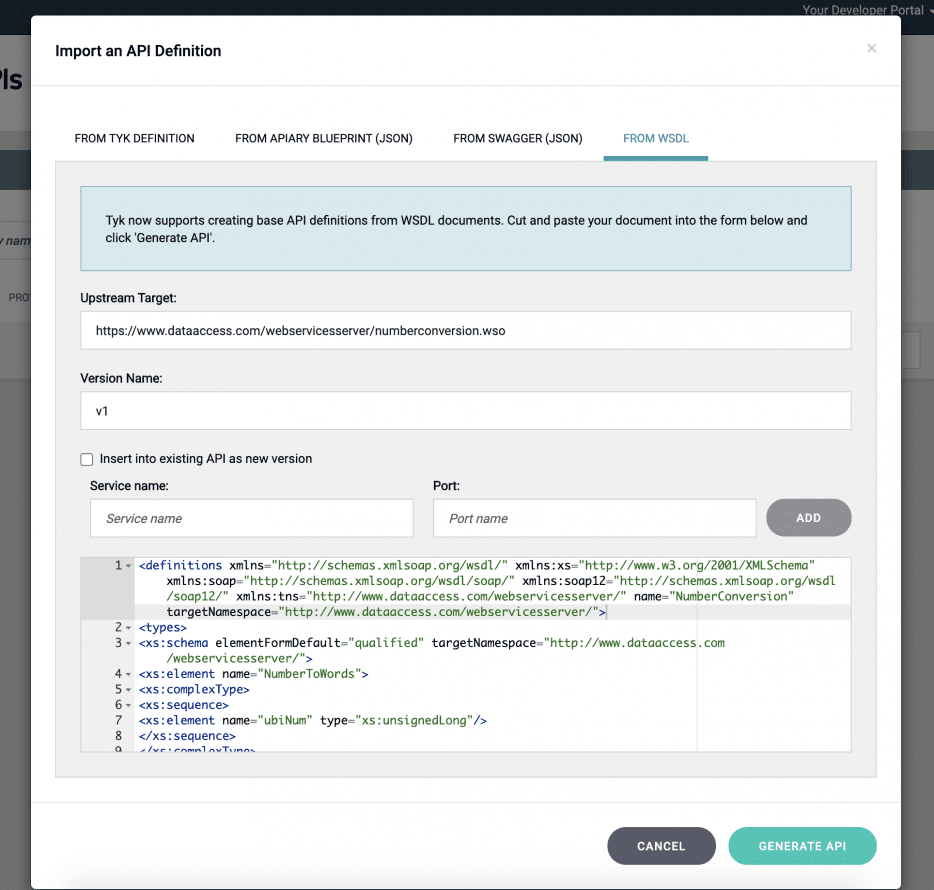
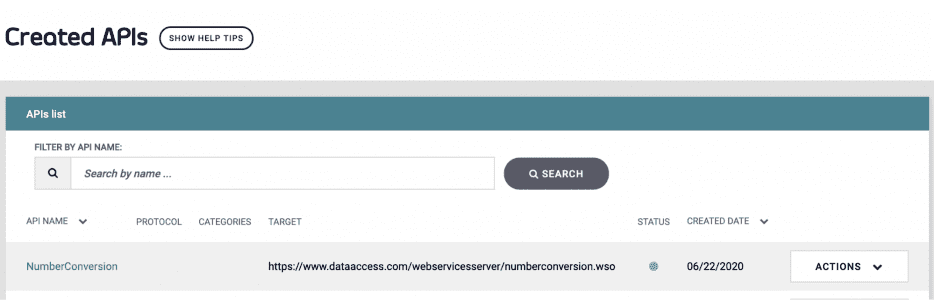
Note: For this demonstration, I will use the following service: https://www.dataaccess.com/webservicesserver/numberconversion.wso
Step 1: import APIs using a WSDL
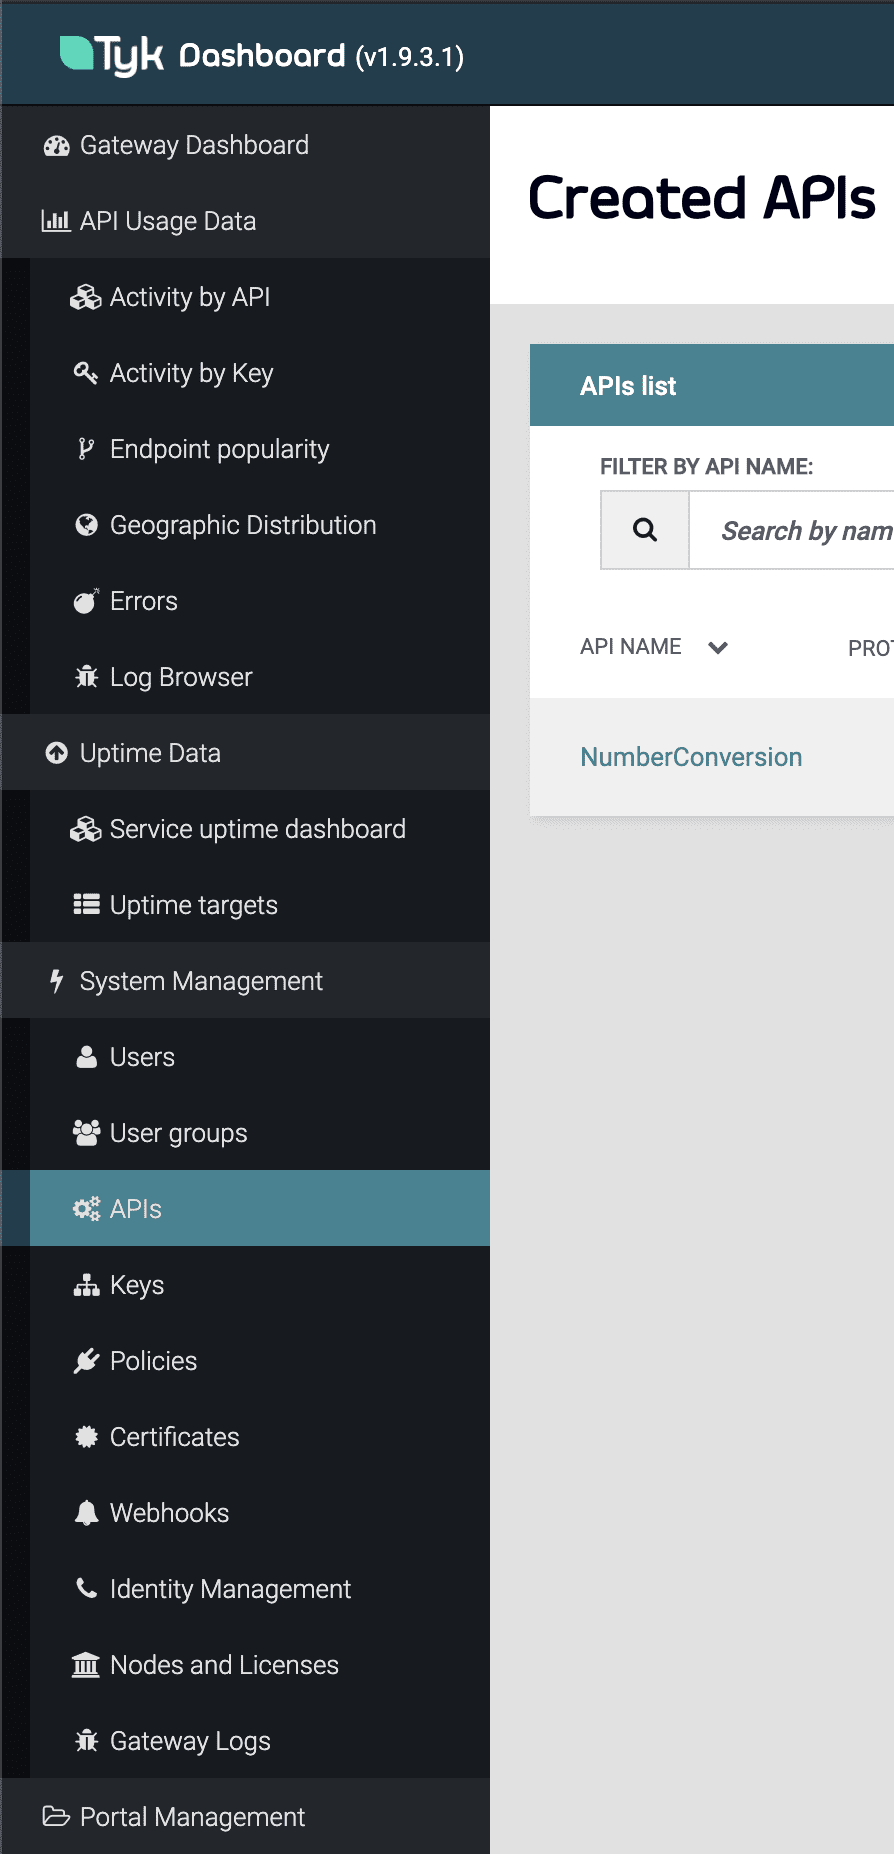
After logging into the dashboard, navigate to the APIs menu item under the System Management menu:
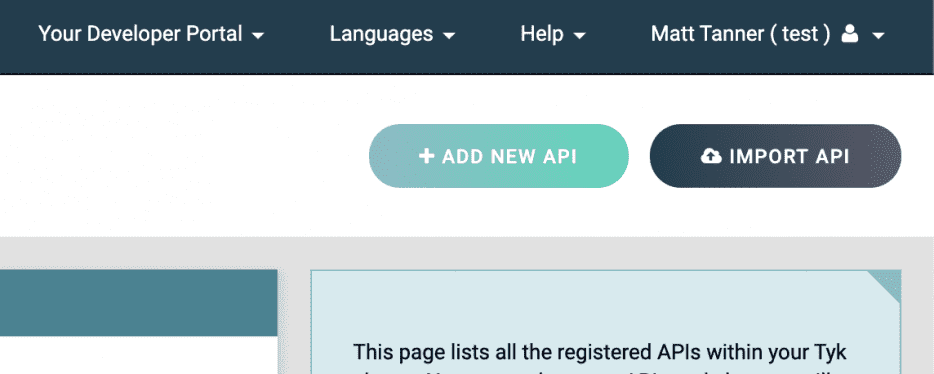
Once on this page, you will click the IMPORT API button in the top right corner of the dashboard:
Now we will see the Import API screen modal show on the screen. Along the header, click FROM WSDL. You should see the following screen at this point:
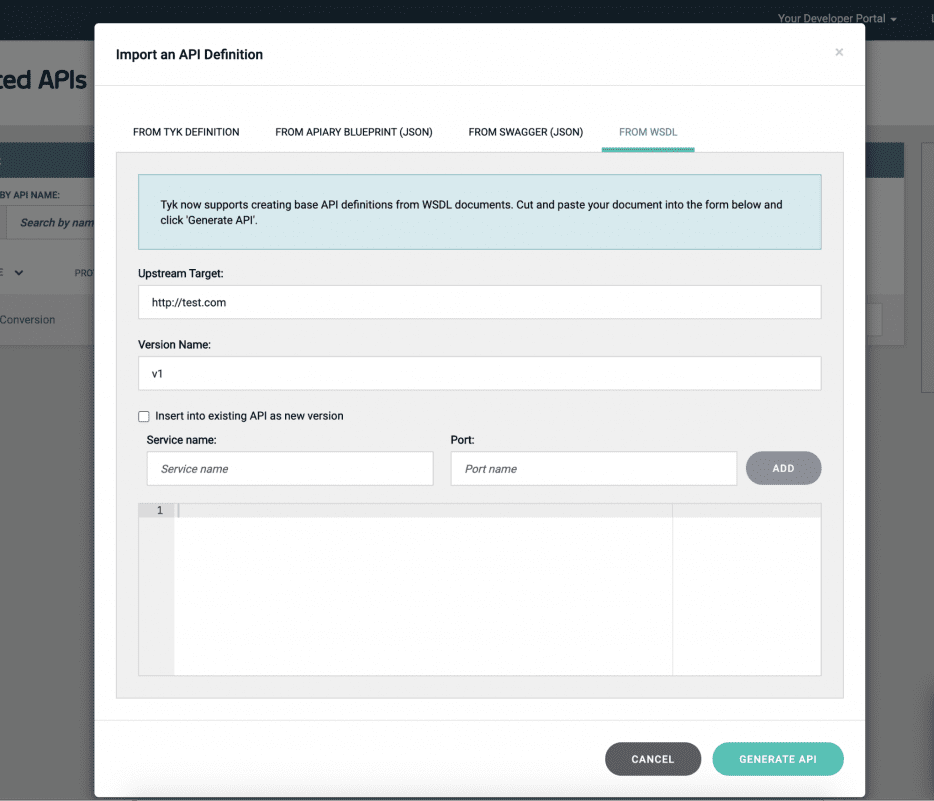
We now want to paste the WSDL in the textbox at the bottom of the model and make sure that our Upstream Target text field is pointing to our running service. If you’re following along with me and the service I am using, you will now have the fields filled out with the following:
After these fields are filled in and valid, click GENERATE API. The Modal will close and you will see your API has been created from the WSDL:
Step 2: Add in the body transformations for the endpoints
Note: I will only demonstrate how to do this on 1 endpoint, not both.
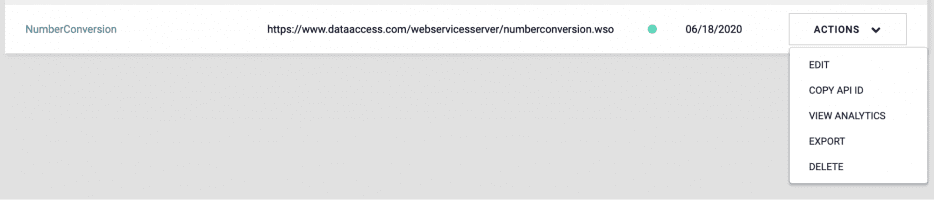
Still on the Created APIs screen (under the APIs menu item), under your newly created API click ACTIONS and select EDIT:
Then, in the top header click on ENDPOINT DESIGNER. You’ll then see your endpoints that were created through the importing of the WSDL:

Sometimes when a WSDL is imported, things go a little funky. For instance, on the WSDL I imported you see that one of our API paths is /NumberConversion/NumberConversion/NumberToWords. Obviously this gets a bit confusing so you can just change the relative path of the endpoint to fix this. This is exactly what I have done with the /NumberConversion/NumberToDollars endpoint in the picture above. If you need to do this all you need to do is adjust the Relative Path field in the endpoint you are working on
Now, we will open up the /NumberToDollars endpoint and add in the following plugins from the dropdown (if not already added):
- Body transform
- Modify Headers
- Track endpoint
- URL rewrite
Once added you should see all of them displayed (except for Track endpoint) under your endpoint like so:

First, we will expand the Body transform plugin and put in our request and response transformations. The request will look like this:
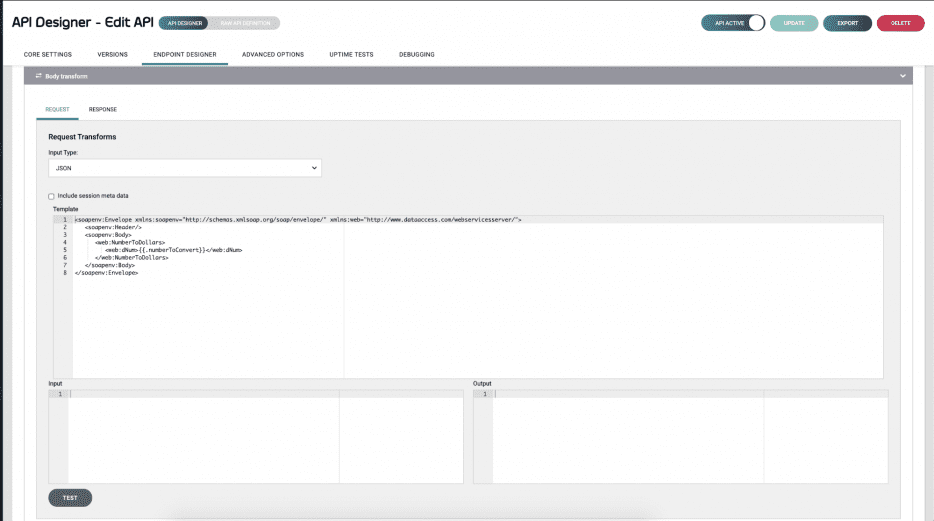
Since we want the incoming JSON request to be transformed into the correct SOAP request we have supplied a template to do exactly this. Any field in the JSON can be accessed by using the following syntax:
{{.fieldName}}So our actual template that is put into the template field will look like this:
<soapenv:Envelope xmlns:soapenv="https://schemas.xmlsoap.org/soap/envelope/" xmlns:web="https://www.dataaccess.com/webservicesserver/">
   <soapenv:Header/>
   <soapenv:Body>
      <web:NumberToDollars>
         <web:dNum>{{.numberToConvert}}</web:dNum>
      </web:NumberToDollars>
   </soapenv:Body>
</soapenv:Envelope>
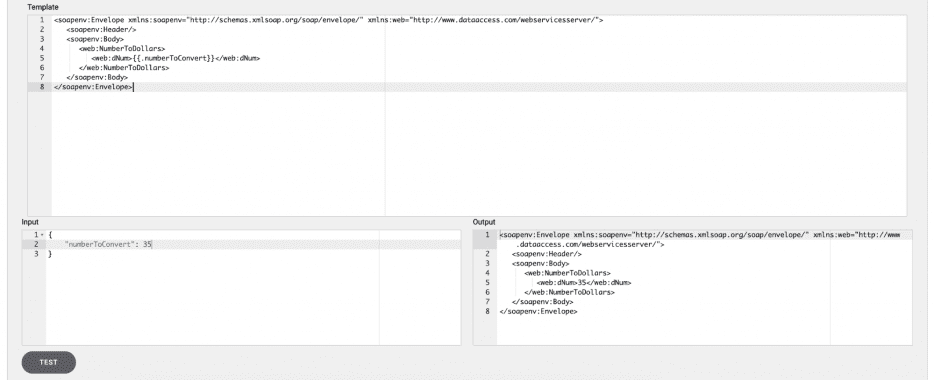
Using the UI we can also test to make sure that our transformation works as we expect. You will put your data to be transformed in the Input textbox, click the TEST button in the bottom right, and the Output textbox shows you the result. Once you are happy with the output, click UPDATE API in the top right corner.
For this example here is what my output looks like:
Now that our request is transformed so it can correctly be ingested by the SOAP web service, we need to move into the response where we will take the SOAP response and transform it into JSON for our client.
To do this, in the top left corner of the Body transform pane we click RESPONSE, change the input type to XML, and begin to input our transformation template in.
Once again we use the {{.fieldName}} syntax but we must grab the value from each of the SOAP elements. Since our value to retrieve is nested, we must concatenate the path to the element we want. In this case we end up with a template that looks like this to access our returned value and map it to the JSON response that we want:
{
    "convertedNumber": "{{.Envelope.Body.NumberToDollarsResponse.NumberToDollarsResult}}"
}
And with that template inserted we can grab a response from our SOAP web service to make sure that our response transformation also works. The result should look like this when we plug in our input and click TEST:

Step 3: Change the content type of the response
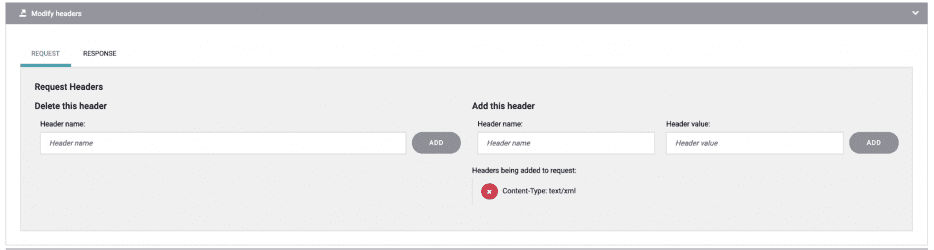
Now we want to use the Modify header plugin to change our request Content-Type header from the default “application/json” to “text/xml” so that our SOAP web service will actually get the transformed payload in the correct format it expats and requires to function.
For this, open up the Modify header plugin. While under the REQUEST tab in the top left corner of the plugin, under “Add this header” put in a Header name of “Content-Type” and a Header value of “text/xml”.Click ADD and you should see the following on your screen:
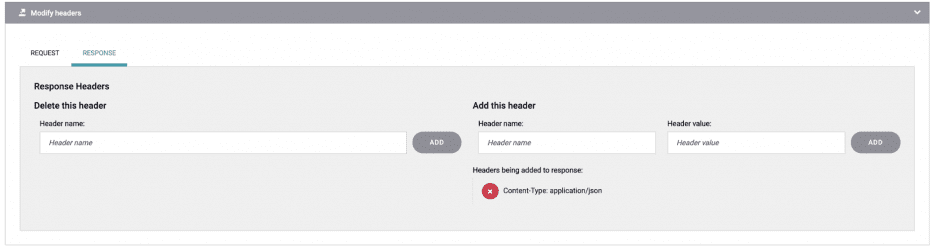
We will now flip over to the RESPONSE tab and change the content-type to “application/json” so that the returned content sent back to the client application will have the correct format. Once this is done, click ADD and you should see this:
Now we will save all of our changes by clicking UPDATE in the top right corner of the screen. Now we are ready to test this out!
Step 4: Testing our new endpoint!
Next you’ll want to open Postman or another tool that you can use to send requests to your endpoint.
Setup a POST request that will hit our generated endpoint and plug in your API endpoint URL. On my local system mine is:
https://127.0.0.1:8080/NumberConversion/NumberToDollars/
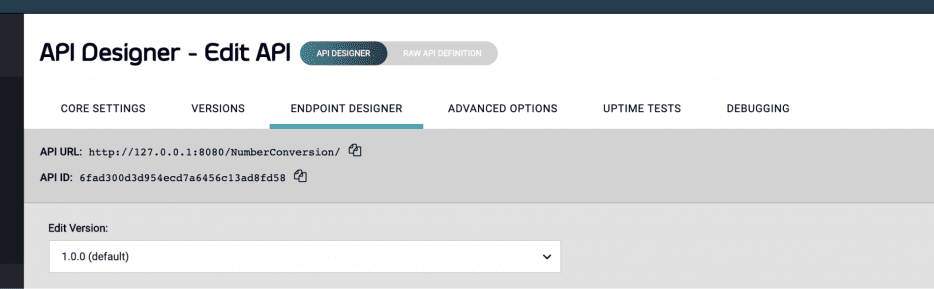
Note you can see the base API URL at the top of the Tyk dashboard screen we were just on. Mine looks just like this:
You then need to add a test payload to the request body. For this example I have used:
{
    "numberToConvert": 35
}
In Postman, all of it together should look like this:

And now when we click send we should see a JSON response returning back to our testing application:

Awesome result! We have now put a RESTful facade on a SOAP web service in a matter of minutes!
Recap
In just a few minutes we have exposed our SOAP web service as a JSON RESTful endpoint ready to be consumed by your modern web applications!
The flow, as we implemented goes roughly like this:
- Client send request to JSON endpoint on gateway
- Gateway uses selected plugins, including the Body transform plugin to prepare the XML payload for the SOAP web service
- Gateway then send the transformed payload to the SOAP web service
- SOAP web service returns the response to the gateway where the plugins once again do their part, including transforming the SOAP payload into our desired JSON response
- Gateway then forwards response back to client application
All of this is extremely powerful, requires minimal spend, minimal time, and no code! Production ready in a matter of minutes!