
There’s been a lot of community chatter about this, and a lot of back-and forth trying to get Auth0 to play nice with Tyk’s low-level JWT handling.
Well, now you can chill, because Auth0 integration is now easy as pie!
Let’s get things ready:
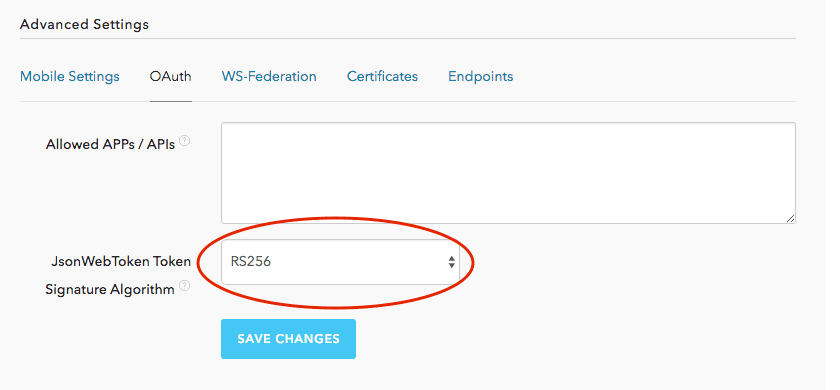
- In your Auth0 Application, under OAuth Settings, click “Show Advanced Settings”
- Select the “OAuth” tab
- Make sure “JsonWebToken Token Signature Algorithm” is set to RS256
- Save it
We’re going to simulate a login here, but in a real app, as part of your OAuth flow, you will need to add scope=openid to your authorize request in order to get the OpenID ID Token.
To simulate a login (I assume you have a test user), browse to your “Users” section and click “Sign In As User” and select your App. In order to get the ID Token, you must use the “Client Side App” option.
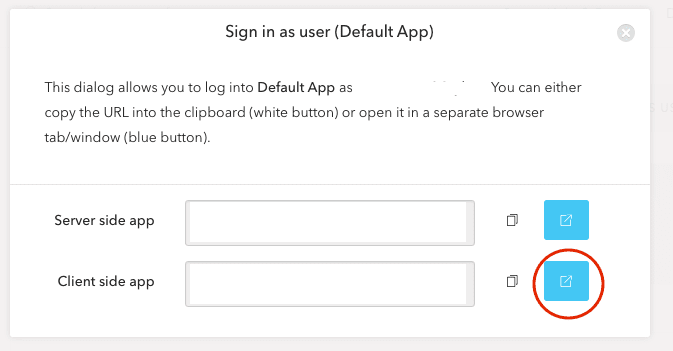
When you click this, you’ll be taken to a login page provided by Auth0, you don’t actually need to log in, Auth0 will do that for you. But in the address bar, you will see a query-string parameter called “id_token”, this is your OpenID ID token you are going to try and use with Tyk, copy that token to a file somewhere safe.
Now that we have a token we can play with, we can use it with an API we are proxying with Tyk.
Setting up Auth0 with Tyk
- Create a new API, let’s call it
auth0 - Select “OpenID Connect” as your Authentication mode
- Save it.
OIDC with Tyk is a little chicken-and-egg, because we need to apply a set of access rules to users coming in via different clients, so we actually need to create a policy before adding the rules to your API Definition. So now that we’ve saved the API: go create a policy that grants access to it.
Now, back to your Auth0 API Definition:
- Add your Auth0 URL as the provider (e.g.
https://tyk-test.eu.auth0.com/, each one is different) – in the field that hasaccounts.google.comas a sample text, and click “Add” - When the new issuer is added, get your Auth0 App’s Client ID and add it as an approved Client ID, and under policies, select the policy you just created.
- Click “Add” – you’ll see the policy add to the table
- Save the API
Ok, you’re all set – now all you need to do is craft a request to your API using the Authorization: Bearer {id-token} header. You’ll see that the token will get through, and the rate limits / policies will be applied for the user that was requested.
Easy as pie 🙂