The vast flexibility of Visual Studio Code (VS Code), along with the fact that it’s free and runs everywhere, has made it a favourite with developers around the world. But what about running VS Code with OAS and Tyk? Well, if you have 10 minutes to spare, we can have you up and running. Why not grab a coffee, and we’ll walk you through the process…
Getting started
One of the (many) great things about Tyk is how nicely it plays with others – including your favourite editors. To get Tyk going with VS Code, for example, all you need to do is install a plugin, import an API and send a request to that API.
First, you’ll need a Tyk Open Source Gateway installation. You’ll need to install VS Code if you haven’t already.
Dashboard or Gateway APIs?
If you are using the paid version of Tyk, you will use the Dashboard APIs. If you are going pure open source, it will be the Gateway APIs. The process for using the Dashboard and Gateway APIs is very similar. We will walk you through the Gateway API process below. To use the Dashboard, the only things you need to change in the instructions below are:
- Use ‘api/apis/oas’ and port 3000 instead of ‘tyk/apis/oas’ and port 8080 when calling the Tyk API endpoints
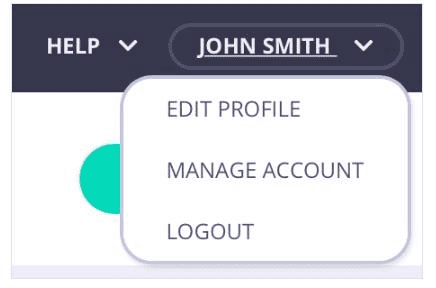
- Replace the ’x-tyk-authorisation’ header with ’authorisation’ and use the credentials key from your Username> Edit Profile > Tyk Dashboard API Access Credentials instead of the Gateway API secret:
- If RBAC is enabled, make sure you have ‘admin’ or ‘api’ rights.
A step-by-step guide to getting started with OAS, Tyk and VS Code
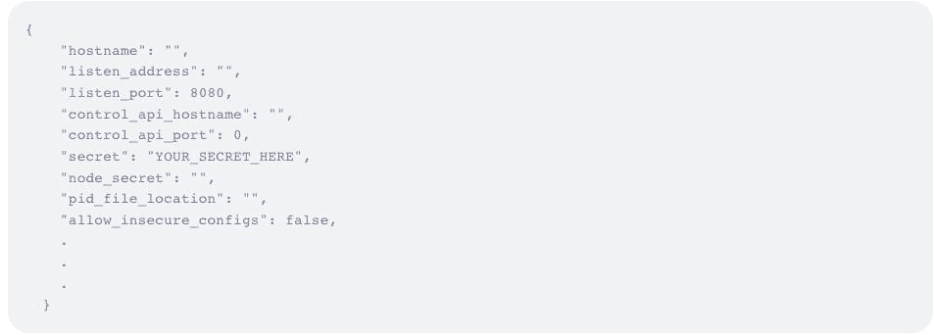
You’ll need to know your Gateway API secret to proceed. Your Tyk Gateway API secret is stored in your tyk.conf file; the property is called secret. You will need to use this with a header called x-tyk-authorisation to make calls to the Gateway API:
Next, it’s time to install the REST client VS Code extension so that you can write clear REST calls easily. First, select Extensions from the left-hand menu in VS Code:

Then search for and install the REST Client.
Before you go any further, restart VS Code to make sure everything is set up correctly.
This client lets you write really clear REST calls easily:
Next, it’s time to create an API definition file to import. Create a directory in VS Code, then create an OAS definition file called simple_api.json.
Good work. Now, copy the code below to the file you just created:
{
"components": {
},
"info": {
"title": "simple_api",
"version": "1.0"
},
"openapi": "3.0.3",
"paths": {}, "servers": [
{
"url": "https://httpbin.org/"
}
]
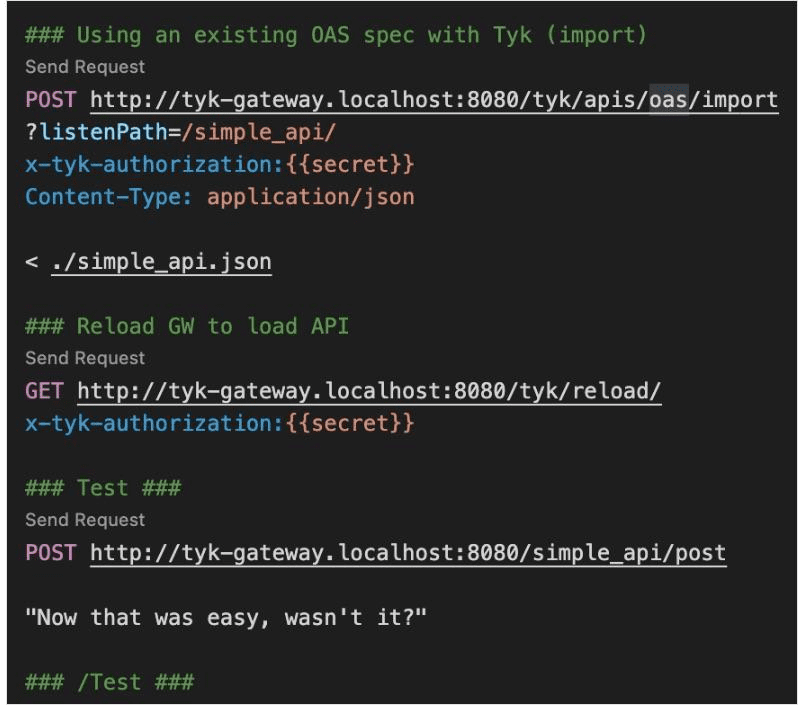
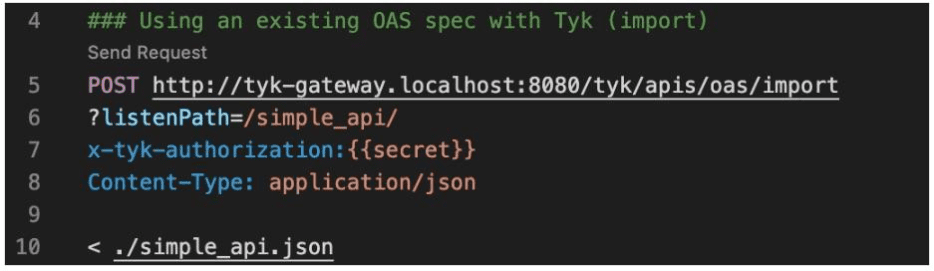
}This is a simple OAS definition with nothing Tyk-specific in it. That’s because you will use the ‘import’ API to ask Tyk to add the Tyk bits automatically. To do so, create a file (in the same directory as your OAS definition) called my_first_api.rest file. Then copy the following into the file:
### Globals
@secret = YOUR_SECRET_HERE

### Using an existing OAS spec with Tyk (import)
POST https://tyk-gateway.localhost:8080/tyk/apis/oas/import
?listenPath=/simple_api/
x-tyk-authorization:{{secret}}
Content-Type: application/json

< ./simple_api.json

### Reload GW to load API
GET https://tyk-gateway.localhost:8080/tyk/reload/
x-tyk-authorization:{{secret}}

### Test ###
POST https://tyk-gateway.localhost:8080/simple_api/post

"Now that was easy, wasn't it?"### /Test ###
So far, so good.

Now it’s time to make an import API request. Click ‘Send Request’ above line 5, using the REST client, to create your API request.
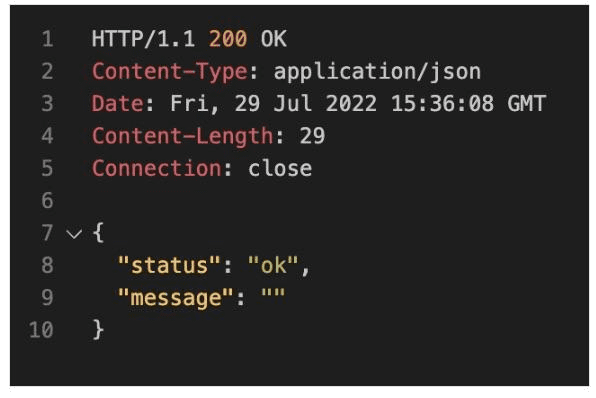
All being well, you should see confirmation that your API was added like this:

Next, you need to reload the Tyk Gateway. Click ‘Send Request’ above line 13 to do so.

Great. You should now have the following response:
Testing time
To test your imported API, click ‘Send Request’ above line 17.
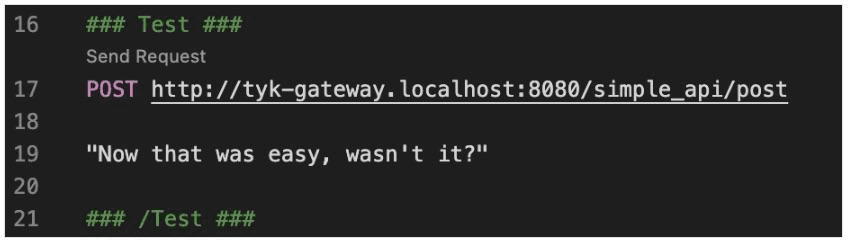
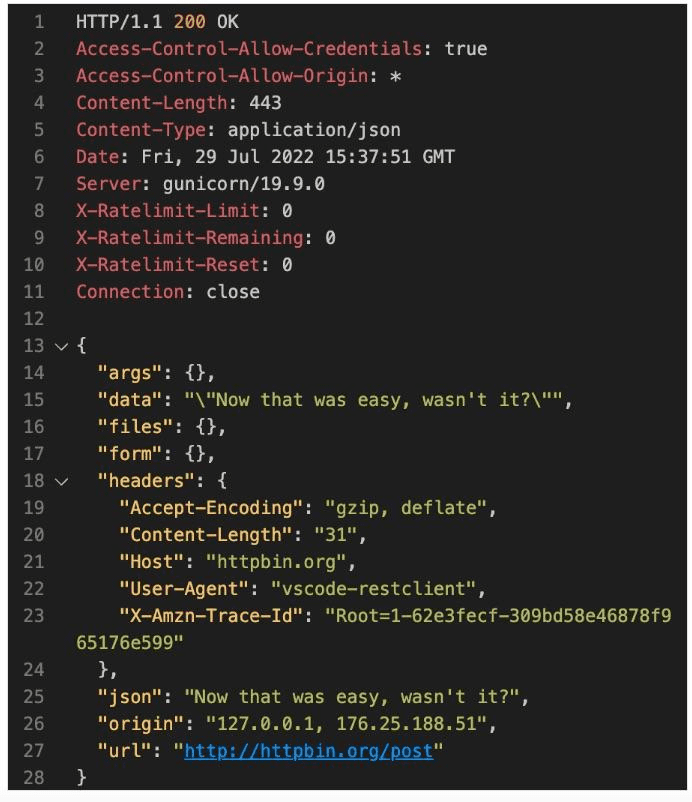
Can you now see “Now that was easy, wasn’t it?” returned on line 25 from the httpbin test service with a POST request? Splendid. Time to give yourself a pat on the back and move on to the next item on your To-Do List.
If you’re after some further reading, then our OAS high level concepts page should serve you well. After that, the world is your oyster; maybe you want to try adding Tyk configuration fields to an existing API or even create a Tyk OAS API definition from scratch? Whichever way you go with VS Code, the Tyk extension is a real help. Of course, you could try out more of the options on the import API to see what else Tyk will generate for you.
Our friendly team is always here to help, so why not reach out to say hello or get involved with the Tyk community? Full documentation for the Gateway and Dashboard APIs can be found in the Tyk Documentation.