If you are using Kubernetes (who isn’t these days?), you might already be familiar with ArgoCD. This step-by-step walkthrough will show you how to configure ArgoCD to deploy the Tyk self-managed platform in Kubernetes.
ArgoCD is an open-source declarative continuous delivery tool designed to manage and automate the deployment of applications in Kubernetes clusters. It follows the GitOps methodology, using Git repositories as the source of truth for configuration and application manifests.
With ArgoCD, you can easily track, deploy, and roll back changes to applications by syncing the desired state declared in Git repositories with the actual state in the Kubernetes clusters. This simplifies and enhances the reliability of the deployment process, ensuring that the entire application infrastructure is consistently and securely managed through version-controlled configurations.
Tyk Helm Charts to deploy Tyk self-managed in Kubernetes
Helm is a package manager for Kubernetes. It simplifies the deployment and management of applications on Kubernetes by packaging applications into a collection of pre-configured resources called charts.
These charts can include everything needed to run an application, such as services, deployments, and configuration files. Helm streamlines installing, upgrading, and removing these packaged applications, providing a standardised and efficient way to manage Kubernetes workloads.
Tyk’s Helm Charts are available for every flavour of Tyk – open-source, self-managed and hybrid cloud. This walkthrough will use the Tyk stack Helm Chart to deploy Tyk Self-Managed with ArgoCD.
Step-by-step walkthrough: Deploying Tyk in Kubernetes with ArgoCD
Here, we will:
- Create Kubernetes secrets needed for the configuration
- Install Redis (needed for Tyk Gateway) and PostgreSQL (needed for Tyk Dashboard)
- Install the Tyk Stack Helm Chart
- Validate that everything is working as expected.
You can follow along or refer to this demo repository to automate the deployment.
Prerequisites:
- Having access to a k8s environment
- Installed ArgoCD
- A Tyk Self-Managed licence. You can register for a free trial.
Create Kubernetes secrets required for configuration
Tyk Gateway requires access credentials to connect to Redis, while Tyk Dashboard needs credentials for connecting to Postgres. In this example, Kubernetes secrets are employed to securely store these credentials.
The code snippets for these secrets can be found here.
Additionally, Tyk’s documentation provides examples and guidance on using secrets in a Kubernetes environment.
To generate these secrets using the provided examples, follow these steps:
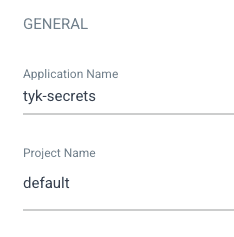
- Create a new application: navigate to “applications” and click on “NEW APP.”
- Set the following parameters:
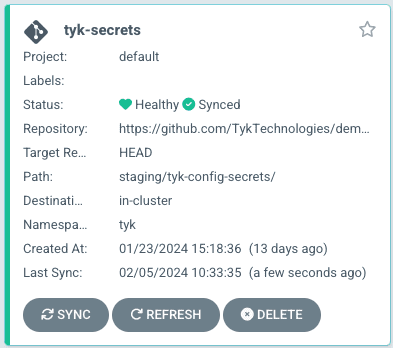
- Application name: tyk-secrets
- Project name: default.
Follow these steps to create the secrets using the examples:
- SYNC POLICY: Automatic
- Select “AUTO-CREATE NAMESPACE” if you haven’t created one already.
- Set the repository details:
- Repository URL: https://github.com/TykTechnologies/demo-argo-selfmanaged.git
- Path: staging/tyk-config-secrets/
- Cluster URL: https://kubernetes.default.svc/
- Namespace: tyk (choose the one you’d like to use
- Keep the remaining settings as default.
- Click on “CREATE.”
- Check that the Application was created.
Install Redis and PostgreSQL
- Connect to the Bitnami Helm repository.
- Access the ArgoCD UI.
- Navigate to the “Settings” tab.
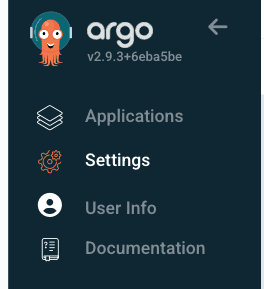
Click on Repositories, and then select CONNECT REPO.
- Choose “VIA HTTPS” as your connection method.
- Type: helm
- Name: bitnamicharts
- Project: default
- Repository URL: https://charts.bitnami.com/bitnami
- (Leave Username and Password empty, and keep the rest of the values as default)
- Click on CONNECT.

To create a new Redis application, follow these steps:
- Navigate to applications and click on NEW APP.
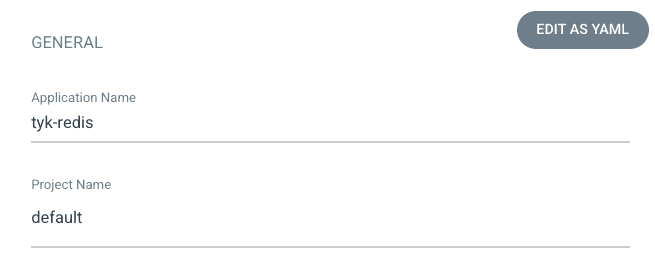
- Set the following details for the new application:
- Application name: tyk-redis
- Project name: default.
- SYNC POLICY: Automatic
- Choose AUTO-CREATE NAMESPACE if you don’t have one already created.

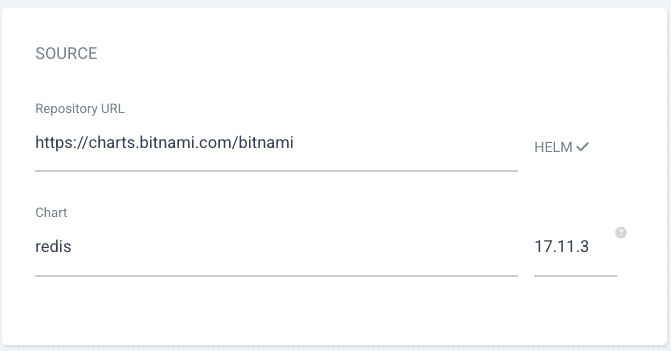
- Repository URL: https://charts.bitnami.com/bitnami
- Chart = Redis and latest revision.
- Cluster URL: https://kubernetes.default.svc/
- Namespace = tyk (in my case, choose the one that you would like to use)
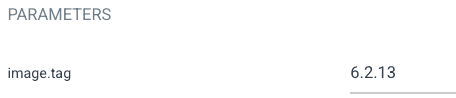
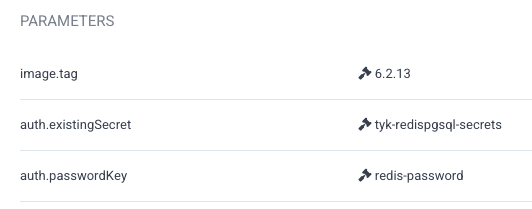
- To specify a compatible Redis version, put 6.2.13 in the image.tag parameter.
To use the secrets that were created add the value of tyk-redispgsql-secrets in auth.existingSecret and redis-password in auth.passwordKey.
- Keep the rest by default
- Click on CREATE
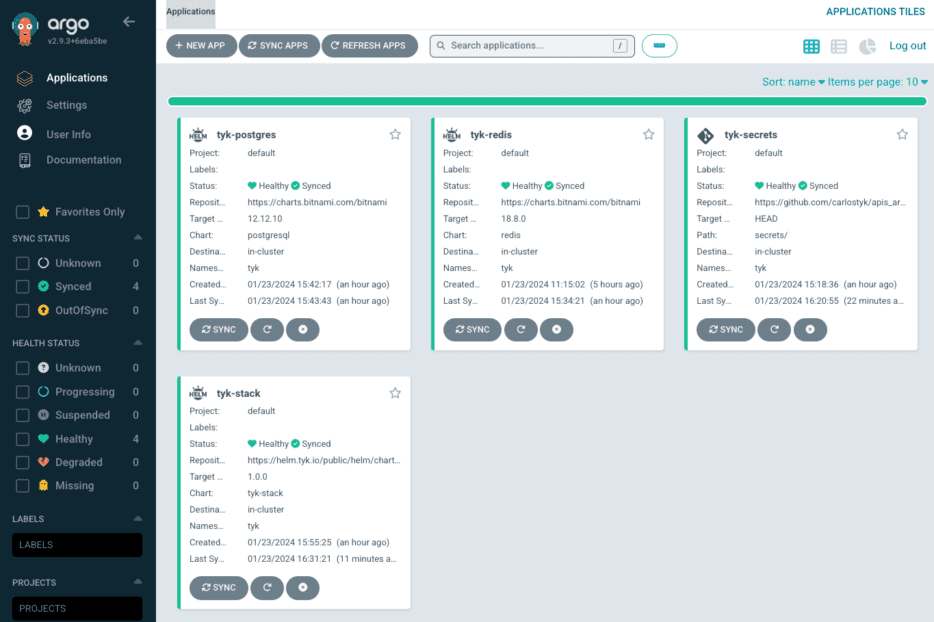
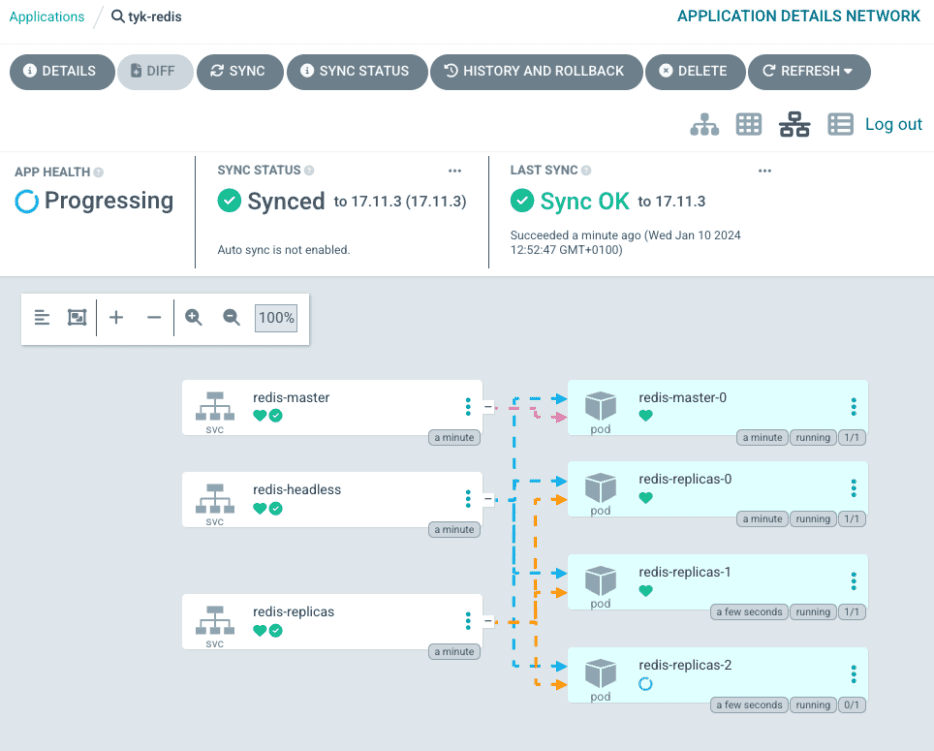
- Check that the pods are running by clicking on the tyk-redis application. There is an image of the different deployed pods.
Create a new PostgreSQL application
- Create a new application (go to Applications and click on NEW APP)
- Application name = tyk-postgres
- Project name = default.

- SYNC POLICY: Automatic
- Select AUTO-CREATE NAMESPACE if you don’t have one.

- Repository URL : https://charts.bitnami.com/bitnami
- Chart = postgresql and revision 12.12.10.

- Cluster URL: https://kubernetes.default.svc/
- Namespace = tyk (Choose the one that you would like to use)
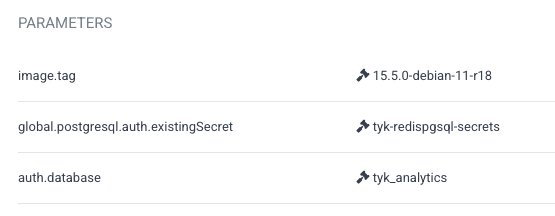
- Add parameter value in Helm –
auth.databaseistyk_analyticsandimage.tag 15.5.0-debian-11-r18. To use the secrets that were created add the value oftyk-redispgsql-secretsinglobal.postgresql.auth.existingSecretandpostgres-passwordinglobal.postgresql.auth.secretKeys.adminPasswordKey.
- Keep the rest by default
- Click on CREATE.
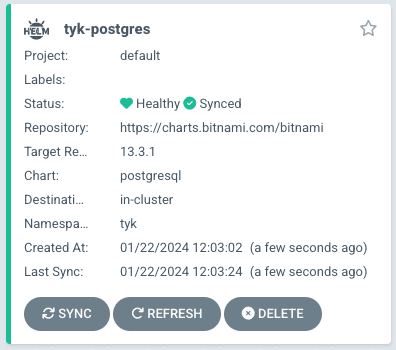
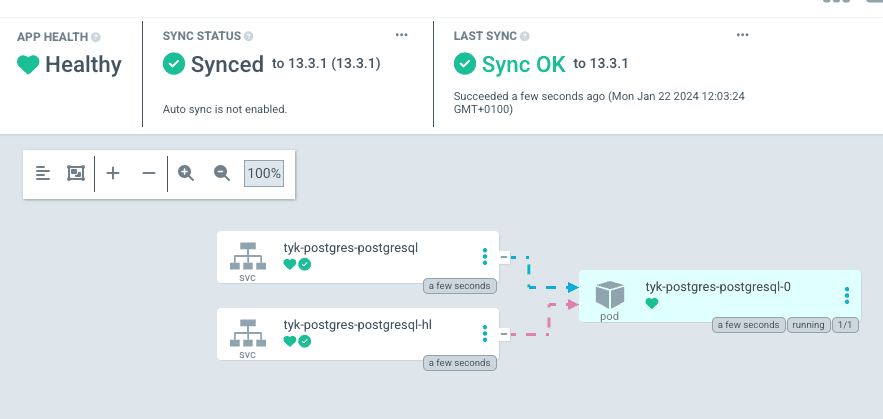
- Check that the pods are running by clicking on the tyk-postgres application. There is an image of the deployed pods.
Install Tyk Self-Managed
Connect to the Tyk Helm repository.
- Go to the Settings Tab
- Click on CONNECT REPO
- Choose your connection method as “VIA HTTPS”.

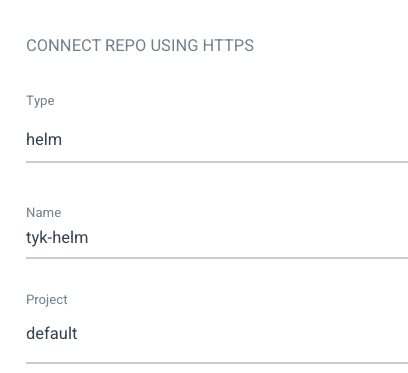
- Type = helm
- Name = tyk-helm
- Project = default
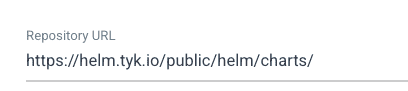
- Repository URL: https://helm.tyk.io/public/helm/charts/
- Leave Username and Password empty and the rest of values by default.
- Create the repository
![]()
![]()
![]()
Create a new Tyk stack application
- Create a new application
- Application Name = tyk-stack
- Project Name = default
- SYNC POLICY: Automatic
- Repository URL: https://helm.tyk.io/public/helm/charts/
- Chart = tyk-stack and revision 1.0.0 (or latest version)
- Cluster URL: https://kubernetes.default.svc/
- Namespace = tyk (in my case choose the one that you would like to use)
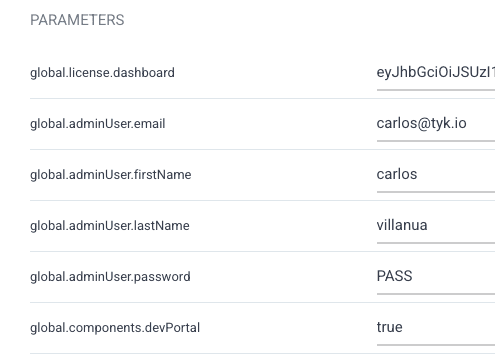
- Add the following values in HELM parameters ( this could also be added into a secret):
global.license.dashboard={{ADD YOUR LICENCE}}

global.adminUser.email={{ADD YOUR EMAIL}}

global.adminUser.password={{ADD YOUR PASSWORD}}
- Click on EDIT AS YAML at the top and add the following:
helm:

Parameters:

- name: global.redis.passSecret.name

value: tyk-redispgsql-secrets

- name: global.redis.passSecret.keyName

value: redis-password

- name: global.redis.addrs

value: 'tyk-redis-master.tyk.svc:6379'

- name: global.postgres.connectionStringSecret.name

value: tyk-redispgsql-secrets

- name: global.postgres.connectionStringSecret.keyName

value: postgresURL
- Click on SAVE
- Keep the rest by default
- Click on CREATE.
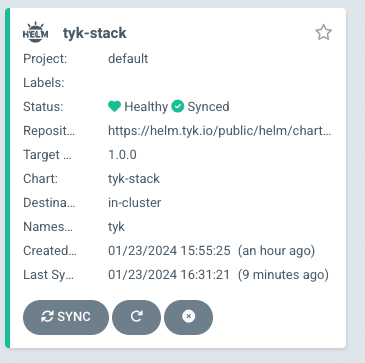
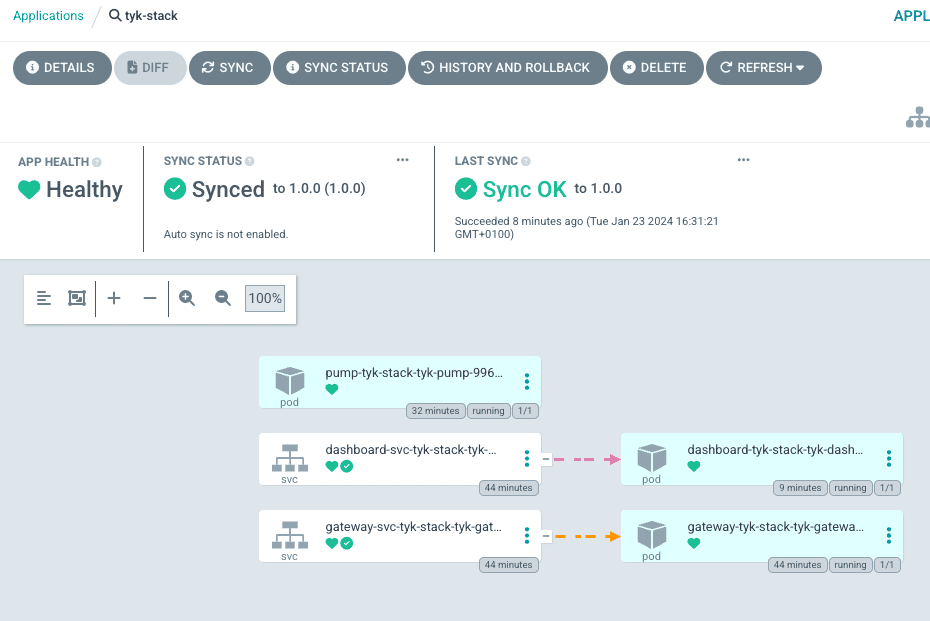
- Check that the pods are running by clicking on the tyk-stack application. There is an image of the different deployed pods.
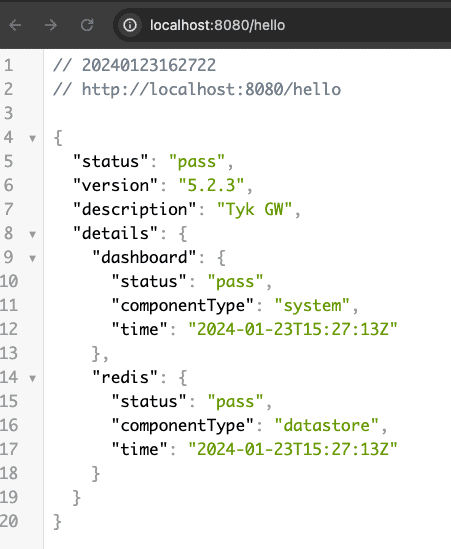
Final check that the Tyk Dashboard and Tyk Gateway are running successfully
- Port forward the Tyk Gateway
kubectl port-forward svc/gateway-svc-tyk-stack-tyk-gateway 8080:8080 -n tyk
- Check that it is healthy
- Use the /hello endpoint to check if it is working correctly.
- Port forward the Tyk Dashboard
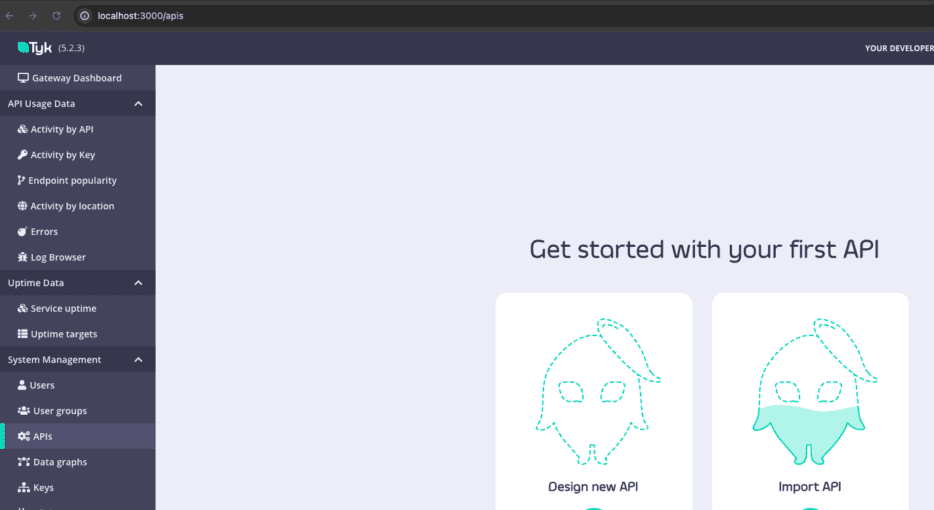
kubectl port-forward svc/dashboard-svc-tyk-stack-tyk-dashboard 3000:3000 -n tyk
Conclusion
In conclusion, we’ve covered the fundamental aspects of ArgoCD, Helm, and effectively deployed Tyk Self-Managed in Kubernetes. Let’s recap the key steps:
- Set up Kubernetes and ArgoCD.
- Integrate Redis using Bitnami Helm.
- Deploy Tyk Stack with Tyk Helm.
Take a look at our demo project to learn how to automate all those manual steps: https://github.com/TykTechnologies/demo-argo-selfmanaged/tree/1-deploy-tyk-on-argo.

With ArgoCD and Helm, your API platform is consistently and securely managed through version-controlled configurations.
In my next post, I will show you how to add Tyk’s Operator to your deployment and how to manage your APIs with Custom Resources the GitOps way.