Dashboard on Red Hat (RHEL) / CentOS
Requirements
Ansible is required to run the following commands. Instructions on how install Tyk Dashboard with shell is in the Shell tab.
Getting Started
- clone the tyk-ansible repositry
$ git clone https://github.com/TykTechnologies/tyk-ansible
cdinto the directory
$ cd tyk-ansible
- Run initalization script to initialize environment
$ sh scripts/init.sh
-
Modify
hosts.ymlfile to update ssh variables to your server(s). You can learn more about the hosts file here -
Run ansible-playbook to install
tyk-dashboard
$ ansible-playbook playbook.yml -t tyk-dashboard
Install Tyk Dashboard: Red Hat
Tyk has its own signed RPMs in a YUM repository hosted by the kind folks at packagecloud.io, which makes it easy, safe and secure to install a trusted distribution of the Tyk Gateway stack.
This tutorial will run on an Amazon AWS Red Hat Enterprise Linux 7.1 instance. We will install Tyk Dashboard with all dependencies stored locally.
We’re installing on a t2.micro because this is a tutorial, you’ll need more RAM and more cores for better performance.
This configuration should also work (with some tweaks) for CentOS.
Prerequisites
- Ensure port
3000is open: This is used by the Dashboard to provide the GUI and the Developer Portal - EPEL (Extra Packages for Enterprise Linux) is a free, community based repository project from Fedora which provides high quality add-on software packages for Linux distribution including RHEL, CentOS, and Scientific Linux. EPEL isn’t a part of RHEL/CentOS but it is designed for major Linux distributions. In our case we need it for Redis DB. Install EPEL using the instructions here.
- Install Redis DB using EPEL
- Tyk requires Python 3.4. Install via the following command:
sudo yum install python34
Step 1: Set up YUM Repositories
First, we need to install some software that allows us to use signed packages:
sudo yum install pygpgme yum-utils wget
Next, we need to set up the various repository configurations for Tyk Dashboard and MongoDB:
Step 2: Configure Tyk Dashboard
Create a file named /etc/yum.repos.d/tyk_tyk-dashboard.repo that contains the repository configuration below. https://packagecloud.io/tyk/tyk-dashboard/install#manual-rpm
[tyk_tyk-dashboard]
name=tyk_tyk-dashboard
baseurl=https://packagecloud.io/tyk/tyk-dashboard/el/7/$basearch
repo_gpgcheck=1
gpgcheck=1
enabled=1
gpgkey=https://keyserver.tyk.io/tyk.io.rpm.signing.key.2020
       https://packagecloud.io/tyk/tyk-dashboard/gpgkey
sslverify=1
sslcacert=/etc/pki/tls/certs/ca-bundle.crt
metadata_expire=300
Step 3: Configure MongoDB v4.0
Create a /etc/yum.repos.d/mongodb-org-4.0.repo file so that you can install MongoDB directly, using yum.
[mongodb-org-4.0]
name=MongoDB Repository
baseurl=https://repo.mongodb.org/yum/redhat/$releasever/mongodb-org/4.0/x86_64/
gpgcheck=1
enabled=1
gpgkey=https://www.mongodb.org/static/pgp/server-4.0.asc
Finally we’ll need to update our local cache, so run:
sudo yum -q makecache -y --disablerepo='*' --enablerepo='tyk_tyk-dashboard'
Step 4: Install Packages
We’re ready to go, you can now install the relevant packages using yum:
sudo yum install -y mongodb-org tyk-dashboard redis
(you may be asked to accept the GPG key for our repos and when the package installs, hit yes to continue)
Step 5: Start MongoDB and Redis
In many cases MongoDB or Redis might not be running, so let’s start that:
sudo service mongod start
sudo service redis start
Step 6: Configure Tyk Dashboard
We can set the Dashboard up with a similar setup command, the script below will get the Dashboard set up for the local instance.
Note
You need to replace <hostname> for --redishost=<hostname>, and <IP Address> for --mongo=mongodb://<IP Address>/ with your own values to run this script.
sudo /opt/tyk-dashboard/install/setup.sh --listenport=3000 --redishost=<hostname> --redisport=6379 --mongo=mongodb://<IP Address>/tyk_analytics --tyk_api_hostname=$HOSTNAME --tyk_node_hostname=http://localhost --tyk_node_port=8080 --portal_root=/portal --domain="XXX.XXX.XXX.XXX"
Note
Make sure to use the actual DNS hostname or the public IP of your instance as the last parameter.
What we have done here is:
--listenport=3000: Told Tyk Dashboard (and Portal) to listen on port 3000.--redishost=<hostname>: Tyk Dashboard should use the local Redis instance.--redisport=6379: The Tyk Dashboard should use the default port.--domain="XXX.XXX.XXX.XXX": Bind the Dashboard to the IP or DNS hostname of this instance (required).--mongo=mongodb://<IP Address>/tyk_analytics: Use the local MongoDB (should always be the same as the Gateway).--tyk_api_hostname=$HOSTNAME: The Tyk Dashboard has no idea what hostname has been given to Tyk, so we need to tell it, in this instance we are just using the local HOSTNAME env variable, but you could set this to the public-hostname/IP of the instance.--tyk_node_hostname=http://localhost: The Tyk Dashboard needs to see a Tyk node in order to create new tokens, so we need to tell it where we can find one, in this case, use the one installed locally.--tyk_node_port=8080: Tell the Dashboard that the Tyk node it should communicate with is on port 8080.--portal_root=/portal: We want the Portal to be shown on /portal of whichever domain we set for the Portal.
Step 7: Start Tyk Dashboard
sudo service tyk-dashboard start
Notice how we haven’t actually started the gateway yet, because this is a Dashboard install, we need to enter a license first.
Step 8: Enter Dashboard license
Add your license in /var/opt/tyk-dashboard/tyk_analytics.conf in the license field.
If all is going well, you will be taken to a Dashboard setup screen - we’ll get to that soon.
Step 9: Restart the Dashboard process
Because we’ve just entered a license via the UI, we need to make sure that these changes get picked up, so to make sure things run smoothly, we restart the Dashboard process (you only need to do this once) and (if you have it installed) then start the gateway:
sudo service tyk-dashboard restart
Step 10 - Go to the Tyk Dashboard URL
Go to:
127.0.0.1:3000
You should get to the Tyk Dashboard Setup screen:
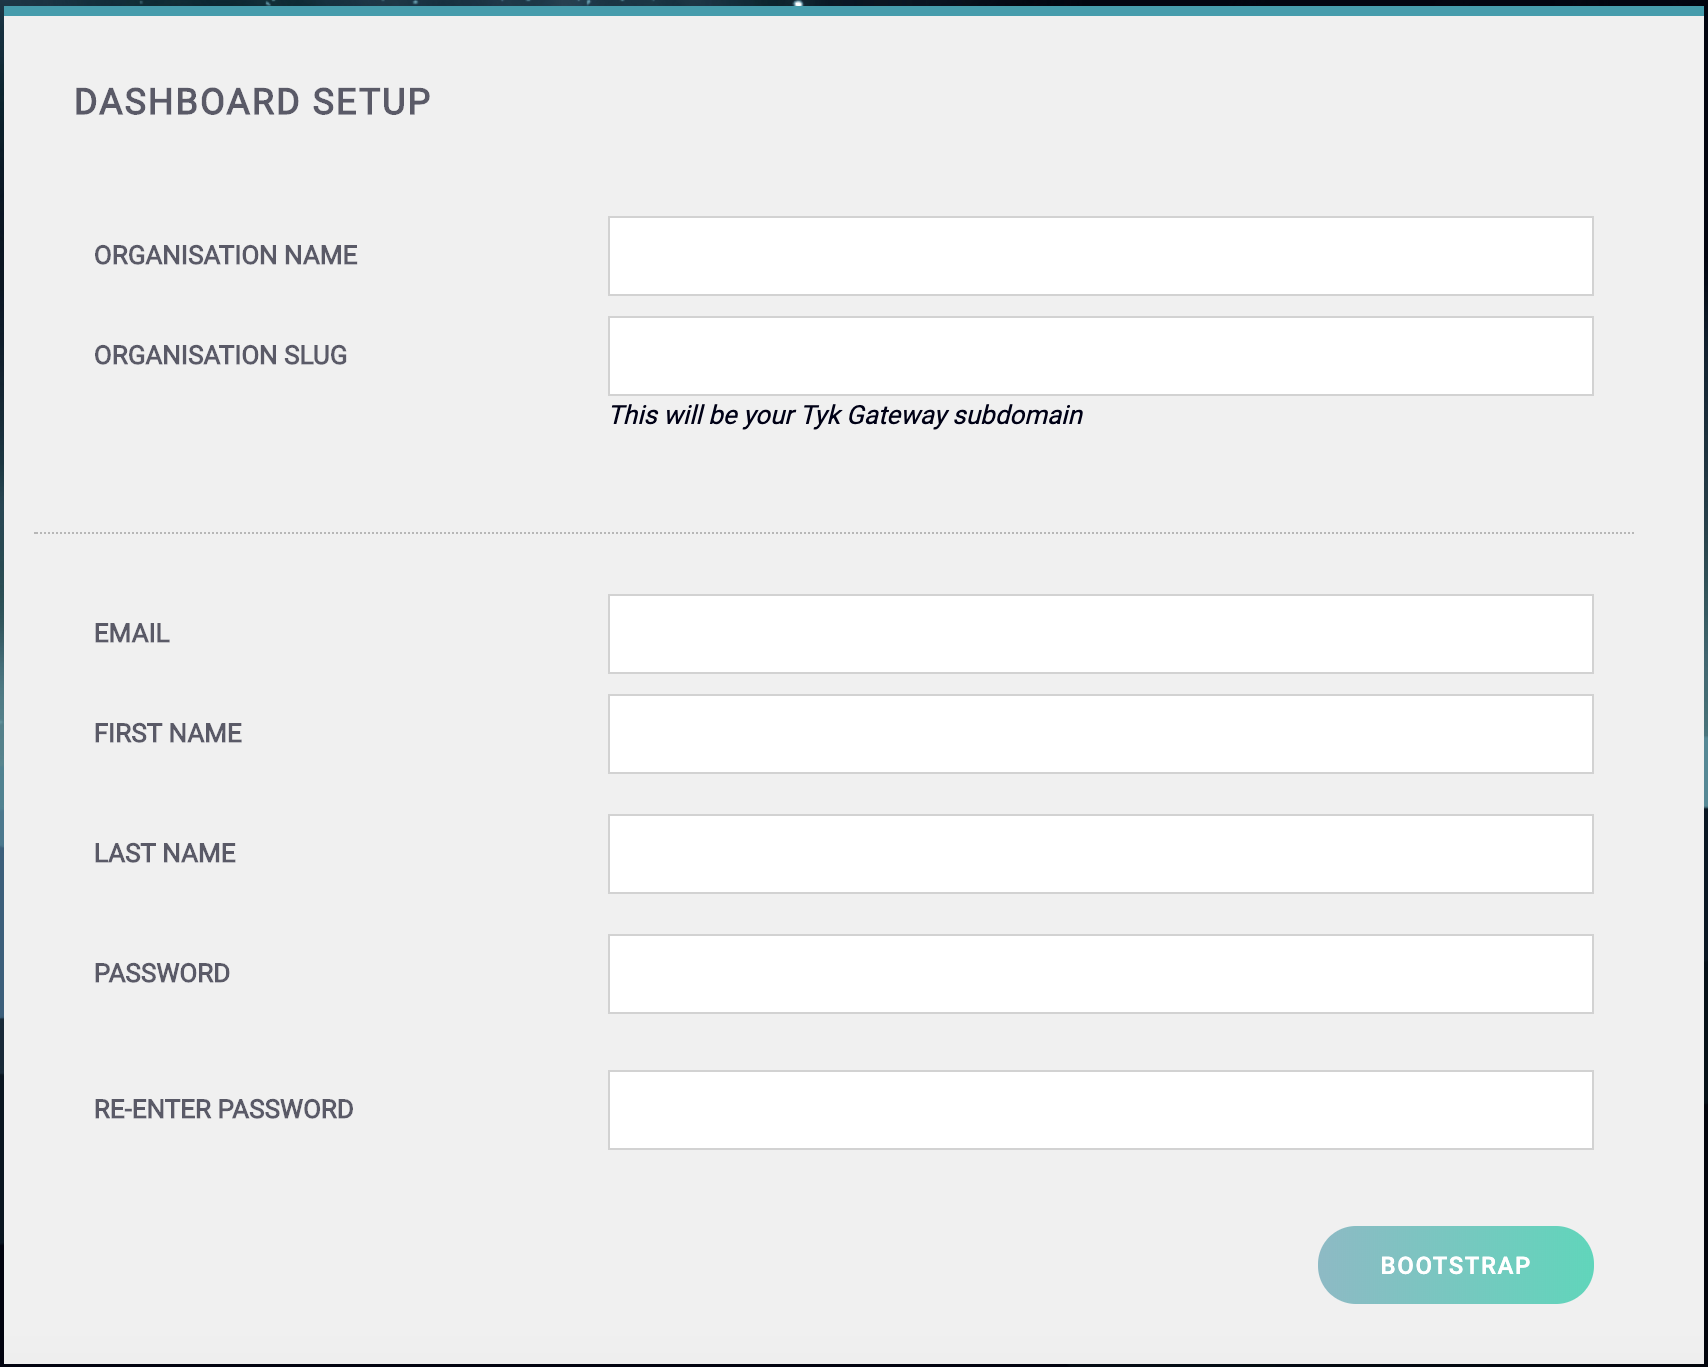
Step 11 - Create your Organisation and Default User
You need to enter the following:
- Your Organisation Name
- Your Organisation Slug
- Your User Email Address
- Your User First and Last Name
- A Password for your User
- Re-enter your user Password
Note
For a password, we recommend a combination of alphanumeric characters, with both upper and lower case letters.
Click Bootstrap to save the details.
Step 12 - Login to the Dashboard
You can now log in to the Tyk Dashboard from 127.0.0.1:3000, using the username and password created in the Dashboard Setup screen.
Configure your Developer Portal
To set up your Developer Portal follow our Self-Managed tutorial on publishing an API to the Portal Catalogue.