Access the Dashboard
Log in to your Tyk Dashboard using your credentials. Familiarize yourself with the interface, where the main navigation menu is located on the left side, and the top bar provides quick access to user settings and notifications.Dashboard Organization
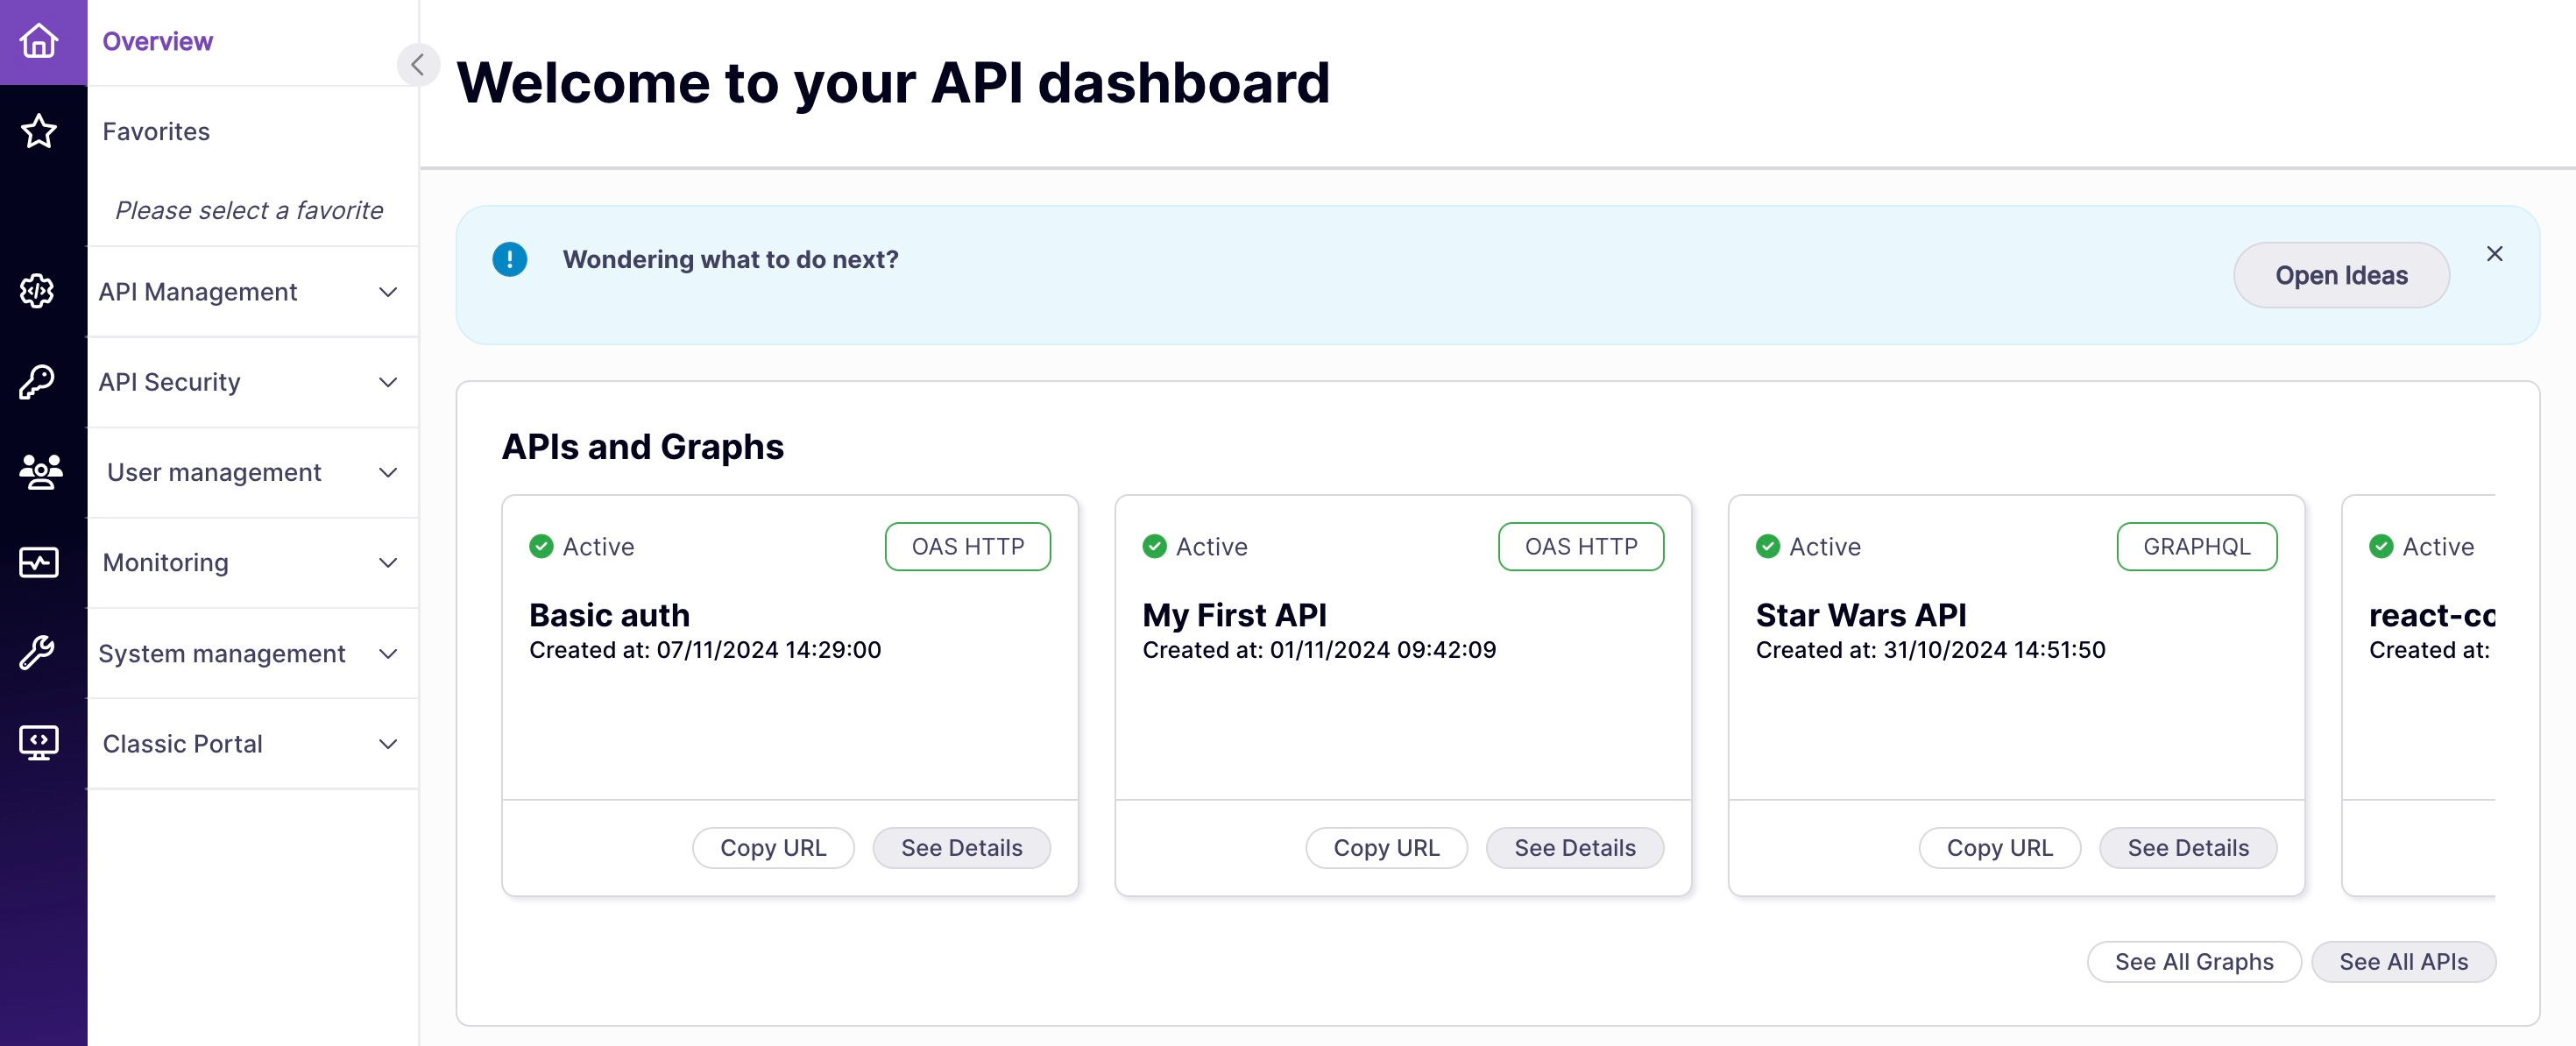
Side Bar
Tyk is organized into a few key categories:- API Management: In API Management, you can access and edit all your APIs, create data graphs, and add webhooks.
- API Security: In API Security, you can manage keys, policies, and certificates to customize your security settings.
- User Management: In User Management, you can control permissions and access for users and user groups. You can also create profiles that help you manage third party identity providers for specific Tyk actions like signing into the portal or logging into the dashboard.
- Monitoring: In Monitoring, you can view activity reports, logs, and analytics related to your APIs.
- System Management: In System Management, you can affect OPA rules that define fine-grained access control for managing and enforcing permissions on various actions and resources in Tyk’s API management system.
- Classic Portal: In Classic Portal, you can affect permissions and configurations related to your developer portal. The Tyk Developer Portal is a platform that enables you to publish, manage, and promote your APIs to external developers.
Overview
API Management
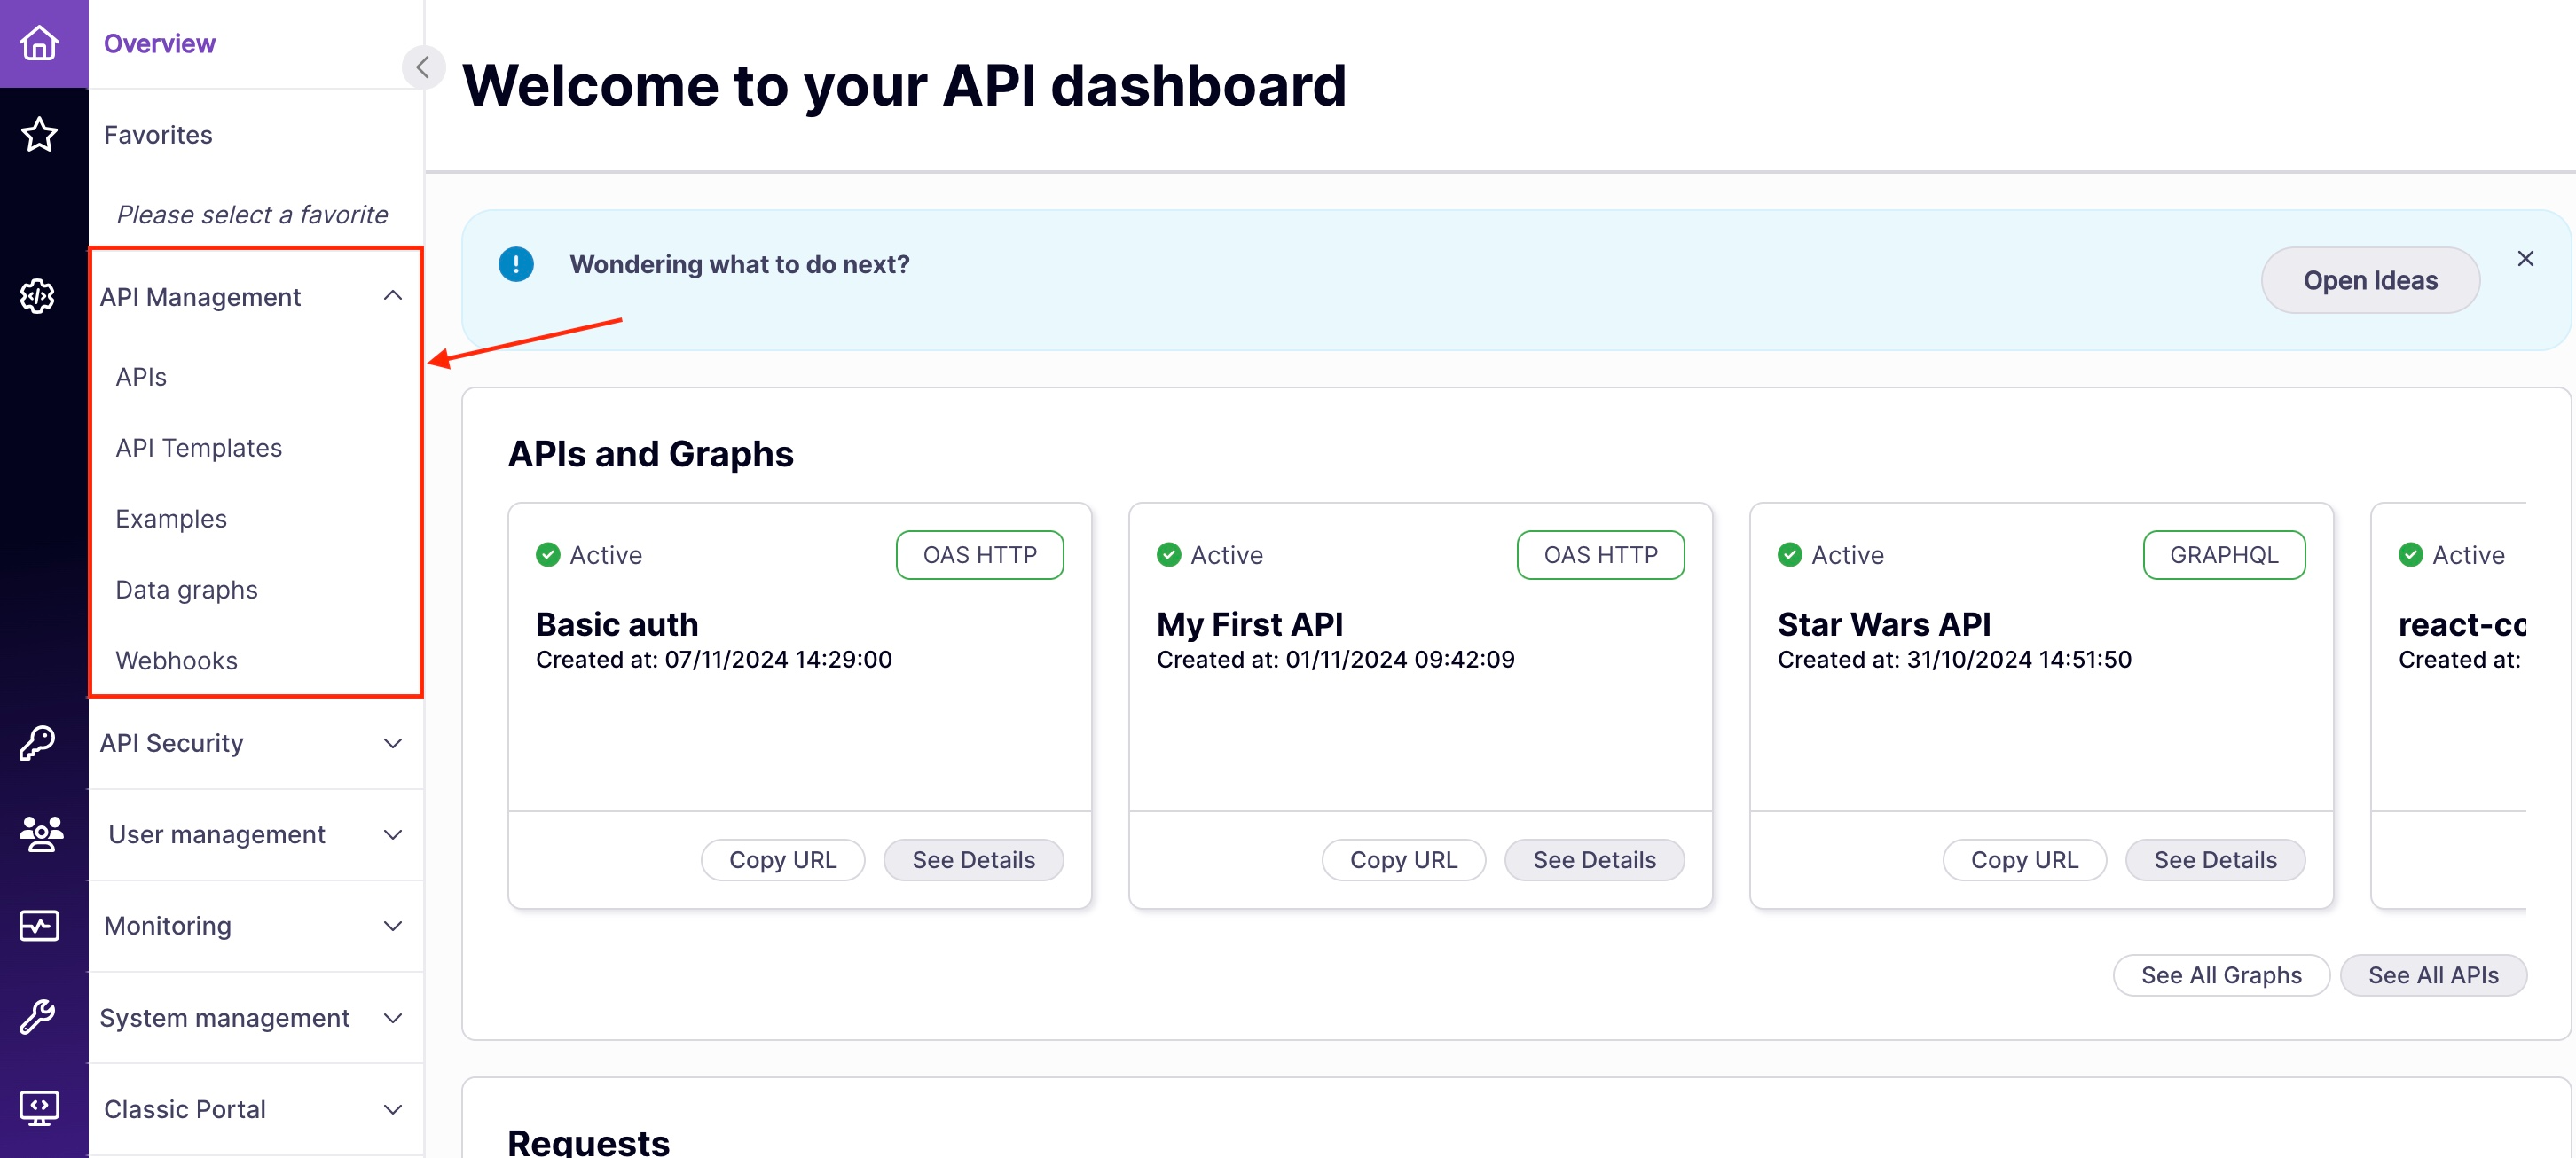
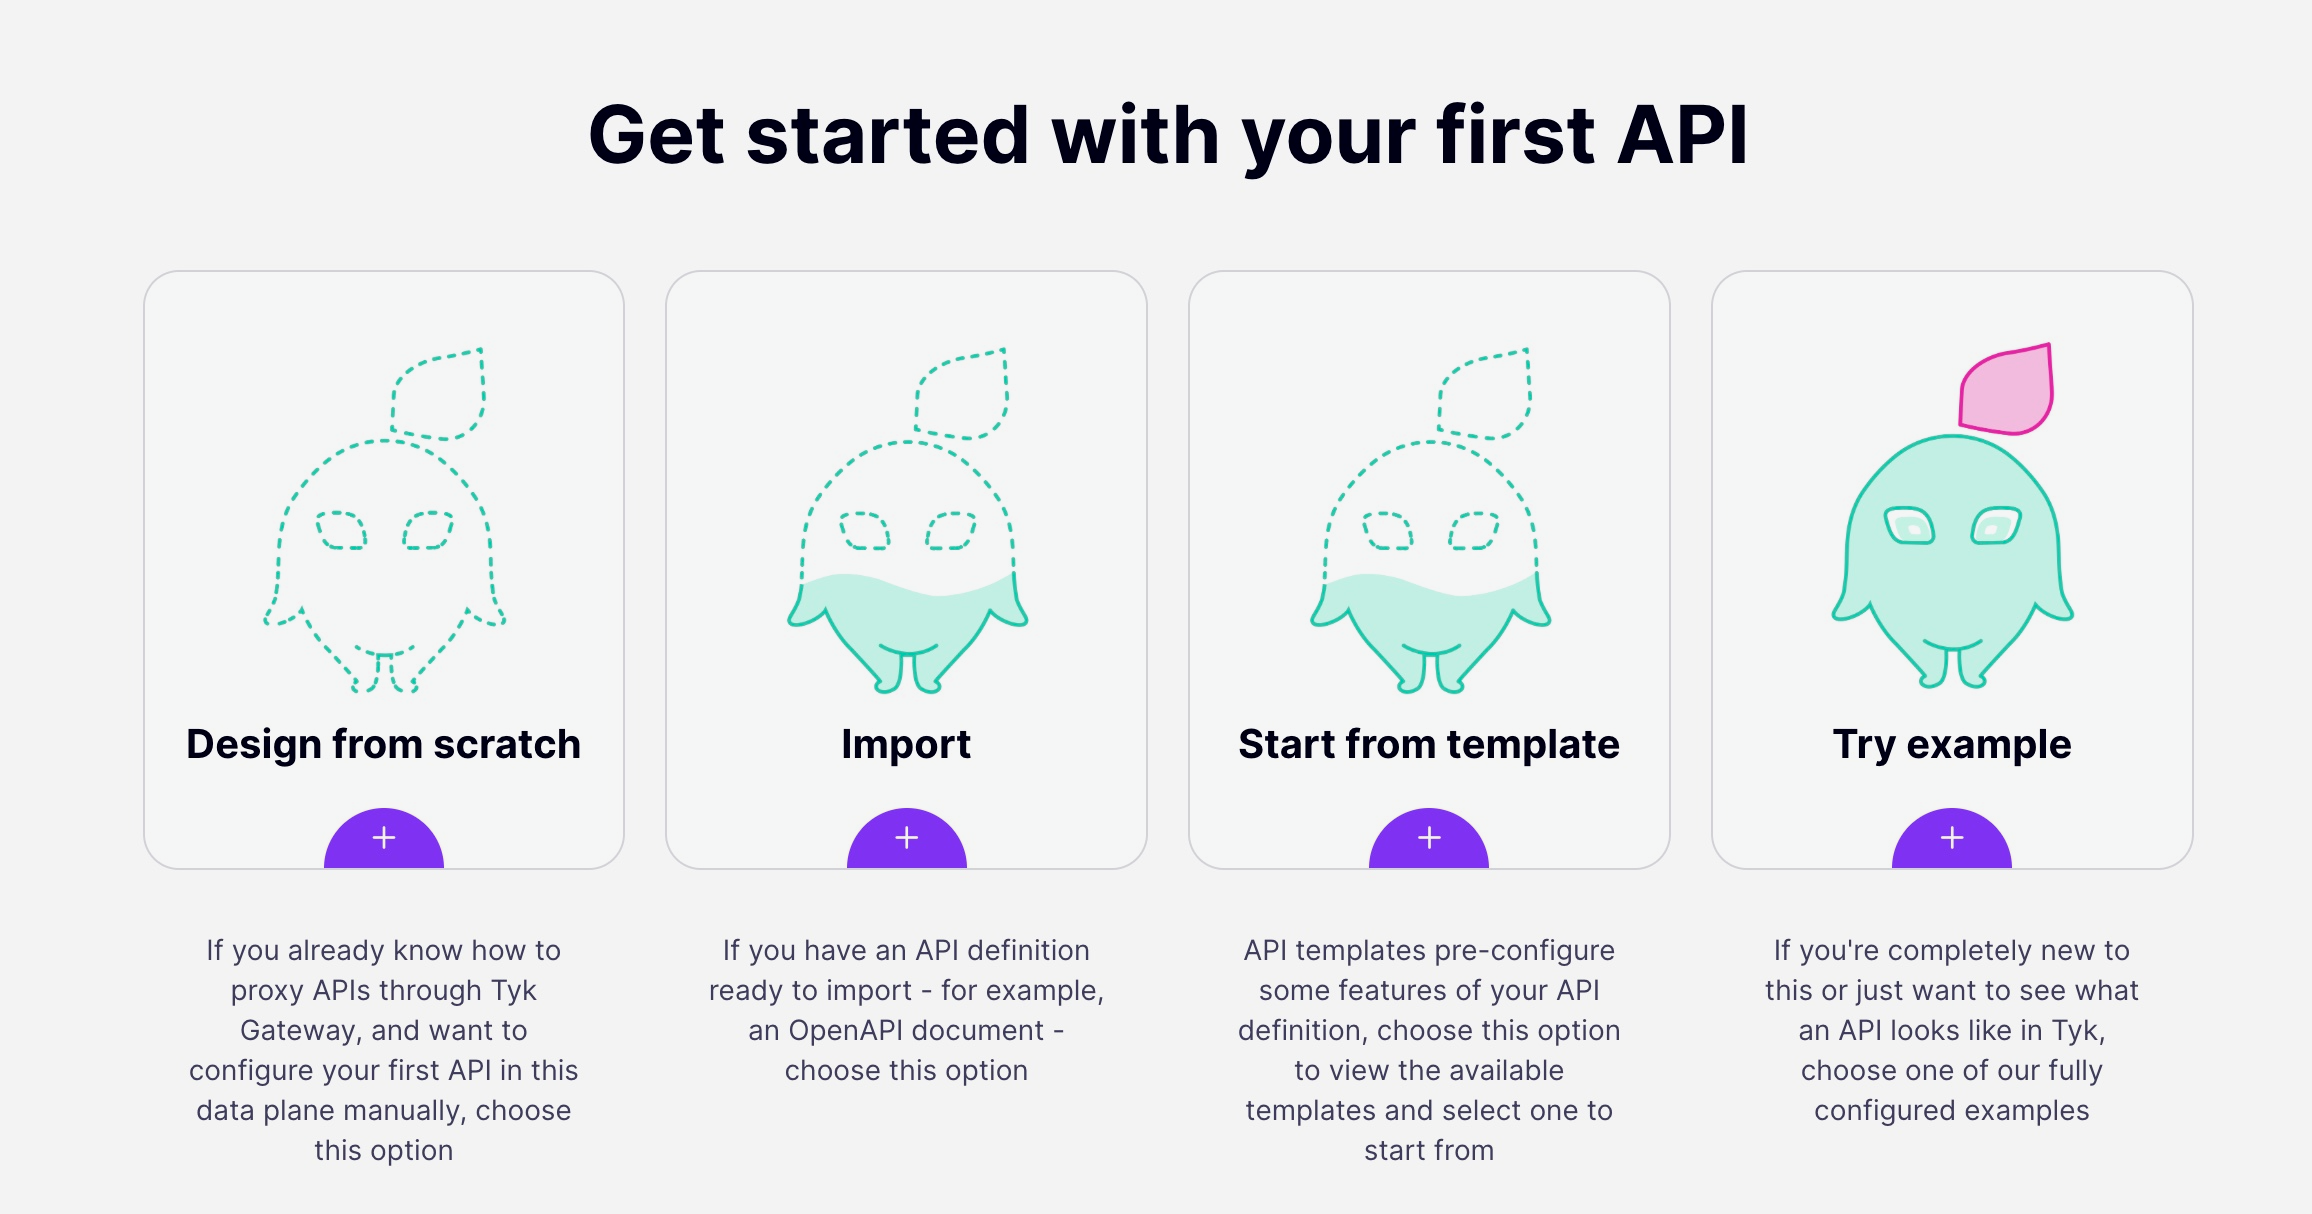
- APIs: The APIs setup allows you to create and access your APIs. If this is your first time setting up an API, we suggest you use an example to learn more or you can go to Configure your First API to learn more.

- API Templates: API Templates allow you to create APIs with preconfigured settings quickly. You can set these up manually or save them from an API which you’ve already created. You can learn more about API Templates here.
- Examples: In Examples, you will find a few sample projects we put together to help you in your journey. We suggest you start with the Tyk OAS APIs and move on to GraphQL and UDG APIs to supplement learning how to setup your API.
- Data Graphs: Universal Data Graphs (UDGs) are a way for you to combine APIs into one usable interface. Using GraphQL, you can access multiple APIs in a single query. In this tab, you can configure your UDGs. You can learn more about Data Graph concepts and how to use them in Tyk, here.
- Webhooks: Webhooks allow you to define redirects to handle specific events. For instance, you can configure a webhook to handle a RateLimitExceeded event to send a notification to your admin. Webhooks are very powerful tools to allow you to customize event handling, to learn more, find more information here.
API Security
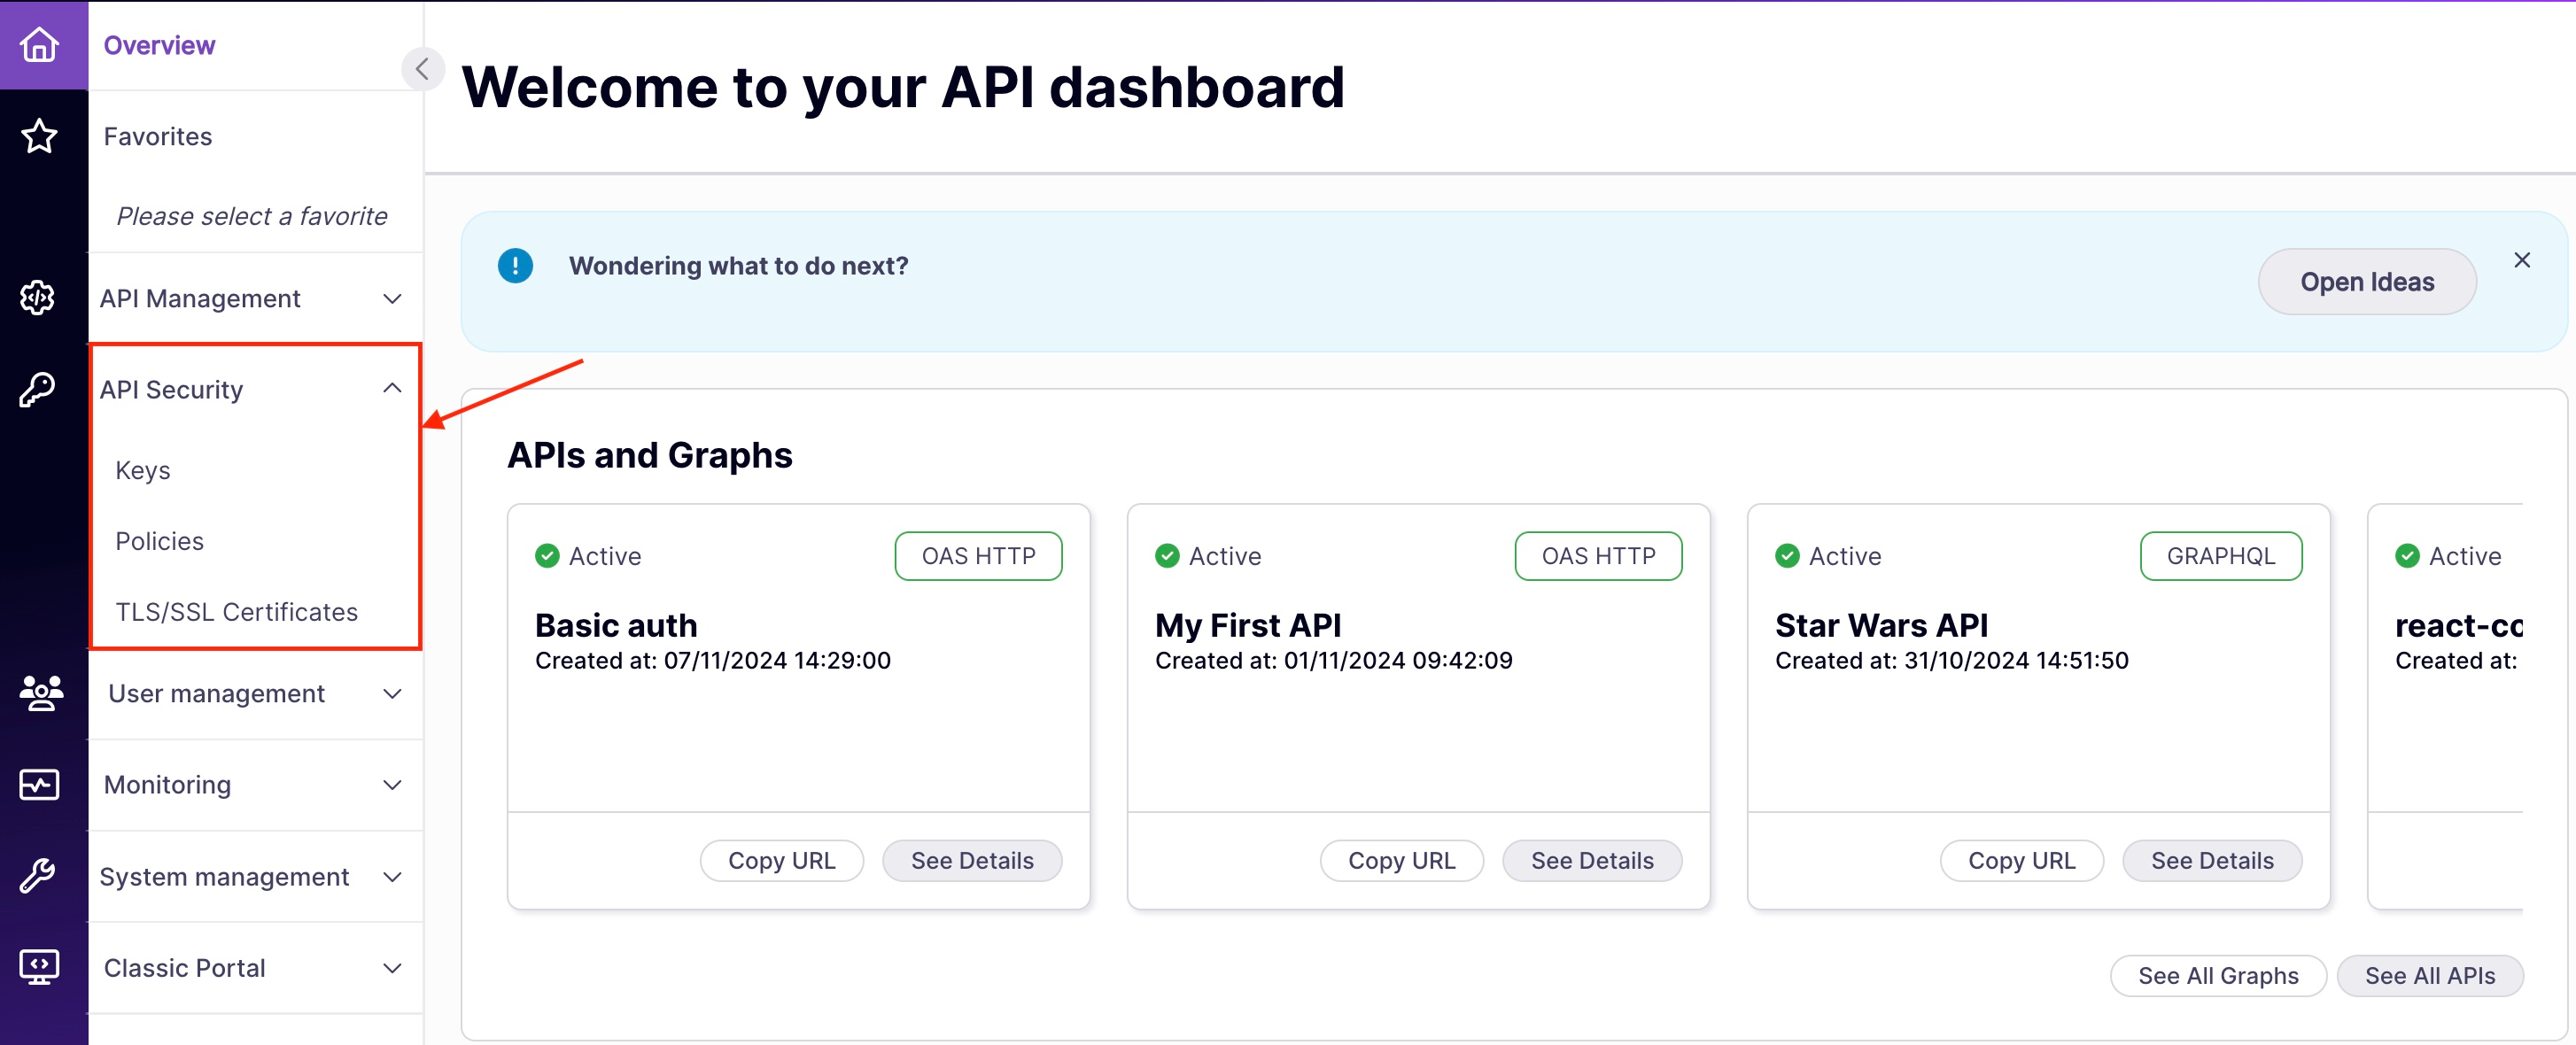
- Keys: Keys are central to securing your APIs through Tyk. In this tab, you can handle the permissions, rate and throttling limits, and quotas associated with a given key.
- Policies: Policies expand on key level security, allowing you to configure granular control over API access. Using policies, you govern which users or applications can access particular endpoints and what they’re allowed to do.
- TLS/SSL Certificates: TLS and SSL is supported in Tyk. You can upload your certificates via
.pemfile to verify the identity of whoever presents the certificate during a secure connection.
User Management
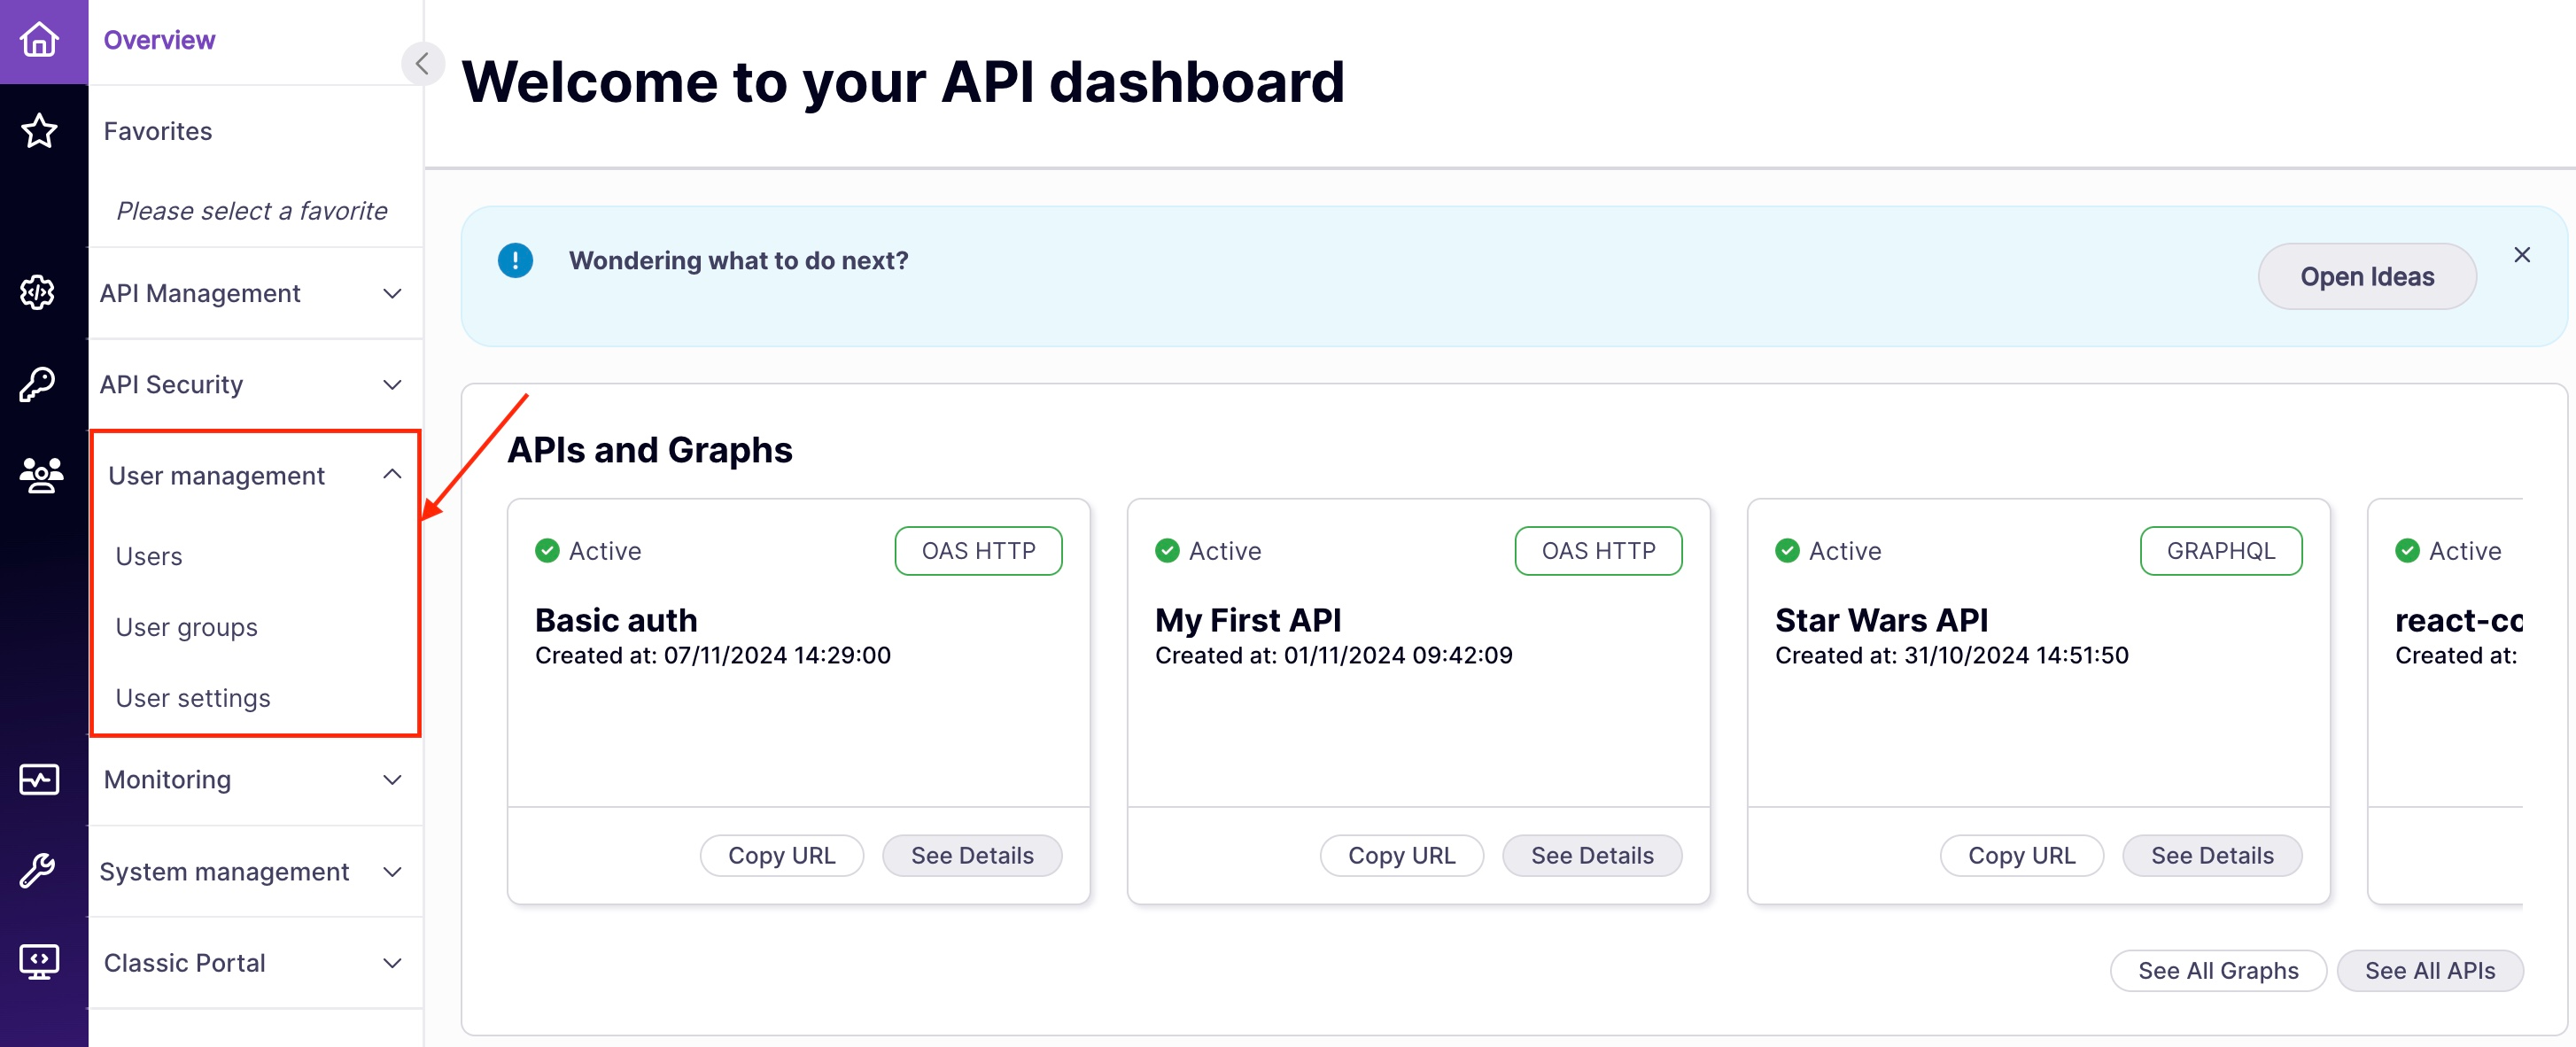
- Users: Here, you can add, revoke, delete, or edit the details of users that need admin access to your Tyk dashboard. ‘Revoking’ a user will suspend their access without deleting their account. You can learn more about users here.
- User Groups: Similar as a policy is to a key, a user group is to a user. By defining user groups, you aggregate the permissions and access controls for multiple users. When you setup a user with a user group, they inherit the user groups’ permissions. You can learn more about user groups here.
- User Settings: In User Settings, you can setup TIB profiles. This allows your users to access Tyk-managed APIs using their existing credentials.
Monitoring
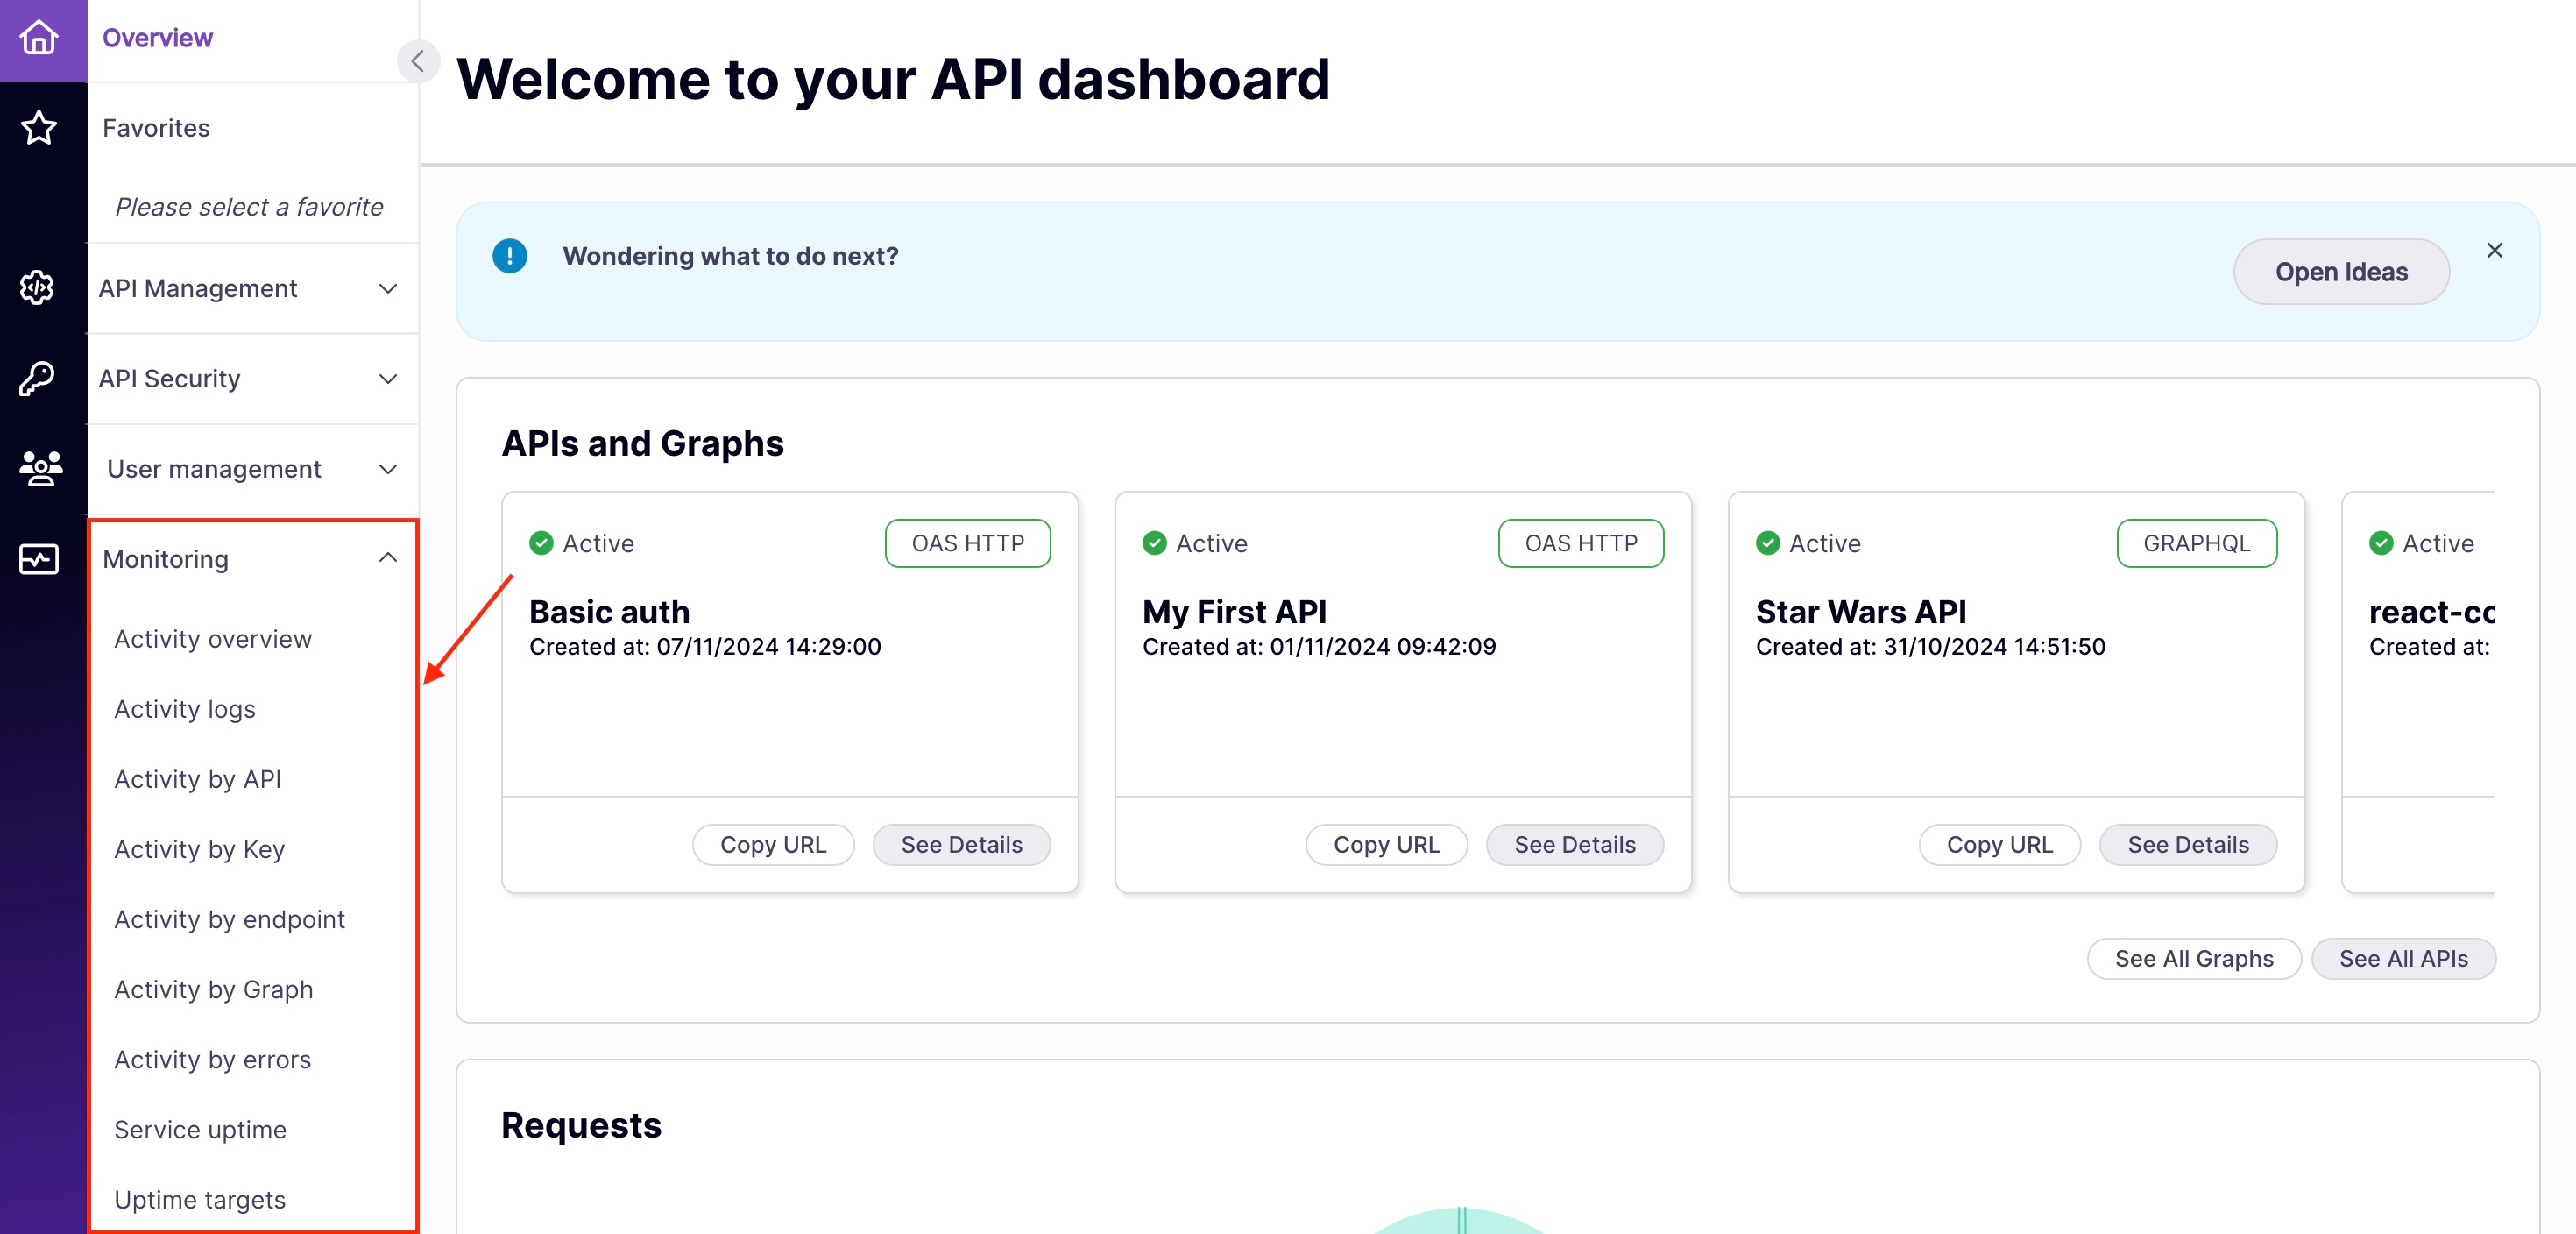
- Activity Overview: In the Activity Overview Tab, you will get a high-level view of requests sent to your APIs, the error breakdown, and your most popular endpoints. You can filter this to view per API statistics and to see the breakdown per hour, day, or month.
- Activity logs: Here, you can view all the activity logs from your APIs, giving you details on user activity or error logs.
- Activity by X: There are several tabs that allow you to view your activity reports per API, Key, Endpoint, Graph, and Errors. We provide these tools for you so that you can quickly visit the analytics you’re interested in and gain insights on your APIs.
- Service Uptime: Here, you can view the service uptime statistics, getting a detailed view of your uptime per version of your API. You can also view the errors associated with your API and if you are hitting your uptime targets.
- Uptime Targets: You can view uptime by target endpoint here, this is particularly useful if you have configured uptime tests to gain visibility into the uptime of your underlying services.
System Management
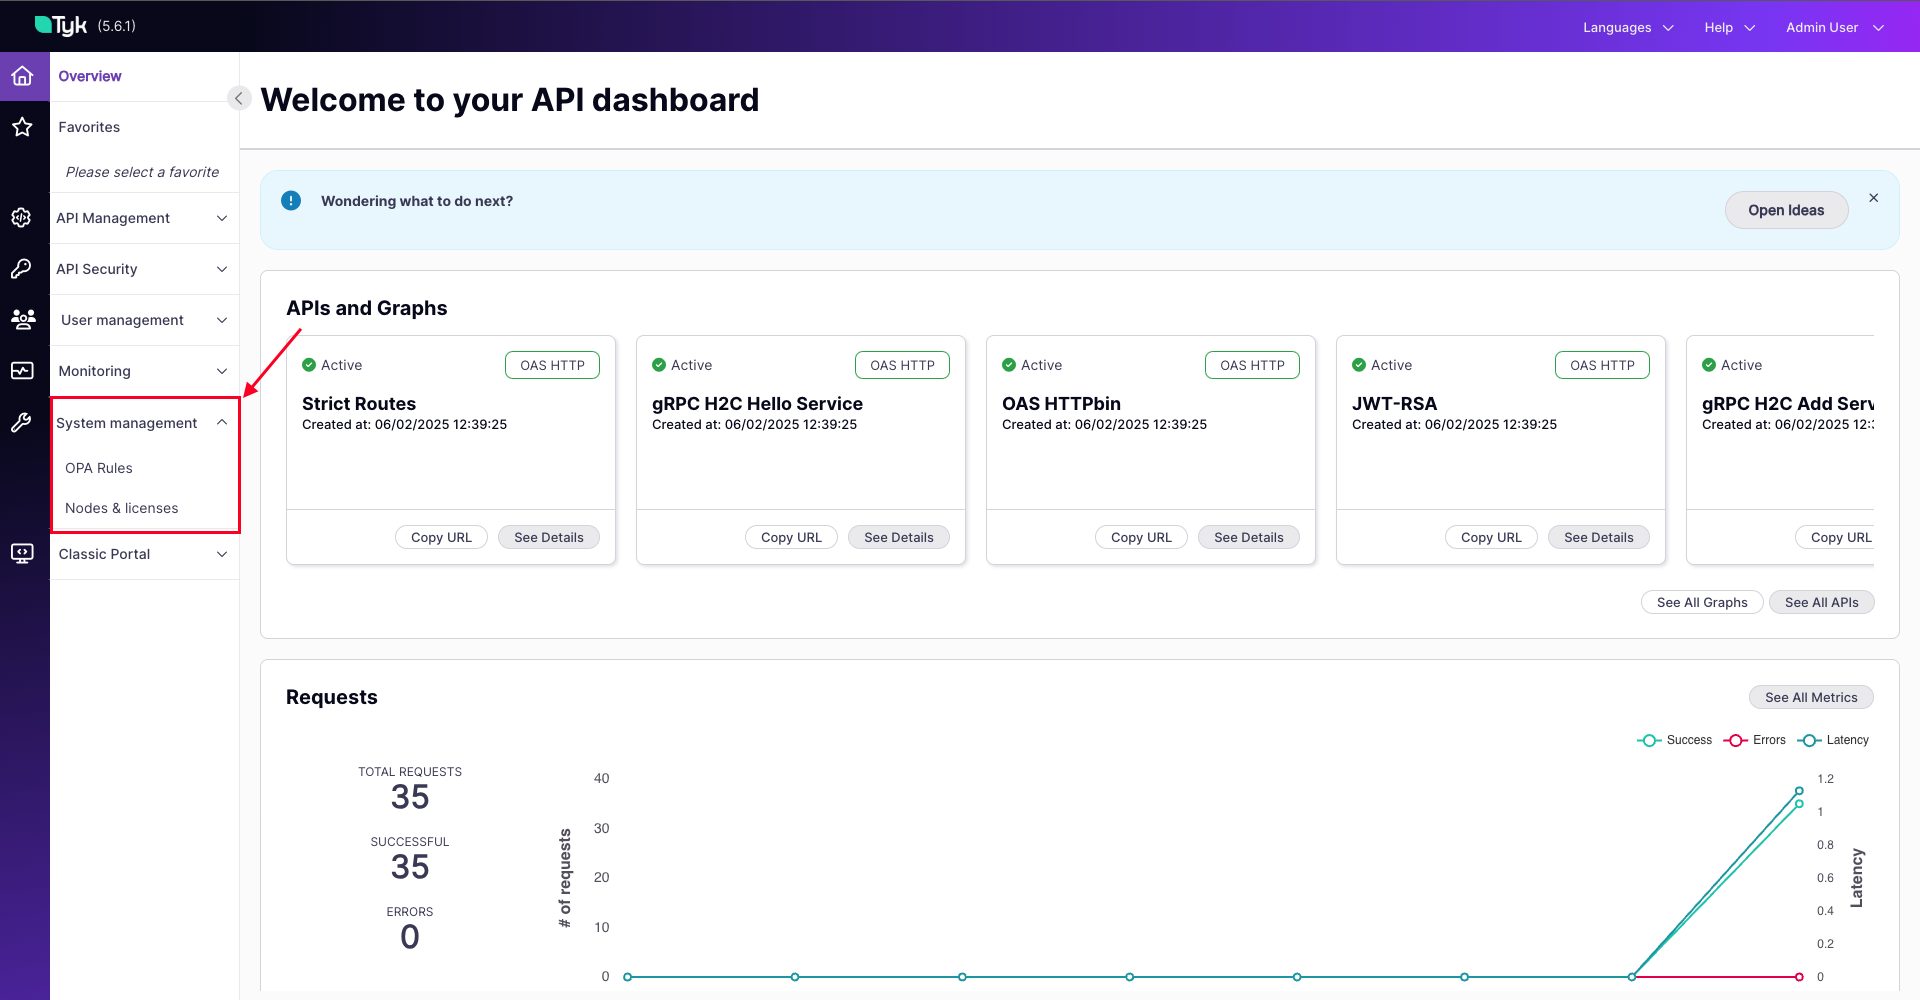
- OPA Rules: You can use this tab to edit your OPA Rules- you can use these custom rules to control the behavior of all of your dashboard APIs. For example, you can restrict regular users to GET requests only, while allowing POST requests for admin roles.
-
Nodes & Licenses: This page provides an overview of the Tyk installation, including license usage metrics and Gateway status. This is available only for
Tyk Self Managedinstallations.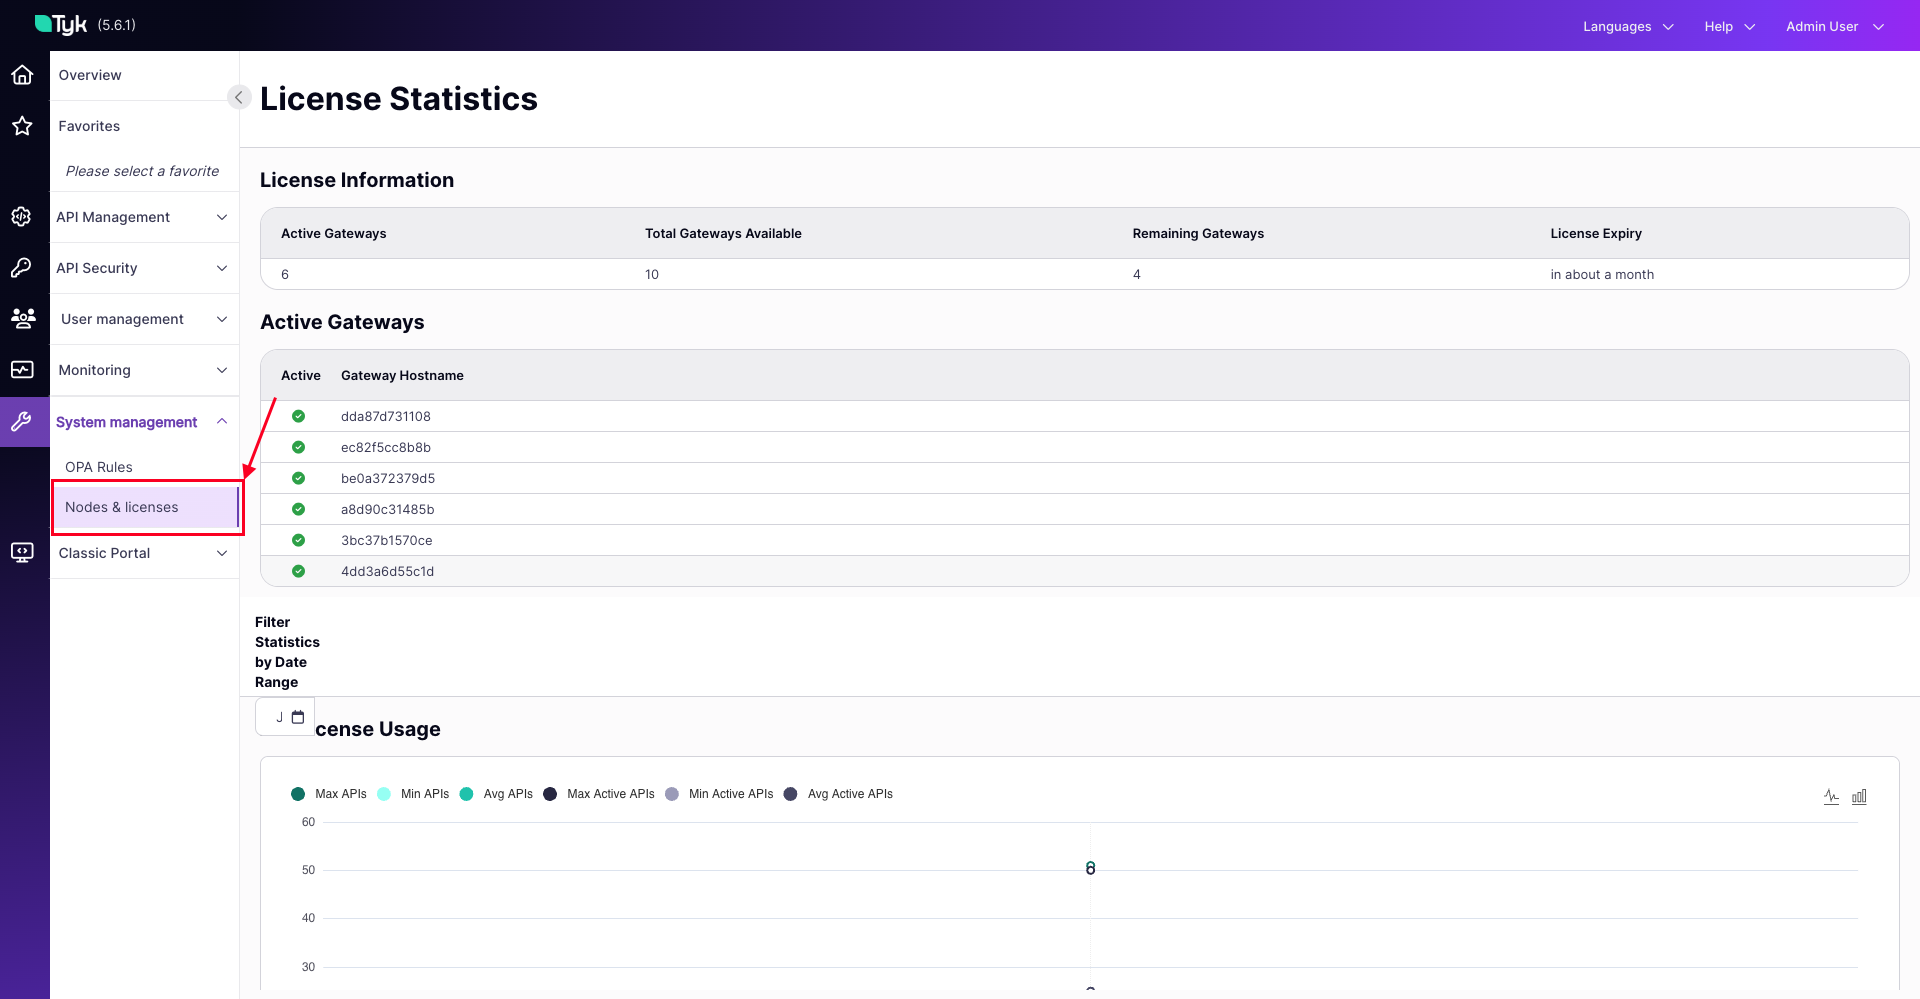
-
License Information:
- Active Gateways: Shows the number of available active gateways. An active gateway refers to a Tyk Gateway instance currently connected to a Control Plane and actively processing API requests. Note: It doesn’t count the Data Plane.
- Total Gateways Available: Total number of Gateways available per the license.
- Remaining Gateways: Unused license slots.
- License Expiry: Indicates the remaining time until the license expires (e.g., ‘in 8 days’).
-
Active Gateways:
- Lists the currently active gateways along with their hostnames.
- Includes a status indicator (green dot) to signify active connections.
-
License Usage:
- It provides a visual representation of the number of APIs loaded in the gateway and displays the minimum, maximum, and average.
-
Data Plane License Usage:
- It visually represents the maximum, minimum, and average number of Data Planes per day. The x-axis is the dates, while the Y axis is the number of data planes connected; for example, if we execute one cluster with groupID “A” and another with groupID “B,” we will get two as max, without caring how many gateways running inside each cluster.
-
Gateway License Usage:
- This provides a visual representation of the maximum, minimum, and average number of total gateways (all deployed gateways, whether they are part of a data plane or control plane).
-
Total API Traffic:
- Provides a visual representation of Total API Traffic across all Gateways in the installation. This can be viewed over the past month or day.
-
License Information:
Classic Portal
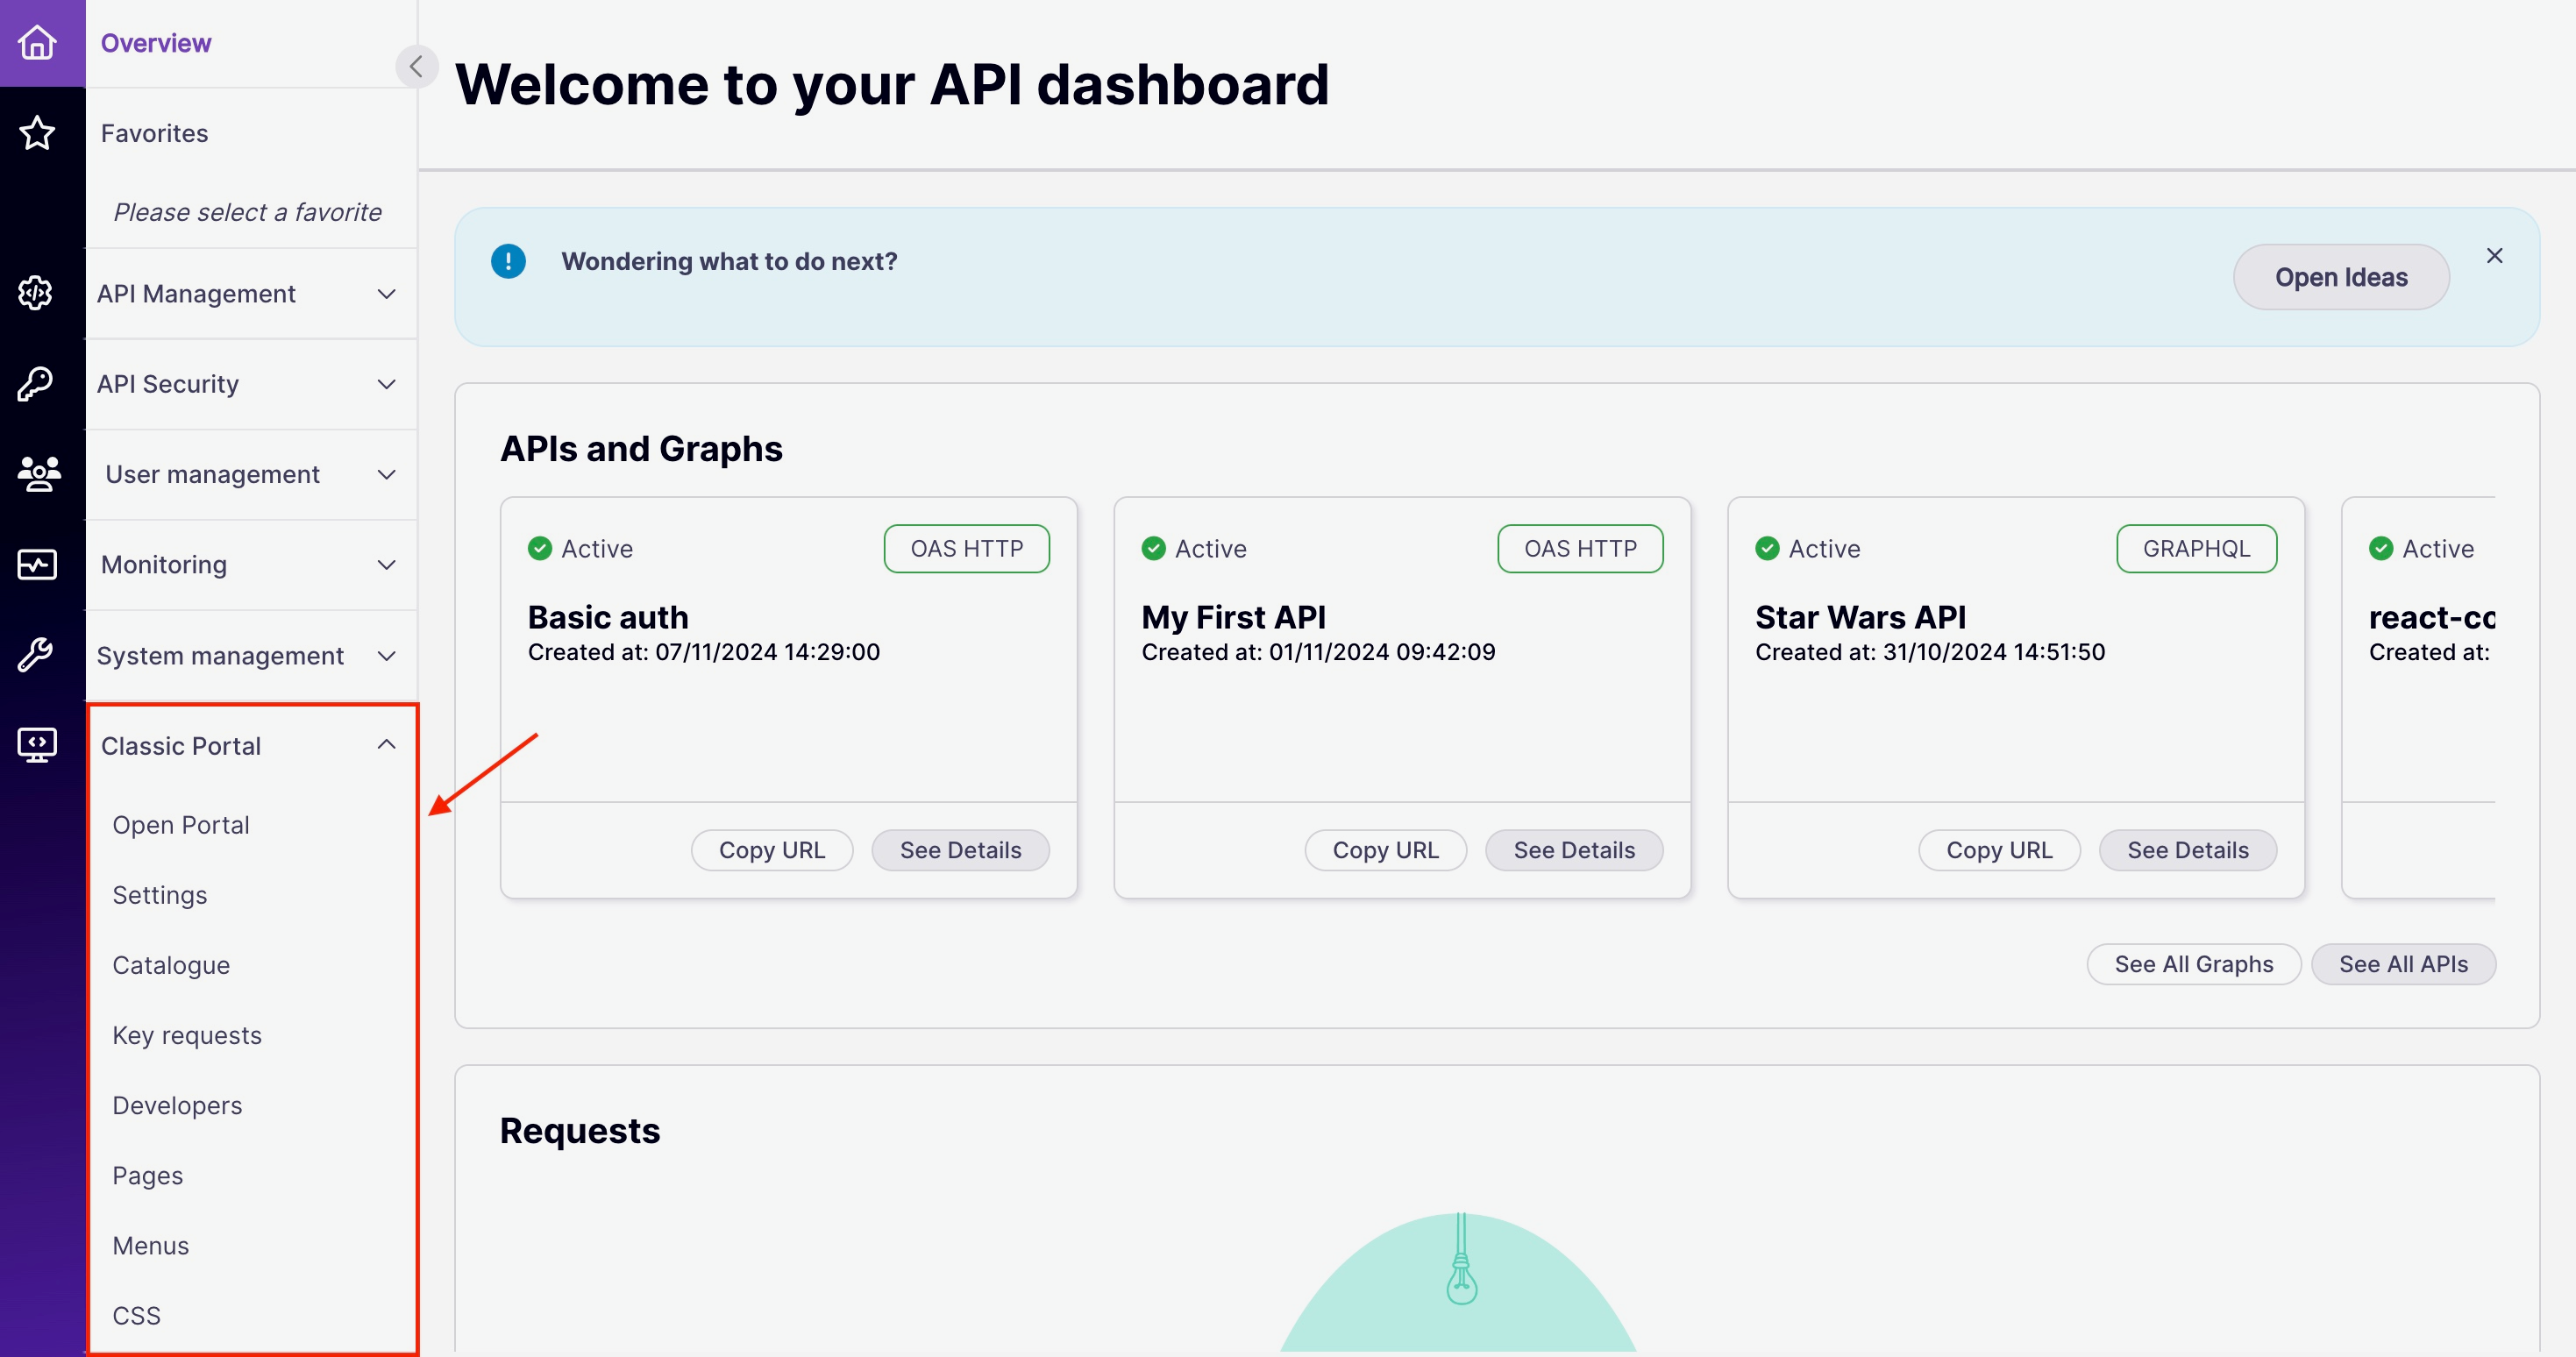
- Open Portal: By clicking this, you will be redirected to the Developer Portal, where developers can access your APIs. This acts as a self-service gateway where developers can discover, request access to, and manage their API Keys, view documentation, and monitor usage reports. You can learn more about the developer portal and how to customize it here.
- Settings: Tyk allows you to customize your portal however you like. The first level of customization occurs through configuring your settings. Here, you can setup your portal domain name, establish an admin to be notified whenever you get an API subscription, affect access and permissions to your portal, and enable email notifications to be sent to the developers using your portal. You can learn more about customizing your settings here.
- Catalogue: Your catalogue is the full list of APIs made available in your portal. You can add APIs to your catalogue in this tab. You can learn more about how to affect your catalogues here.
- Key Requests: For the APIs listed in your catalogue, you developers will submit key requests to gain access to them. This page allows you to view the full list of key requests, you can use it to see what APIs are gaining popularity, you can also approve or decline key requests here. You can learn more about key requests here.
- Developers: Developers are the people consuming your APIs. You can add developers to your portal in this tab.
- Pages: As mentioned earlier, your portal is completely customizable. This tab makes it easy to add or edit the pages available in your portal. You can make this as simple or complicated as you want, you just have to add a title and URL for each page. You can learn more about adding pages to your portal here.
- Menus: Next, if you want to configure the navigation of your site, you can customize your menus.
- CSS: In this tab, you can customize your site using CSS. Just write a custom CSS script and press the “update” button in the top right corner to publish your custom styling. For inspiration, take a look at this tutorial.