Websockets
Last updated:
As from Tyk gateway v2.2, Tyk supports transparent WebSocket connection upgrades. To enable this feature, set the enable_websockets value to true in your tyk.conf file.
WebSocket proxying is transparent, Tyk will not modify the frames that are sent between client and host, and rate limits are on a per-connection, not per-frame basis.
The WebSocket upgrade is the last middleware to fire in a Tyk request cycle, and so can make use of HA capabilities such as circuit breakers and enforced timeouts.
Tyk needs to decrypt the inbound and re-encrypt the outbound for the copy operations to work, Tyk does not just pass through the WebSocket. When the target is on default SSL port you must explicitly specify the target url for the API:
https://target:443/
WebSocket Example
We are going to set up Tyk with a WebSocket proxy using our Tyk Pro Docker Demo installation.
We will be using the Postman WebSocket Echo Service to test the connection.
Steps for Configuration
-
Setup the API in Tyk
Create a new API in Tyk. For this demo we are going to select Open (Keyless) as the Authentication mode.
Set the Target URL to
wss://ws.postman-echo.com/raw -
Test the Connection
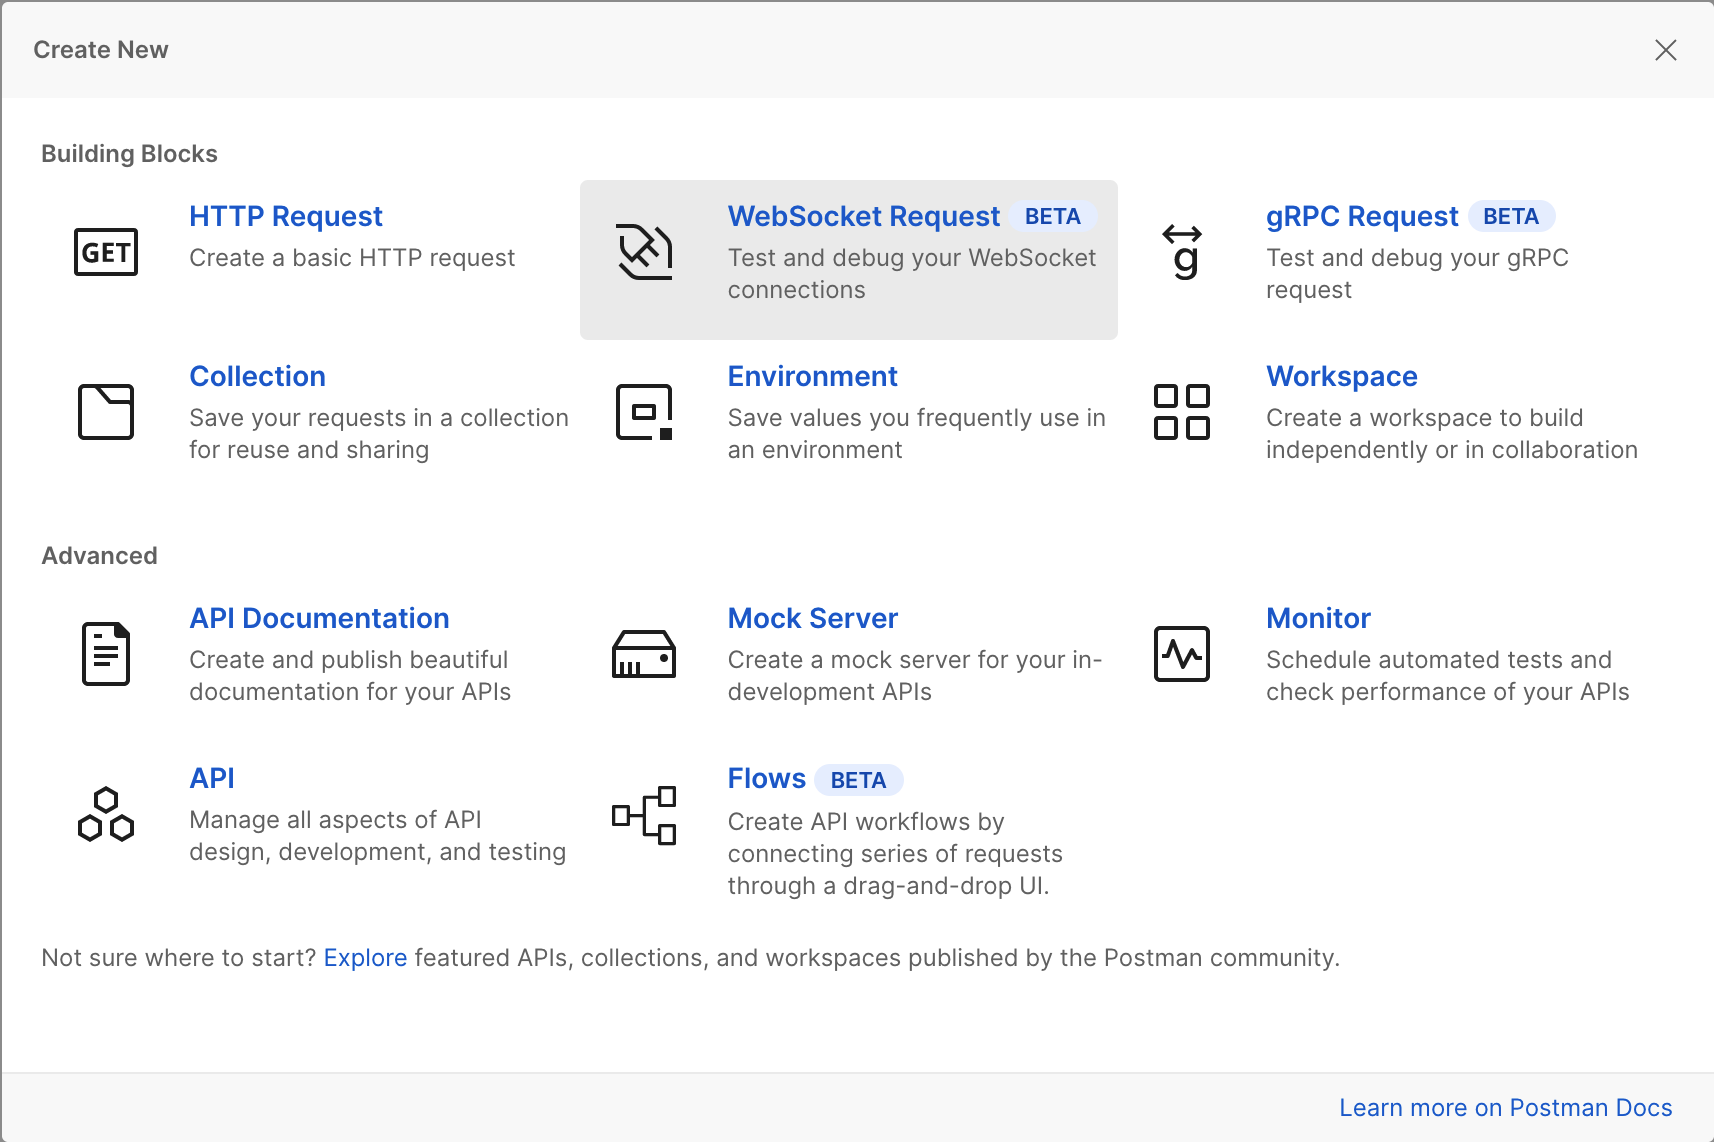
- From Postman, select File > New > WebSocket Request (or from Workspace > New > WebSocket Request if using the web based version).
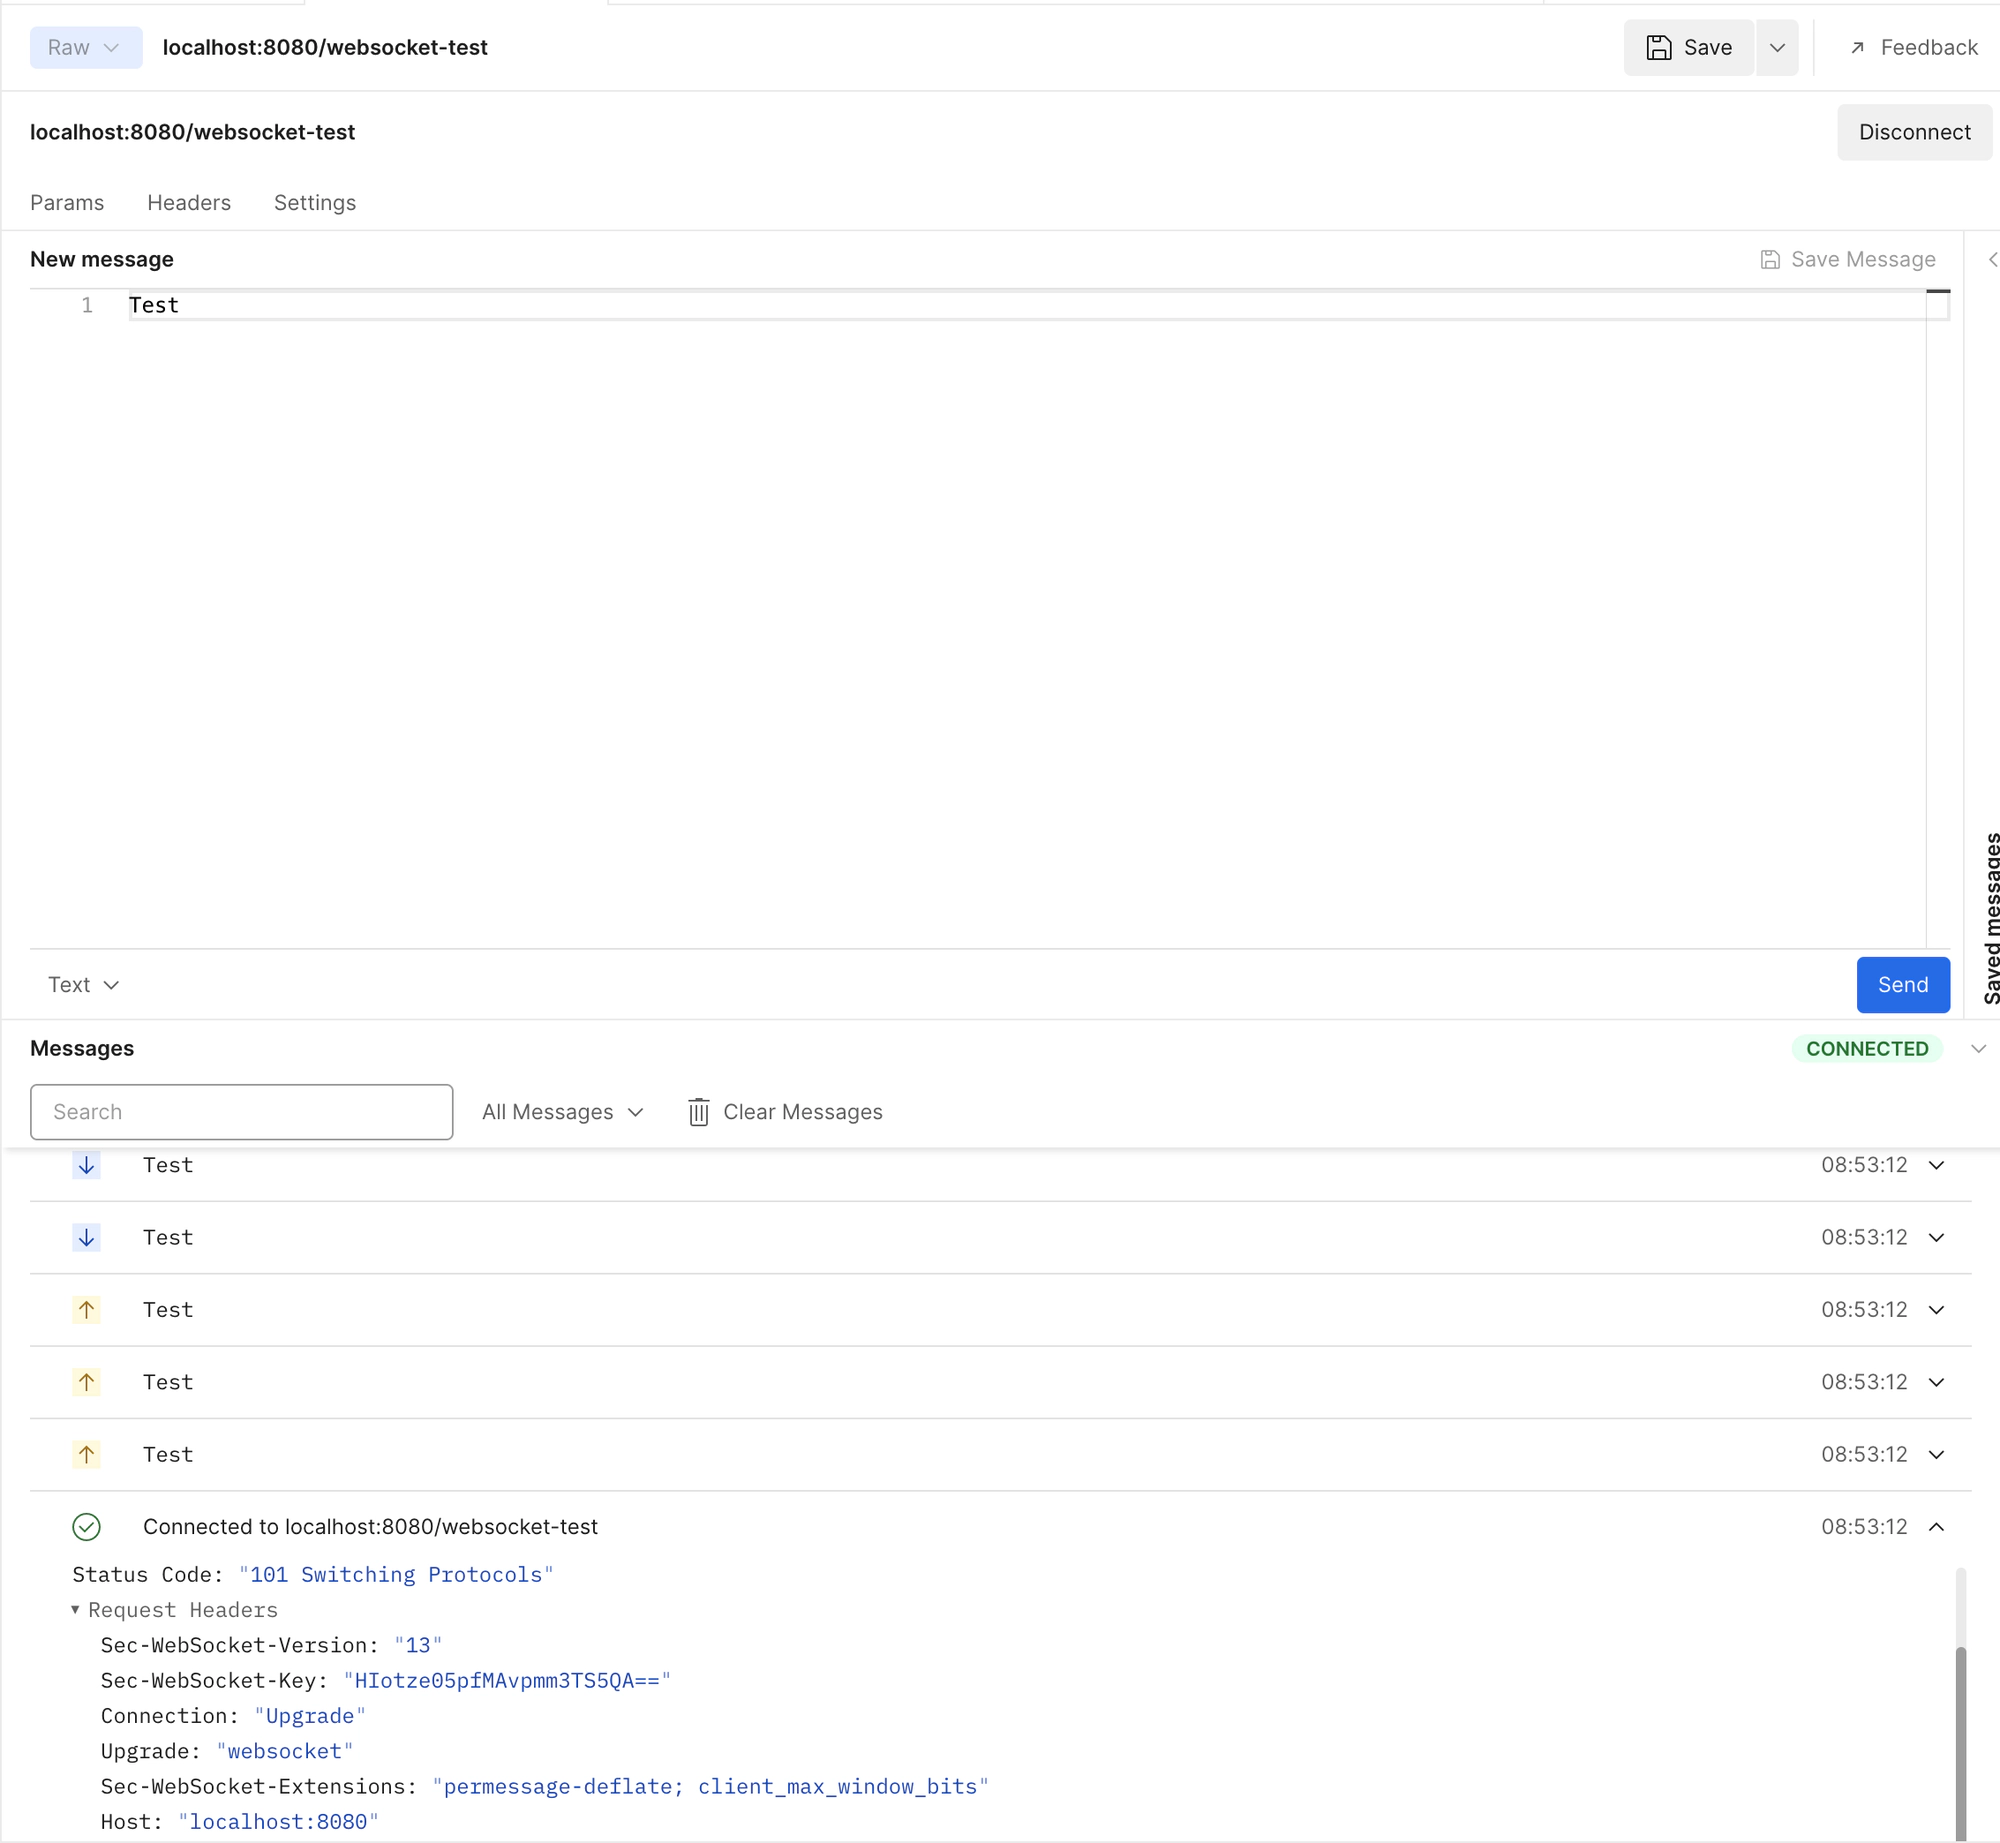
- Enter your Tyk API URL in the Enter server URL field (minus the protocol).
- Enter some text in the New Message field and click Send.
- You will see a successful connection.
Note
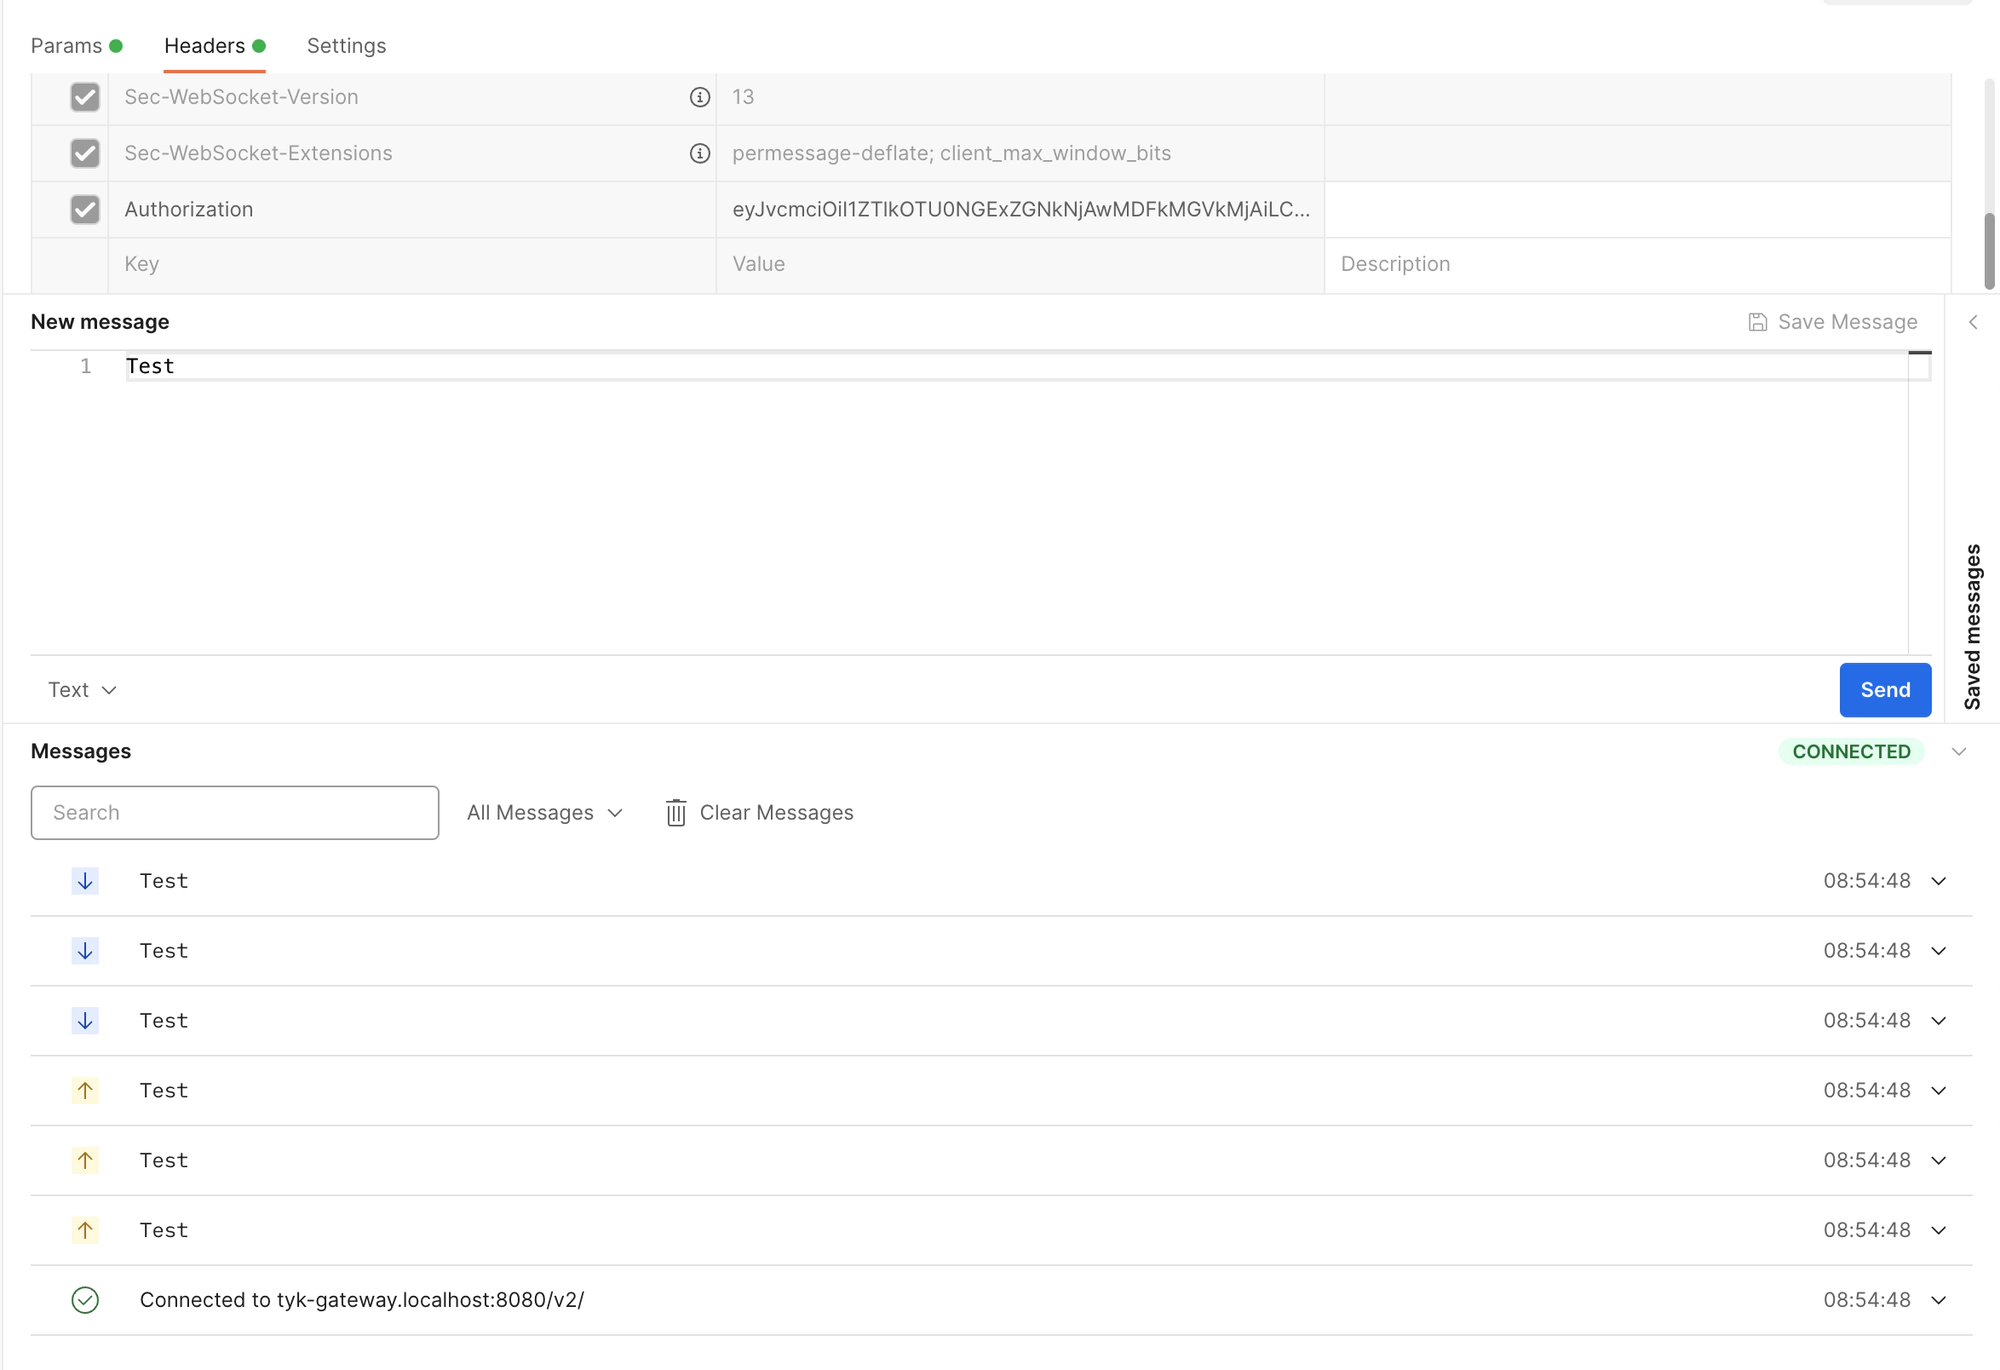
If your API uses an Authentication mode other than Open (Keyless), add the details in the Header tab.
An example Header configuration for using an Authentication Token with an API:
See the Access an API tutorial for details on adding an Authentication Token to your APIs.