Overview
This guide helps you get started with Tyk by covering the basics:- Set up your API: Create and configure a new API in the Tyk Dashboard.
- Create API keys: Generate API keys and assign them to your APIs for secure access.
- Monitor API performance: Track traffic, logs, and performance analytics.
This page focuses on getting started with Tyk Cloud, If you are looking for information on Tyk Self-Managed, please refer to the Getting Started with Tyk Self-Managed Guide.
Prerequisites
To start quickly, we’ll use Tyk Cloud in this guide. Before you begin, make sure you have:- A Tyk Cloud account.
- Admin access to the Tyk Dashboard.
- (optional) A backend service that your API will proxy (e.g., a RESTful API) - or you can use the httpbin service.
Set Up Your API
Start by creating a new API in Tyk Cloud:- Log in to the Tyk Dashboard..
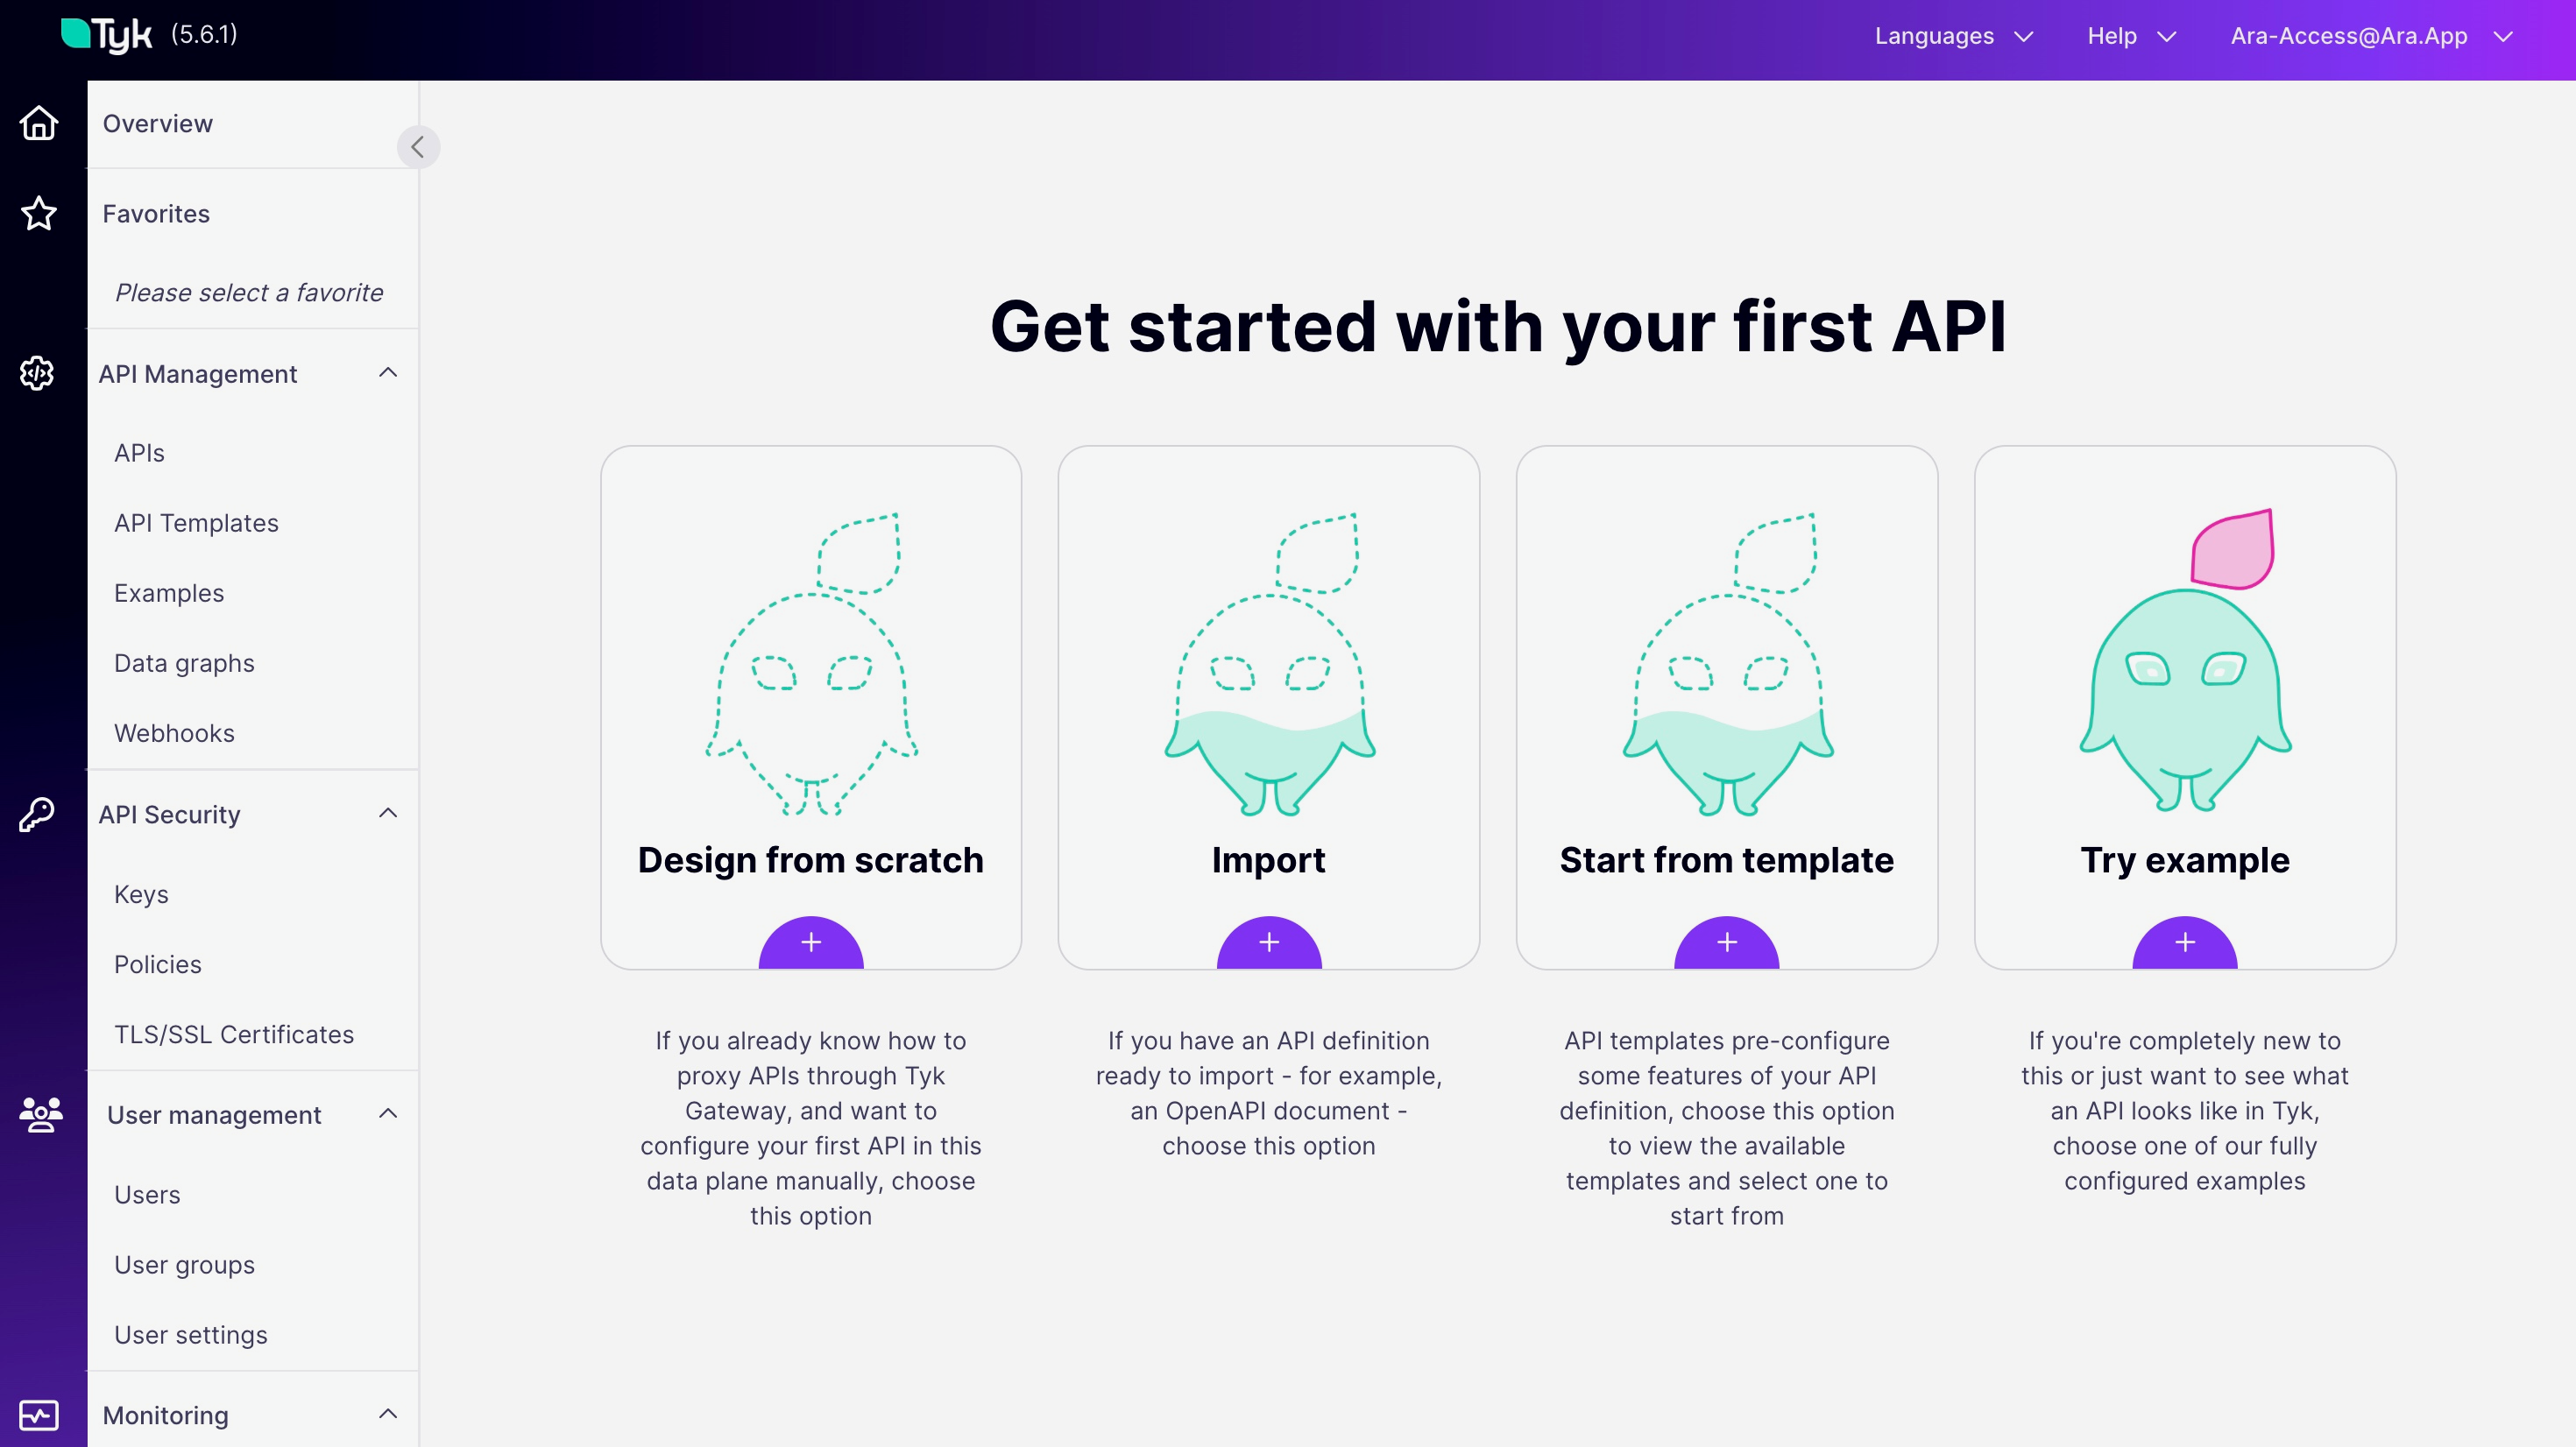
- Navigate to APIs and click Add New API or Design From Scratch button.
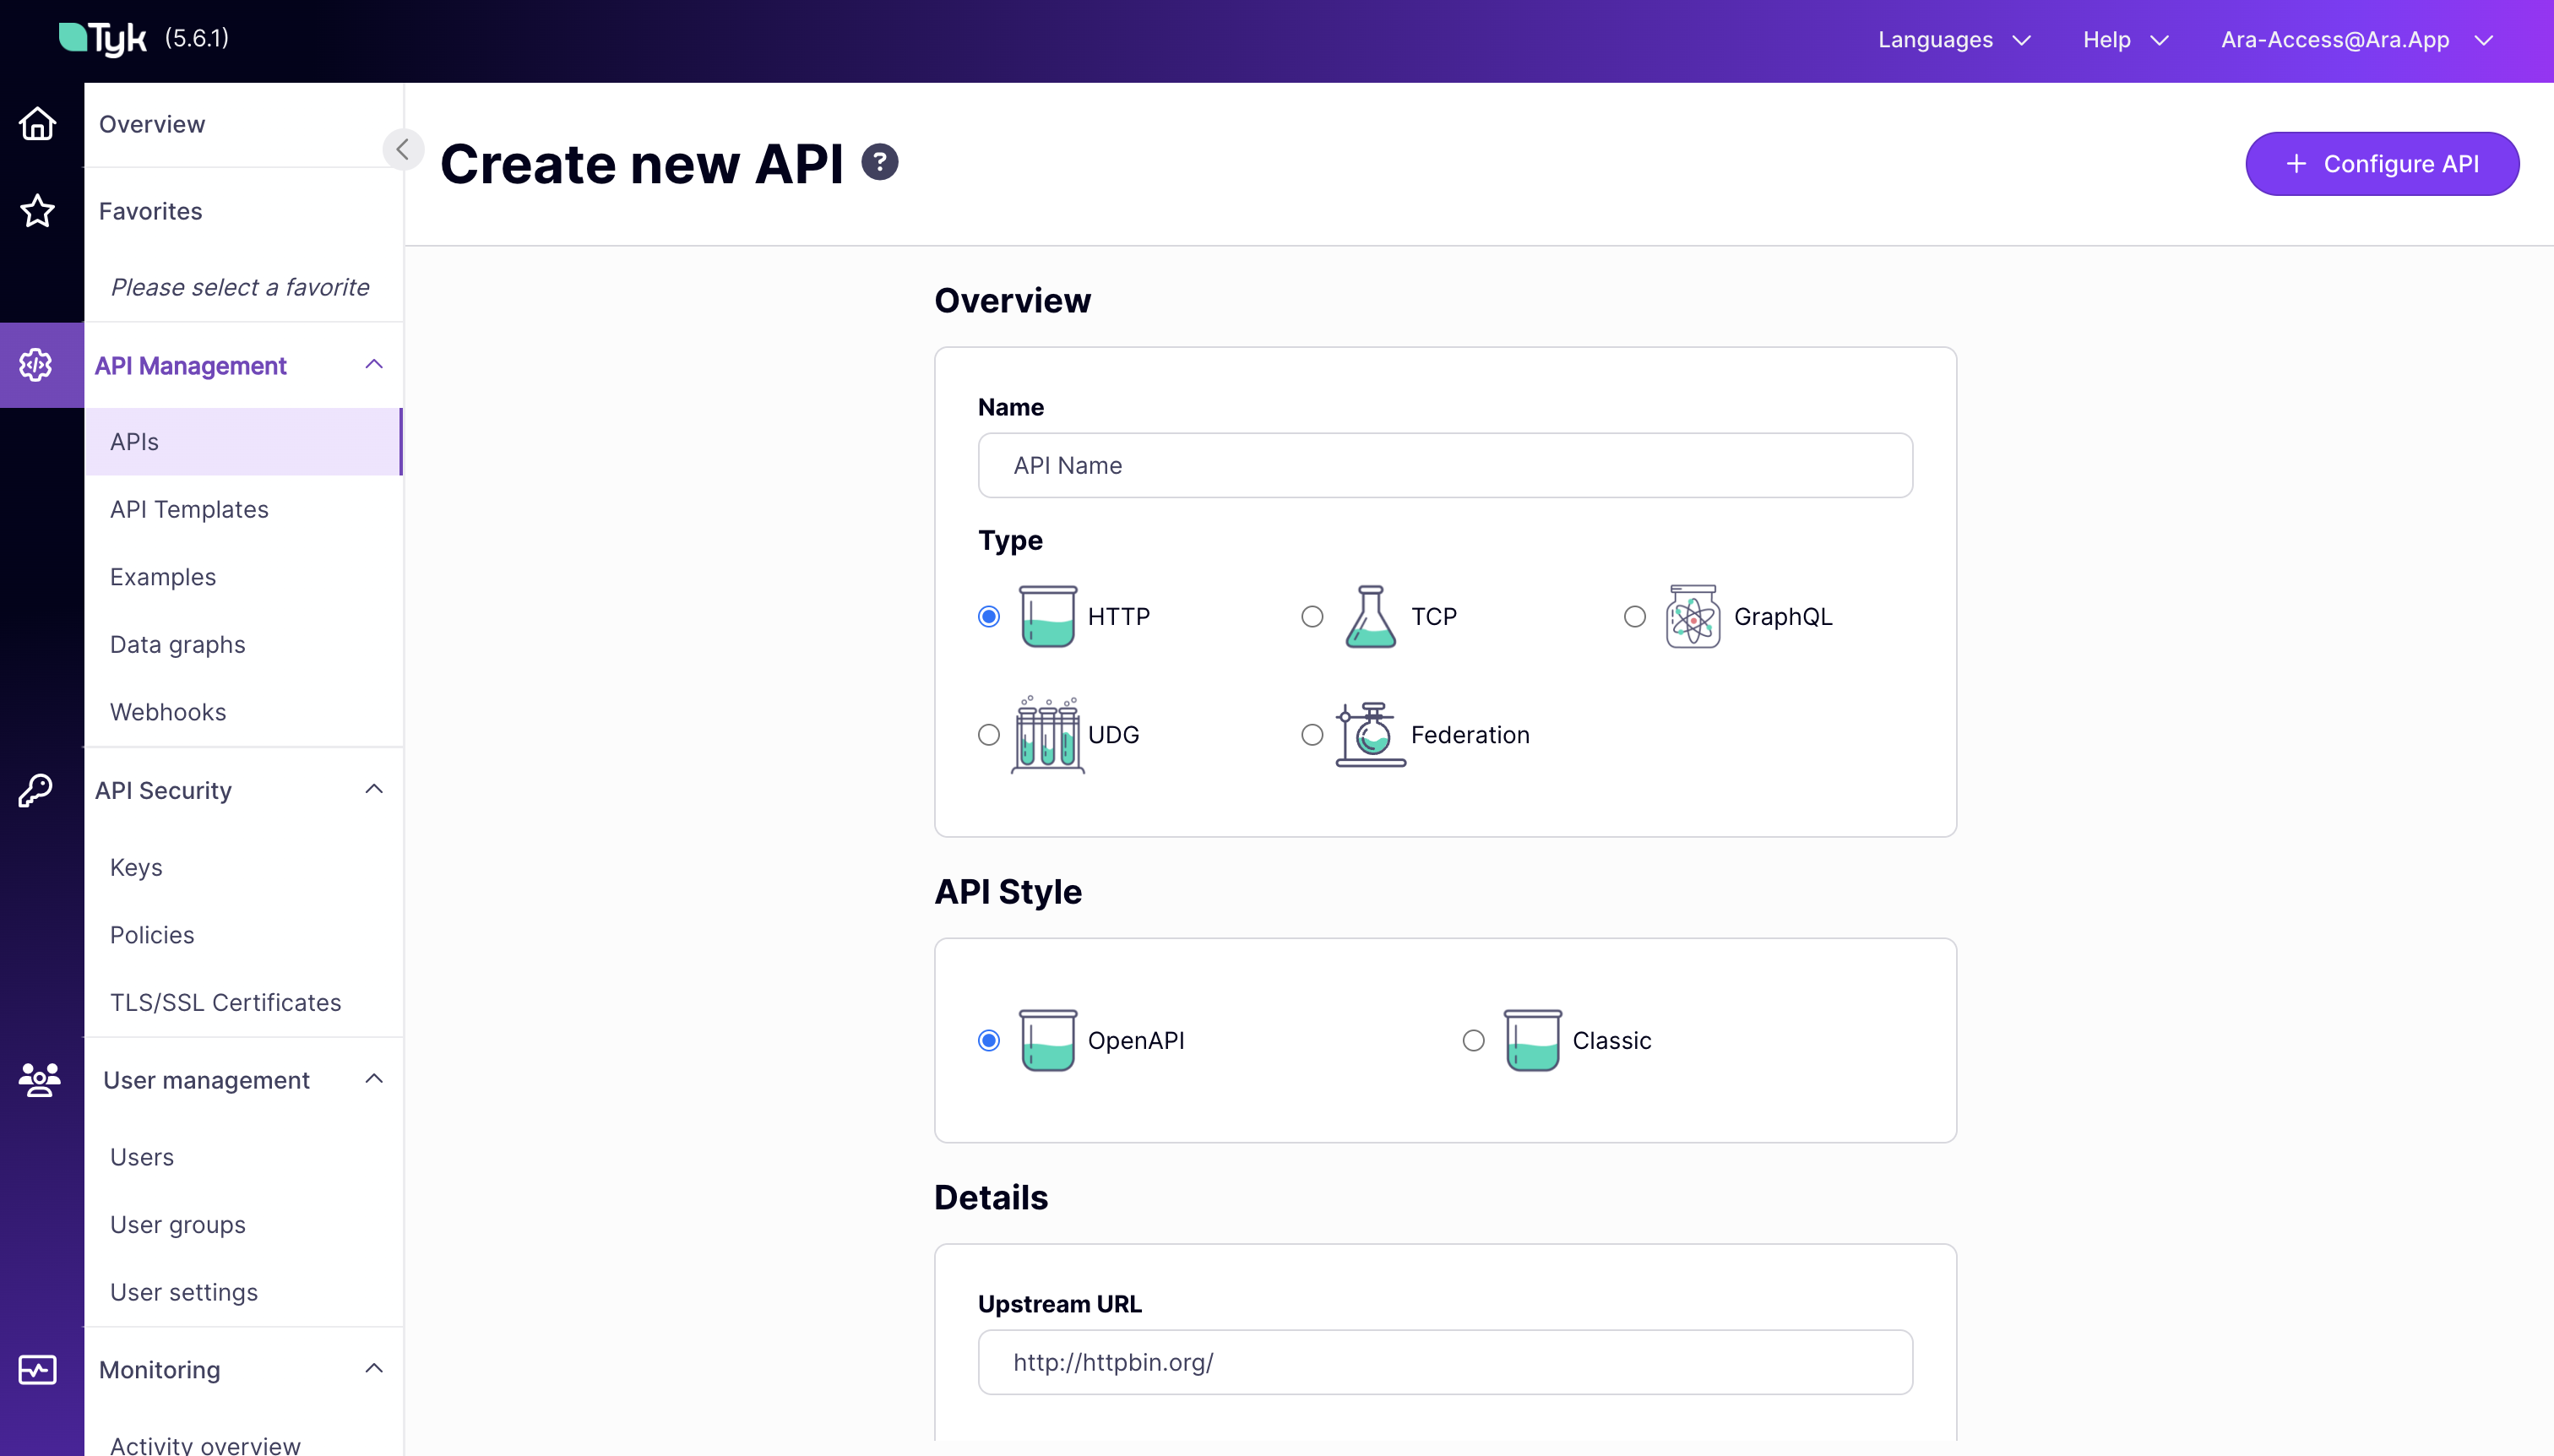
- Configure API Details:
- API Name: Name your API (e.g.,
My First API). - API Type: Choose from HTTP, TCP, GraphQL, UDG, or Federation, depending on your use case.
- API Style: Select OpenAPI for standardized HTTP APIs or Classic for flexible configurations and non-HTTP APIs.
- Target URL: Provide the URL of your backend service (e.g.,
http://httpbin.org).
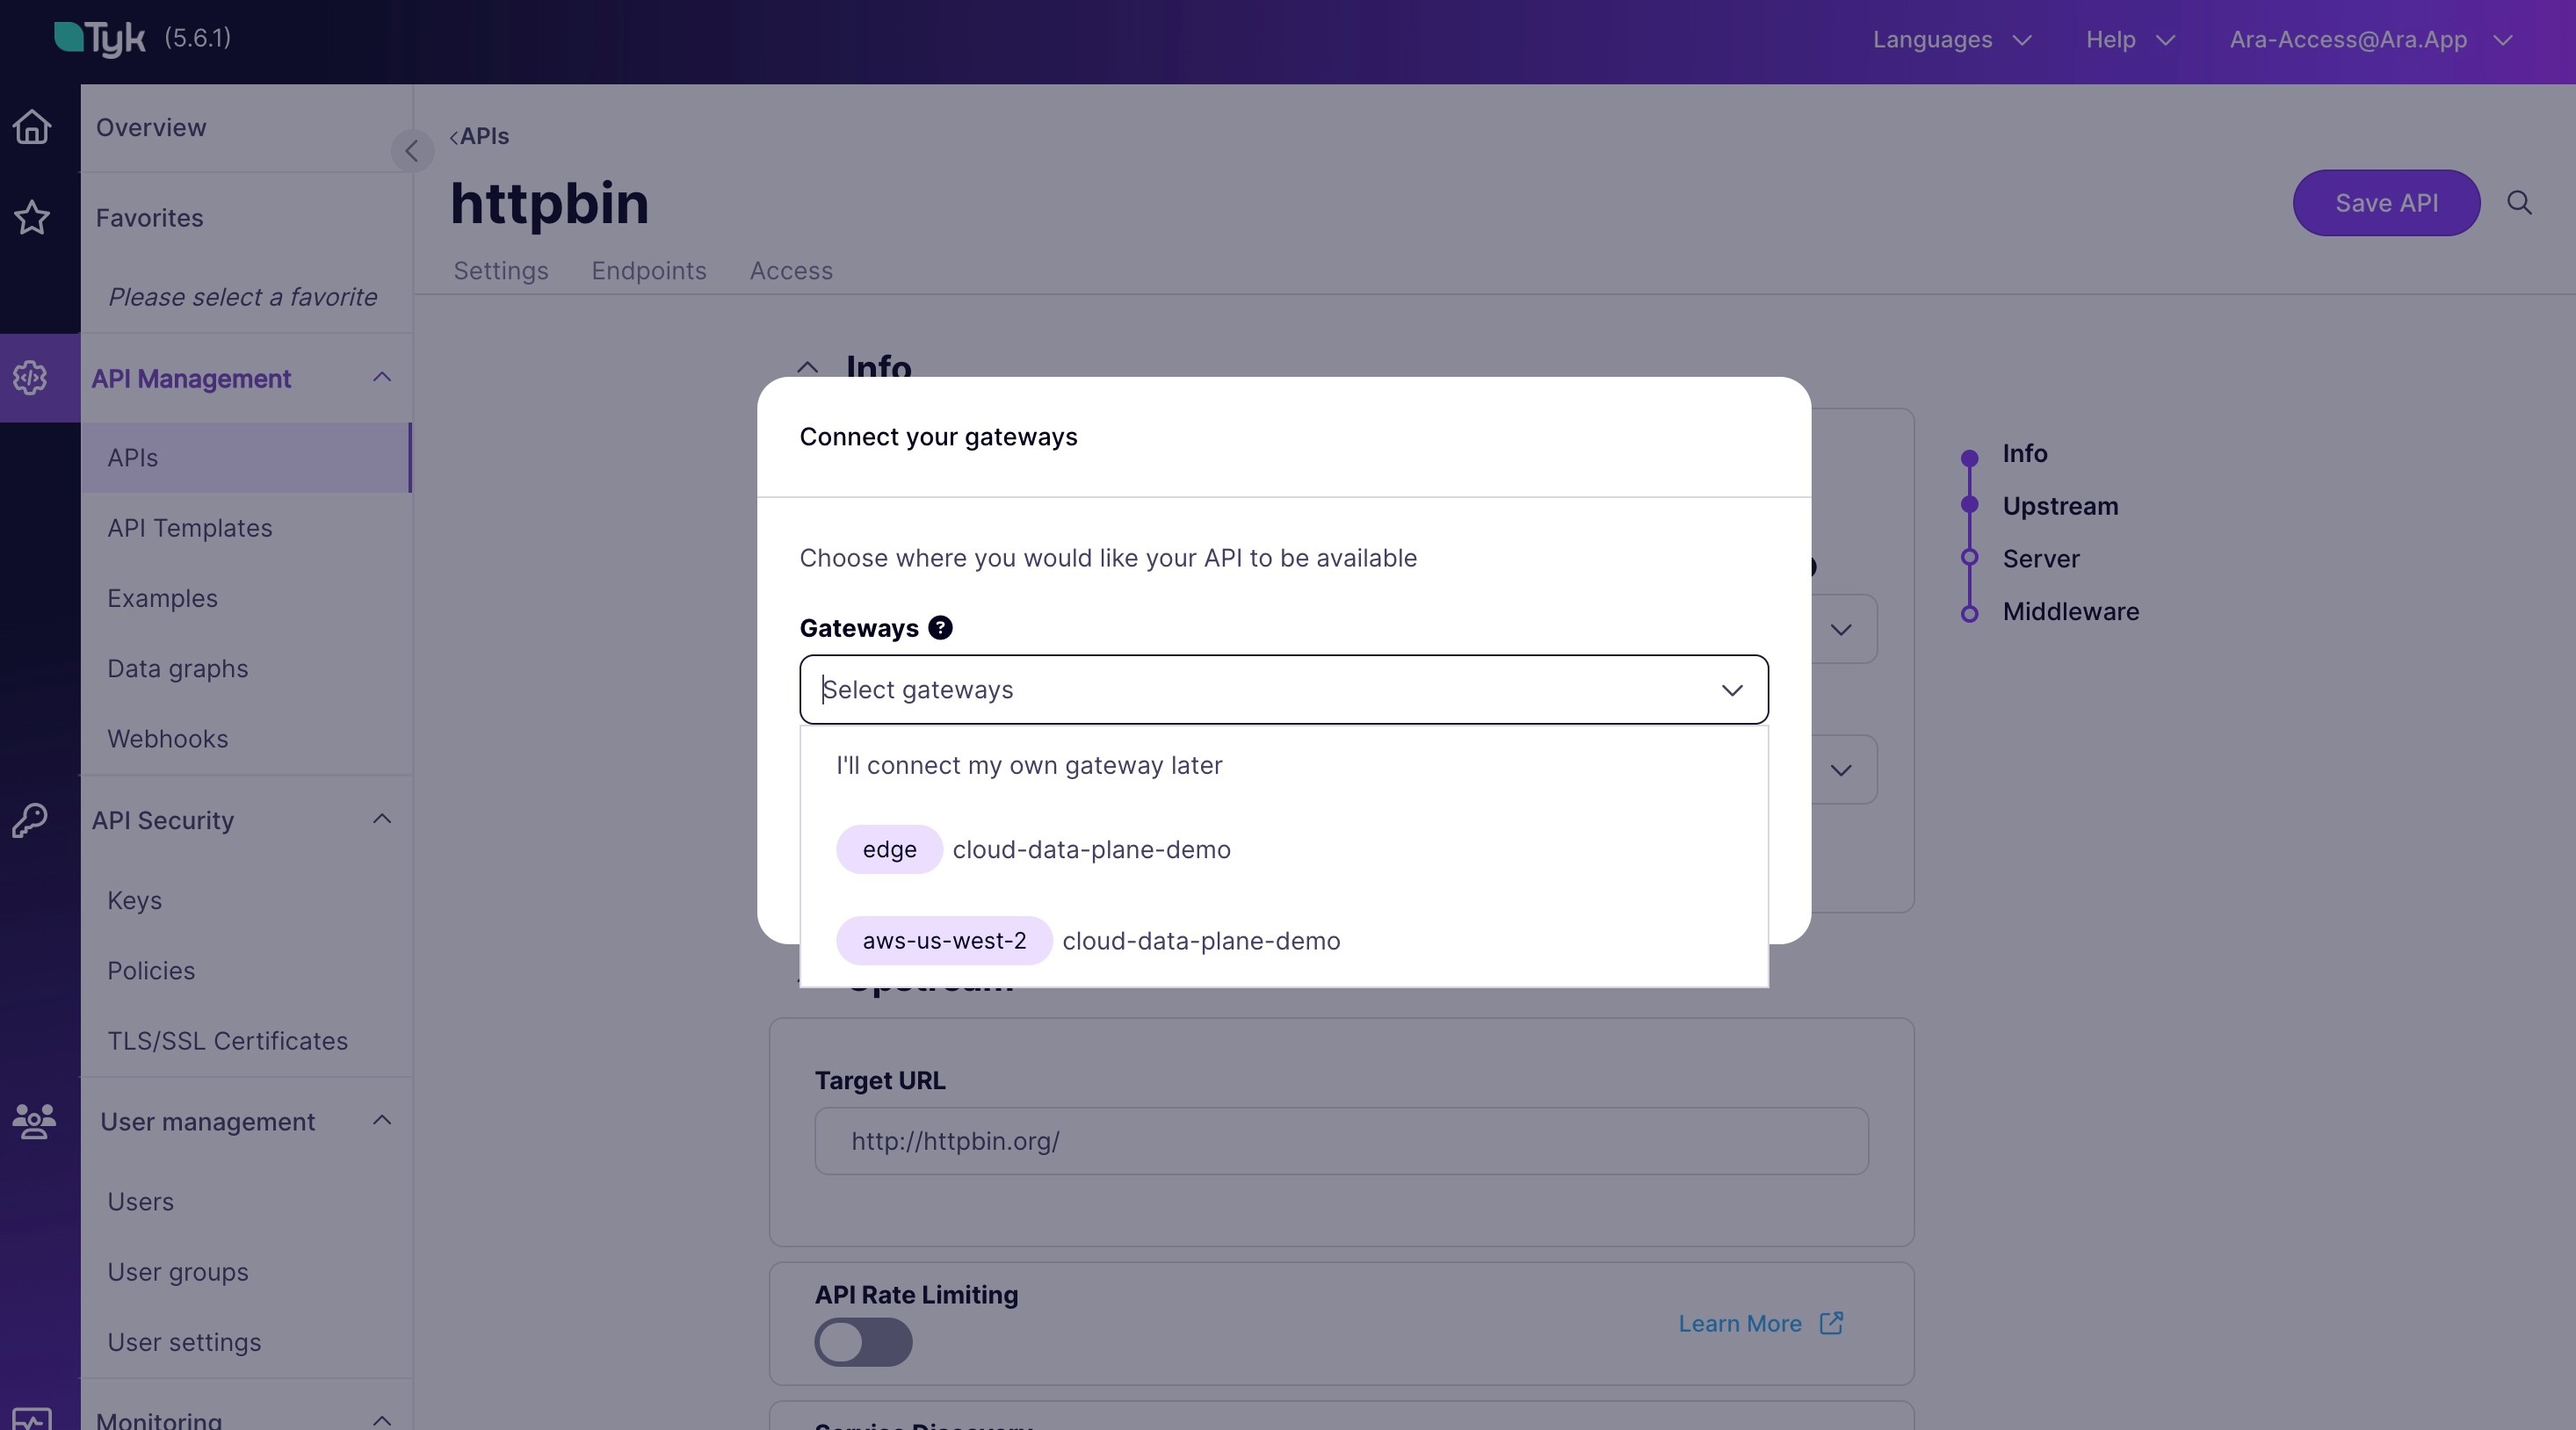
- Connect to Your Desired Gateway:
Edge Gatewaysgenerally provide low-latency, regionally distributed API processing, ideal for a global user base.Regular Gatewayscentralize API management, offering comprehensive API processing without additional edge optimizations.
- Configure your API Settings:
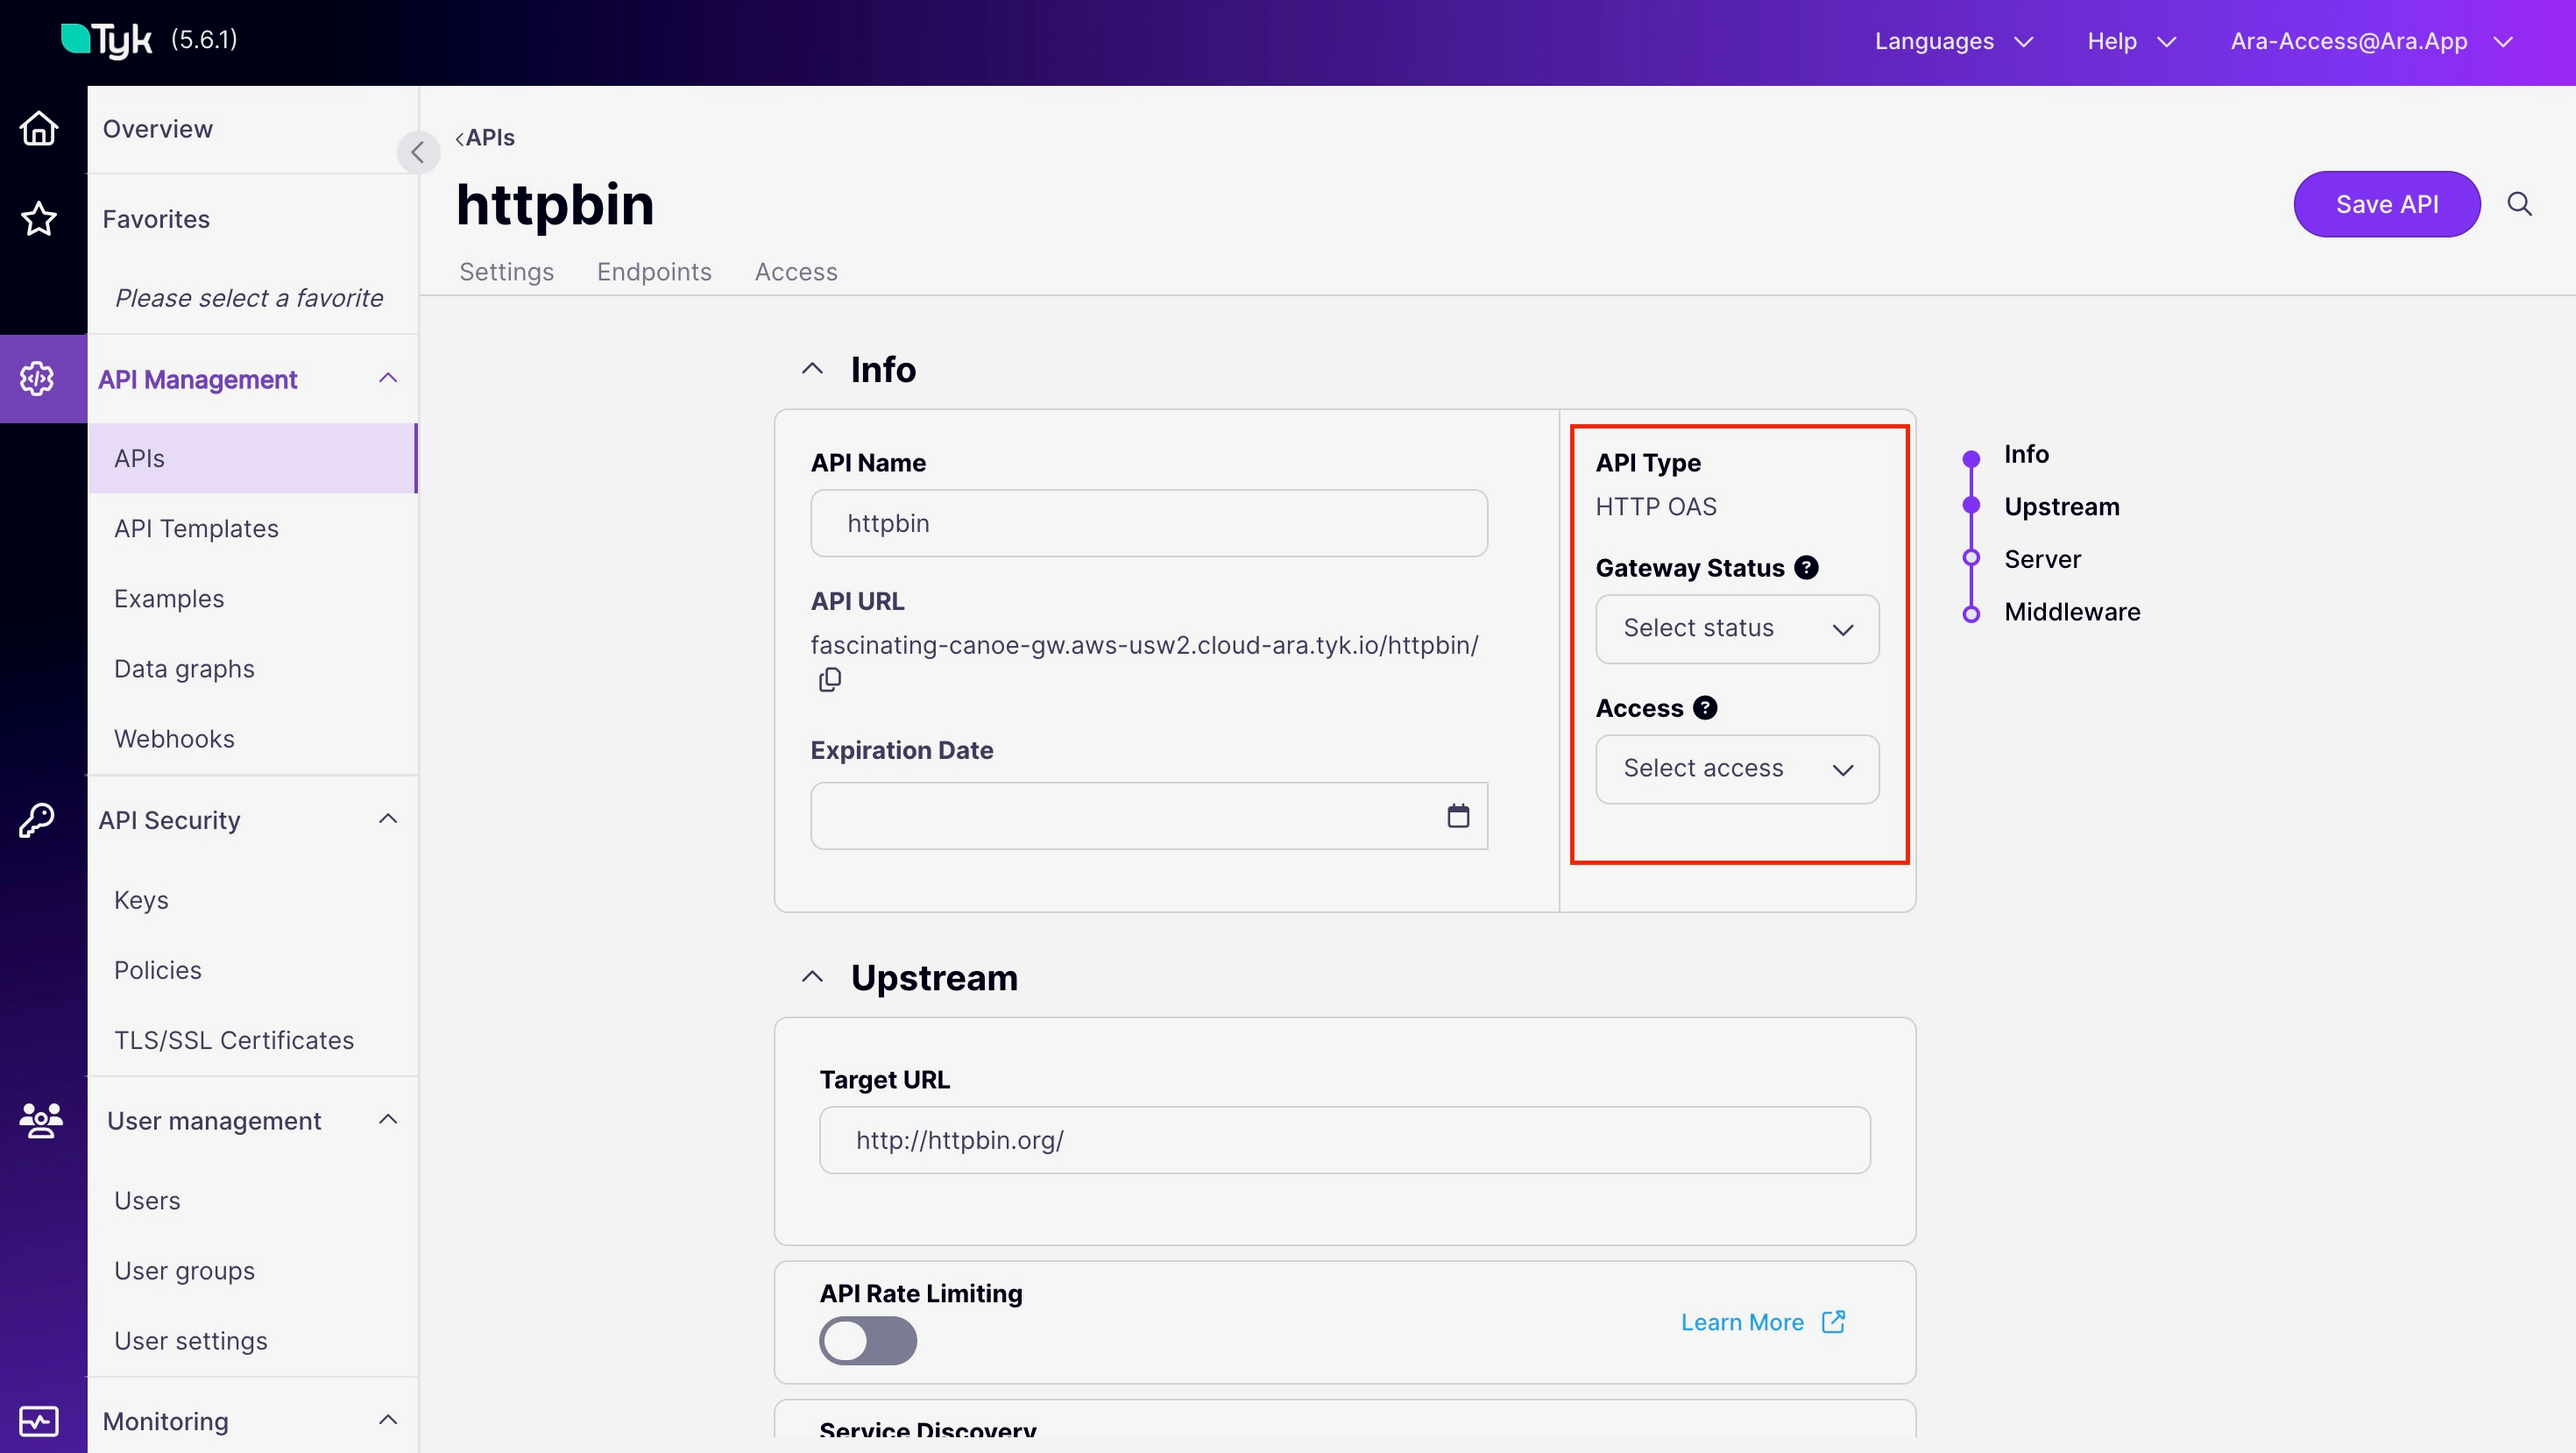
- Expiration Date: An optional config that allows you to set an expiry date for this API, where access will expire after this date. This can be edited at any time.
- Gateway Status: Setting this to
Activewill publish your API and make it public. When in theDisabledstate, your API will stay in a draft state until you are ready to publish it. This is a required field; for this guide, we will set it toActive. - Access: Your API can be set to either
InternalorExternal, determining whether you want to keep your API accessible only through Tyk or to external services, respectively. This is a required field; for this guide, we will set it toExternal.
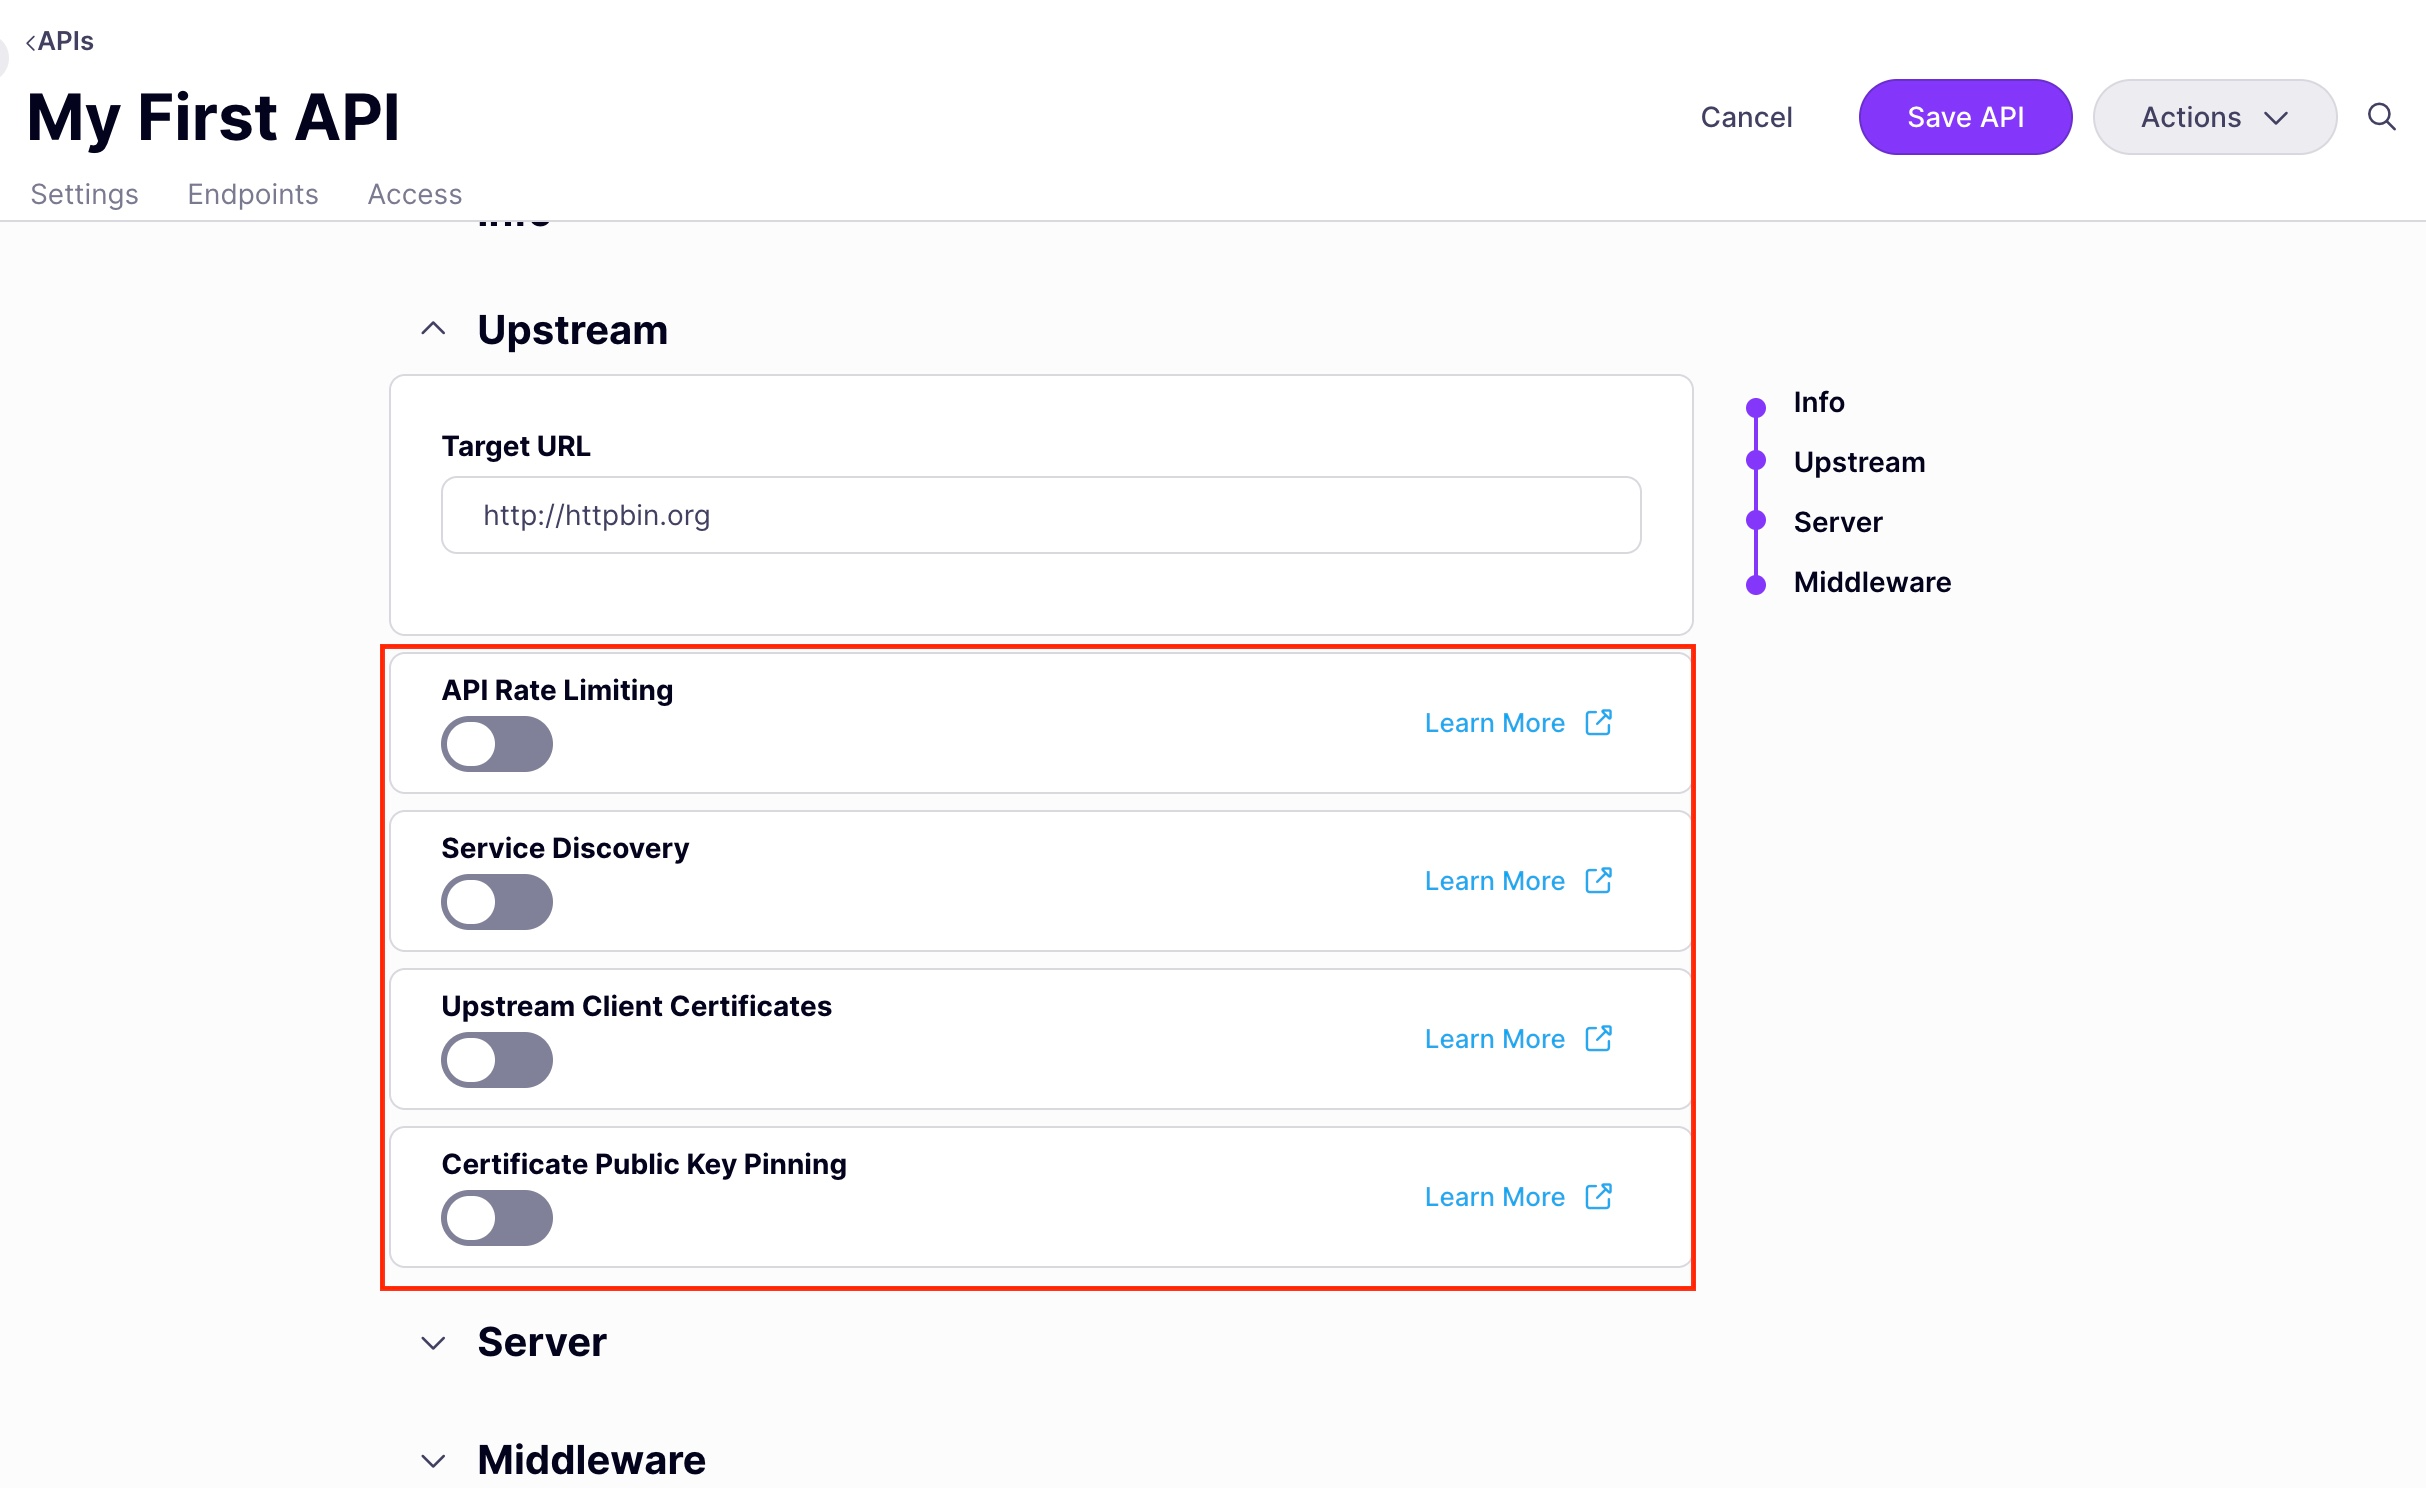
These are not necessary to add now, but they are good to explore.
- API Rate Limiting: Set limits on the number of requests (e.g., 100 requests per minute) to control usage and prevent abuse.
- Service Discovery: Enable dynamic backend discovery with tools like Consul or Kubernetes, ensuring traffic is directed to healthy instances.
- Upstream Client Certificates: Use client certificates for secure backend connections via mutual TLS (mTLS), adding an extra layer of security.
- Certificate Public Key Pinning: Pin specific public keys to validate certificate authenticity and prevent unauthorized access.
- Configuring the Server section:
-
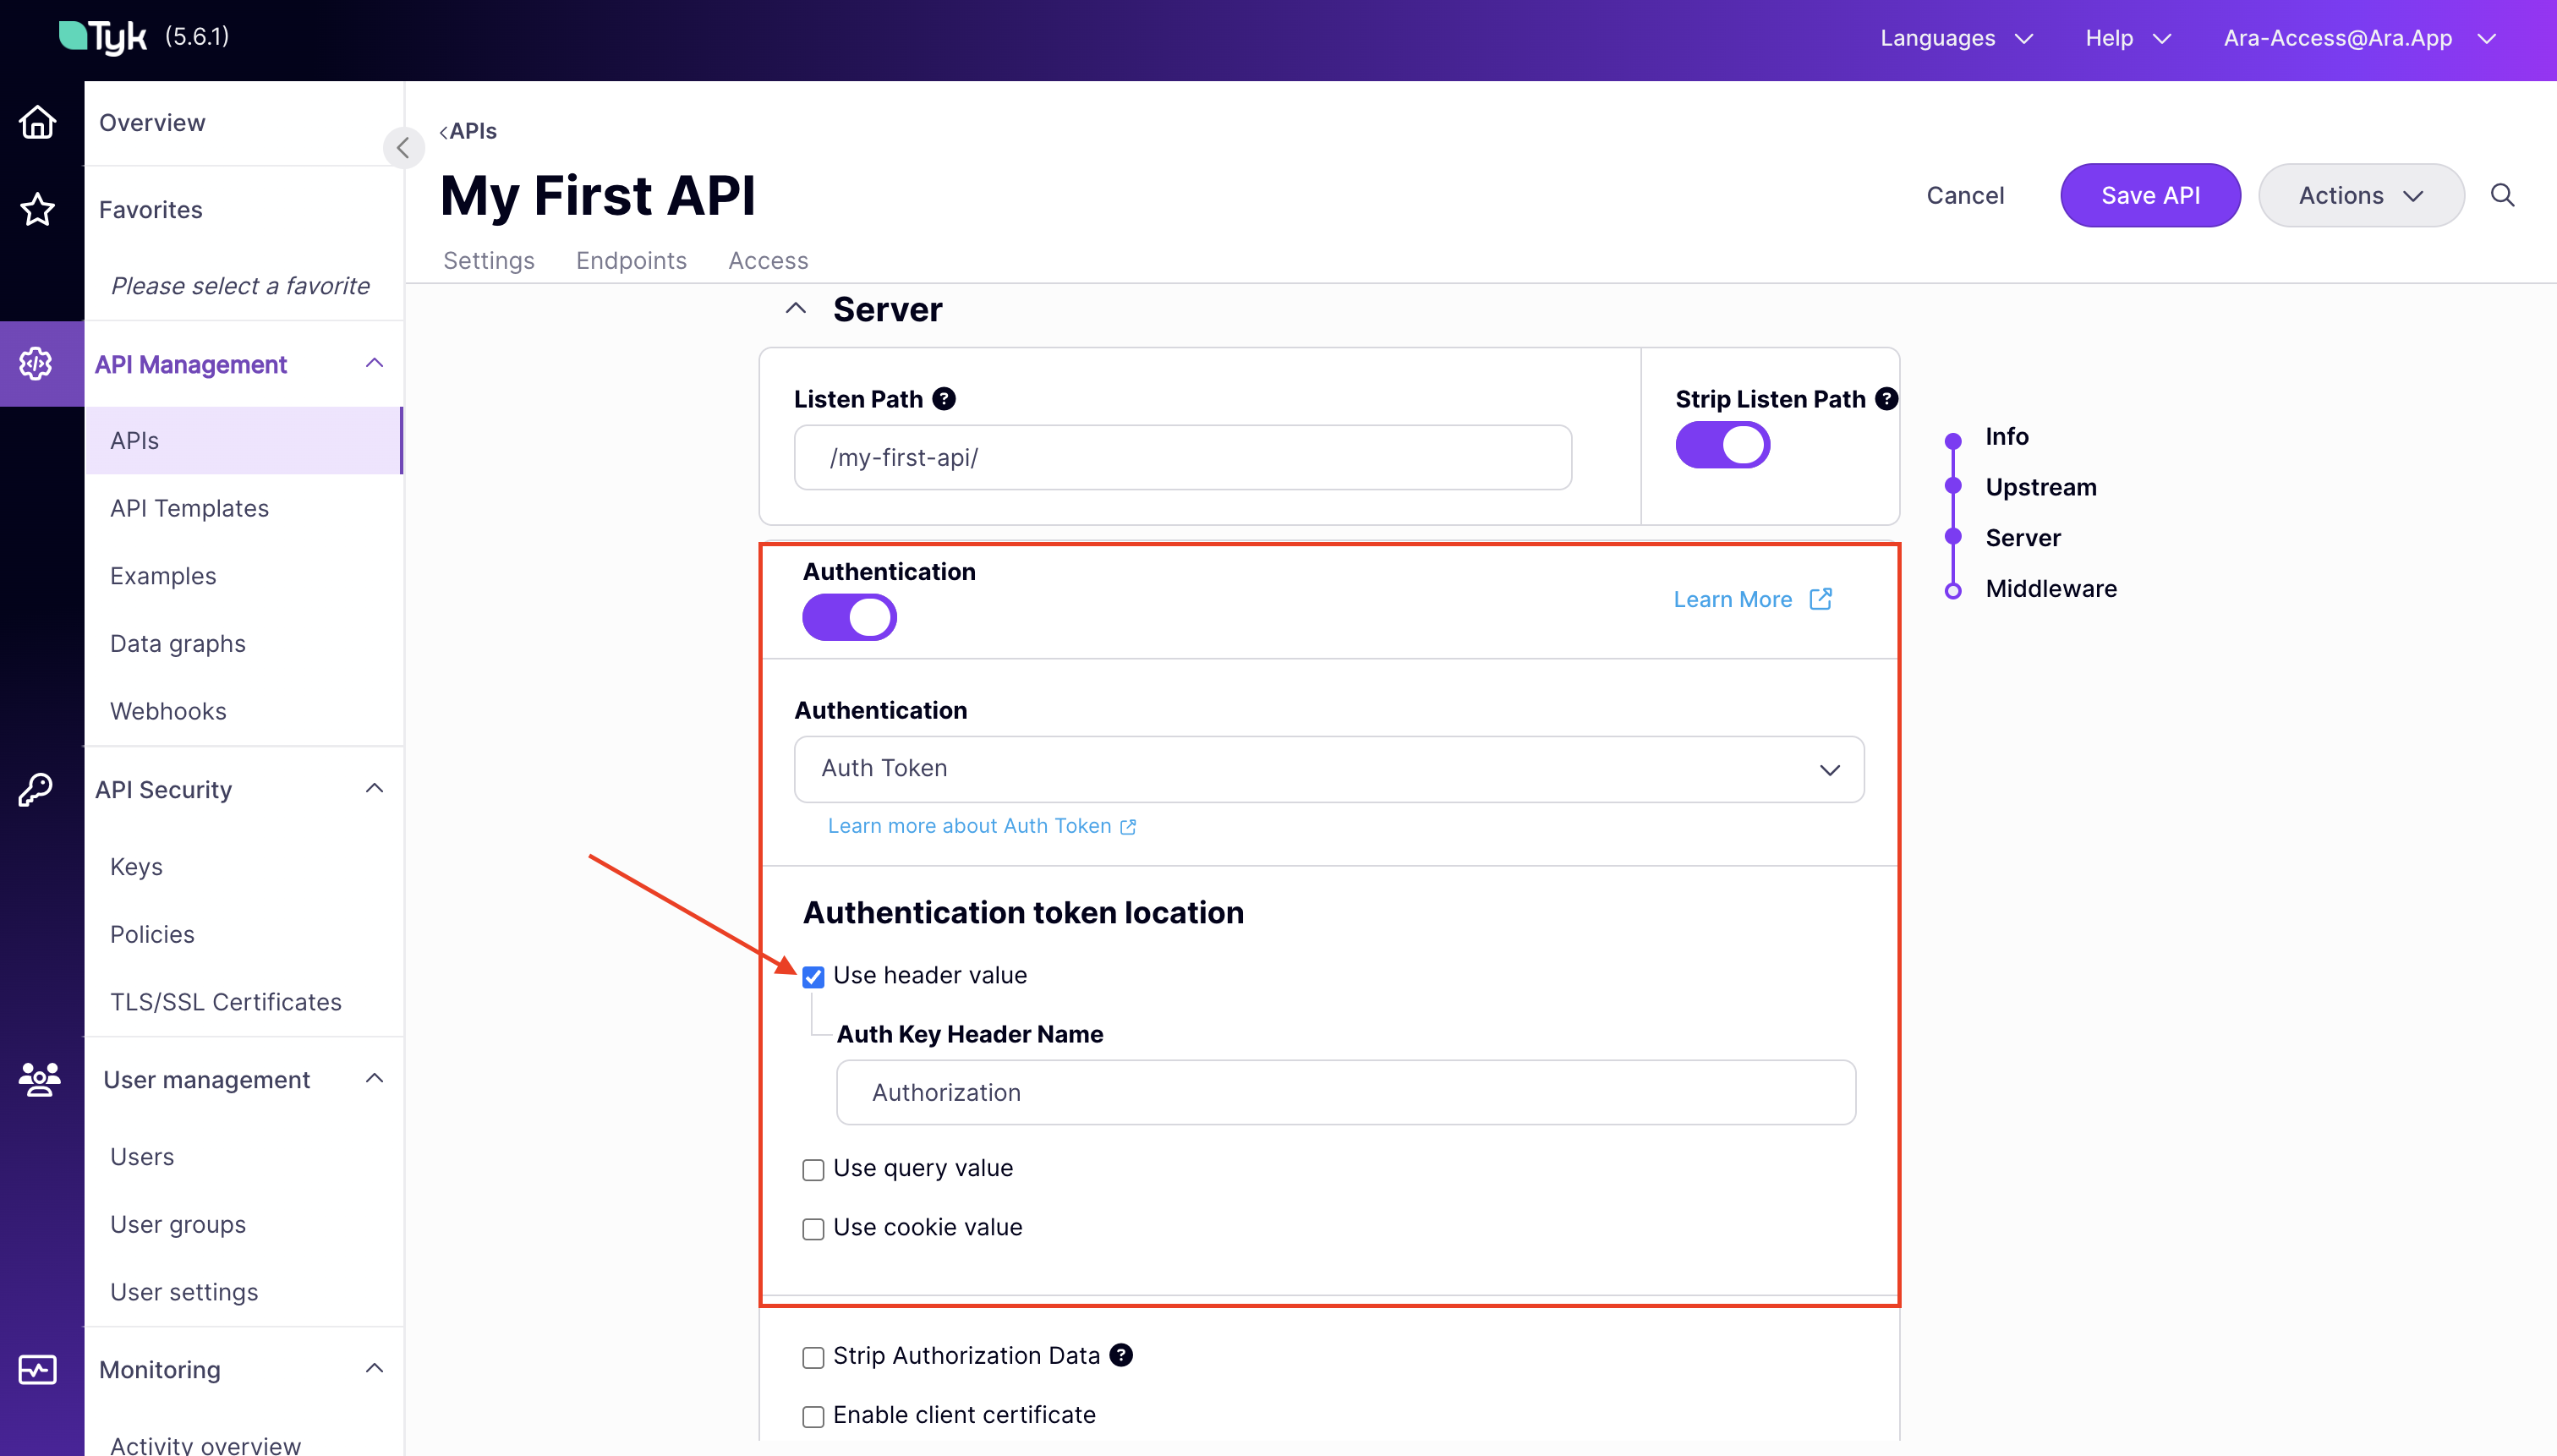
Listen Path: This is the
pathTyk API will use to proxy your API requests. So a request made to this URLhttps://<tyk-clou-url>/<listen-path>will be proxied to the upstream URL configured above. -
Authentication: Choose the desired authentication method (e.g., API Key).
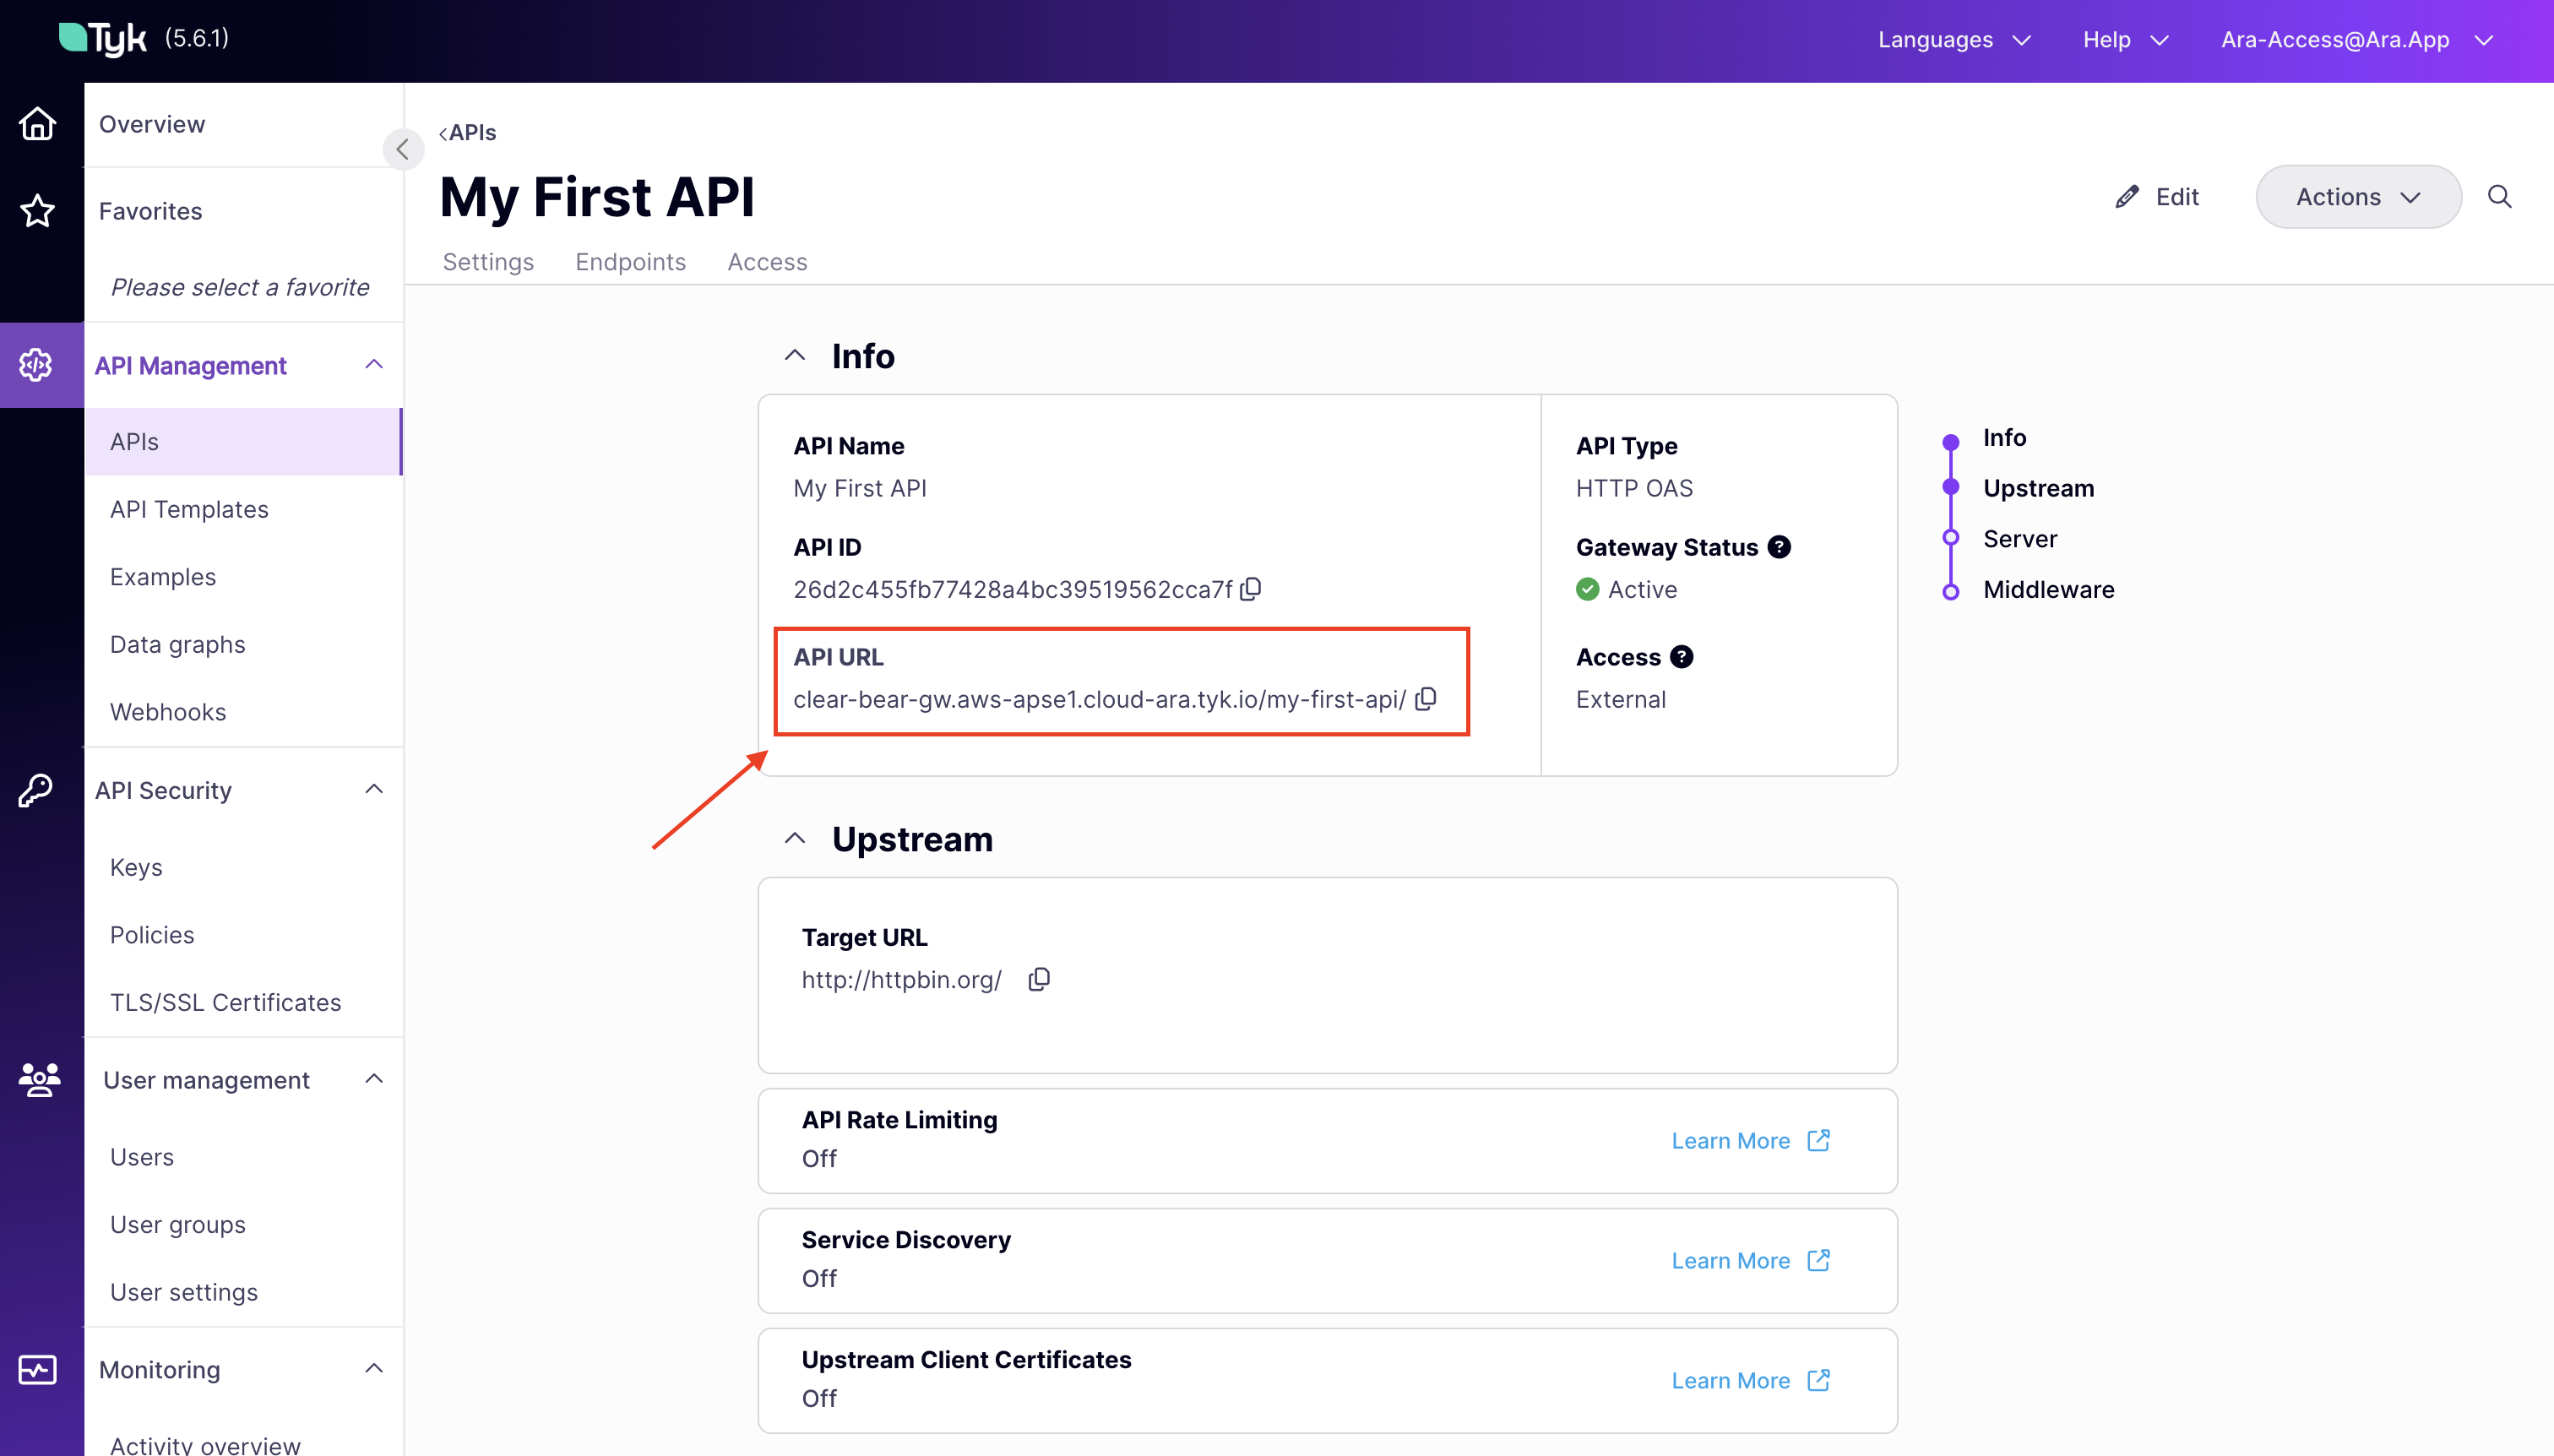
- Copy the API URL
-
When you save the API configuration, Tyk generates a unique Gateway URL that can be used to access your API. Copy this URL, we will use it later during testing.
Create an API Key
The Tyk Dashboard provides the simplest way to generate a new API key. Follow these steps:-
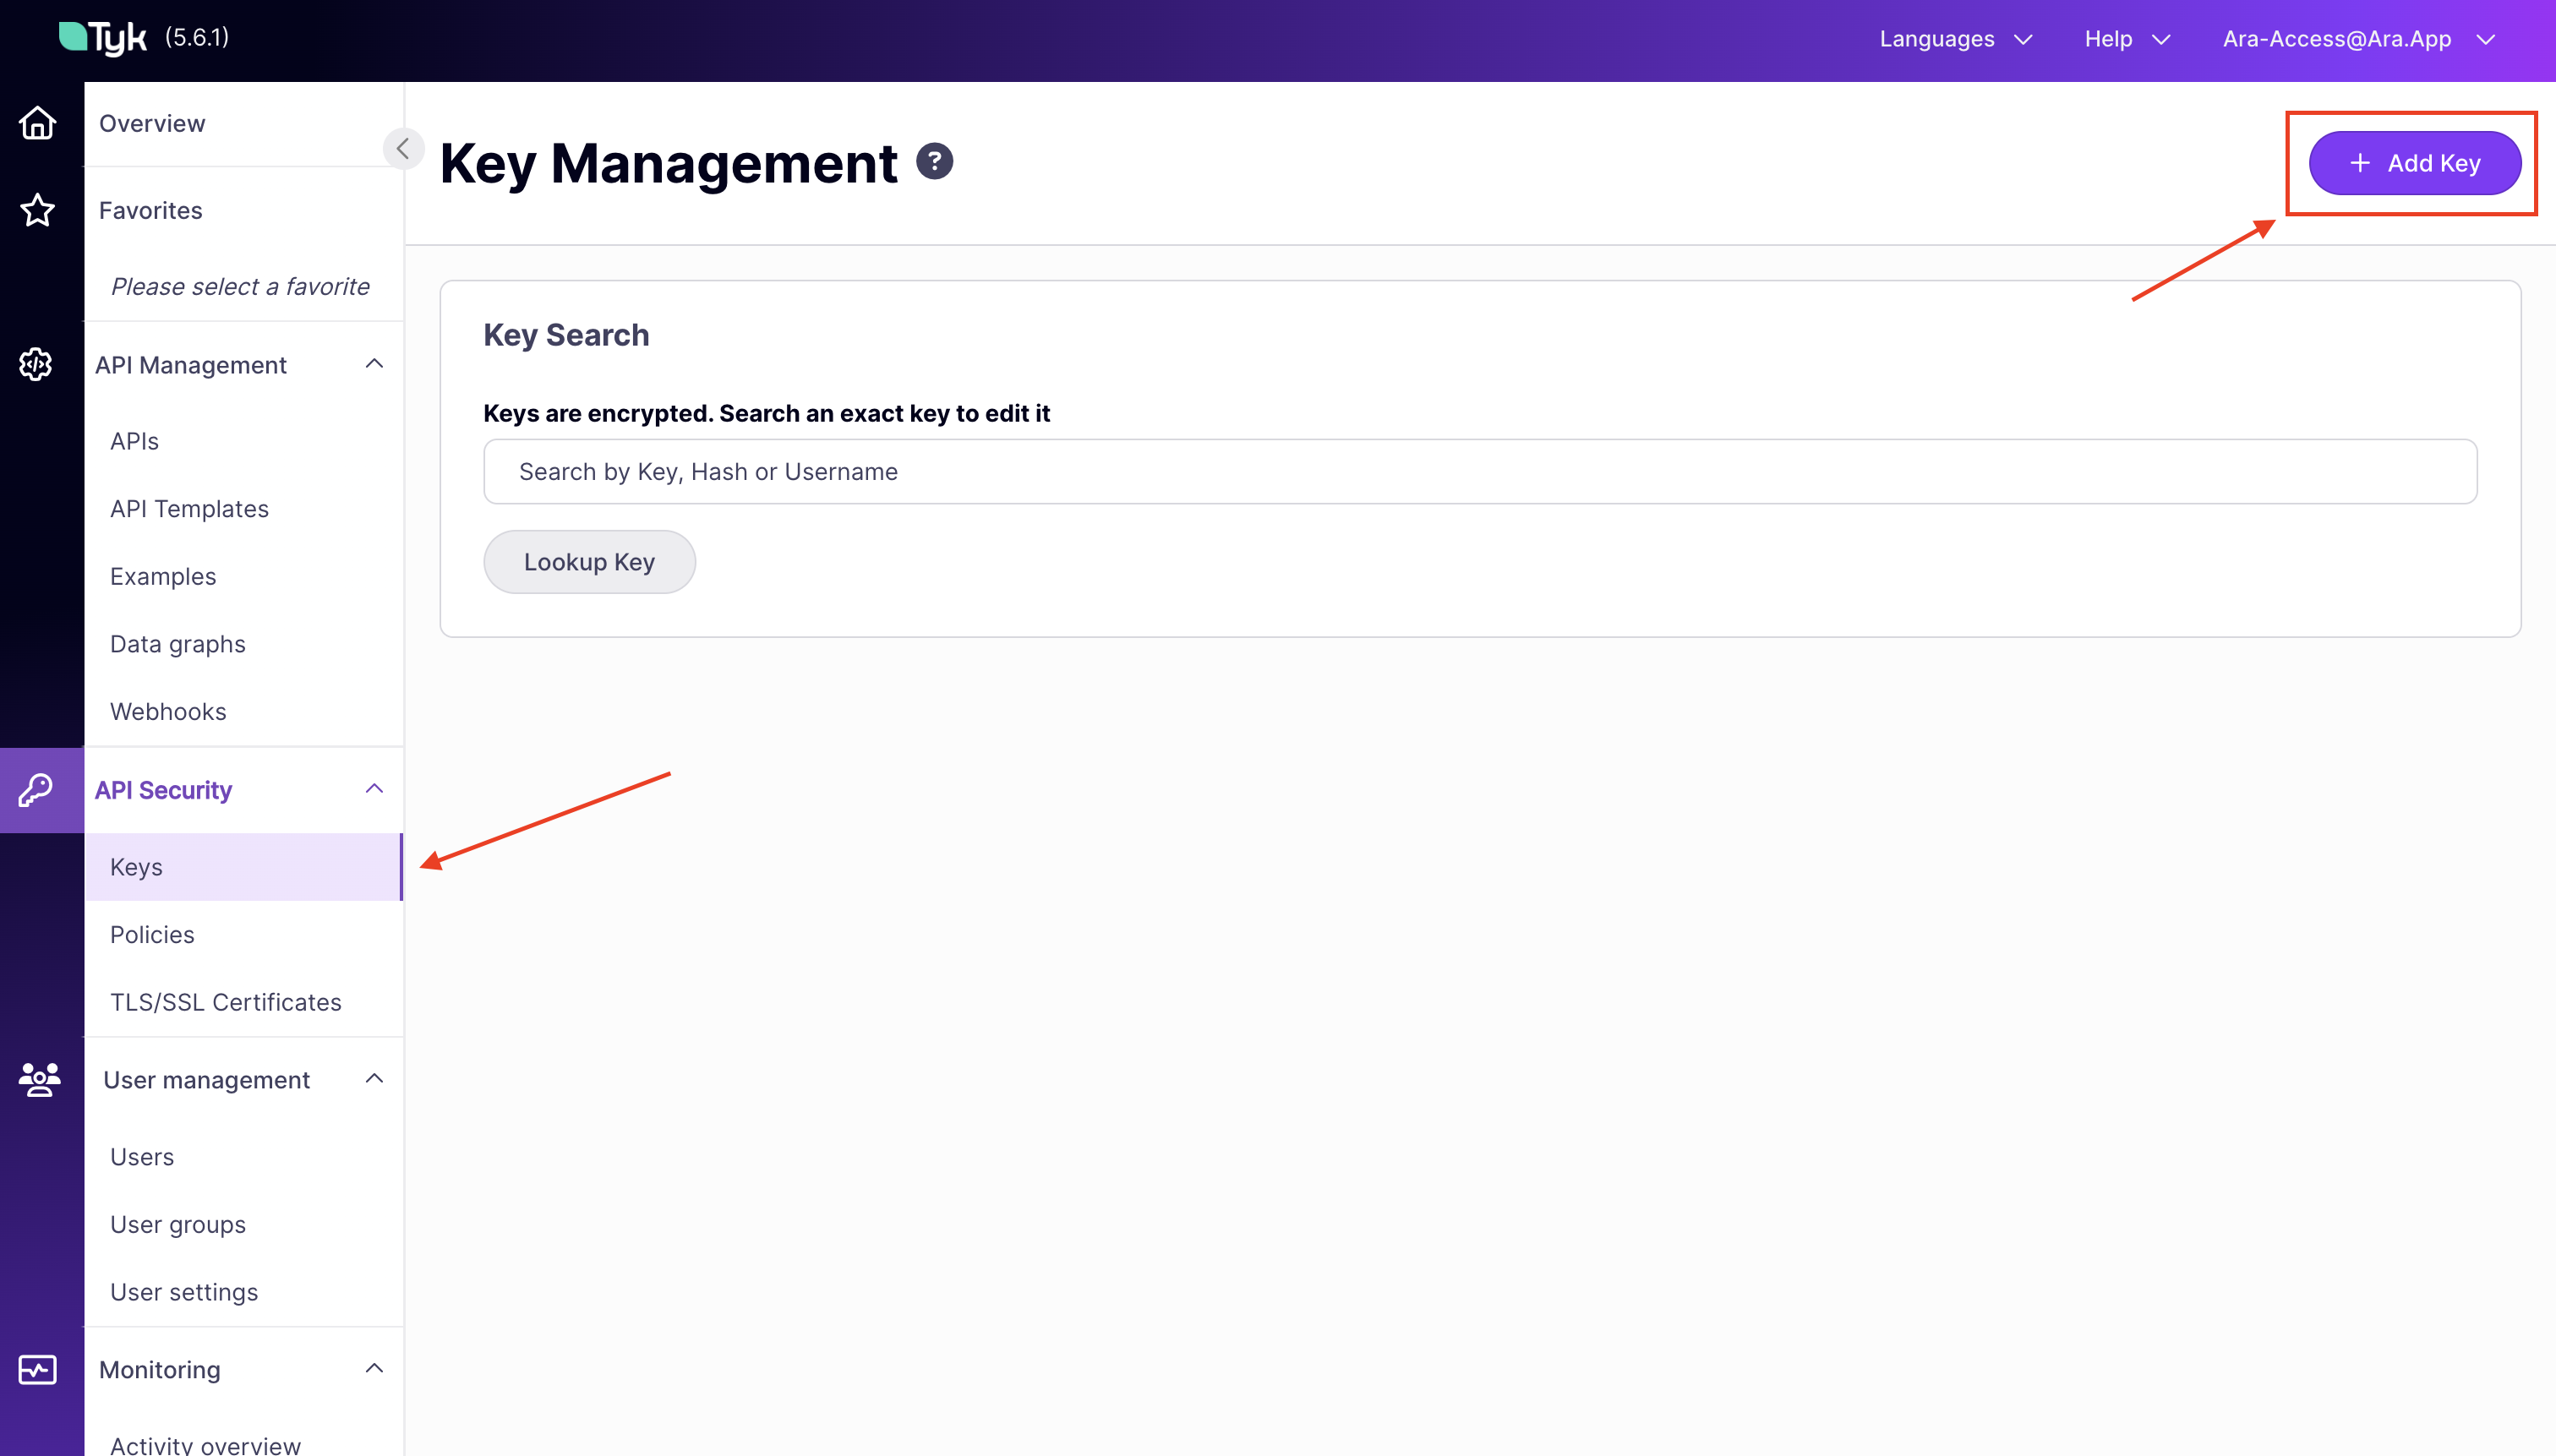
Select “Keys” from the API Security section and Click “Add Key” to generate a new key.
-
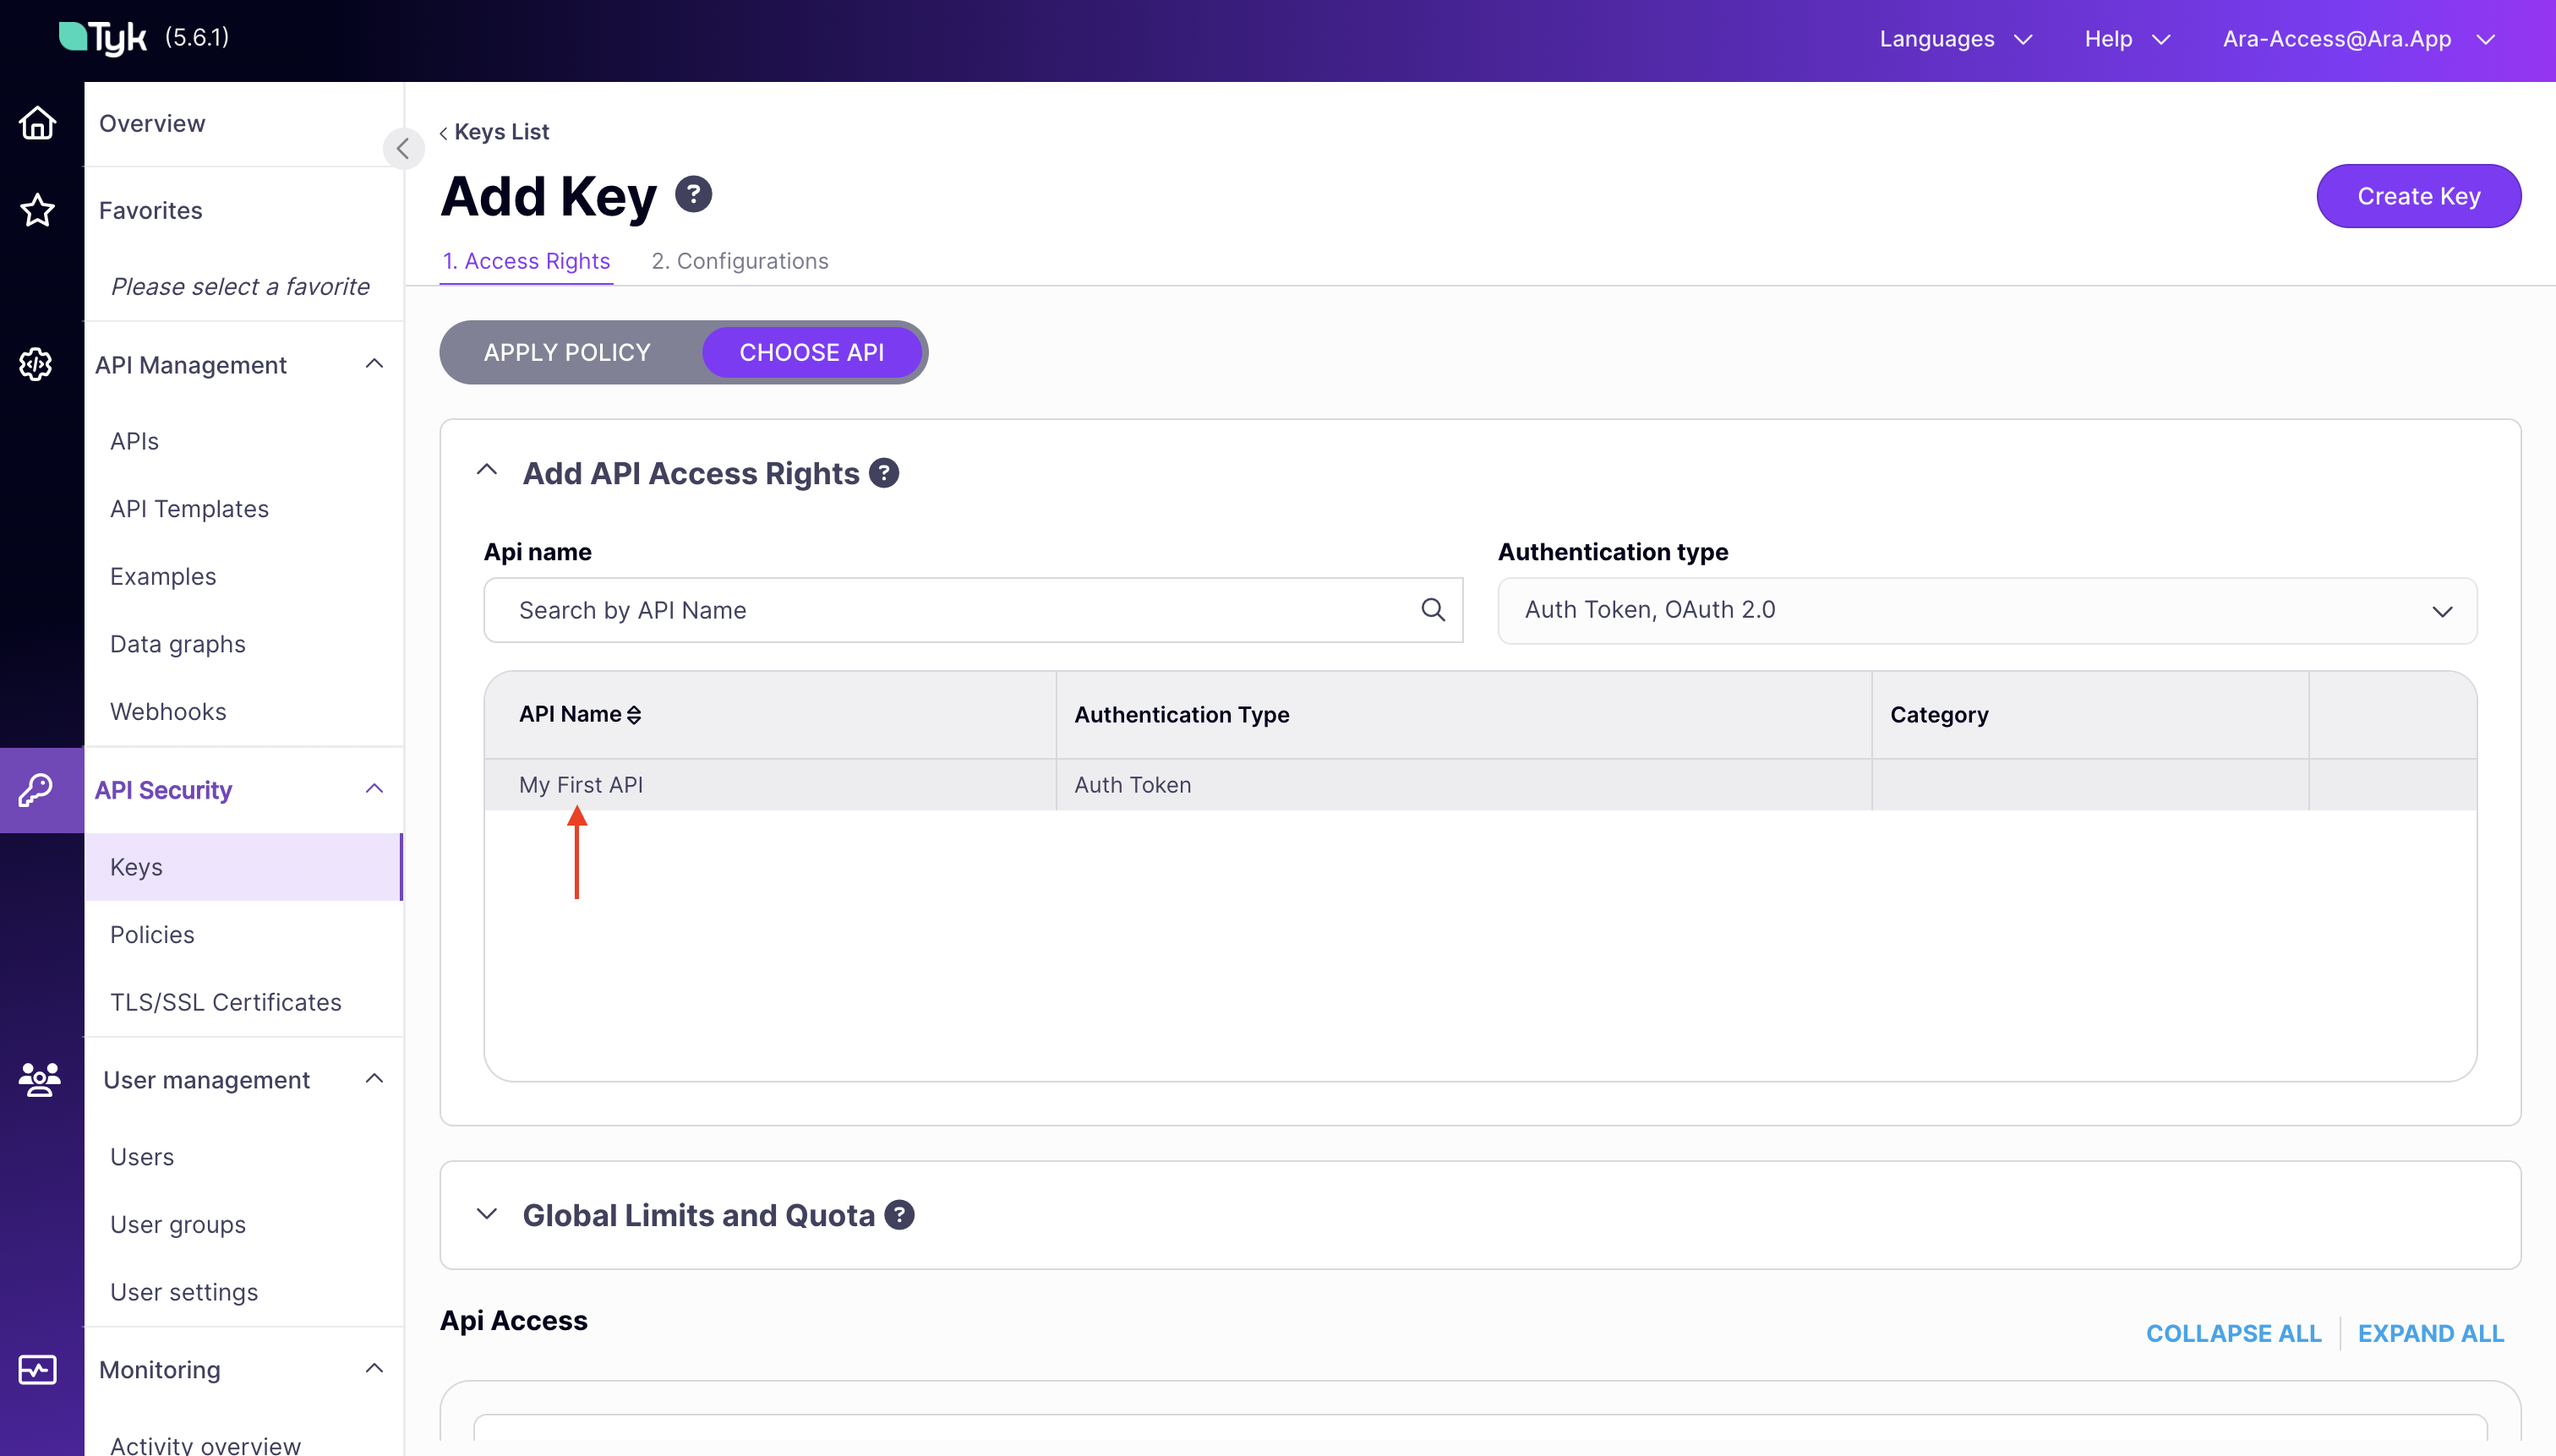
Add a Policy or API to Your Key:
- You can either add your key to an existing Policy or assign it to an individual API.
- For this guide, we will assign the key to the
My First API, which we created in the previous step. You can:- Scroll through your API Name list,
- Use the Search field or Group by Authentication Type to filter APIs.
- Leave all other options at their default settings.
-
Click on the Configuration Tab and add the below details.
- Enable Detailed Logging: This is optional and disabled by default.
- Key Alias: Assign an alias to your key for easier identification.
- Key Expiry: Set an expiry time from the drop-down list. This is required.
- Tags: Add tags for filtering data in Analytics. Tags are case-sensitive.
- Metadata: Add metadata such as user IDs, which can be used by middleware components.
-
Click CREATE:
- Once the key is created, a Key successfully generated pop-up will be displayed showing your key. Copy the key ID to your clipboard and save it for future reference, as it will not be shown again. And that should result in a successfully generated key!
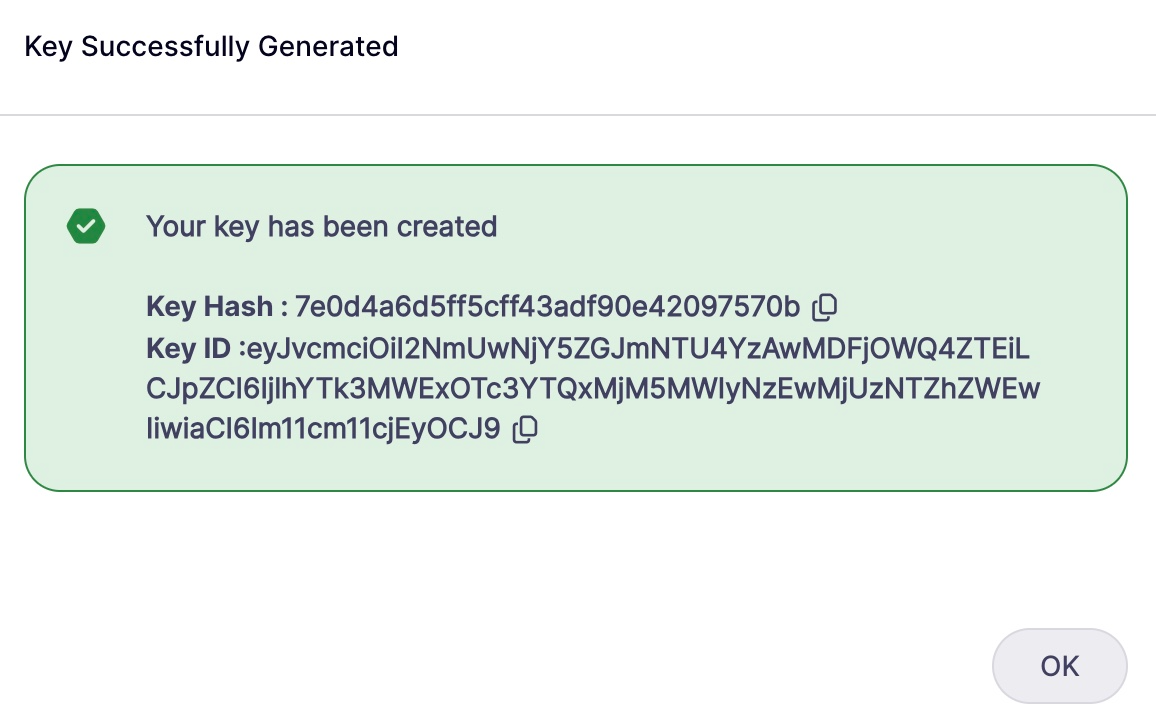
When creating a key in Tyk, you should copy the key ID. This is the identifier you’ll need for referencing the key in your API requests or configurations. The hash is generally used internally by Tyk and is not required for most user-facing tasks.
Test Your API
After configuring and deploying your API, it’s essential to test it to ensure it performs as expected. Follow these steps to verify your API setup:-
Retrieve Your API Key:
- Copy the API Key ID from the previous step as you’ll need it to authenticate requests to your API.
-
Make a Test Request:
- Use a tool like Postman or
curlto send a request to your API endpoint. - Example request using
curl: - Replace
{YOUR_API_KEY_ID}with the actual key ID and{YOUR_TYK_GATEWAY_URL}with your gateway’s URL. - Send the request and you should get HTML output with
200status code.
- Use a tool like Postman or
Monitor Traffic and Analyze API Performance
With your API live, monitor its traffic and analyze performance:View Traffic Analytics
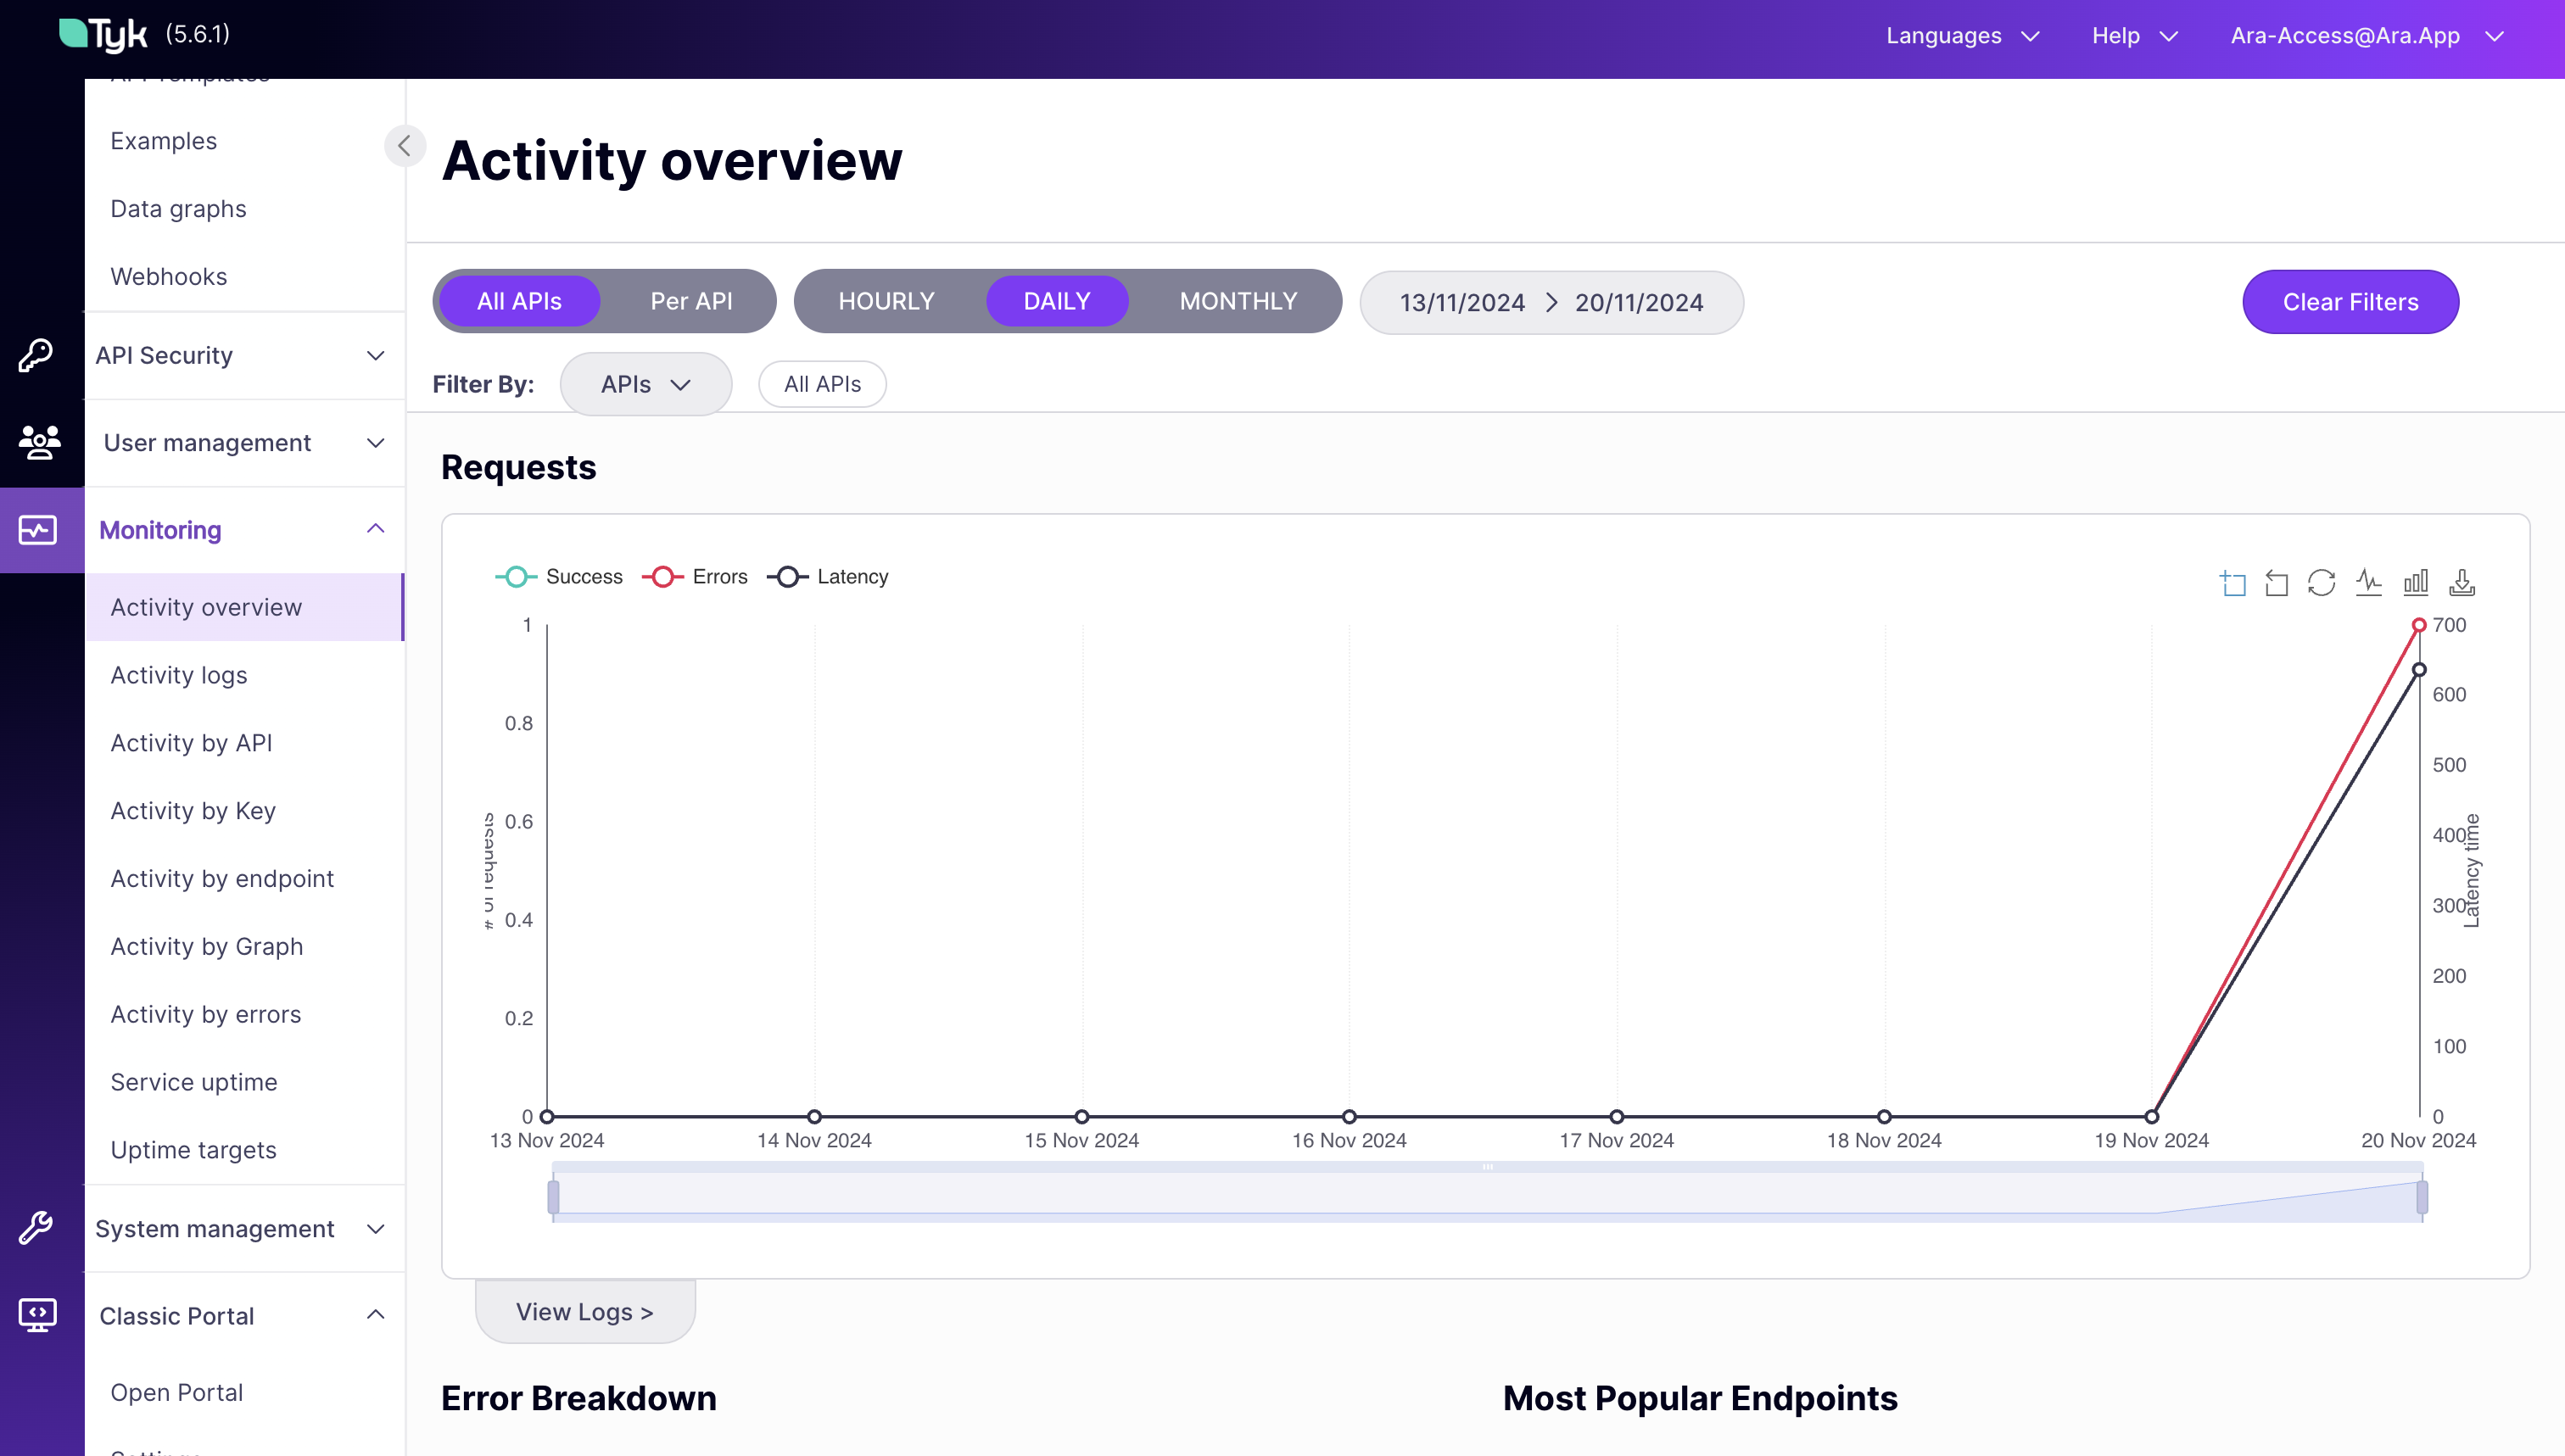
- Navigate to the Monitoring Section in the dashboard. And click on Activity Overview.
- View Traffic Metrics: Review metrics such as request count, response times, and error rates.
- Analyze Data: Use traffic trends to identify performance issues or optimize API behavior.
View Log Data
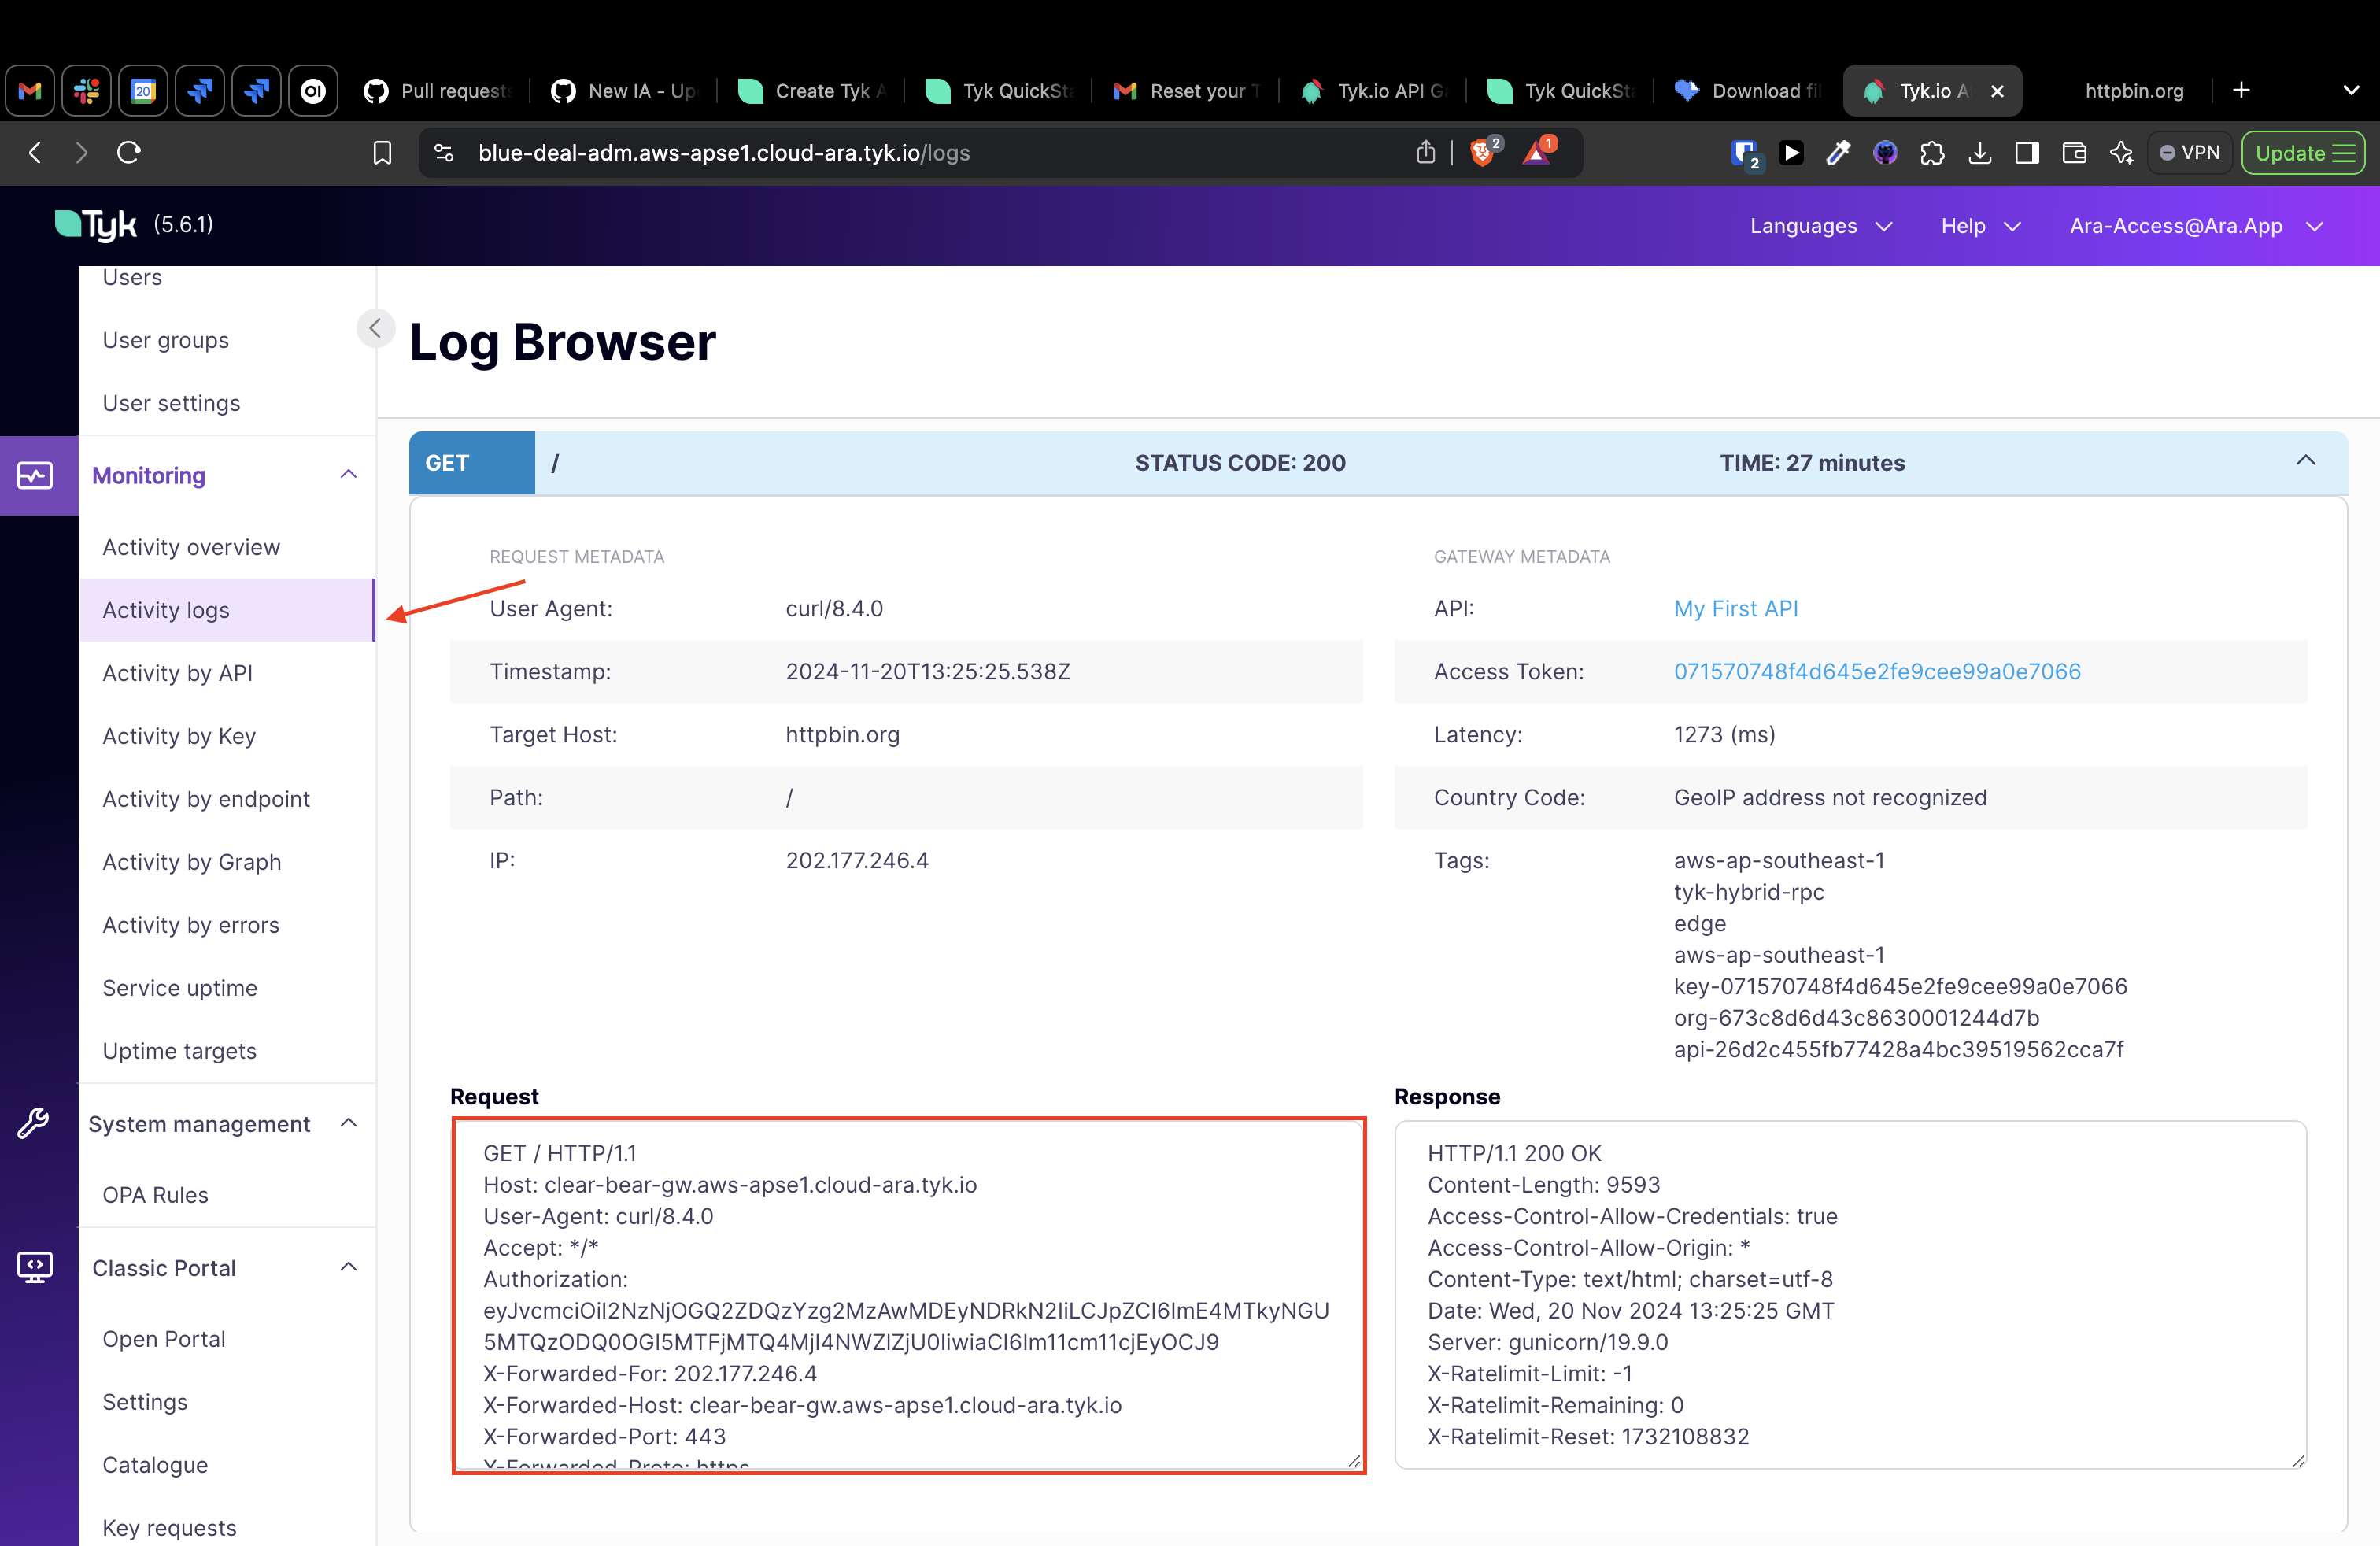
- Go to the Activity Logs Section of your API.
- Search and Filter Logs: Use filters to drill down by response status, endpoint, or client IP.
- Review Detailed Logs: View full request and response data to troubleshoot issues.
