Introduction
Modern web applications require secure communication to protect sensitive data from eavesdropping and tampering. Transport Layer Security (TLS) is the foundation of secure internet communication, and Tyk provides comprehensive TLS support for both client-facing APIs and backend service communication.Understanding Secure Communication
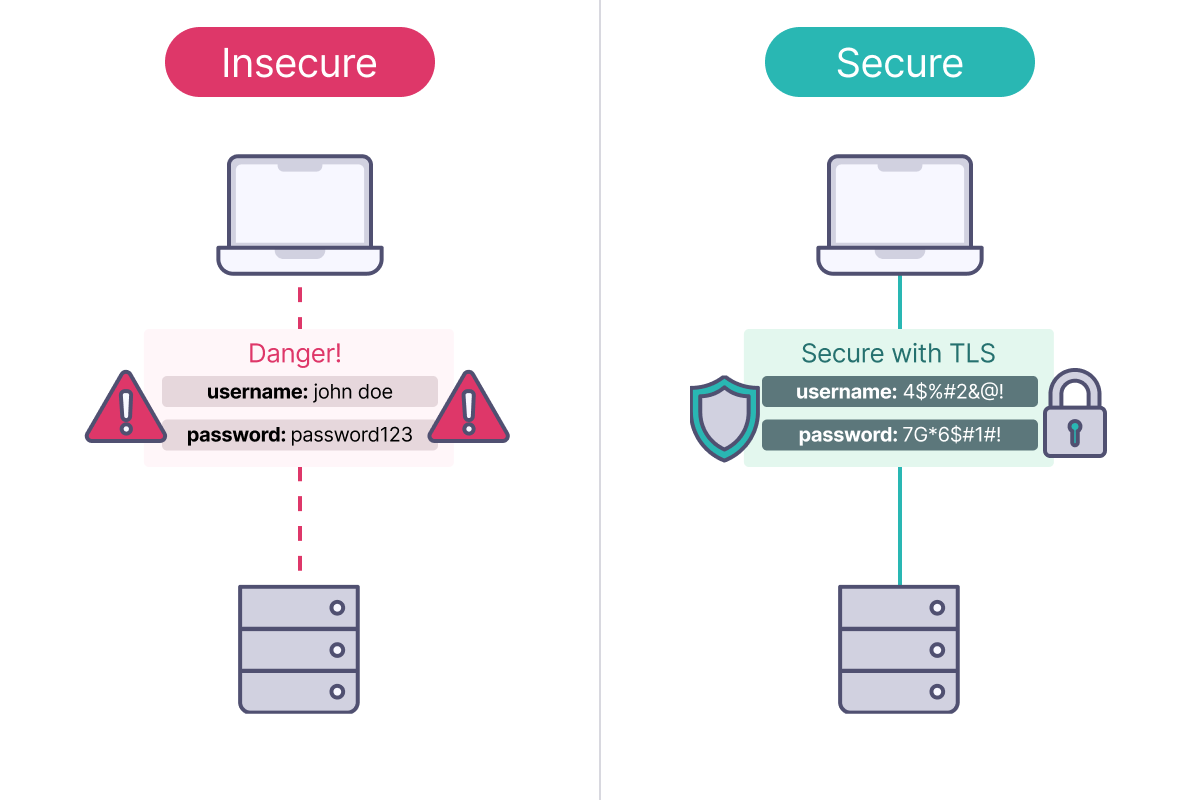
The Problem: Insecure Communication
Without encryption, network communication faces several risks:- Eavesdropping: Anyone can read your data as it travels across networks.
- Tampering: Attackers can modify data in transit without detection.
- Impersonation: Malicious actors can pretend to be legitimate servers or clients.
The Solution: Transport Layer Security (TLS)
TLS (Transport Layer Security) is a cryptographic protocol that solves these problems by providing:- Confidentiality: Encrypts data so only intended recipients can read it.
- Integrity: Ensures data hasn’t been modified during transmission.
- Authentication: Verifies the identity of communicating parties.
TLS or SSL
SSL (Secure Sockets Layer) is the older version of TLS, which is now the standard for secure web communication. TLS uses stronger encryption and better key management. All SSL and earlier TLS versions (1.0, 1.1) are deprecated. Today, “SSL” usually refers to TLS, especially versions 1.2 and 1.3, which are secure.Fundamentals of Public Key Cryptography
Transport Layer Security uses public key cryptography. This is an asymmetric method in which each communicating party possesses a unique key pair: a private key for decryption and a public key for encryption, enabling secure communication.Encryption Keys
A key is a specific value used within a cryptographic algorithm to encrypt data into an unreadable format and decrypt it back to its original state with the correct key using a defined algorithm. With public key cryptography, there are two different keys:- the private key is held by the originator of the message and is kept private
- the public key is shared with the recipient of the message
Digital Certificates
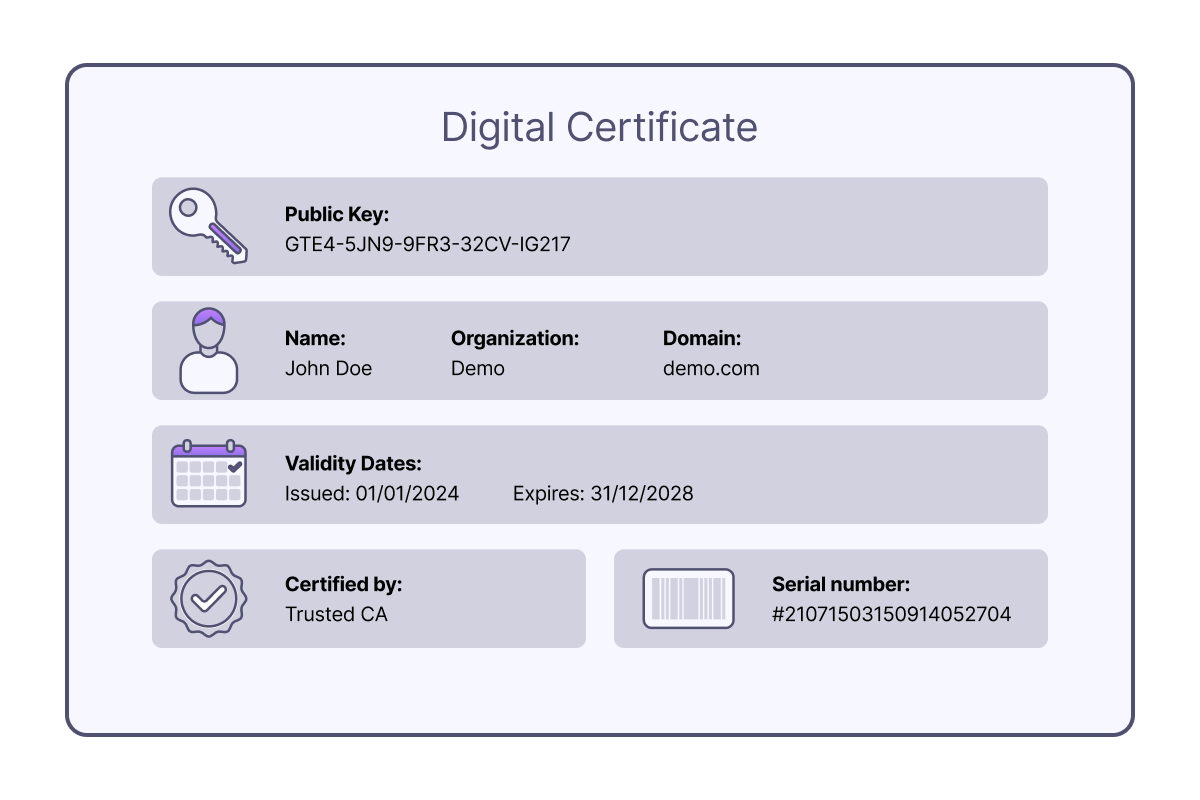
Various signature algorithms are available for signing certificates. The chosen algorithm can affect performance, as some are easier for Tyk to verify than others. Generally, elliptic curve algorithms offer better performance on average, but actual results may vary depending on CPU architecture. It is recommended to test and determine the most suitable balance between security and performance for specific needs.
Certificate Authorities (CAs)
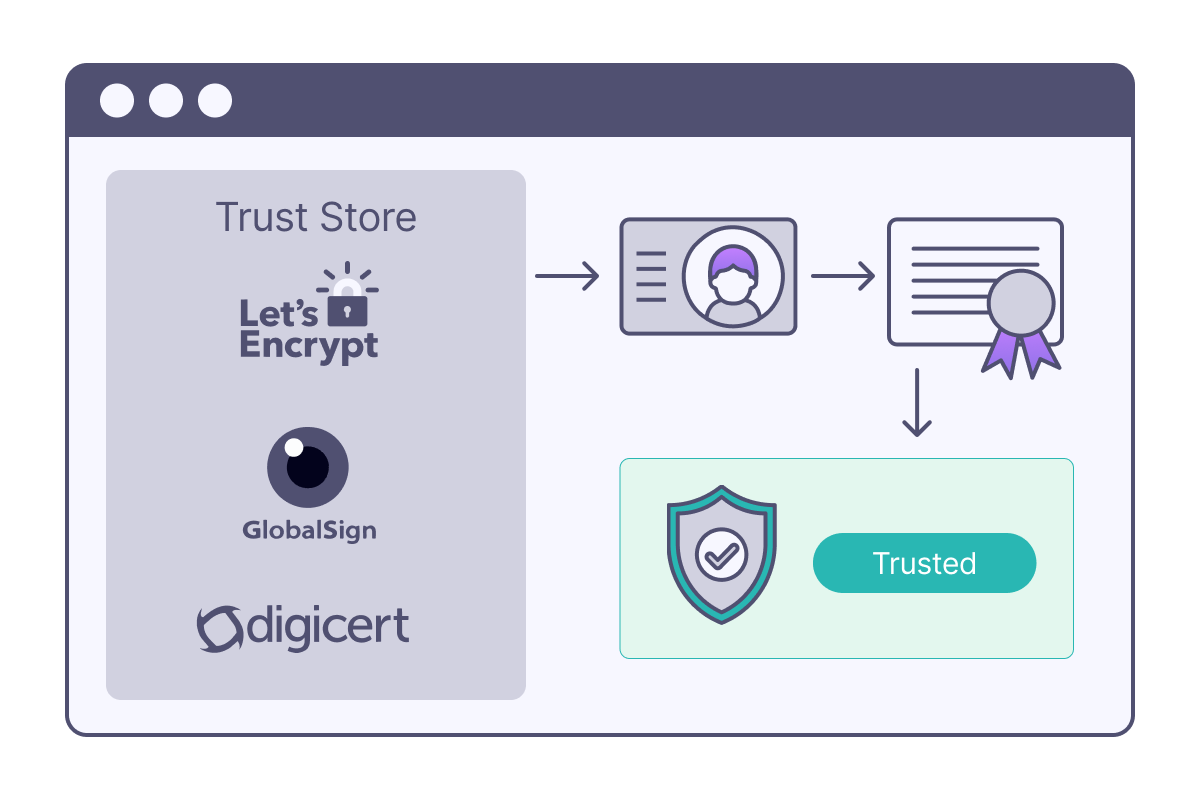
- Let’s Encrypt: Free, automated certificates
- DigiCert: Enterprise-grade certificates
- GlobalSign: International CA with global presence
- Internal CAs: Organizations can run their own CAs for internal use (self-signed certificates)
Certificate Chains and Trust

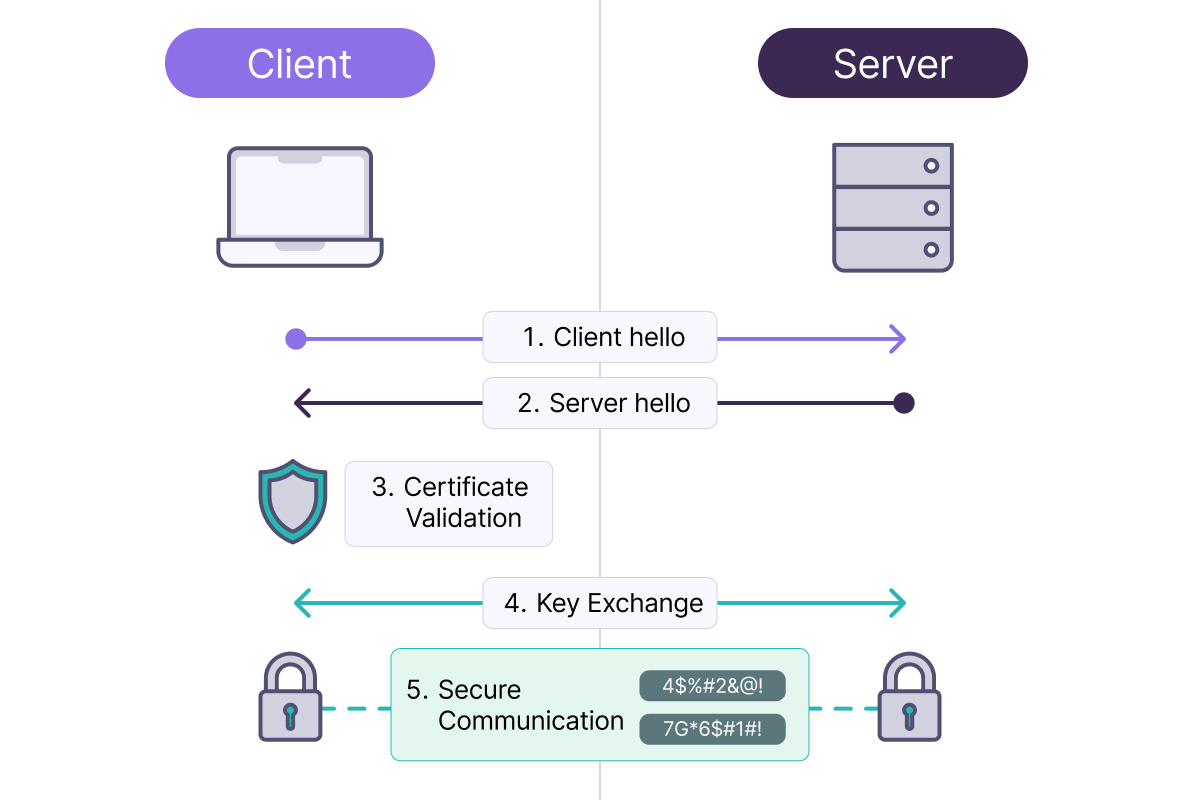
Fundamentals of Transport Layer Security
Standard TLS: Server Authentication
Mutual TLS (mTLS): Two-Way Authentication

- The server knows that the client is who they claim to be.
- The client knows that the server is legitimate.
- Both parties are cryptographically verified.
Certificate Management
Wherever Tyk accepts a certificate, the value is a certificate reference which can take one of three forms:- The recommended approach for most deployments is the Tyk Certificate Store, which centralizes certificate management and is available in both licensed and OSS installations.
- Inline PEM content (from Tyk Gateway 5.14.0) is the preferred approach for Kubernetes deployments where certificates are managed externally.
- A legacy local file path approach is also supported for backwards compatibility.
cert_file, key_file, ca_file fields in the External Services mTSL Config in the Gateway config file (tyk.conf).
Tyk Certificate Store
The Tyk Certificate Store centralizes certificates within Tyk’s data layer for use by multiple APIs.Licensed Deployments
In licensed Tyk installations, the Tyk Dashboard manages certificates. Certificates are stored in the Control Plane Redis and synced to the Data Plane Redis for Tyk Gateway to consume.Tyk OSS Deployments
In a Tyk OSS installation, there is no Tyk Dashboard or Control Plane. Tyk Gateway manages the certificates directly, storing them in Redis. Tyk Gateway also exposes a Certificate Management API so that OSS users can manage certificates without a Tyk Dashboard.Certificate ID and Redis Key
When a certificate is added, it gets a unique certificate ID, used to refer to it, such as when linking to an API. This ID combines theorgID and the certificate’s SHA-256 hash. In Redis, it is stored under cert-raw- plus the certificate ID.
This means that certificate IDs are predictable and can be calculated if you know the Organisation ID and have the certificate file. You can generate the SHA256 fingerprint using the following command:
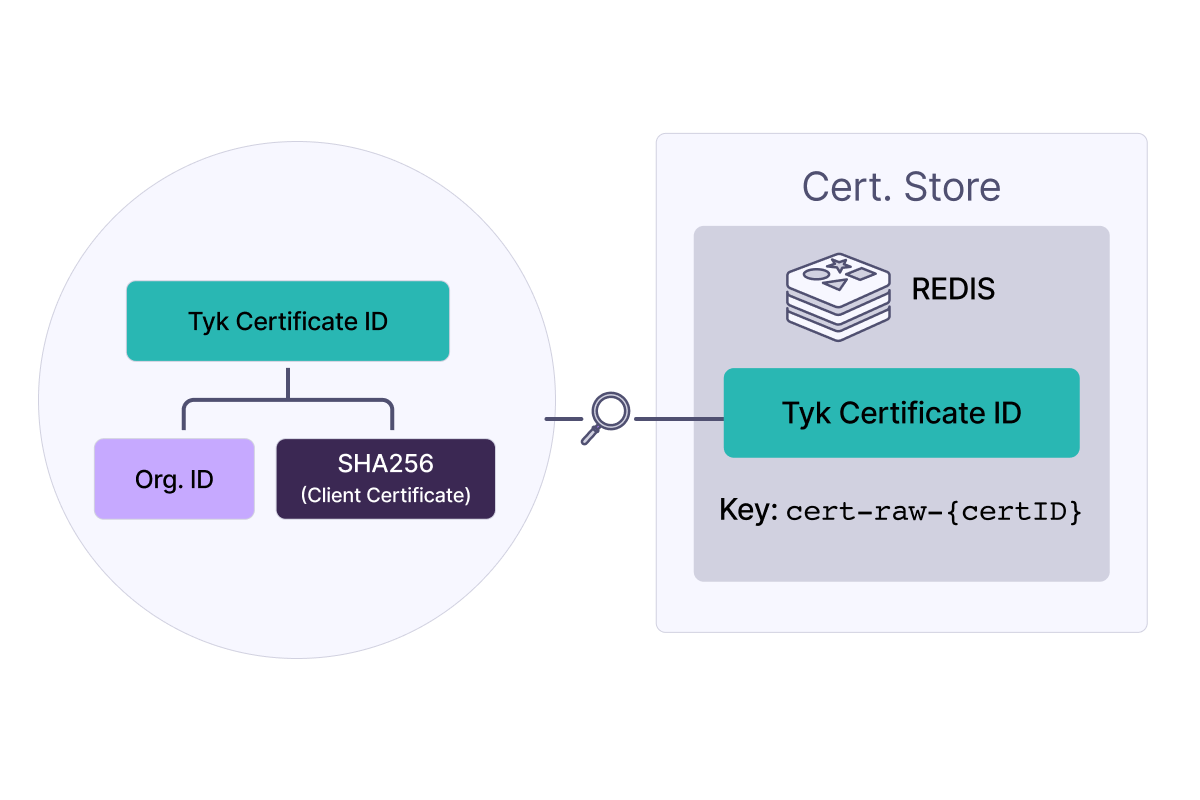
Notice that you can’t retrieve the raw certificate from just the certificate ID and that this is a unique identifier.
Certificate Data
The data stored against a certificateID is the PEM-encoded certificate chain data, comprising:- The Certificate(s):
- The primary X.509 certificate
- Any intermediate certificates in the chain
- Encrypted Private Key (if provided):
- If a private key was included with the certificate, it’s encrypted using AES-256
- The encryption uses the
private_certificate_encoding_secretfrom your Tyk configuration - The encrypted key is appended to the certificate chain with the header
ENCRYPTED PRIVATE KEY
- Gateway:
TYK_GW_SECURITY_PRIVATECERTIFICATEENCODINGSECRET - Dashboard:
TYK_DB_SECURITY_PRIVATECERTIFICATEENCODINGSECRET - MDCB:
TYK_MDCB_SECURITY_PRIVATECERTIFICATEENCODINGSECRET
It is important to keep the shared secret secure.
Monitoring Certificate Expiry
X.509 certificates have a validity period with both start and end timestamps outside which they will not be accepted in the TLS handshake. Tyk Gateway checks the validity of each certificate when it is used in an API request and will generate both an error log and a Gateway event if an attempt is made to use an expired certificate (after itsnotAfter timestamp).
An optional warning can be configured to generate a log and Gateway event if a certificate is used within a configurable window before the notAfter timestamp.
CertificateExpired: an expired certificate has been used in a requestCertificateExpiringSoon: a certificate has been used within the expiry threshold window
security.certificate_expiry_monitor section of the Gateway configuration (or equivalent environment variables):
Note that the certificate expiry monitor is reactive and only checks for certificate expiry when the certificate is used; it will not flag impending expiry or expired certificates if they are not actively used.
Event handlers can be configured at the API level to respond to Gateway event generation.
Tyk Certificate Store API
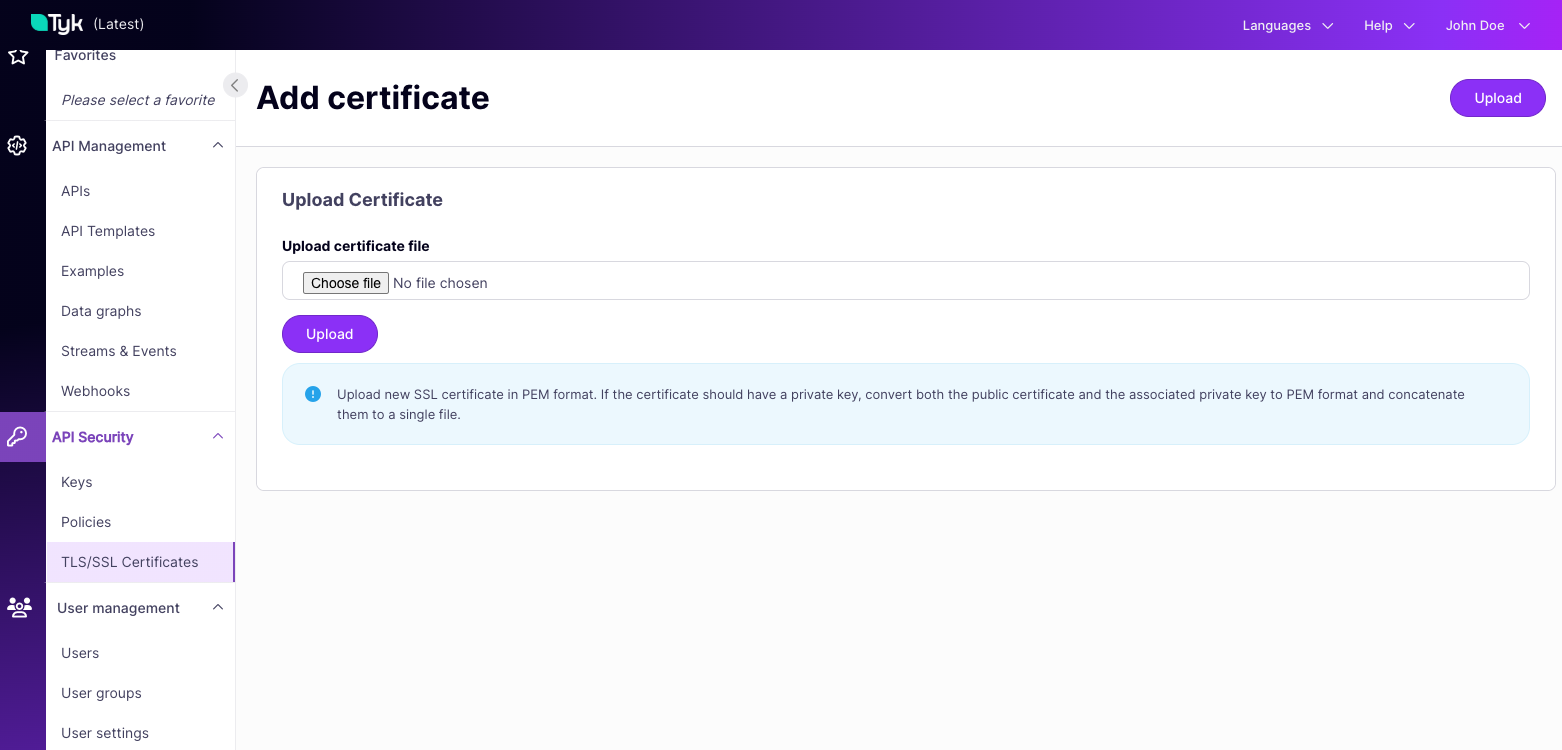
The Tyk Dashboard API exposes endpoints to manage the Tyk Certificate Store, allowing you to:- Register a new certificate with the store
- Provide either a PEM-encoded certificate (optionally concatenated with PEM-encoded private key) or a PEM-encoded public key.
- This returns the assigned certificate ID.
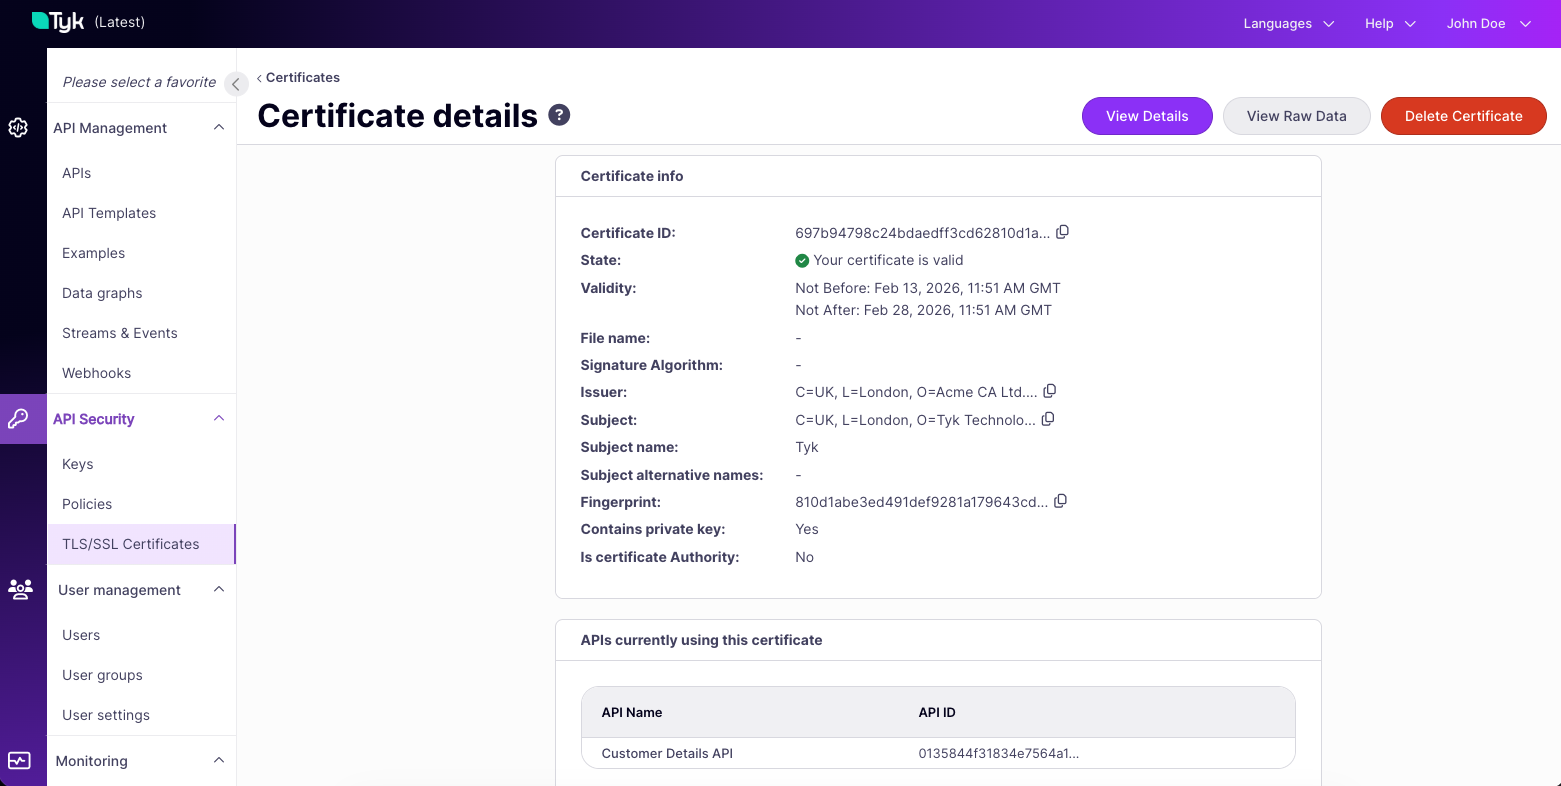
- Retrieve details of a specific entry in the store
- Provide a certificate ID.
- This returns metadata including the certificate issuer, whether there is a private key, and the certificate fingerprint (SHA256 hash of the certificate).
- Retrieve a list of all certificates in the store
- Delete a certificate from the store
- Retrieve a list of APIs that are using a certificate
Managing Certificates Using the Dashboard UI
The Tyk Dashboard provides a visual interface to the Tyk Certificate Store via the API Security > TLS/SSL Certificates screen.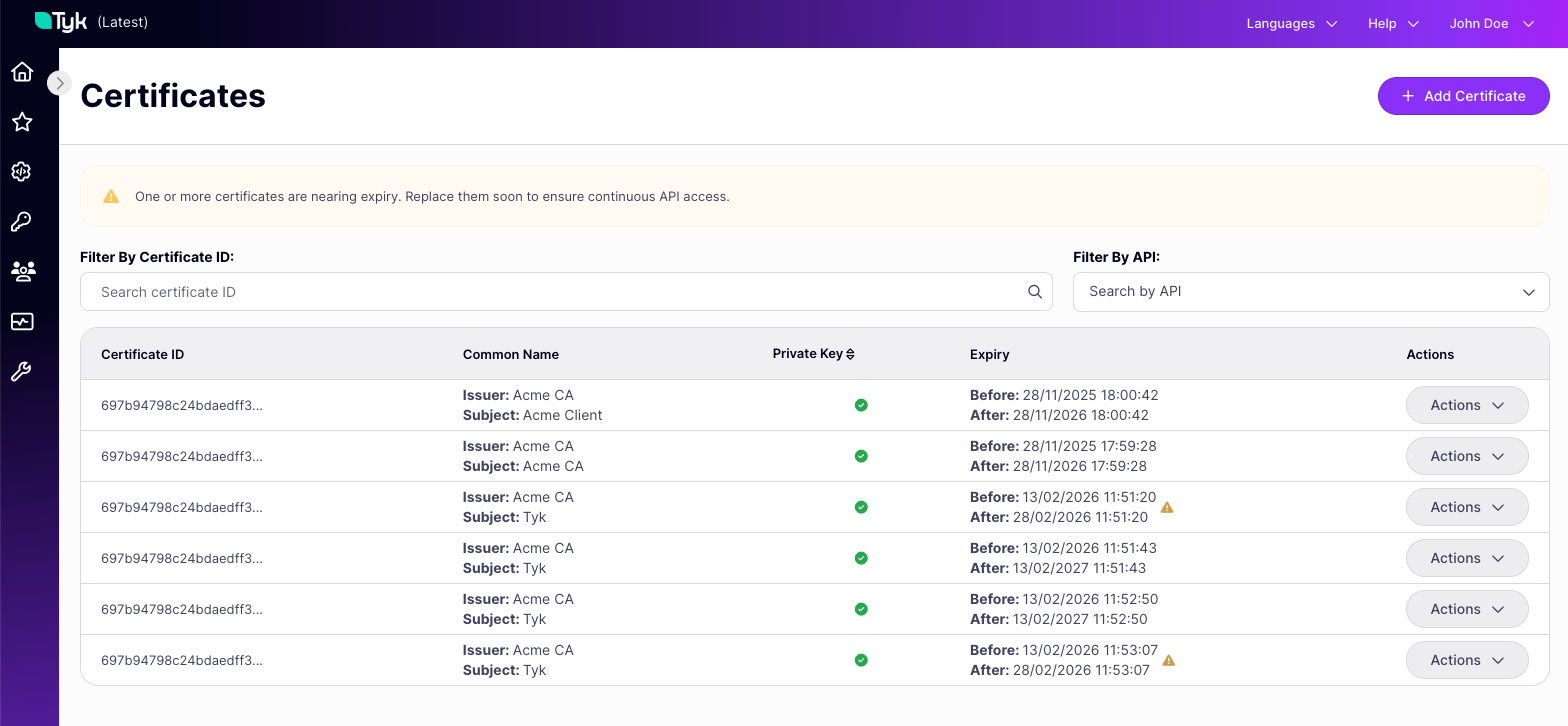
Inline PEM Content
From Tyk Gateway 5.14.0, certificate fields in API definitions accept inline PEM-encoded content directly, in addition to a certificate ID or file path. The PEM content follows the same format as the Tyk Certificate Store: a certificate chain optionally followed by a PEM-encoded private key. The primary use case is supplying certificates from a secret management system without storing them in the Control Plane. Any supported KV reference can supply the PEM content at load time, for example, afile:// reference can read a certificate mounted from a Kubernetes secret volume without the Control Plane ever storing the private key. See Using Local Files as a KV Store for configuration details.
For example:
Embedding a private key directly in an API definition is a security risk. The intended pattern is to supply PEM content via a KV reference, such as a
file:// reference pointing to a Kubernetes secret volume, so the private key never appears in the API definition itself.Local File Path
A legacy approach allows certificate fields to contain the path to a.pem file on the local filesystem. Tyk Gateway reads the certificate from that path when the API is loaded. The Gateway process must have read access to the file.
This is distinct from a file:// KV reference (see Inline PEM Content): a local file path is used directly as the certificate’s location on disk, whereas a file:// reference is resolved to the file’s contents and treated as inline PEM content.
This approach is still supported but is not recommended for new deployments. It couples the Gateway to the local filesystem and does not benefit from the centralized management or access controls provided by the Tyk Certificate Store.