Endpoint Designer
The Endpoint Designer is a powerful and versatile way for you to add specific behaviours to your API. By Default, Tyk will proxy all traffic through the listen path that you have defined.
If you want to have specific behaviours applied to a path (for example, a header injection), then you can enable the middleware on a path-by-path basis by using matching patterns in the Endpoint Designer.
Note
You do not need to define your whole API in the editor, only those paths you want to manage. The exception to this is if you are using a
allowlist1 , in which case you will need to specify every endpoint as all others will be blocked.
By default, importing an API using Swagger/OpenAPI or API Blueprint JSON definitions will generate a allowlist1 .
To get started, click Add Endpoint, this will give you an empty path definition:
In a new path definition, you can set multiple options, and if you do not specify a specific action for that list (from the plugins drop-down), then saving the path will actually do nothing (and it will vanish).
Your options are:
- Method: The method you are targeting, can be any valid HTTP method, simply pick one from the drop-down menu.
- Relative Path: The relative path to the target. For example, if your API is listening on an
/apilisten path, and you want to match the/api/getURL, in the Endpoint Designer you should match for the/getendpoint. It is important to exclude aberrant slashes (/) from your path matching, as otherwise the gateway may not match the path correctly. A path can contain wild cards, such as{id}, the actual value in the wildcard is not used (it is translated into a regex), however it is useful to make the path more human readable when editing. - Plugin: A path can belong to multiple plug-ins, these plug-ins define the behaviour you want to impose on the matched request.
Note
When using Regular Expressions with the following plugins (Mock Response,
Blocklist2 and
Allowlist1 ) you need to add $ to the end of your URL. This prevents anything following the endpoint being mocked as well. For example, adding /mock also means /mock/somepath can also be mocked. Using /mock$ prevents /somepath being added and mocked to your endpoint.
Available Tyk Middlewares
Allowlist
Adding a path to a Allowlist1 will cause the entire API to become blocked. This means any non-specified routes will be blocked, and only those listed in the Endpoint Designer will be allowed through. This is great if you wish to have very select access rules for your services.
Accessing a path which has not been allowed:
< HTTP/1.1 403 Forbidden
< Content-Type: application/json
< Date: Thu, 19 Jul 2018 21:42:43 GMT
< Content-Length: 50
<
{
  "error": "Requested endpoint is forbidden"
}
Case Sensitivity
By default the
Allowlist1 endpoint plugin is case-sensitive, so for example if getuser is allowed, getUser and GetUser will not be allowed. If you select the Ignore Case option from the
Allowlist1 plugin settings, getUser, GetUser and getuser will all be allowed in the above example.
Note
You can also use ignore_endpoint_case at a “global” Tyk level in your tyk.conf file and at an individual API level. Those settings will ovverride this setting. This is new for v2.9.4.

Blocklist
Adding a path to a Blocklist2 will force it to be blocked. This can be useful if you are versioning your API and are deprecating a resource. Instead of just making the path vanish you can block access to it.
Accessing a path which has been blocked:
< HTTP/1.1 403 Forbidden
< Content-Type: application/json
< Date: Thu, 19 Jul 2018 21:42:43 GMT
< Content-Length: 50
<
{
  "error": "Requested endpoint is forbidden"
}
Case Sensitivity
By default the
Blocklist2 endpoint plugin is case-sensitive, so for example if getuser is blocked, getUser and GetUser will not be blackblocked. If you select the Ignore Case option from the
Blocklist2 plugin settings, getUser, GetUser and getuser will all be blocked in the above example.
Note
You can also use ignore_endpoint_case at a “global” Tyk level in your tyk.conf file and at an individual API level. Those settings will ovverride this setting. This is new for v2.9.4.

Body Transform
The Body Transform plugin allows Body Transforms for both the Request and the Response. See Request Body and Response Body for more details.
Cache
If you specify a a path to be in the cache list, then the path will be cached by Tyk. Tyk will only ever cache safe requests, so adding a POST/PUT/DELETE request to the cache list will not work.
Circuit Breaker
Our circuit breaker is rate-based, so if x% of requests are failing then the circuit is tripped. When the circuit is tripped, the gateway stops all inbound requests to that service for a pre-defined period of time (a recovery time-period).
The circuit breaker will also emit an event which you can hook into to perform some corrective or logging action. See Circuit Breaker for more details.
Do Not Track Endpoint
This plugin prevents any analytics, including log browser, API activity and endpoint popularity from being tracked.
Enforced Timeout
This plugin allows you to ensure that your service always responds within a given amount of time. See Enforced Timeouts for more details.
Ignore
Adding a path to an ignored list means that the path will not be processed for authentication data. This plugin can be very useful if you have a non-secure endpoint (such as a ping) that you don’t need secured.
Note
Adding a path to an ignore list will bypass all other configuration settings.
Case Sensitivity
By default the Ignore endpoint plugin is case-sensitive, so for example if getuser is ignored, getUser and GetUser will not be ignored. If you select the Ignore Case option from the Ignore plugin settings, getUser, GetUser and getuser will all be ignored in the above example.
Note
You can also use ignore_endpoint_case at a “global” Tyk level in your tyk.conf file and at an individual API level. Those settings will ovverride this setting. This is new for v2.9.4.

Internal
This plugin allows an endpoint to not be listened to by the Tyk Gateway, but can be called by other APIs using the tyk://self/ prefix.
Method Transforms
This plugin allows you to change the method of a request. See Method Transforms for more details.
Mock Response
This plugin allows you to mock responses for an API endpoint. This can be useful when creating a new API, or when making a development API available to an external team.
Note
In order for mocks to be enabled, the path must also be in a list. We recommend adding the path to a
allowlist1 . If this isn’t done, then the mock will not be saved on an update.
API Blueprint: If you have imported an API Blueprint definition, and selected the mocks option in the importer, then your whole API will be a white list.
Note
Support for API Blueprint is being deprecated. See Importing APIs for more details.
The options are for a mock:
Code: the status code to respond with Response body: The response body Headers: The headers to inject with the response
Modify Headers
This plugin allows you to modify header information before it leaves the proxy and is passed to your upstream API or when a response is proxied back to the client. See Request Headers for more details.
Request Size Limit
This plugin will ensure that requests are only accepted if they are under a certain size. To use this plugin, select a path that matches your required URL, then set the size, in bytes, that is the maximum allowed. See Request Size Limits for more details.
Track Endpoint
This plugin allows you to manually select each endpoint for tracking.
URL Rewrite
This plugin allows you to translate an outbound API interface to your internal structure of your services. See URL Rewriting for more details.
Validate JSON
This plugin allows you to verify user requests against a specified JSON schema and check that the data sent to your API by a consumer is in the right format. This means you can offload data validation from your application onto us.
If it’s not in the right format, then the request will be rejected. And you can set a custom error code. The default is “422 Unprocessable Entity”. See Validate JSON for more details.
Virtual Endpoint
This plugin allows you to create small code snippets that run on your set path. These snippets can be written in JavaScript and offer an easy way to create dynamic, flexible endpoints that perform complex interactions with your underlying services. See Virtual Endpoints for more details.
Global Settings
In some cases you will want to set global settings that happen to all paths that are managed by Tyk. The Global Version Settings section will enable you to perform a common API management task of injecting custom headers into request data.
These headers can also include metadata that is part of the session object to better qualify the inbound request.
Versions
At the top of the Endpoint Designer you can see which version you are currently editing. If you have more than one option, selecting it from the drop-down will load it’s endpoint configuration into the editor.
Debugging
The API screen has a Debugging tab that allows you to test your endpoints before you publish or update them. You can also use it for testing any middleware plugins you have implemented. Any debugging you create will persist while still in the current API, enabling you to make changes in the rest of the API settings without losing the debugging scenario.
The Debugging tab consists of the following sections:
- Request
- Response
- Logs
Request

In this section you can enter the following information:
- Method - select the method for your test from the drop-down list
- Path - your endpoint to test
- Headers/Body - enter any header information, such as Authorization, etc. Enter any body information. For example, entering user information if creating/updating a user.
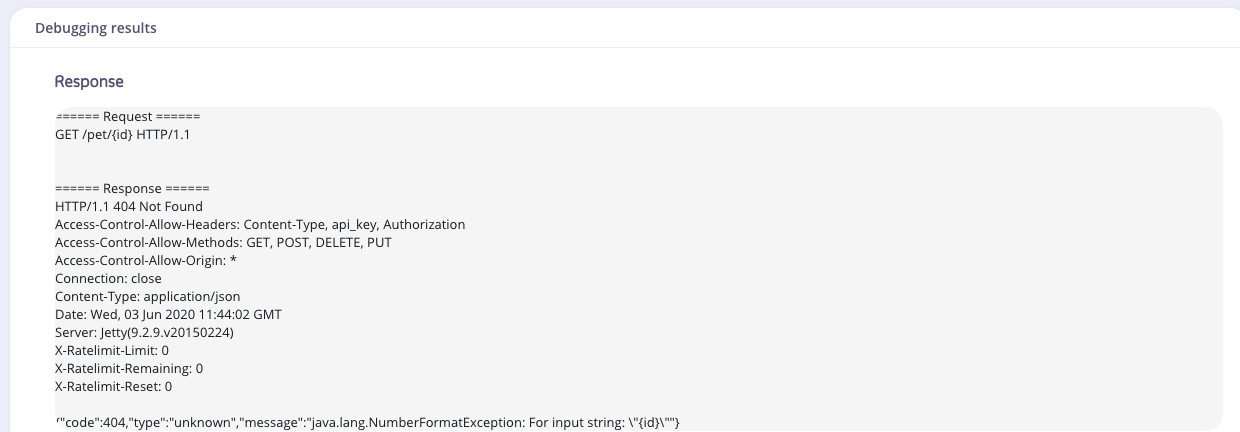
Once you have entered all your request information, click RUN. Debugging Response and Log information will be displayed:
Response

The Response section shows the JSON response for your request.
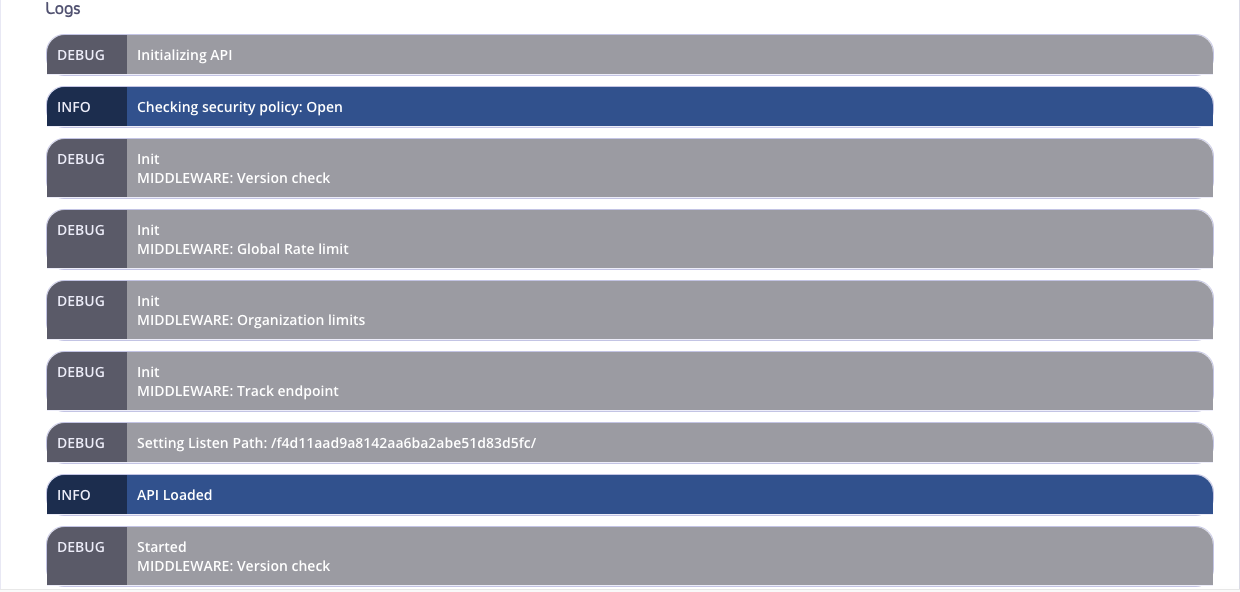
Logs

The debugging level is set to debug for the request. This outputs all logging information in the Endpoint Designer. In the Tyk Gateway logs you will see a single request. Any Error messages will be displayed at the bottom of the Logs output.
