- API Owners - Portal administrators who manage APIs, plans, and developer access from the Admin Portal.
- API Consumers - External developers who browse the Live Portal and request API access.
We recommend that you read the Tyk Identity Broker overview before configuring SSO for Developer Portal.
How It Works
When a user logs in via SSO, TIB authenticates them against the configured IdP and then calls the Tyk Developer Portal API to obtain a one-time nonce. TIB redirects the user’s browser to the Portal API’s/sso endpoint with the nonce appended. Tyk Developer Portal validates the nonce and creates a session automatically.
The outcome of a login depends entirely on which TIB profile is used.
- You will typically configure two separate TIB profiles - one for each audience - and publish their respective login URLs to the appropriate users.
- The login URL contains the profile ID:
-
The
ActionTypeconfigured in that profile determines the result:
Enabling Single Sign-On
To enable Single Sign-On with Portal you must set the following configuration:- set
PORTAL_TIB_ENABLED=truein the portal configuration - set the
TYK_IB_SESSION_SECRETenvironment variable with a secret that will be used to sign the redirect session cookie if you are using an IdP that implements the redirect flow, such as those using OpenID Connect.
From Portal v1.12.0, TIB is embedded in the portal and no separate TIB installation is required. If you are running an earlier version, or have a specific infrastructure requirement, see Using Standalone TIB.
API Owner Login
Tyk Developer Portal maintains user accounts for all API Owners, identified by email address. When a user is authenticated by the IdP and is directed to a TIB profile configured for actionGenerateOrLoginUserProfile, the following decision tree is followed:
By default, Tyk will automatically create a new account for any successful login where there is no existing admin account for the user’s email address. Set
AdminRegistrationAllow to false in the Portal configuration to require that an admin account must already exist before SSO login is permitted.API Owner Profile Configuration
The following TIB profile fields are required for API Owner SSO:
The following optional fields are also available:
API Consumer Login
When a user authenticates, the IdP returns a set of attributes about them, such as their name, email address, and group membership. TIB receives these attributes as a key-value map. When configured with an API Consumer SSO profile, TIB derives an SSO key from the user’s IdP identity. The SSO key is a combination of the user’s unique IdP user ID and the provider name (for example,abc123@okta). It is stored on the Portal developer account and used to recognize the same user on subsequent logins, independently of their email address.
Login Flow
TIB uses the SSO key to determine whether to create or update a Portal developer account:There is no configuration option to restrict API Consumer SSO login to pre-existing accounts only. A new user who successfully authenticates via SSO will always have a new API Consumer Admin account created for them.
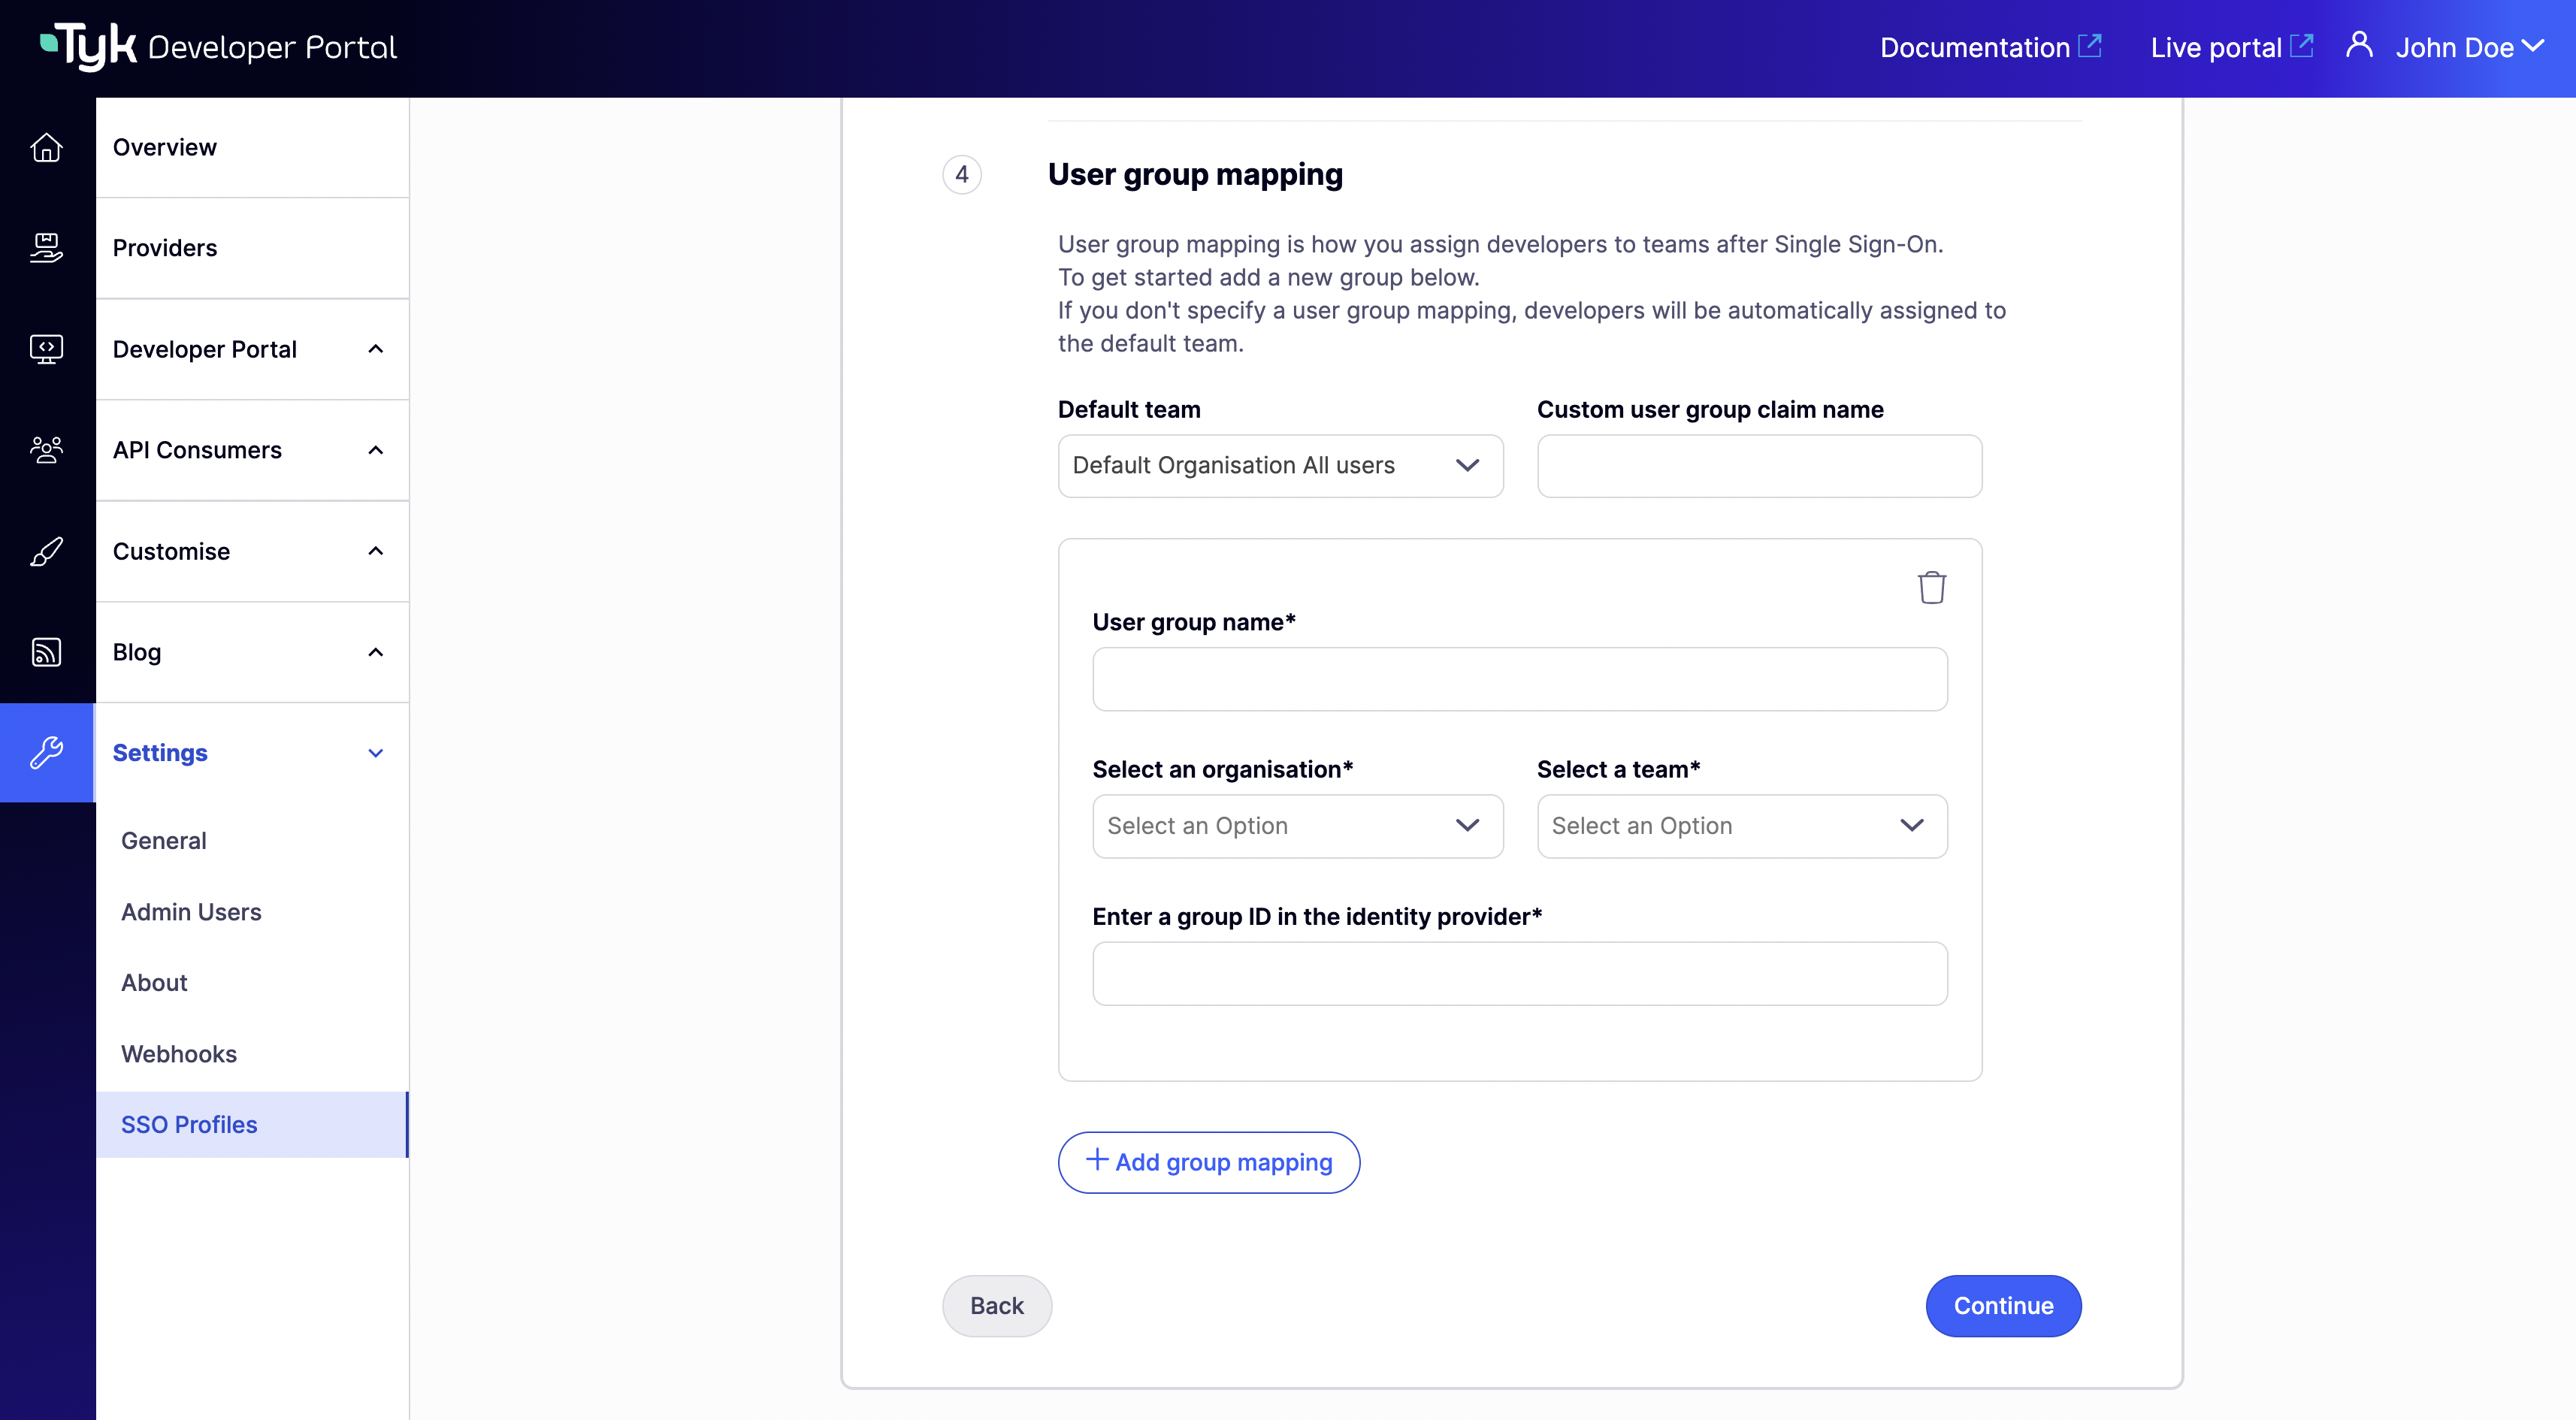
Team Assignment
When a user logs into an account which is not assigned to any Teams - either because it is newly created, or because all Teams were removed after the first login (as shown in the diagram above) - Team assignment takes place based on the TIB profile and claims in the attributes returned by the IdP. This assignment involves two stages: TIB resolves the user’s IdP group claim to a Portal Team ID, then the Portal looks up that Team and assigns the user. Stage 1: TIB resolves the Team ID Stage 2: Portal assigns the Team and OrganisationOnce a user has been assigned to a Team - whether via SSO on first login or manually by an admin - subsequent SSO logins will never change their Team or Organisation. Any manual changes made in the Portal are preserved.
User Group Mapping Configuration
The following TIB profile fields control how IdP group claims are resolved to Portal Team IDs (Stage 1 above):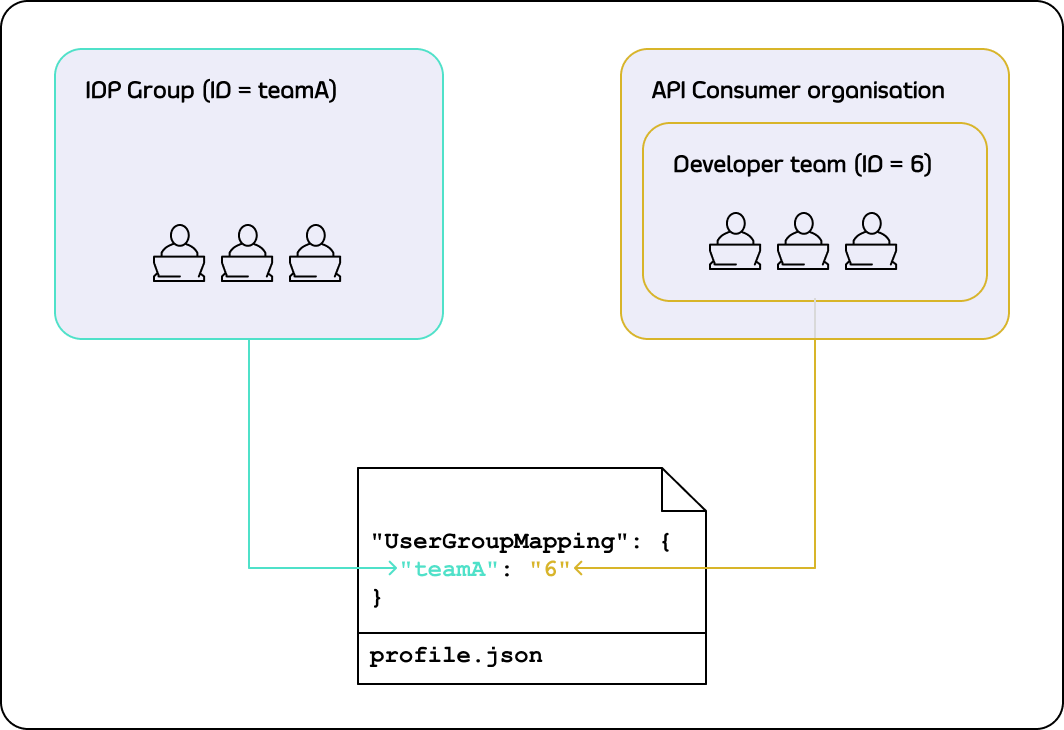
API Consumer Profile Configuration
The following TIB profile fields are required for API Consumer SSO:
The following optional fields are also available:
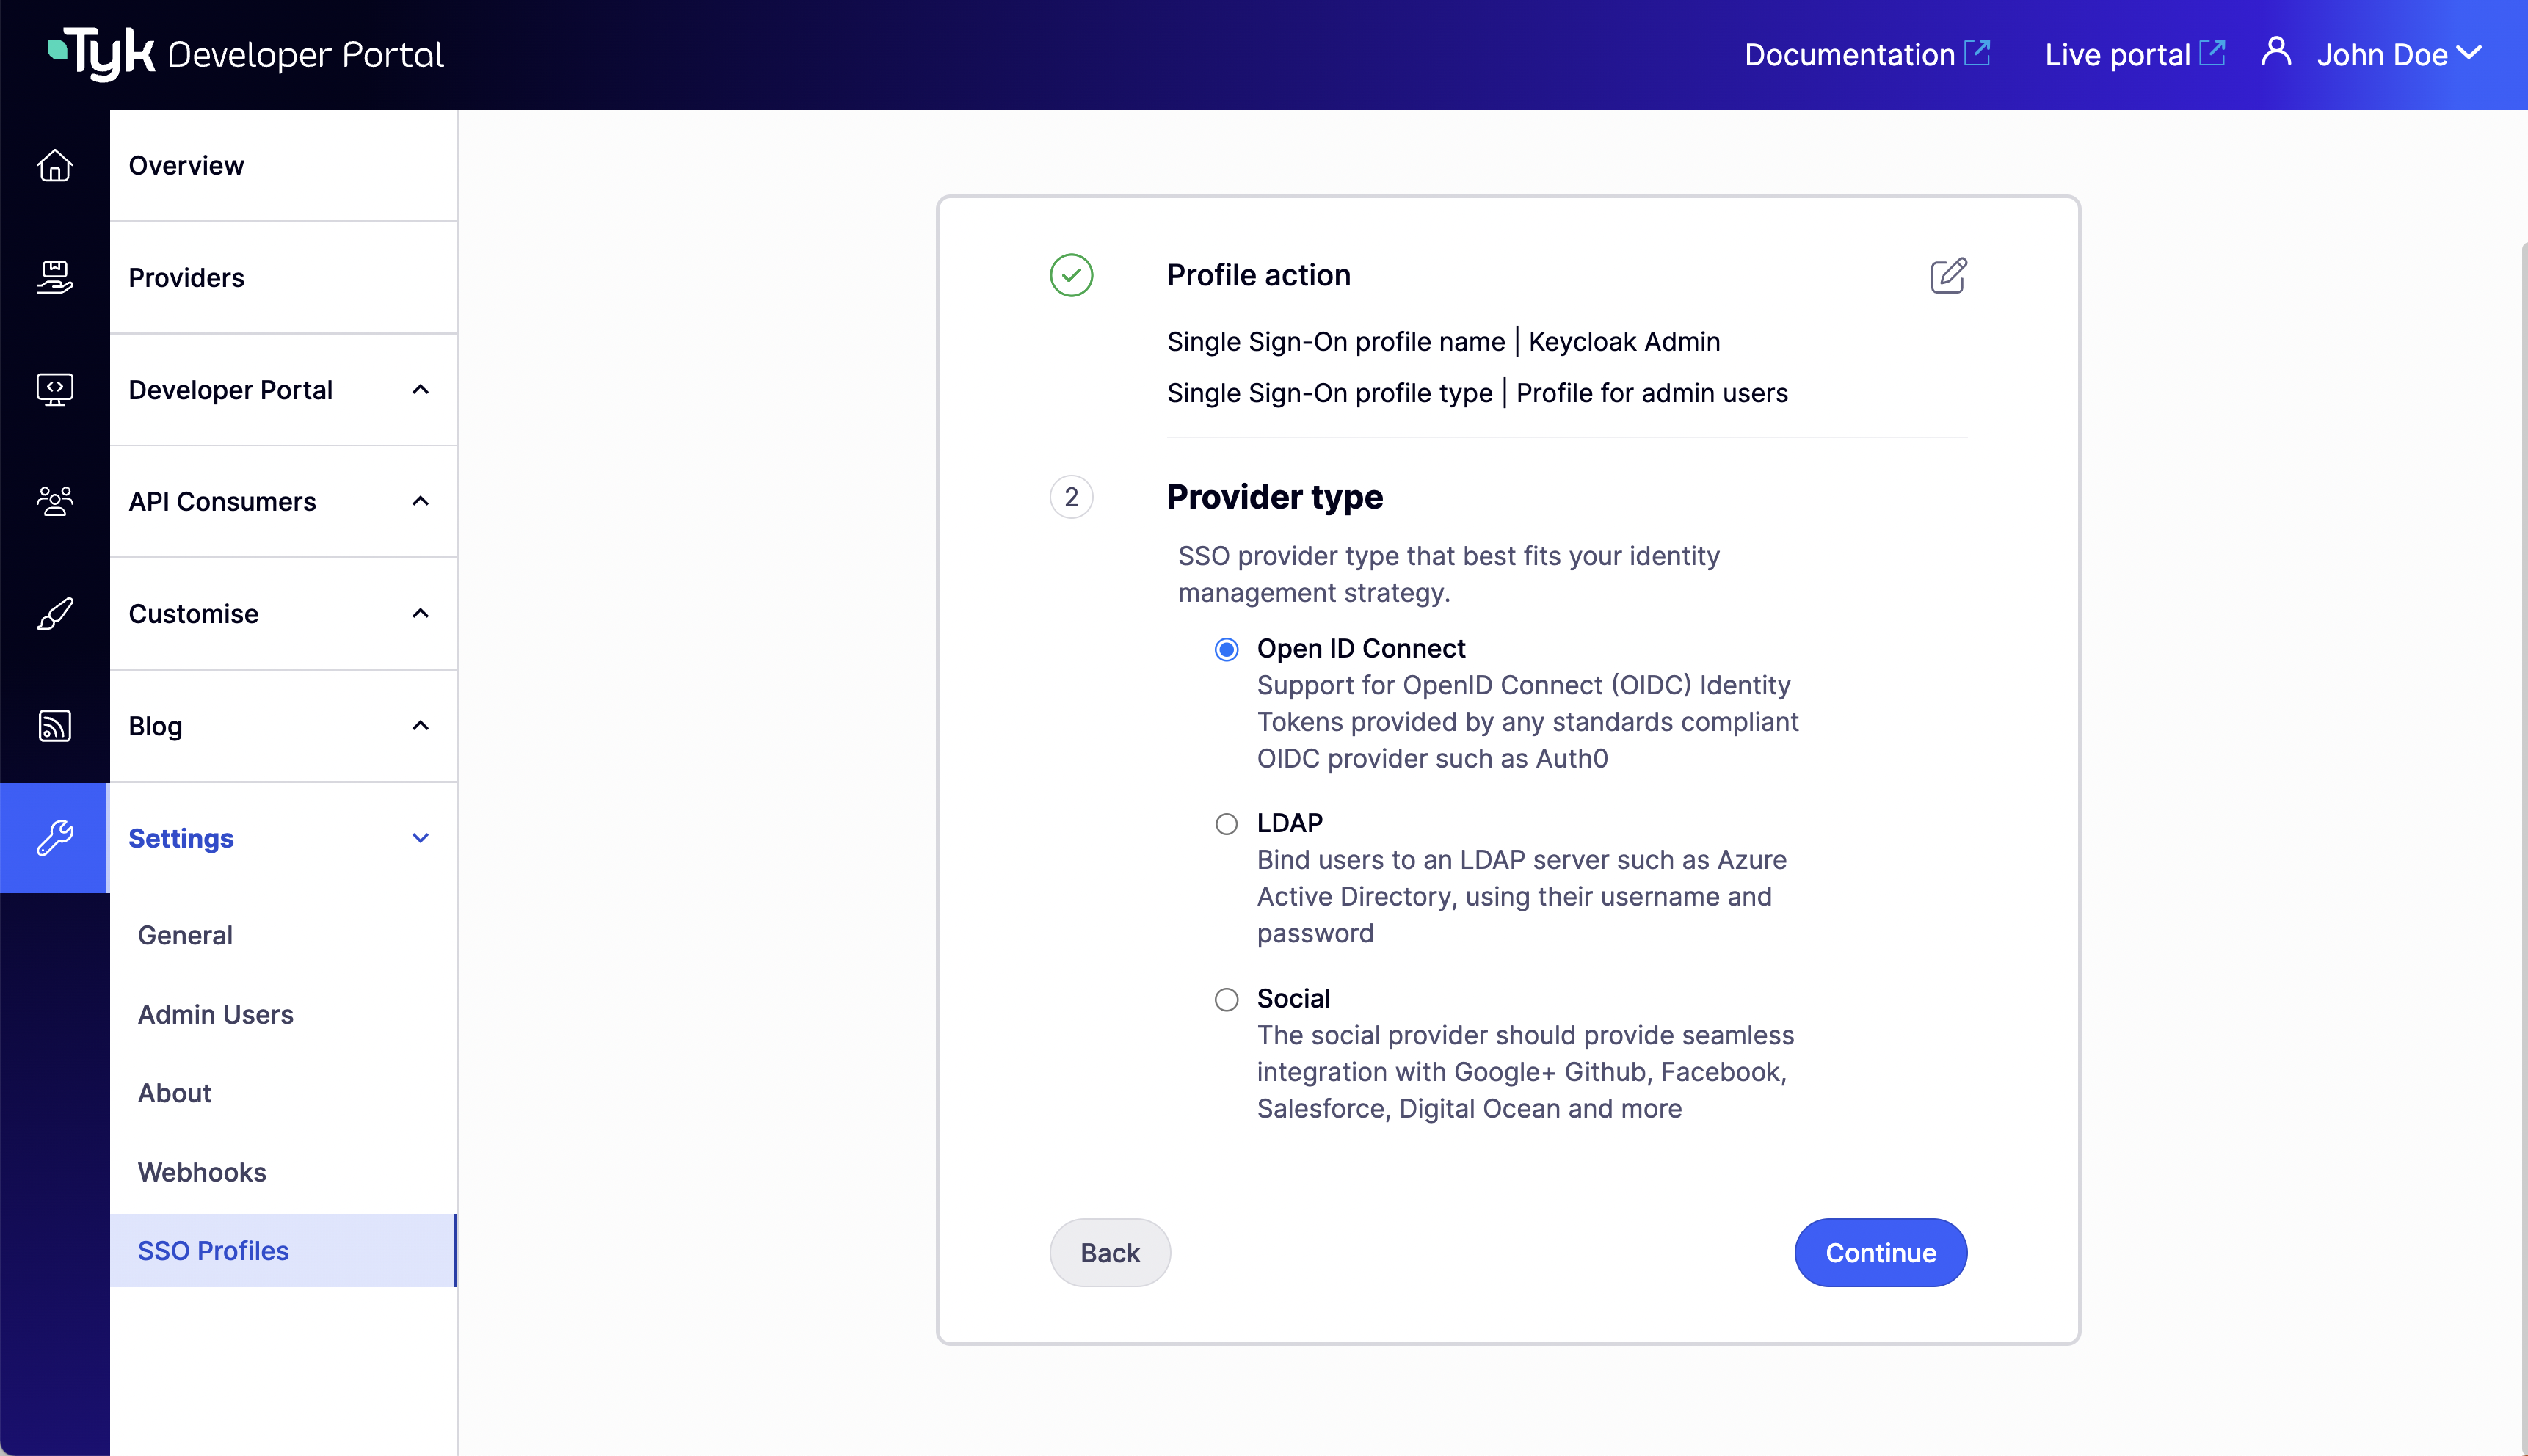
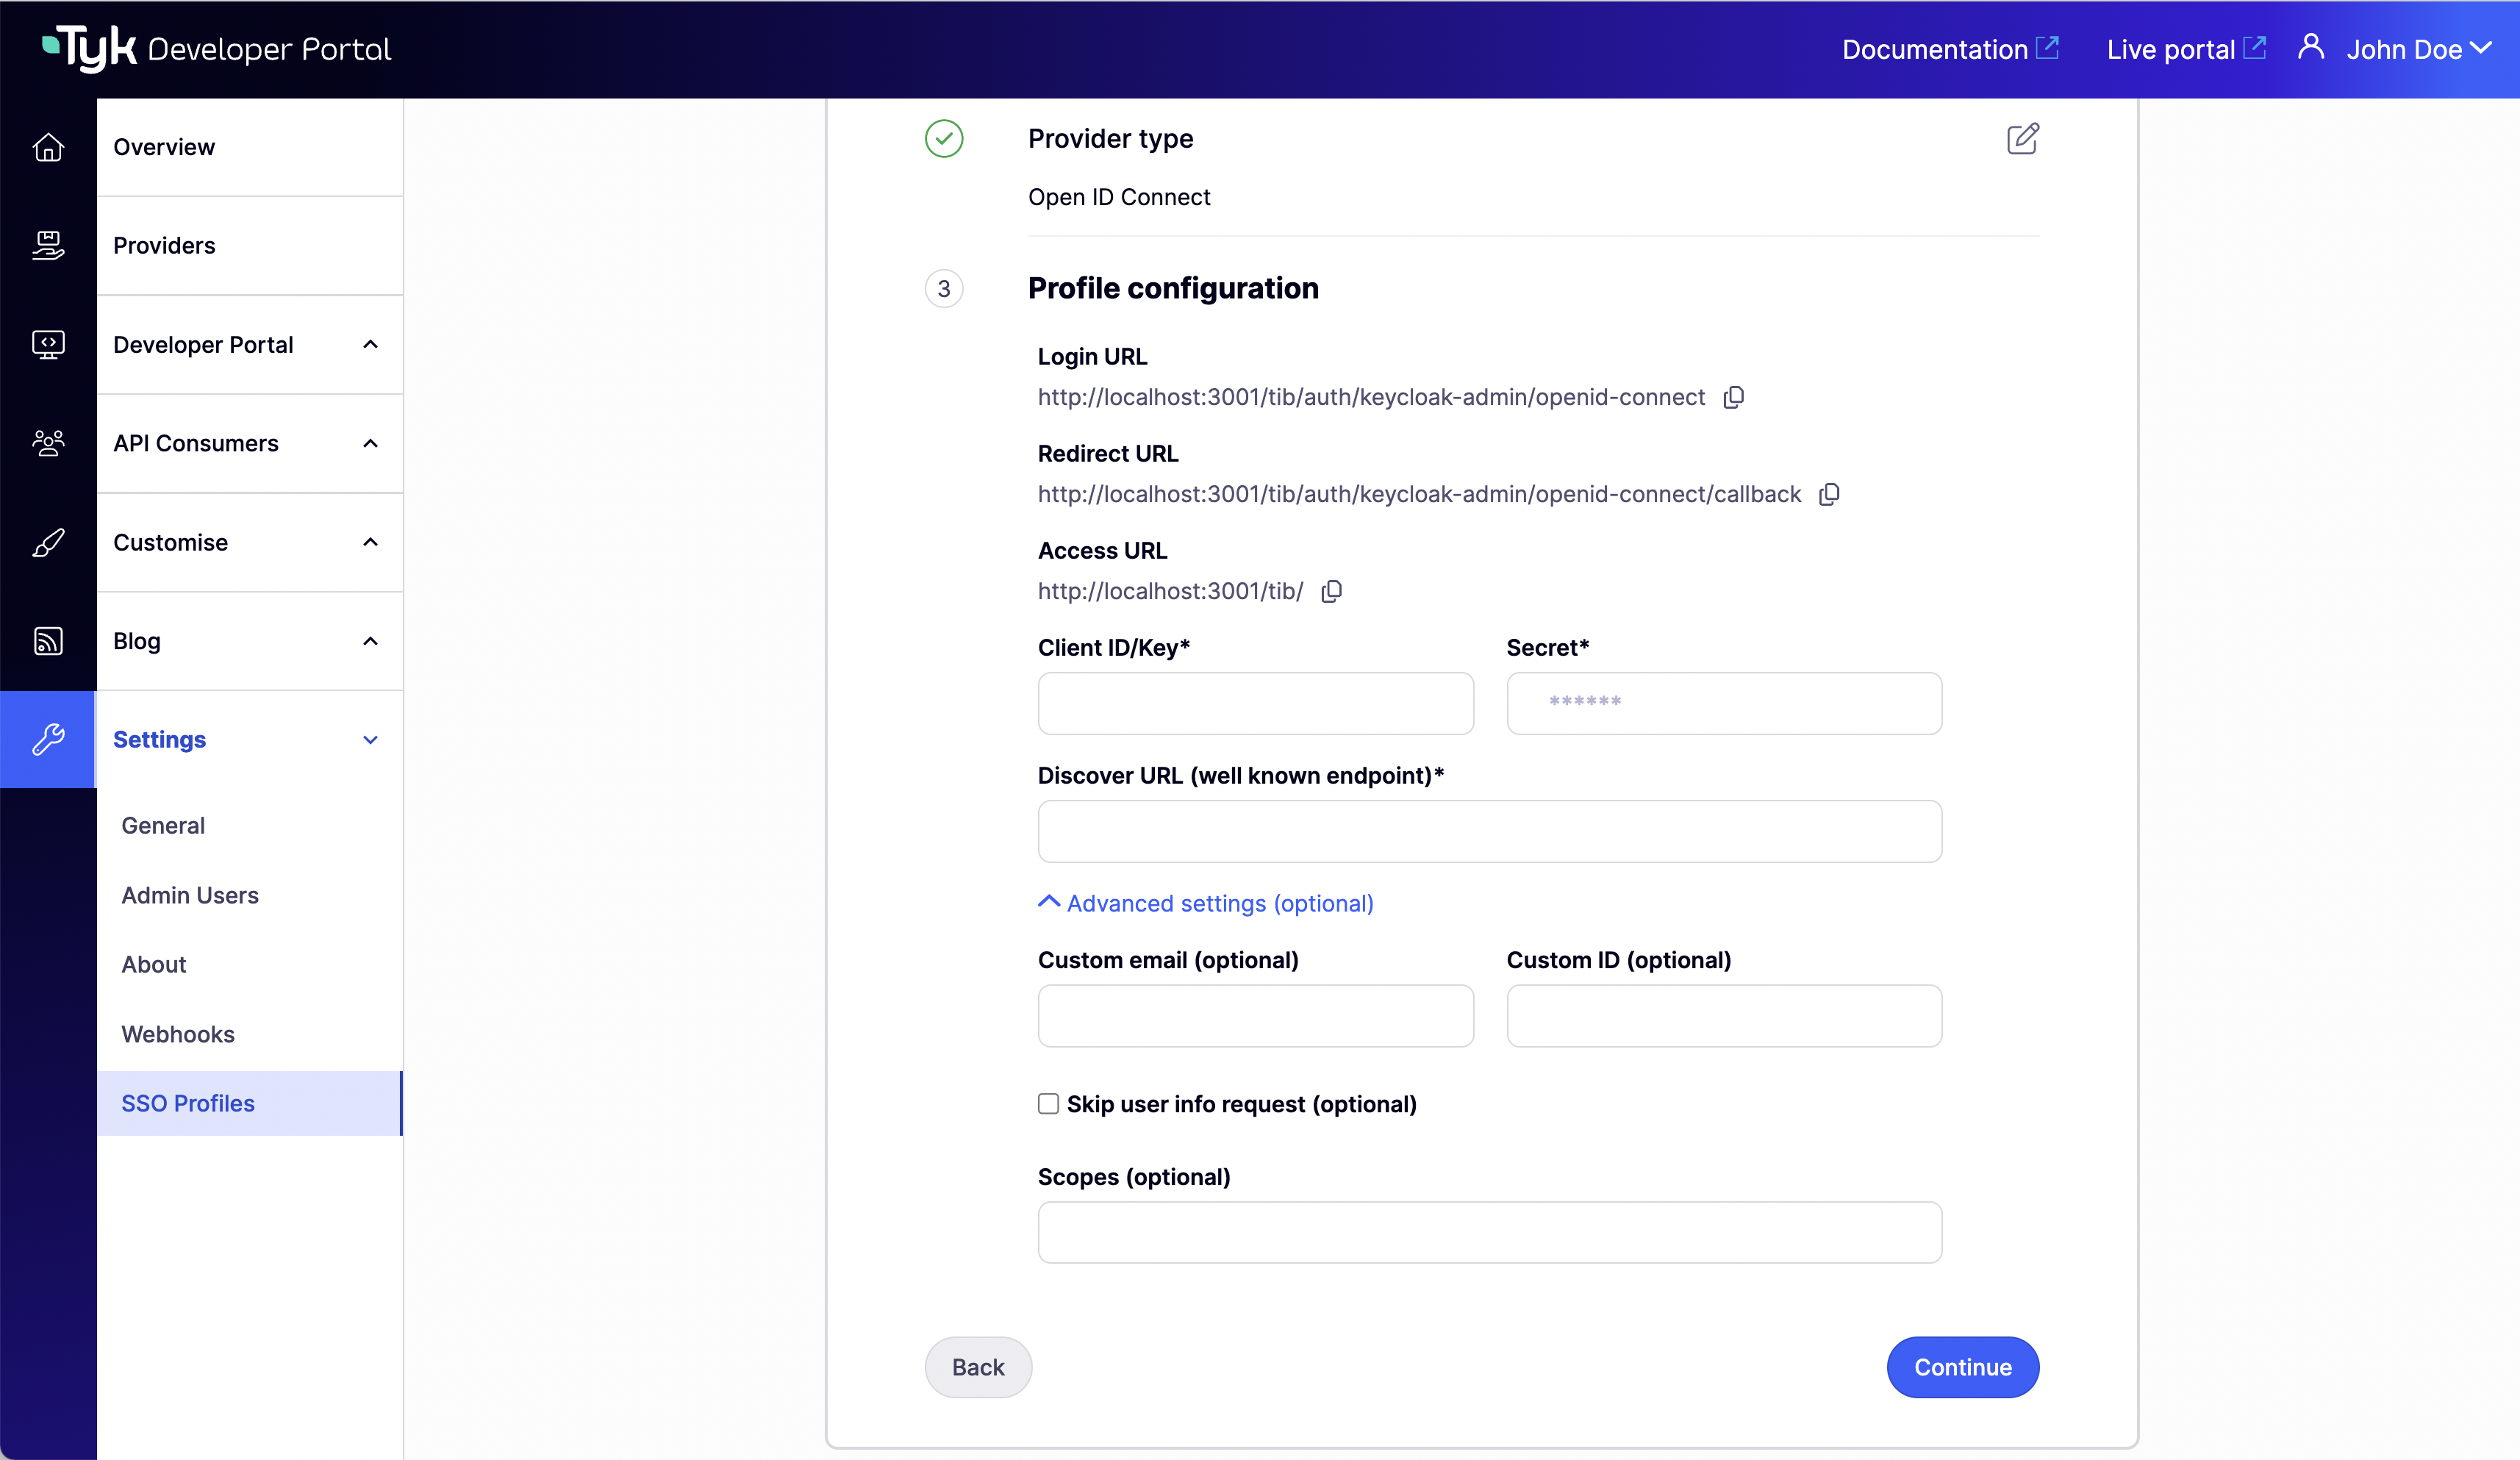
Creating a TIB Profile
TIB profiles are managed in the Portal UI under Settings > SSO Profiles.- Select Add new SSO Profile.
-
Complete the Profile action step. Choose a Name (this becomes the profile
ID), select the Profile type - Profile for admin users for API Owner login or Profile for developers for API Consumer login - and set the failure redirect URL.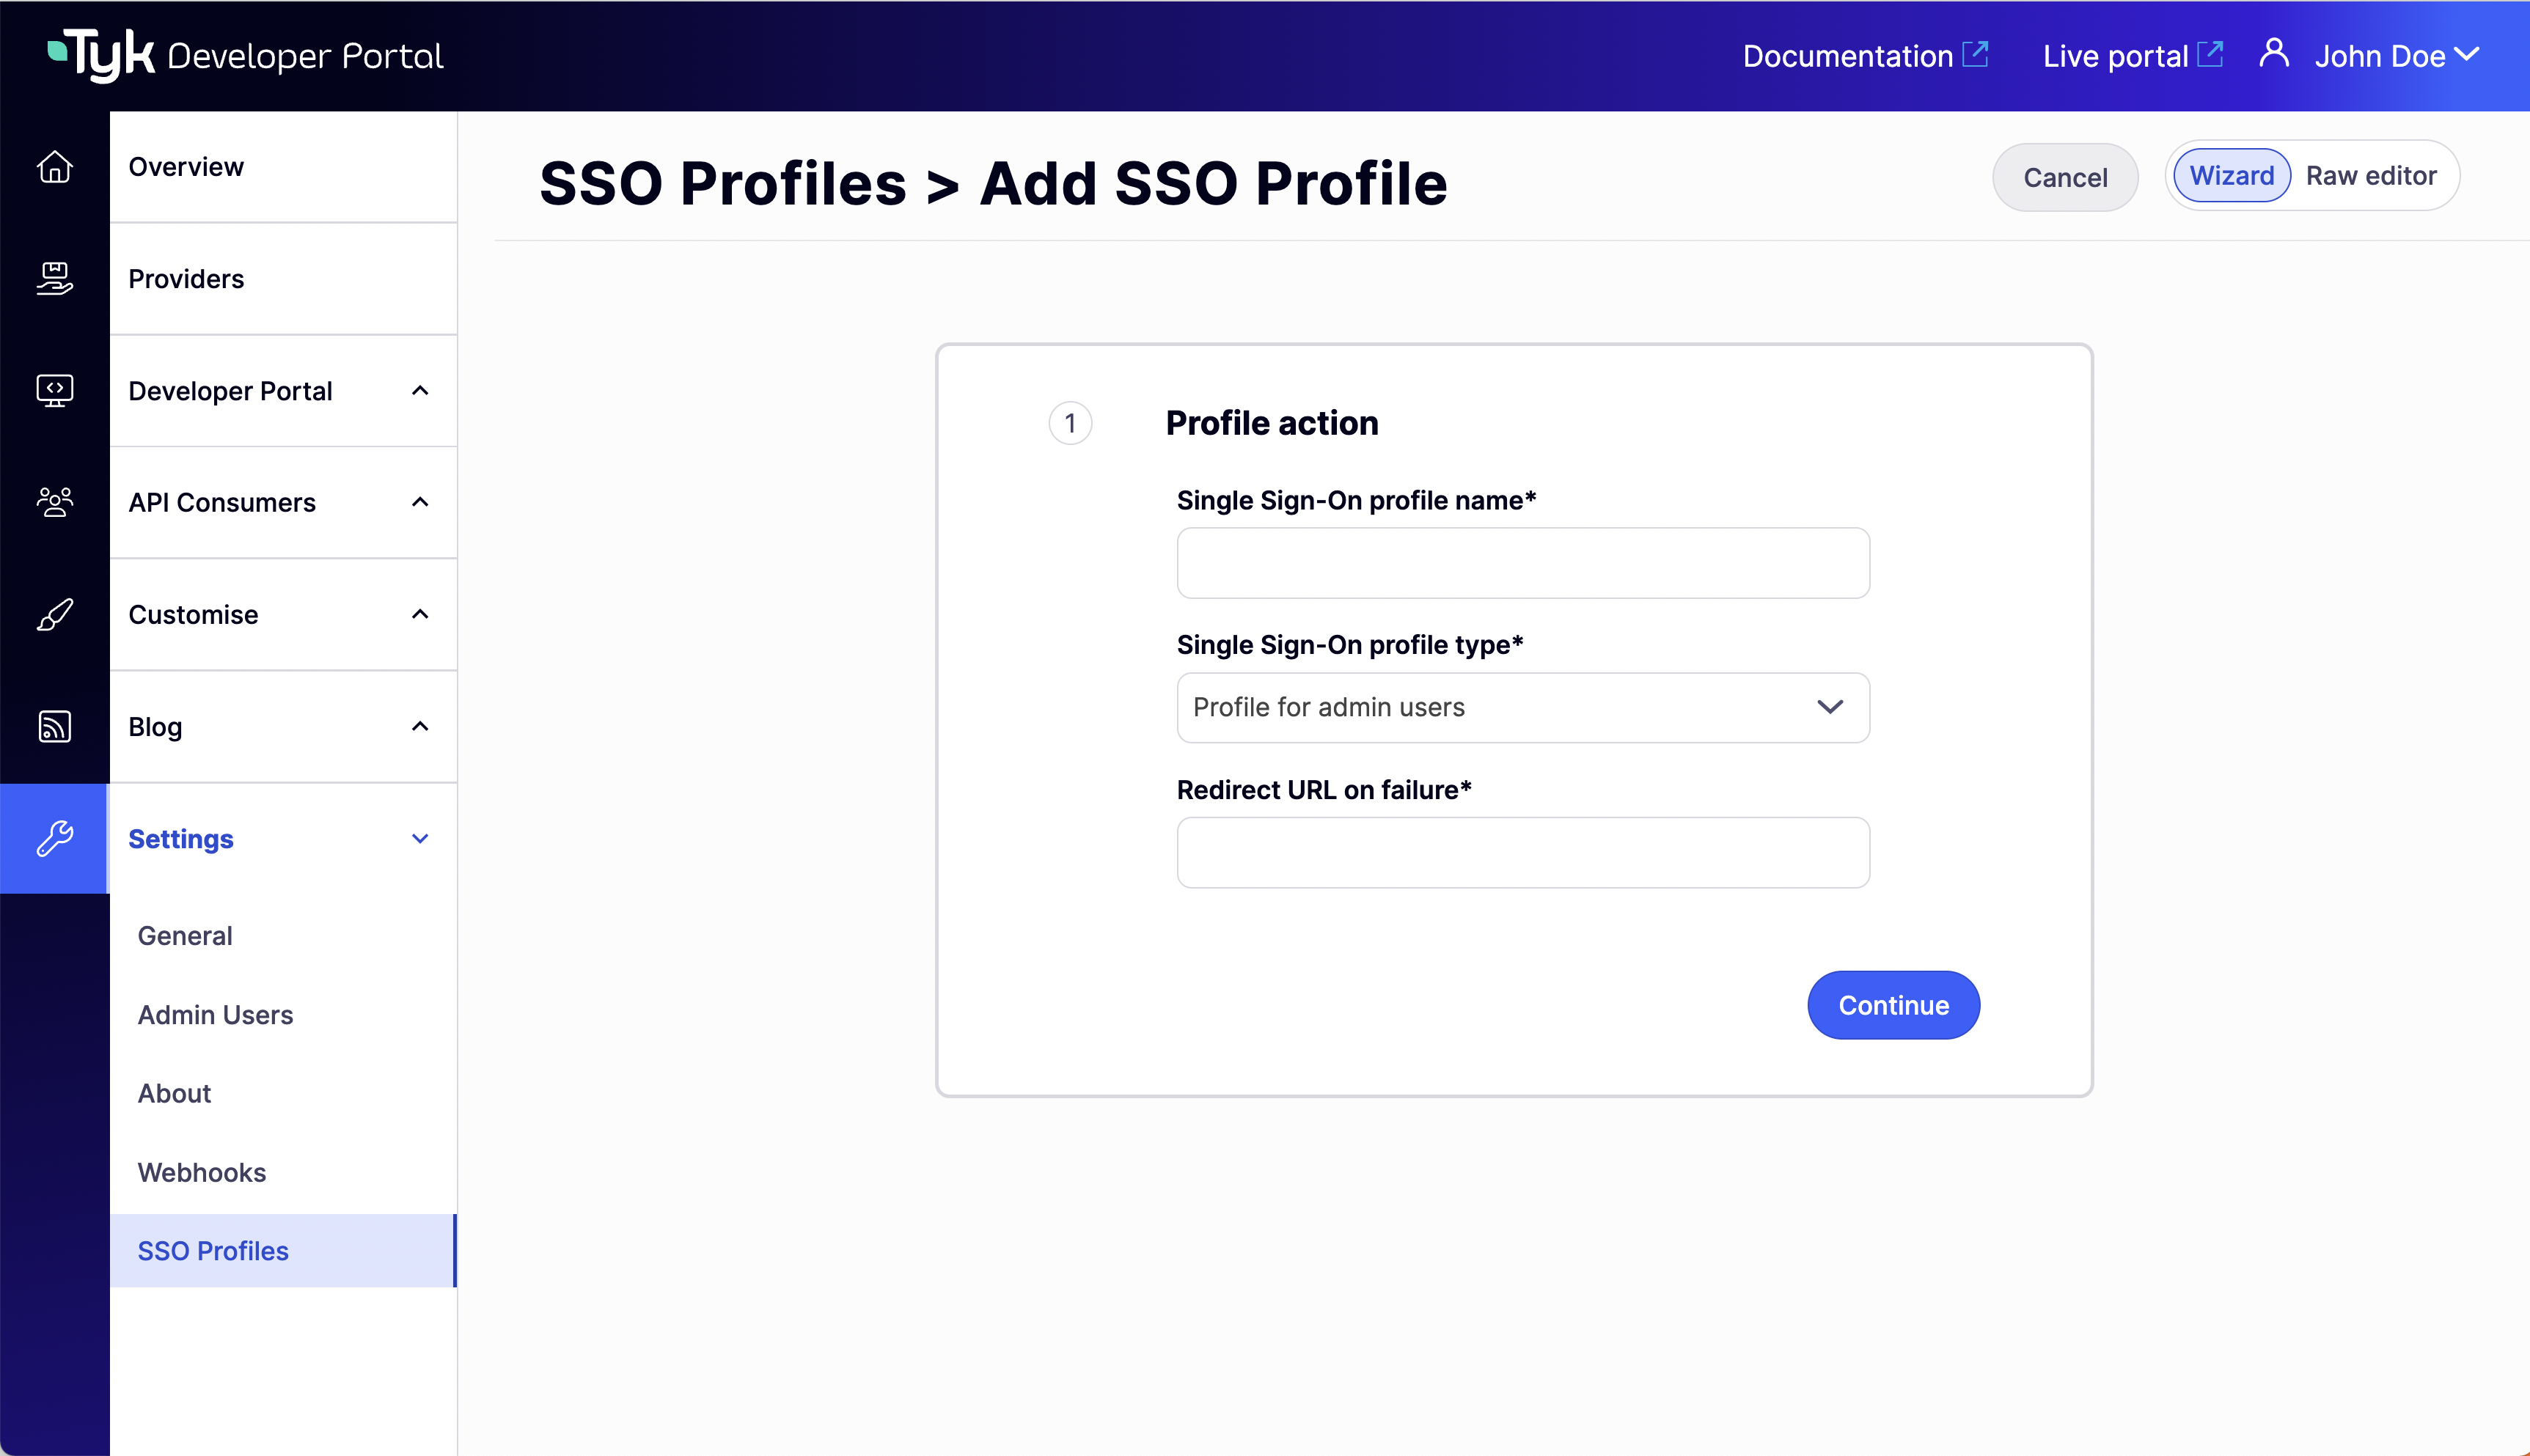
-
Select the Provider type for your IdP.
-
Complete the Profile configuration step with your IdP connection details.
-
For developer profiles, configure the Group mapping. Set Custom user group claim name to the IdP claim that contains the user’s group membership. For admin profiles, skip this step.
- Click Continue to create the profile.
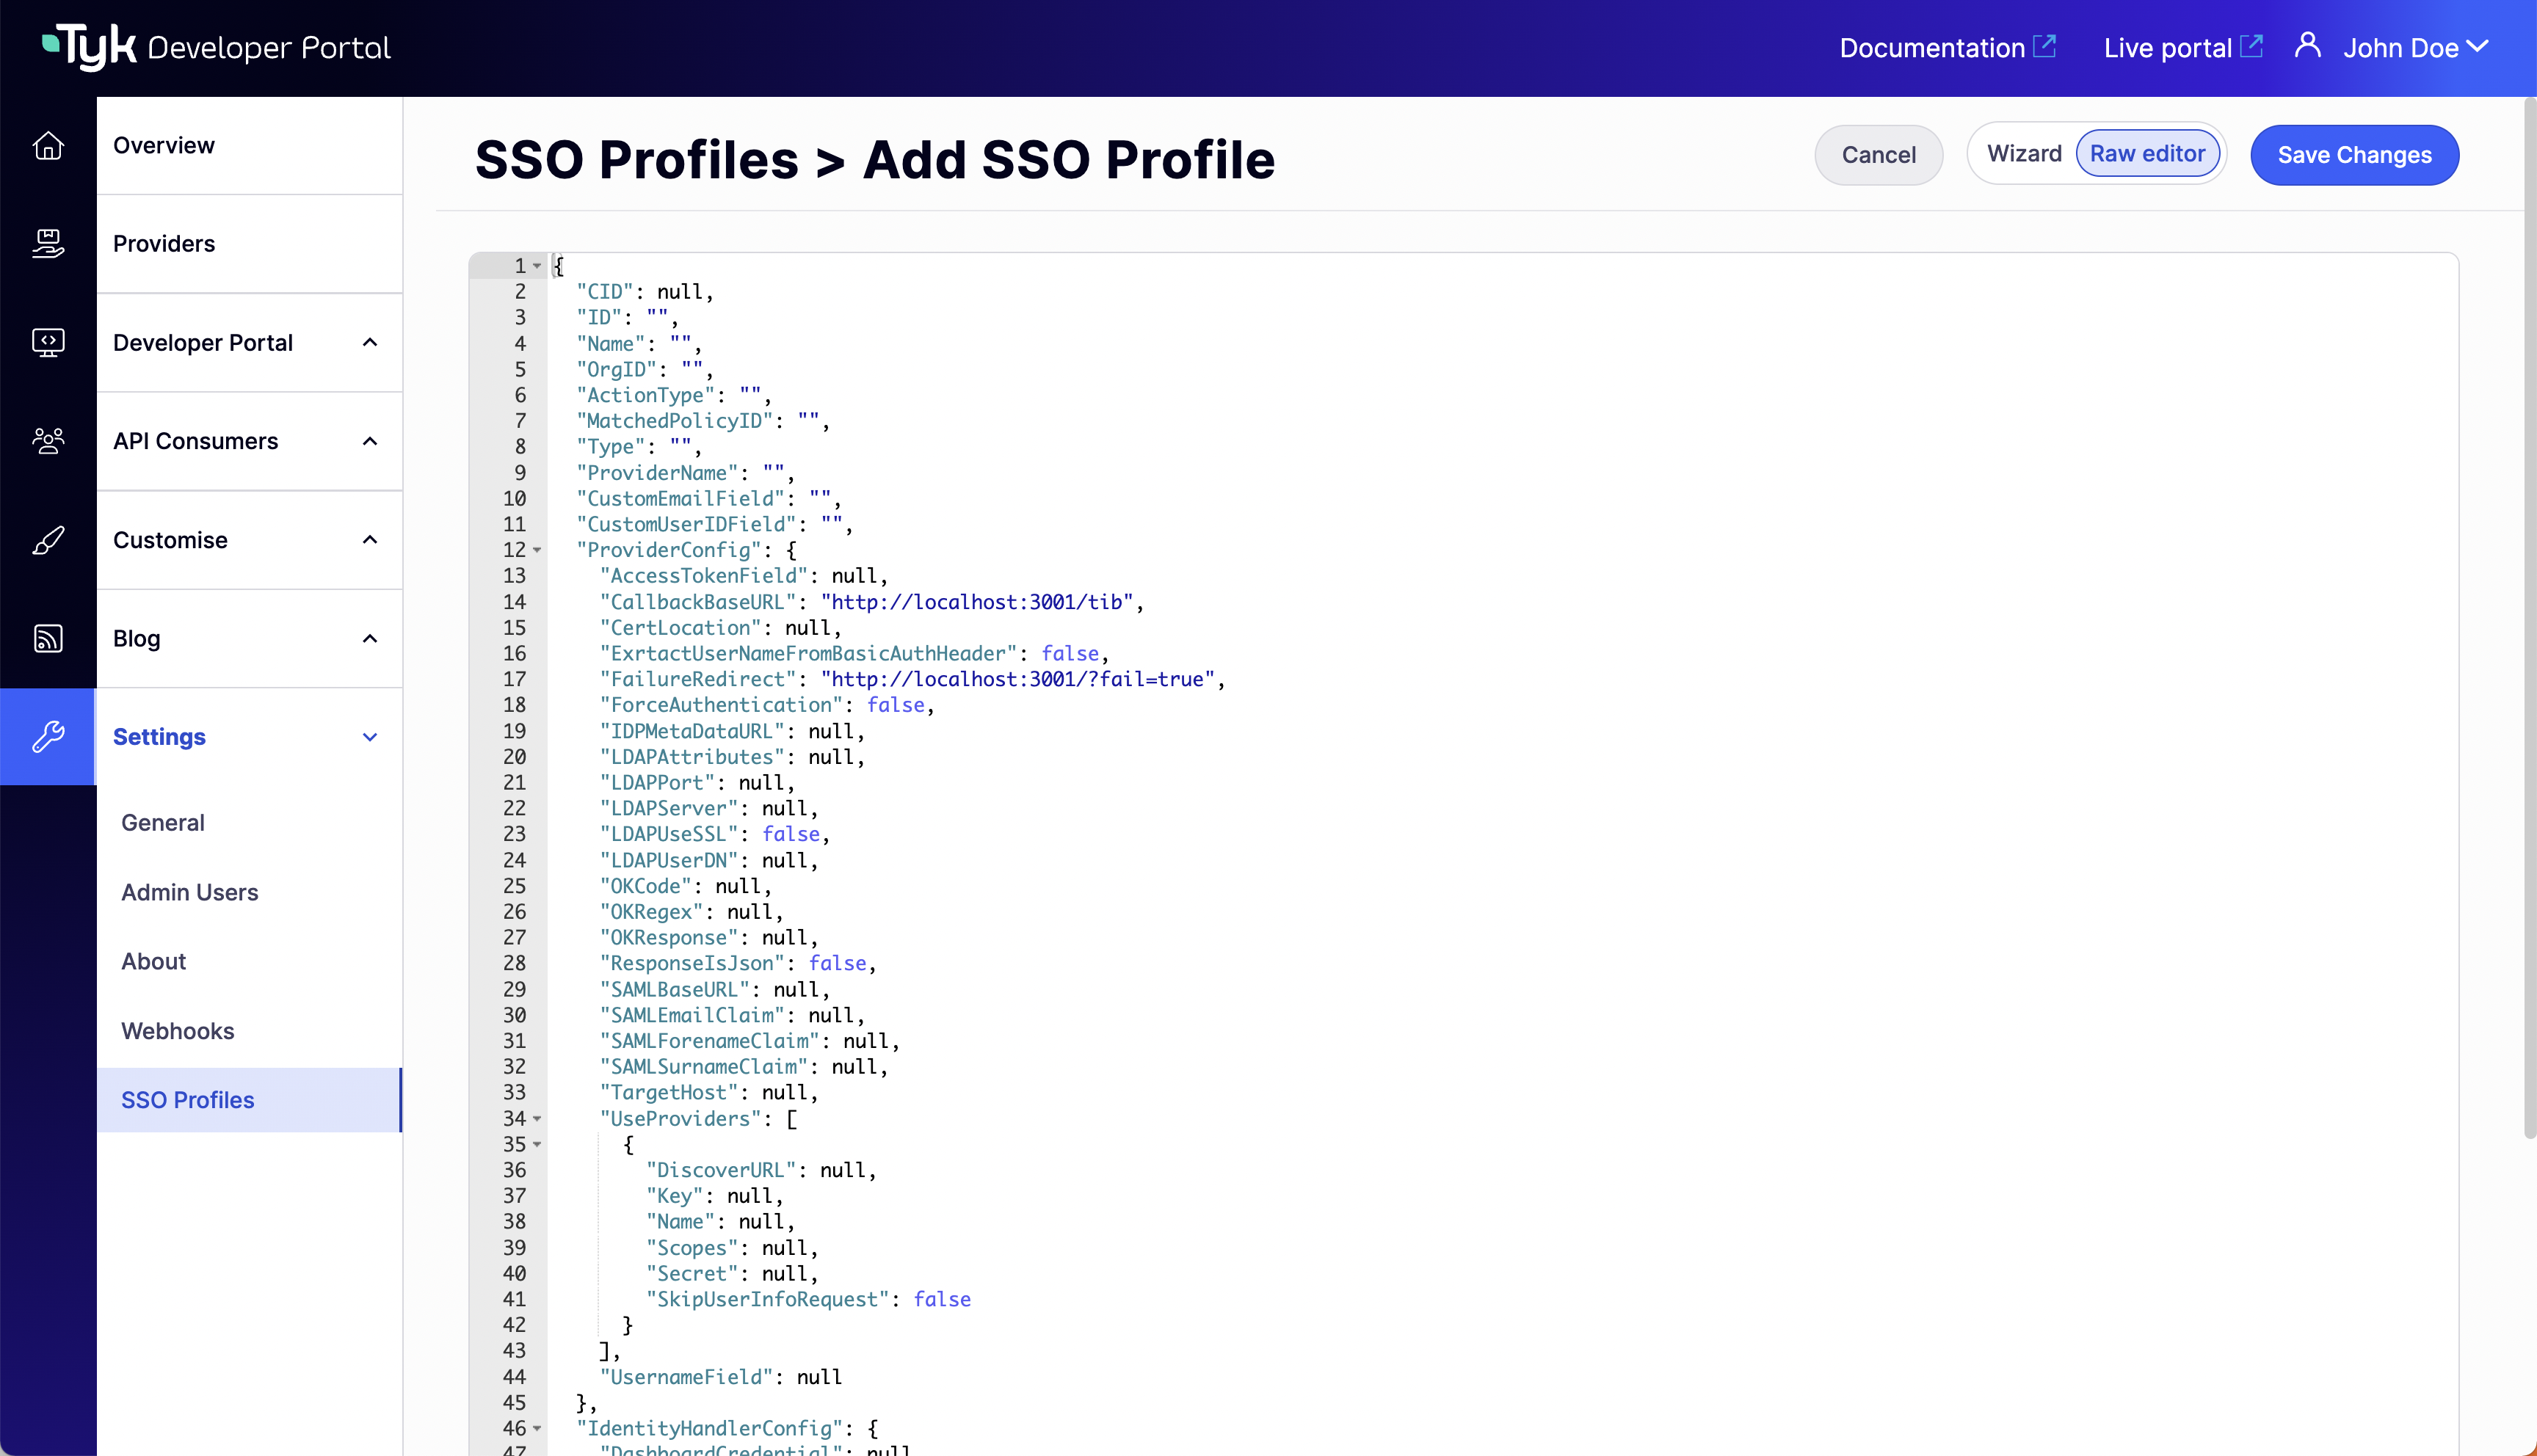
The SSO profile wizard supports OIDC, LDAP, and Social provider types. SAML is not available as a selectable option so you would need to create the TIB profile in the Raw editor view.
Initiating SSO Login
The TIB authentication URL for each profile is shown in the profile’s Provider configuration section in Settings > SSO Profiles.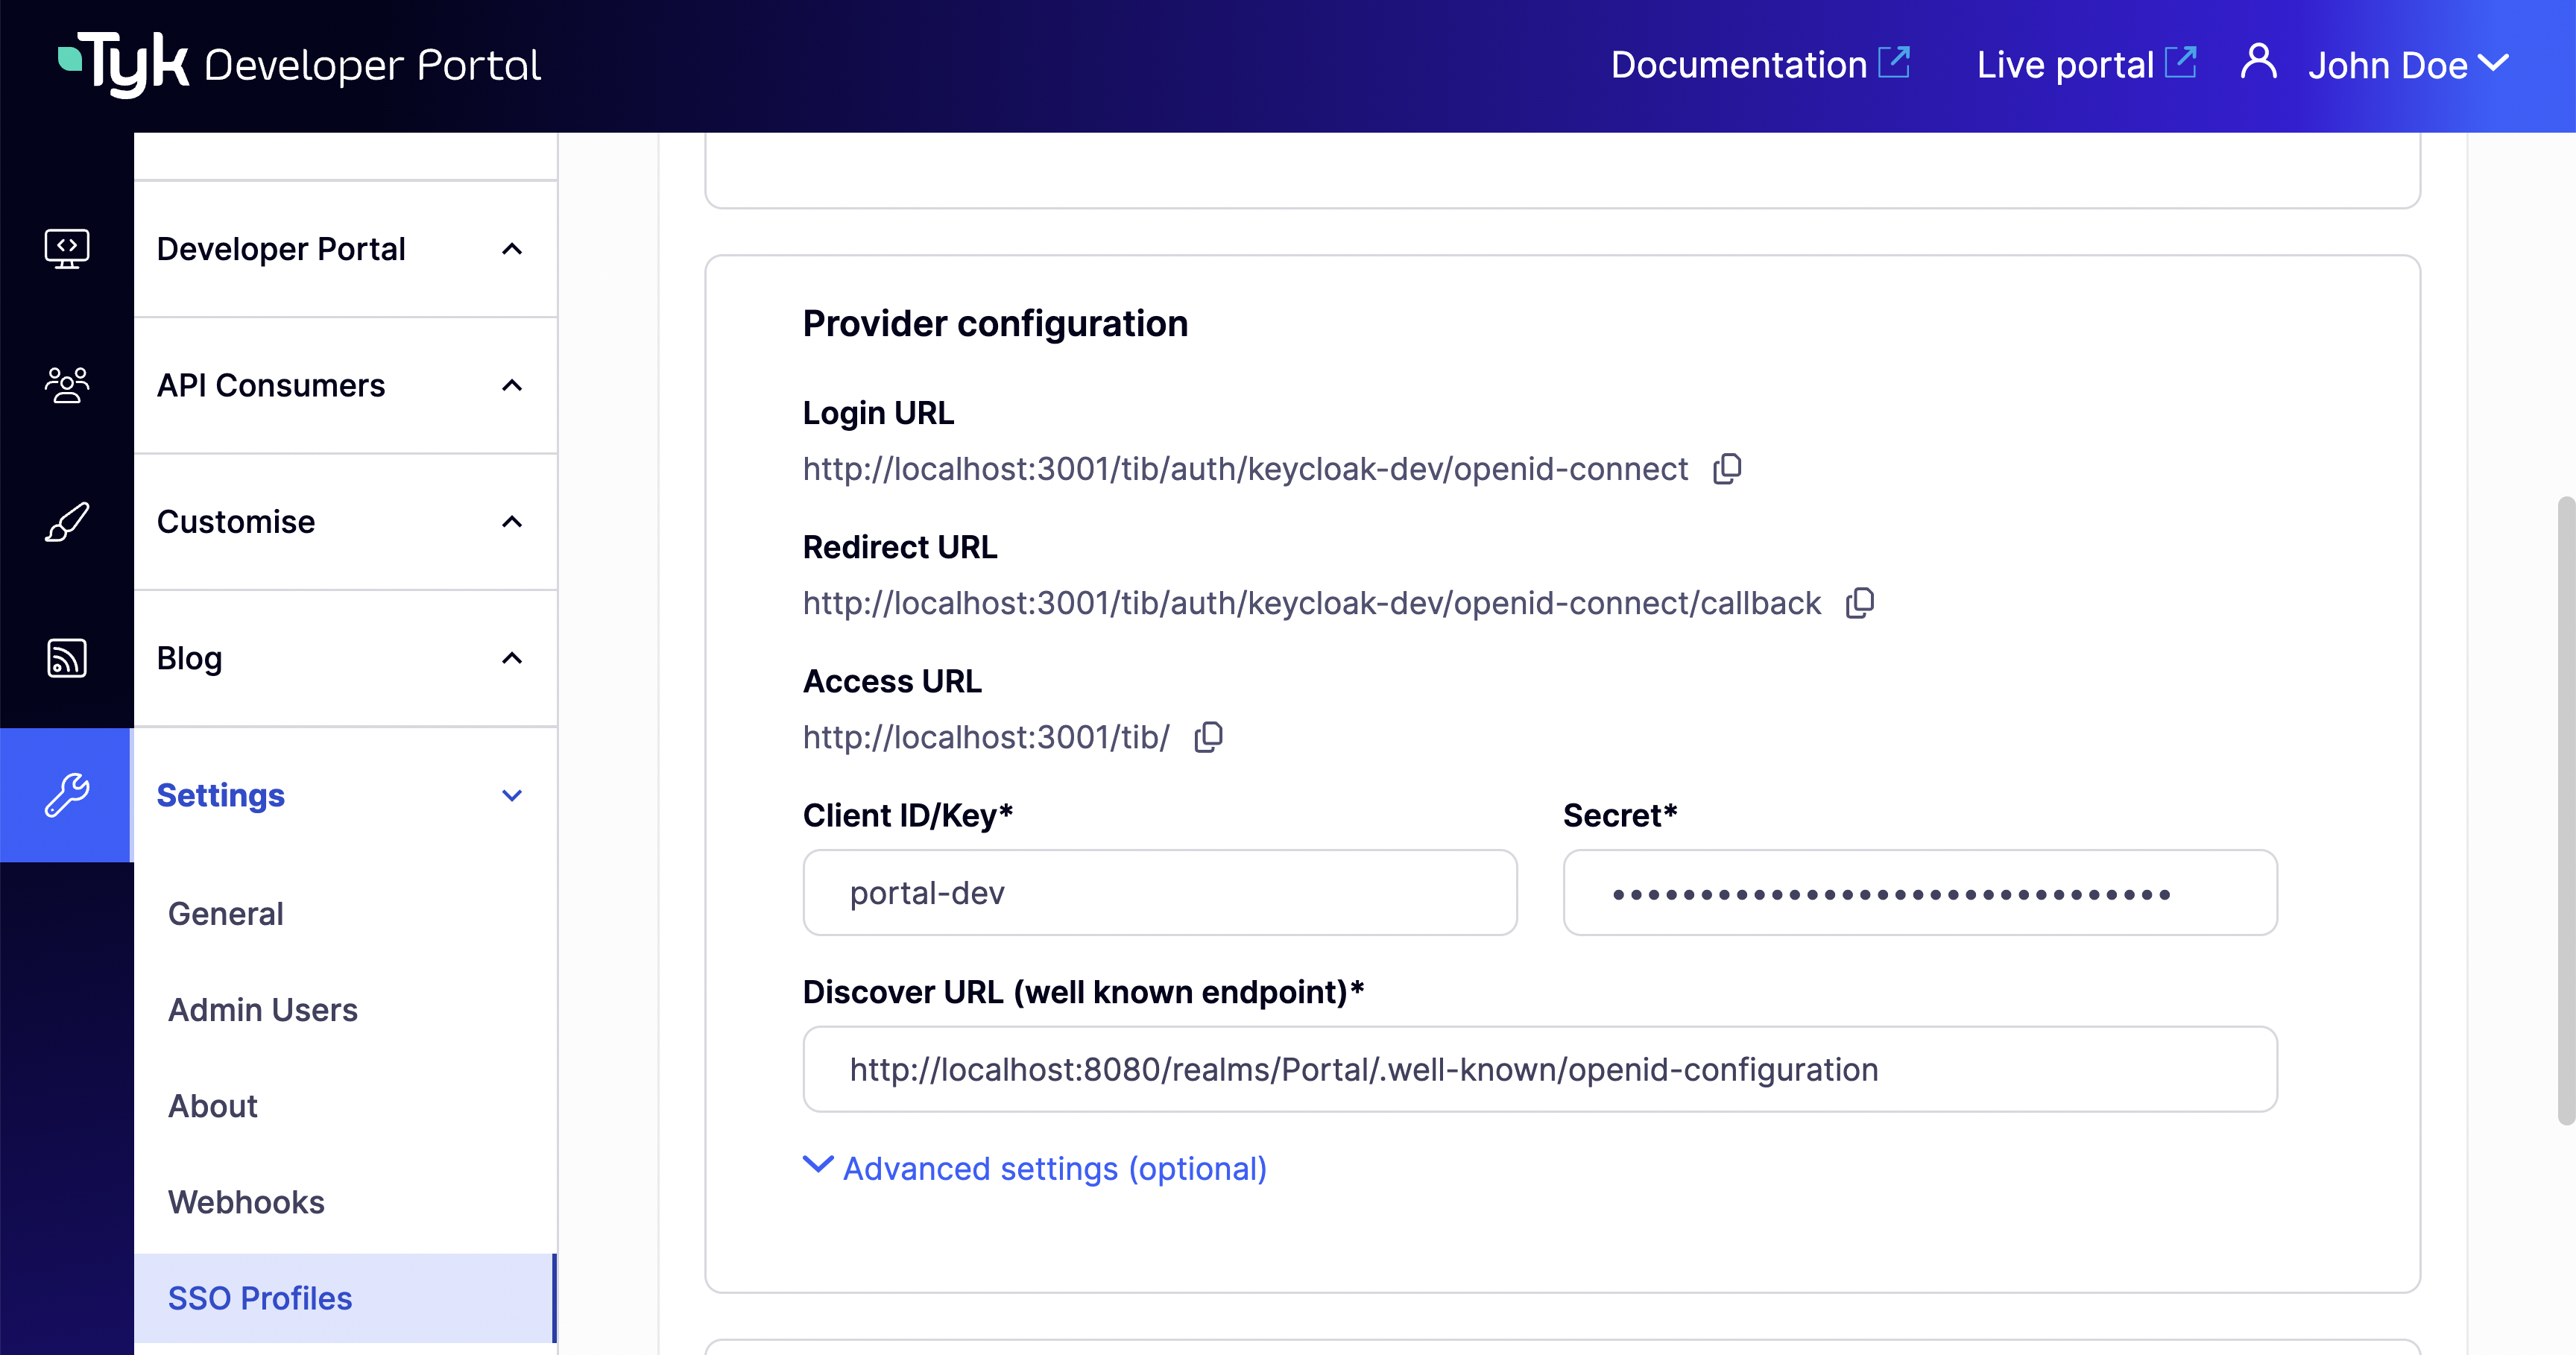
Redirect Flow (OIDC, Social)
For redirect-based IdPs, the IdP hosts the login page. Users need to be directed to the TIB authentication URL, which then redirects them to the IdP. From Portal v1.16.0, you can configurePORTAL_SSO_CUSTOM_LOGIN_URL to automatically redirect users from the Portal login page to your IdP’s login flow. When set, all login requests - including the Portal’s Log in button - are redirected to the specified URL instead of displaying the built-in login form.
Set it to the TIB authentication URL for the profile:
- Environment variable
- Config file
This setting only redirects the login entry point. User registration and password reset pages are not affected.
Passthrough Flow (LDAP, Proxy)
For passthrough-based IdPs, there is no IdP-hosted login page. Users submit their credentials directly to TIB via a formPOST. You must provide a custom HTML login page, for example:
{portal-host}, {portal-port}, and {profile-id} with the values for your installation.
Using Standalone TIB
By default, Tyk Developer Portal uses its embedded TIB for SSO from v1.12.0 onwards. If you need to use a standalone TIB instance instead - for example, if you are running an earlier Portal version - install and configure TIB separately and point it at the Portal. The TIB configuration for standalone Portal SSO requires theTykAPISettings.DashboardConfig block to reference the Portal host and PortalAPISecret:
For full installation and configuration instructions, see Install Standalone TIB.
TIB uses the same
DashboardConfig block to connect to both Tyk Dashboard and Tyk Developer Portal - a single standalone TIB instance can only point at one. If you need standalone TIB for both Dashboard SSO and Portal SSO in the same deployment, you must run a separate TIB instance for each.