

Introduction
Descope is an OIDC-compatible identity provider. TIB connects to Descope usingSocialProvider with the openid-connect provider type.
Descope acts as an identity provider for external applications through a Federated Application. You create an OIDC Federated Application in the Descope Console, then point TIB at your project’s discovery URL.
Before configuring your IdP and TIB profile, read Dashboard SSO or Portal SSO to understand the ActionType, ReturnURL, and IdentityHandlerConfig fields required for your use case.
This page covers the Descope-specific configuration only.
Configure Descope
Create the Federated Application
Every Descope project includes a default OIDC Federated Application, which you can use with TIB. Creating additional Federated Applications is a Descope Pro tier feature.
- Log in to the Descope Console and navigate to Federated Apps.
- Click + Application, then select Generic OIDC Application from the Federated Apps Library.
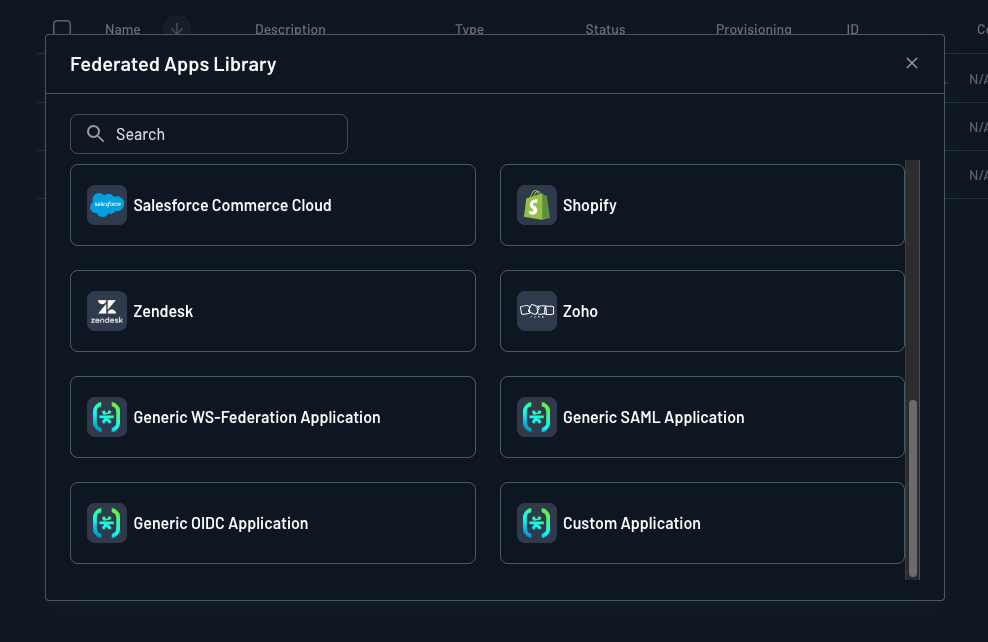
- Enter an Application Name, then click Create.
- From the application’s IdP Configuration section, copy the Discovery URL. This is the value TIB needs.
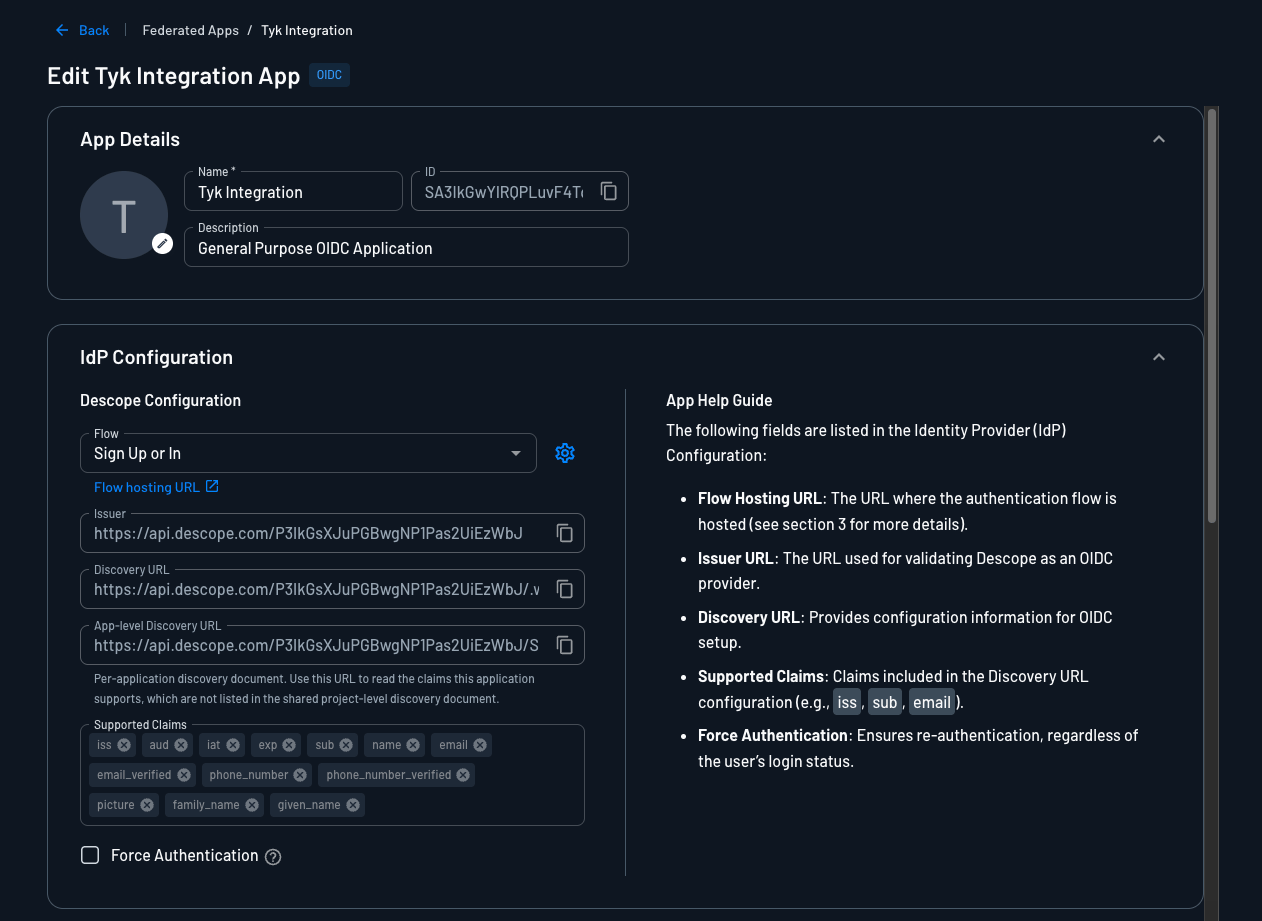
The application settings also show an App-level Discovery URL. That document lists the claims specific to this application. Use the project-level Discovery URL for TIB. If your project holds more than one Federated Application, use the App-level Discovery URL instead.
Get the Client ID
The Client ID is your Descope Project ID, found under Project Settings > General.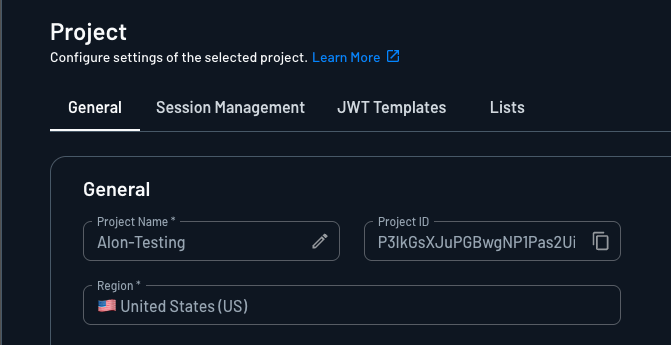
The Client ID is your Project ID, so every OIDC Federated Application in the project shares it. Descope does not issue a Client ID per application.
Generate the Client Secret
The Client Secret is a Descope Access Key.- Navigate to Access Keys and click + Access Key.
- Enter a Name and select an Expiration, then click Generate Key.
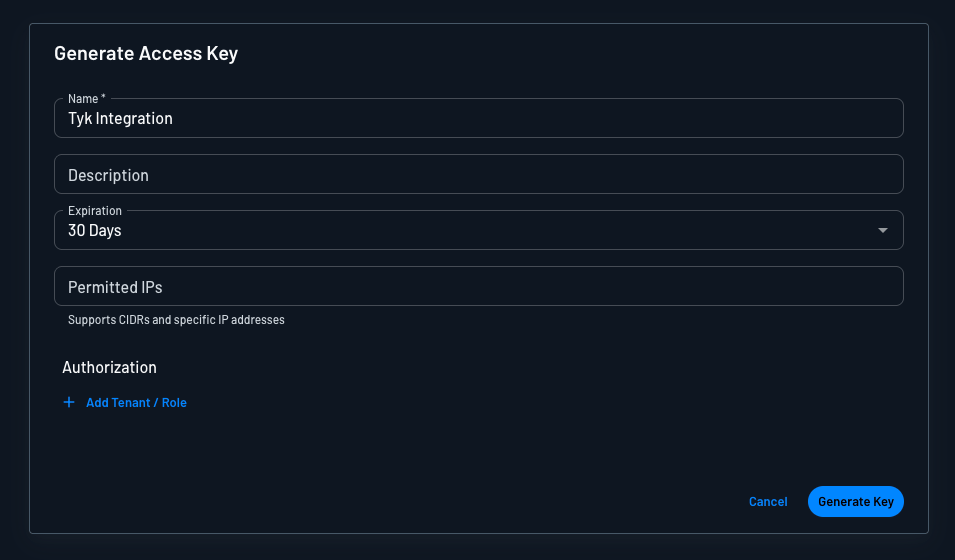
- Copy the generated key and store it securely before you close the dialog.
Approve the Tyk Domain
TIB receives the response from the IdP at this callback URL:{tib-host} with the hostname of your TIB instance and {profile-id} with the ID you will assign to the TIB profile.
Unlike most identity providers, Descope does not hold a list of callback URLs on the application. It validates redirect URLs against a project-wide allow list of domains, so you register the domain rather than the full callback URL.
- Navigate to Project Settings > General and find the Security section.
- Add your Tyk host to Approved Domains. Enter the domain only, without the protocol, for example
dashboard.example.com.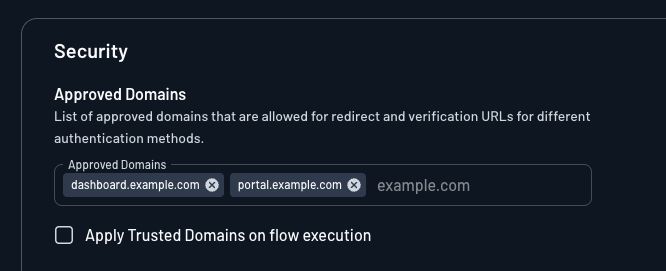
If you enable Apply Trusted Domains on flow execution, Descope stops approving its own hosted domains automatically. Also add the host from your application’s Flow hosting URL. This defaults to
auth.descope.io, but on some projects it is your Descope API host or your custom domain.Discovery URL
The Descope OIDC discovery URL for your project is:{project-id} is the Project ID from Project Settings > General.
Descope hosts projects in several regions, and the base URL differs per region. Always take the base URL from the Discovery URL field of your application:
If your project uses a custom domain, replace the base URL with your custom domain.
TIB Profile
The Descope-specific configuration goes in theProviderConfig block of the TIB profile. Set ProviderName to SocialProvider and Type to redirect.
ProviderConfig fields are:
Additional Scopes
Descope returnssub, name, email, email_verified, given_name, family_name, and picture for the scopes above. Further scopes are available if you need more than the standard profile claims:
phoneadds the user’s phone number.descope.claimsadds the user’s tenants, roles, and permissions in atenantsclaim.descope.custom_claimsadds any custom claims you have configured in Descope.
tenants claim as an object keyed by tenant ID. Each tenant holds nested roles and permissions arrays.
TIB reads group membership from a single top-level claim that holds a string, and splits multiple values on UserGroupSeparator. The nested tenants object does not match that shape. To drive user group mapping from Descope roles, write the roles into a top-level claim as a separated string. Use a Descope Custom Claims flow action or a JWT Template. Then set CustomUserGroupField to that claim name.
Descope signs ID tokens with RS256. Its discovery document advertises no ID token encryption, so the TIB JSON Web Encryption (JWE) configuration does not apply.
Worked Examples
These examples use embedded TIB, so theCallbackBaseURL is the same as the Dashboard or Portal respectively; TIB handles requests on the same host and port.
- Dashboard SSO
- Portal SSO
In this example, Tyk Dashboard is running at With this configuration, registered users (with a Tyk Dashboard user account) get their own permissions; unregistered users fall back to the group specified in In production, present this as a “Log in with Descope” button or link on a custom login page, rather than expecting users to navigate to it directly.See Dashboard SSO for details on session behavior, permissions, and user group mapping.
http://dashboard.example.com on port 3000; replace the example values with your own.Tyk Dashboard configurationsso_default_group_id. See Dashboard SSO for full details.TIB profileThe TIB profile is created via the Tyk Identity Broker API or the Tyk Dashboard UI.- set
Keyto the Descope Project ID - set
Secretto the Descope Access Key - set
DashboardCredentialto the TIB service account’s Dashboard credentials
dashboard.example.com is listed in Approved Domains in your Descope project settings. Descope rejects the callback if the domain is absent.Login URLThis URL initiates the SSO login flow: