Availability
Prerequisites
- Dashboard License: Contact our team to obtain a license or get self-managed trial license by completing the registration on our website.
- Working Tyk Environment: You need access to a running Tyk instance. For setup instructions using Docker, please refer to the Tyk Getting Started Guide.
- Developer Portal Setup with
- Admin access to the Tyk Developer Portal.
- The end user (developer accounts) must exist in the portal.
- Tyk Developer Portal v1.12.0 or later
- API Products, Plans and Catalogue already created and published in the portal.
- The custom token or credential value you want to import.
What we will do
- Create an application in the Developer Portal for the user.
- Add a custom credential to that app.
- Select one or more API Product and the Plan to associate with that credential.
- Save, confirm visibility on the user’s developer portal dashboard, and verify API access.
Watch the video demo on YouTube — a short walkthrough that shows the entire flow (creating an app, importing a custom token, attaching products & plans, and verifying access).
Instructions
Follow these steps to associate products and plans with custom credentials in the Tyk Developer Portal:1. Create Application and Import Custom Credential
- Log in to the Developer Portal as an Administrator.
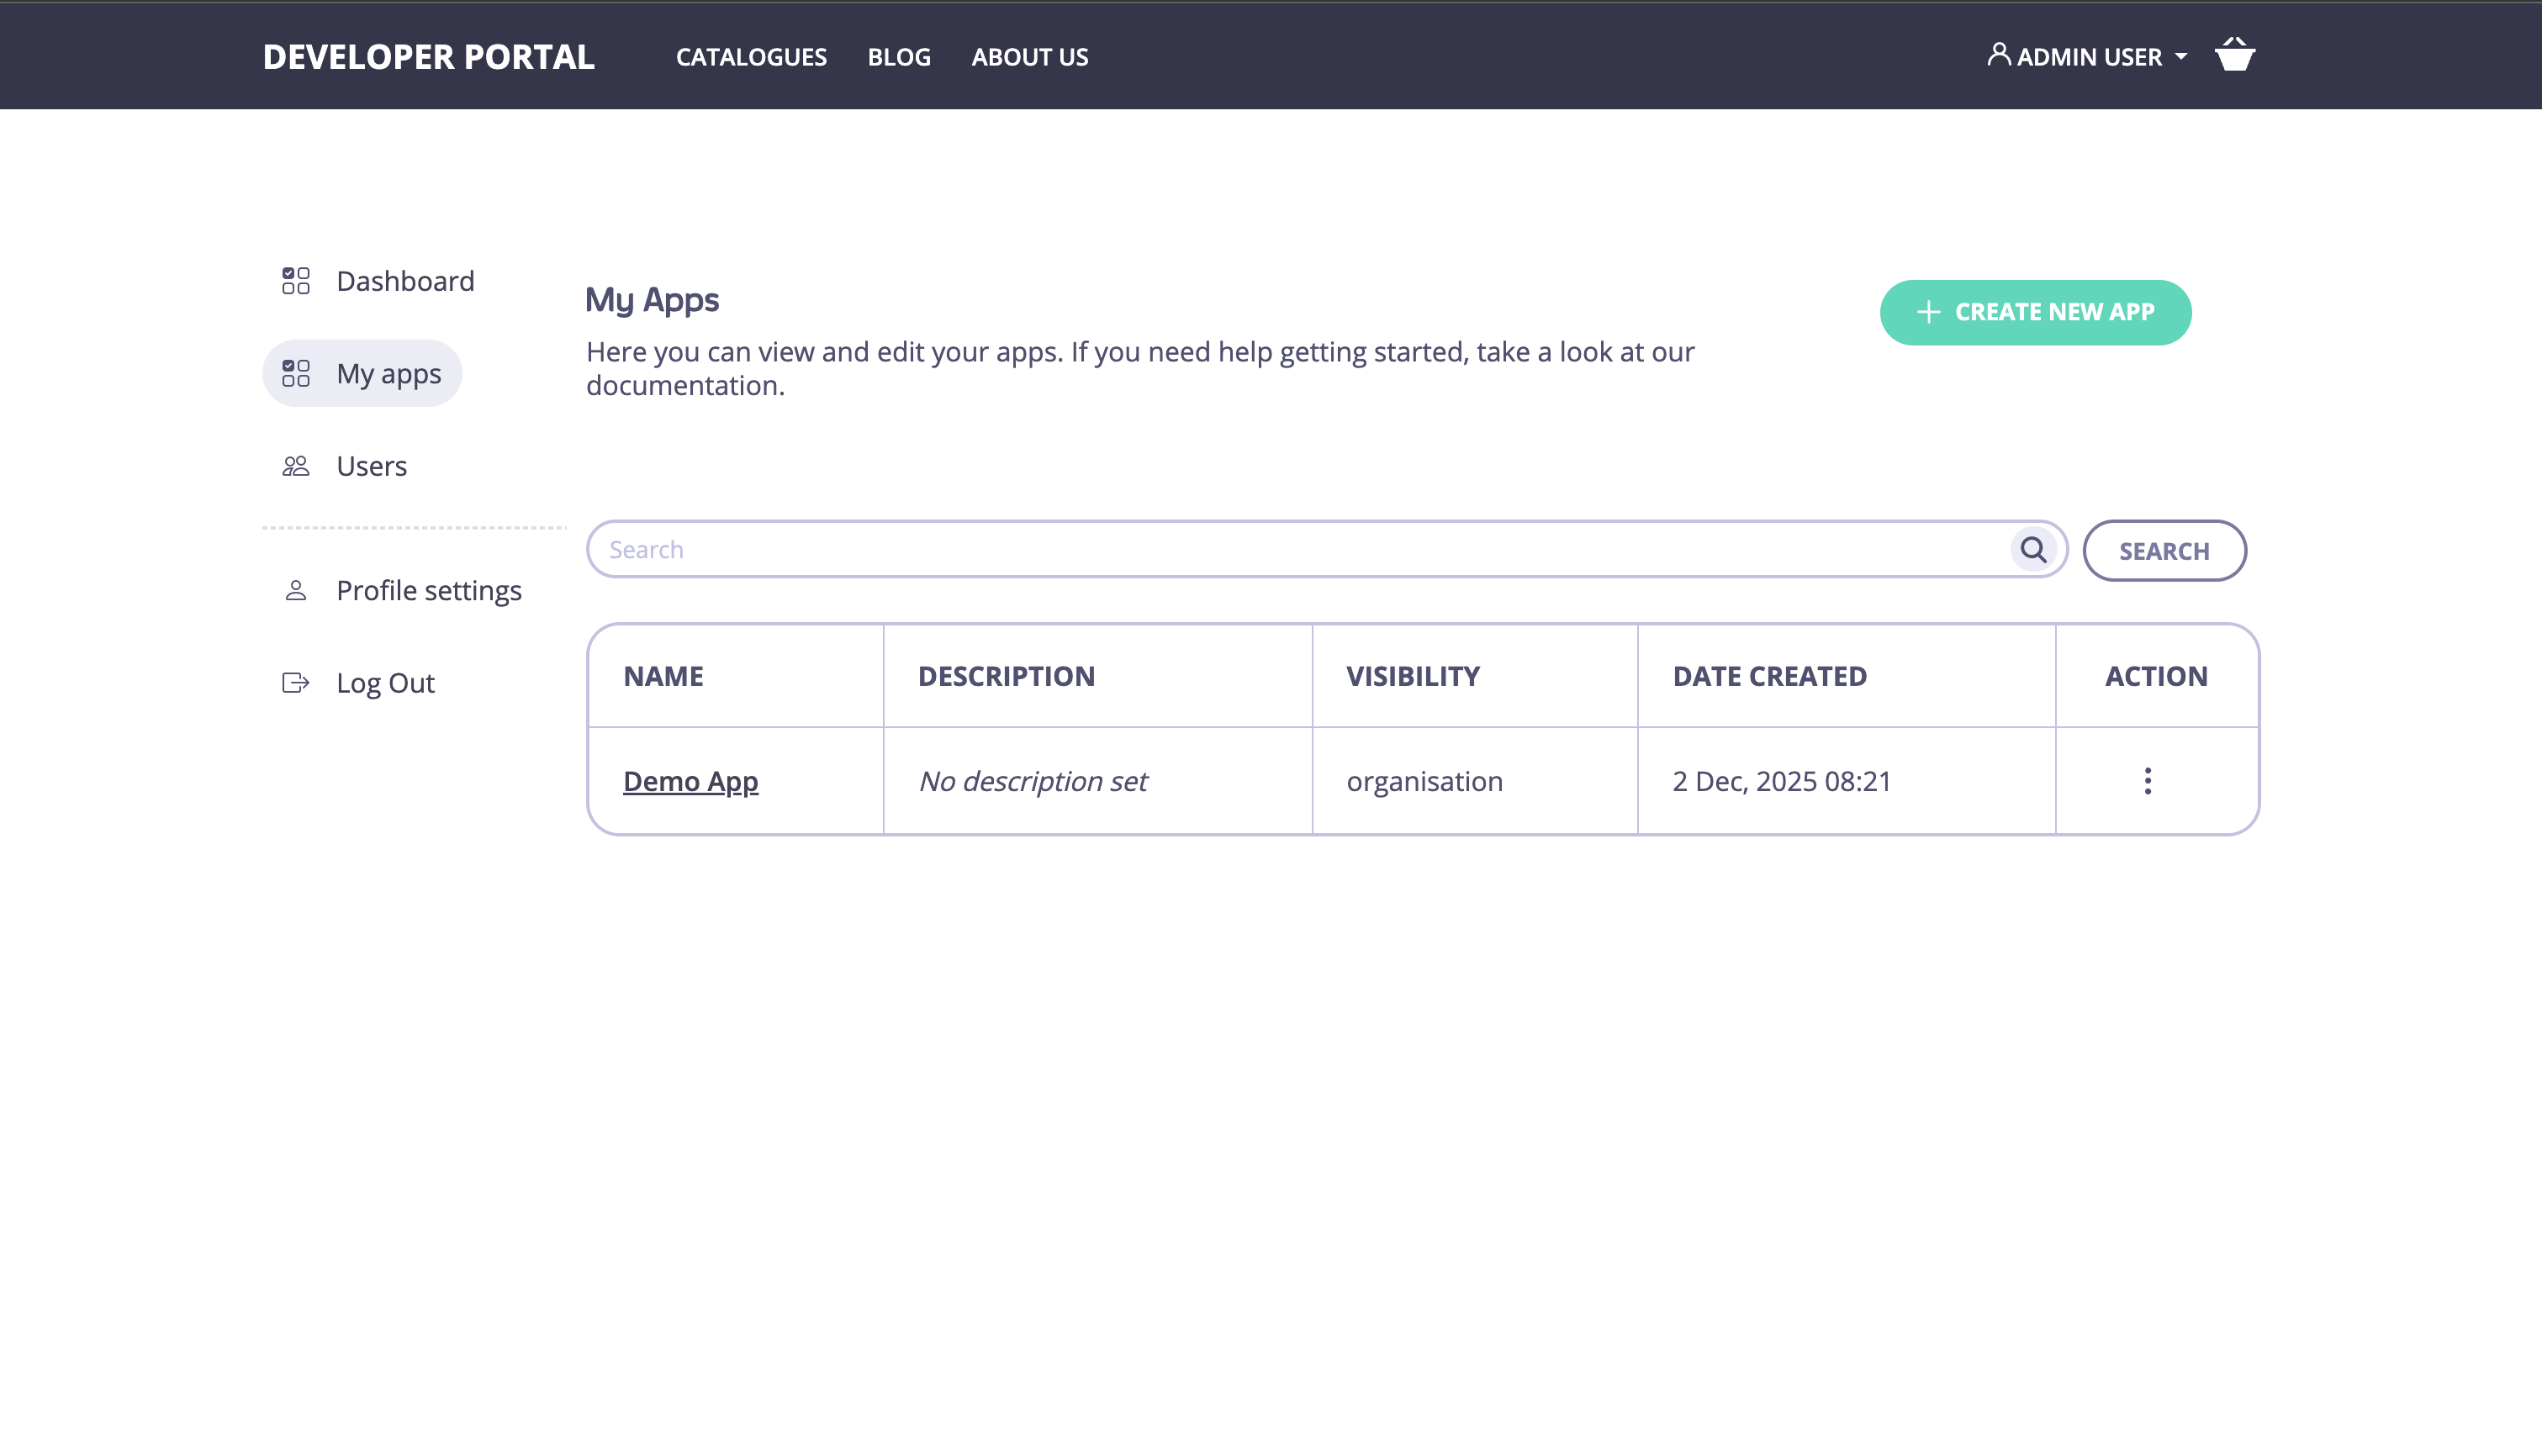
- In the left-hand navigation, go to Apps
-
Click Add New App
- Enter a Name for the application (e.g.,
Demo App). - Select the App Owner that this application belongs to (the developer/customer account).
- Enter a Name for the application (e.g.,
-
Next, click on the Add Credential button.

- Credential alias: descriptive name for the credential (e.g.,
Custom API Token). - Type of Credential: choose Tyk Managed (so the portal can manage the credential metadata).
- Authentication method: select Auth Token.
- Tyk authentication token type: choose Custom (so you can paste your existing token value).
- Key ID: paste the actual token value you are importing.
- Credential alias: descriptive name for the credential (e.g.,
-
Next, in the Access rights section:
- In the same dialog, choose the Plan you want to attach to this credential.
- Select the API Products (one or more) that this credential should provide access to.
- Click Save to create the application.
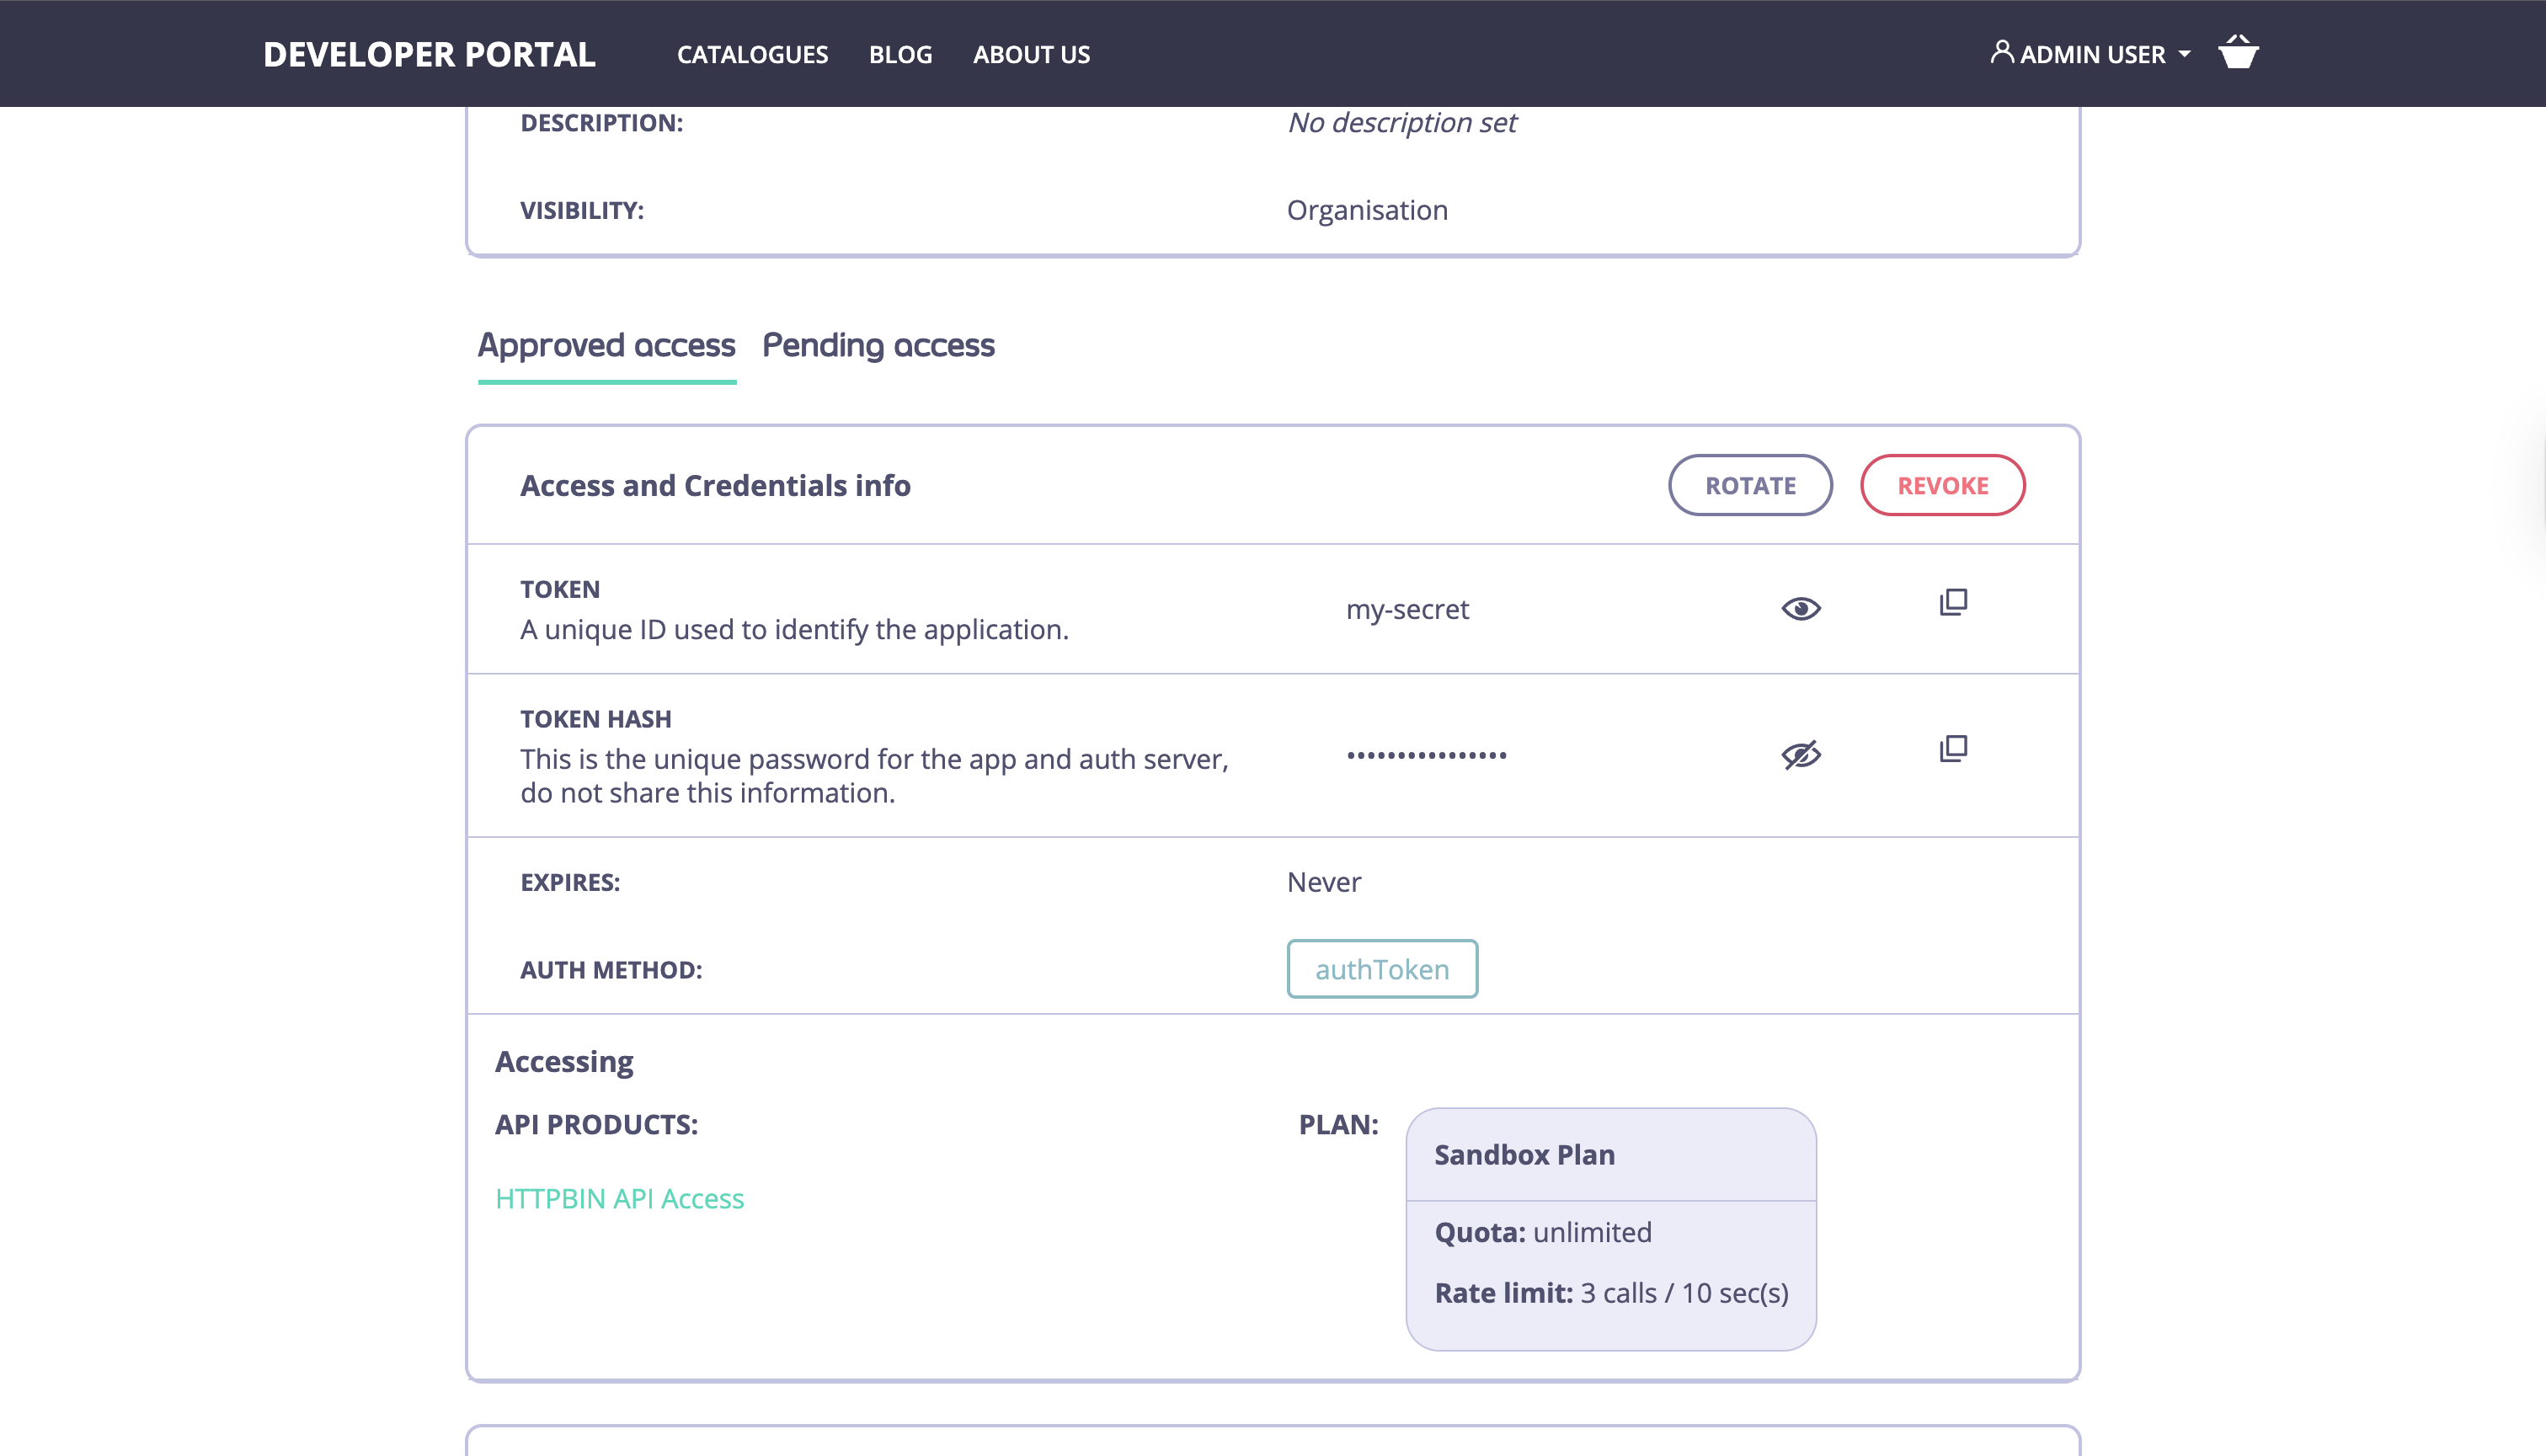
When you add a Tyk Managed Custom Credential, the Developer Portal automatically creates a corresponding API key in the Tyk Dashboard for that credential. You can find this key in the Dashboard, which allows you to manage and monitor its usage alongside other credentials.
2. Verify in Live Portal
- Log in to the developer portal as the end user.
-
Go to My Apps, by clicking on your profile icon in the top-right corner and select My Dashboard from the dropdown.
-
Open the created Application (Demo App), now the user can view:
- The imported custom token.
- Products associated with the credential and click into them to view OpenAPI specs, Graph explorer, or other product details.
- The Plan details (rate limits, quotas) should be visible as part of the application/product view so the user understands limits that apply to their token.
3. Verify API access
The exact header and method depend on how your gateway expects the token (Authorization header, X-API-Key, etc.). Example (replaceCUSTOM_KEY and https://api.example.com/endpoint with your values):
Import Custom Credentials via API
If you have a large number of users and tokens to import, you can replicate the workflow above programmatically using the Tyk Developer Portal APIs.-
Use the Create Application API to create the application for the user.
-
Use the Add Credential to Application API to add the custom credential, specifying the token value, and associating the desired products and plan.