Availability
GraphQL Server URL auto-population and Universal Data Graph (UDG) support require v1.16.0 or later.
Overview
You can add a GraphQL Schema Definition Language (SDL) file to an API Product to enable the interactive GraphQL Playground in the Live Portal. Consumers with approved access can write and execute queries directly from the Portal, with their credentials automatically pre-populated in the Playground headers.Prerequisites
- Developer Portal v1.15.0 or later
- A working Tyk environment with Tyk Gateway and Tyk Dashboard
- A GraphQL SDL schema file in
.graphql,.graphqls,.gql, or.jsonformat
Add GraphQL Documentation to an API Product
-
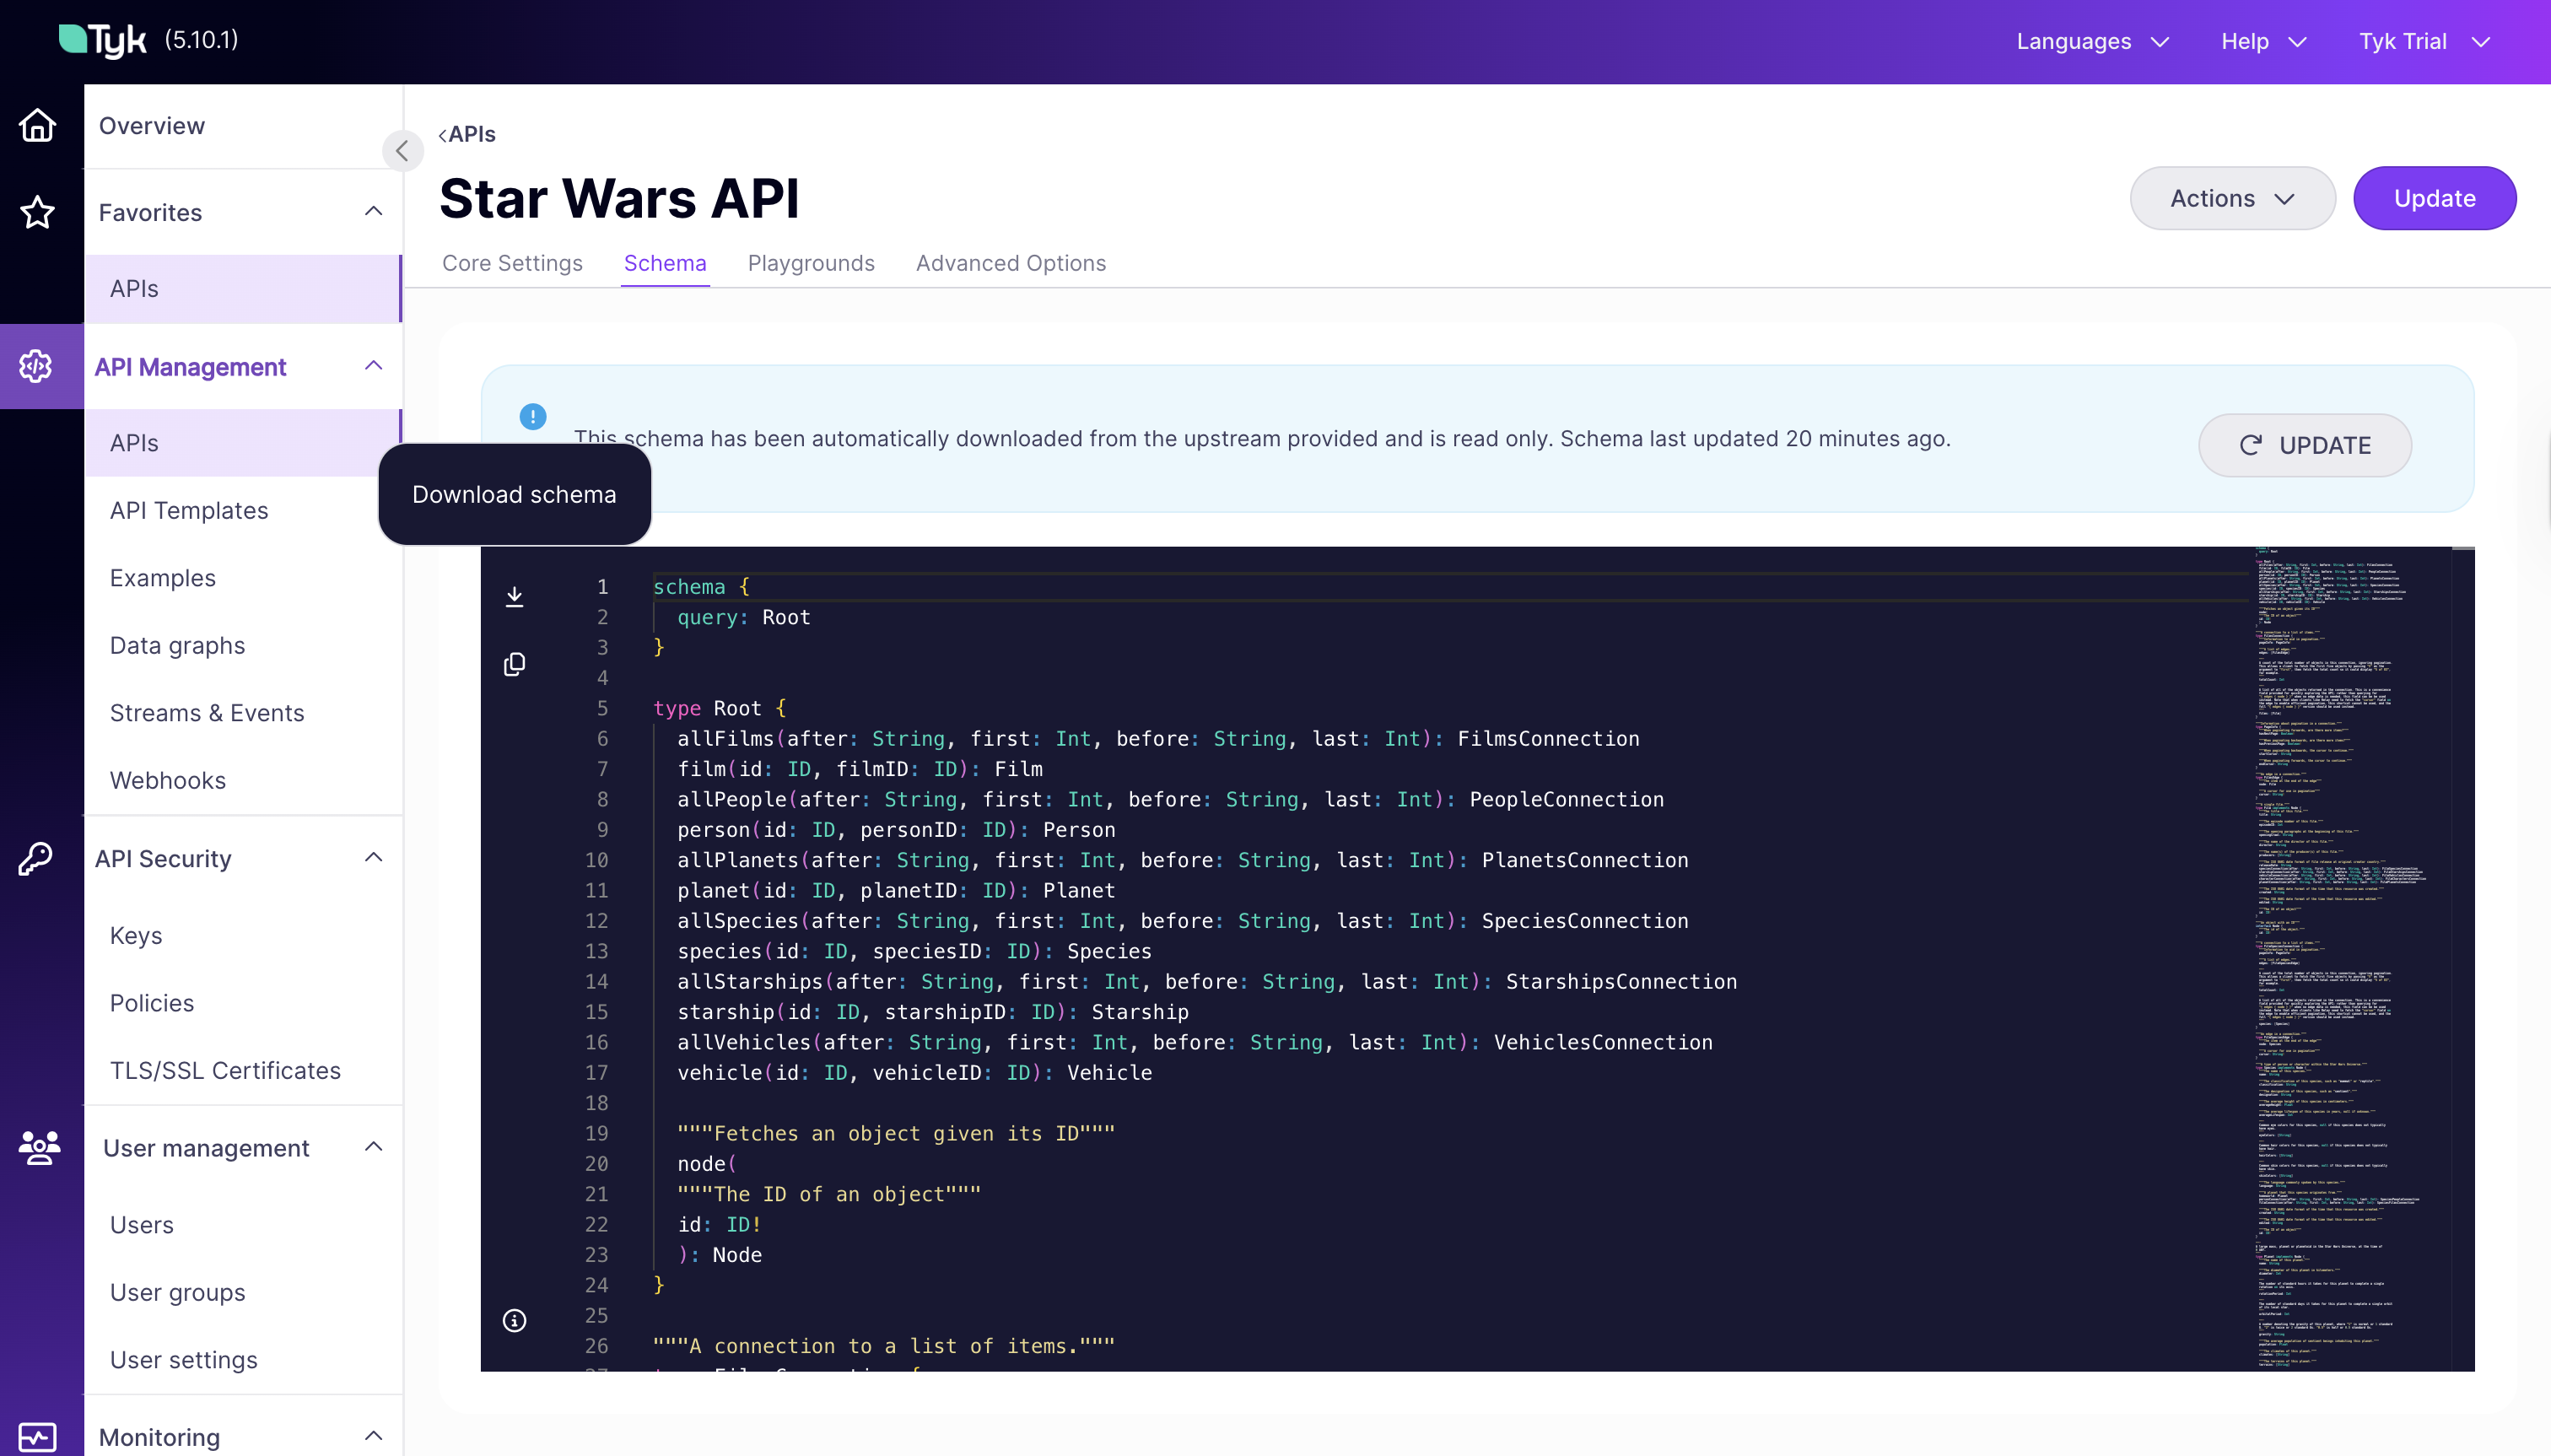
Create a test GraphQL API
If you don’t have an existing GraphQL API, use the built-in Star Wars example from the Tyk Dashboard:
- Navigate to APIs > Add New API, click Try example, select Star Wars GQL API, and click Use Example
- Copy the Key ID from the confirmation pop-up and save it; you will use this as the auth header when testing in the Playground
- Go to the Schema tab of the newly created API and download the schema file; you will upload this as the SDL file in step 5
- Navigate to Developer Portal > API Products and create a new API Product.
-
On the APIs tab, select your GraphQL API:
- Choose a Provider: select the Tyk Dashboard Provider
- Choose authentication method: match the authentication configured on your GraphQL API
- Select APIs: check your GraphQL API from the list
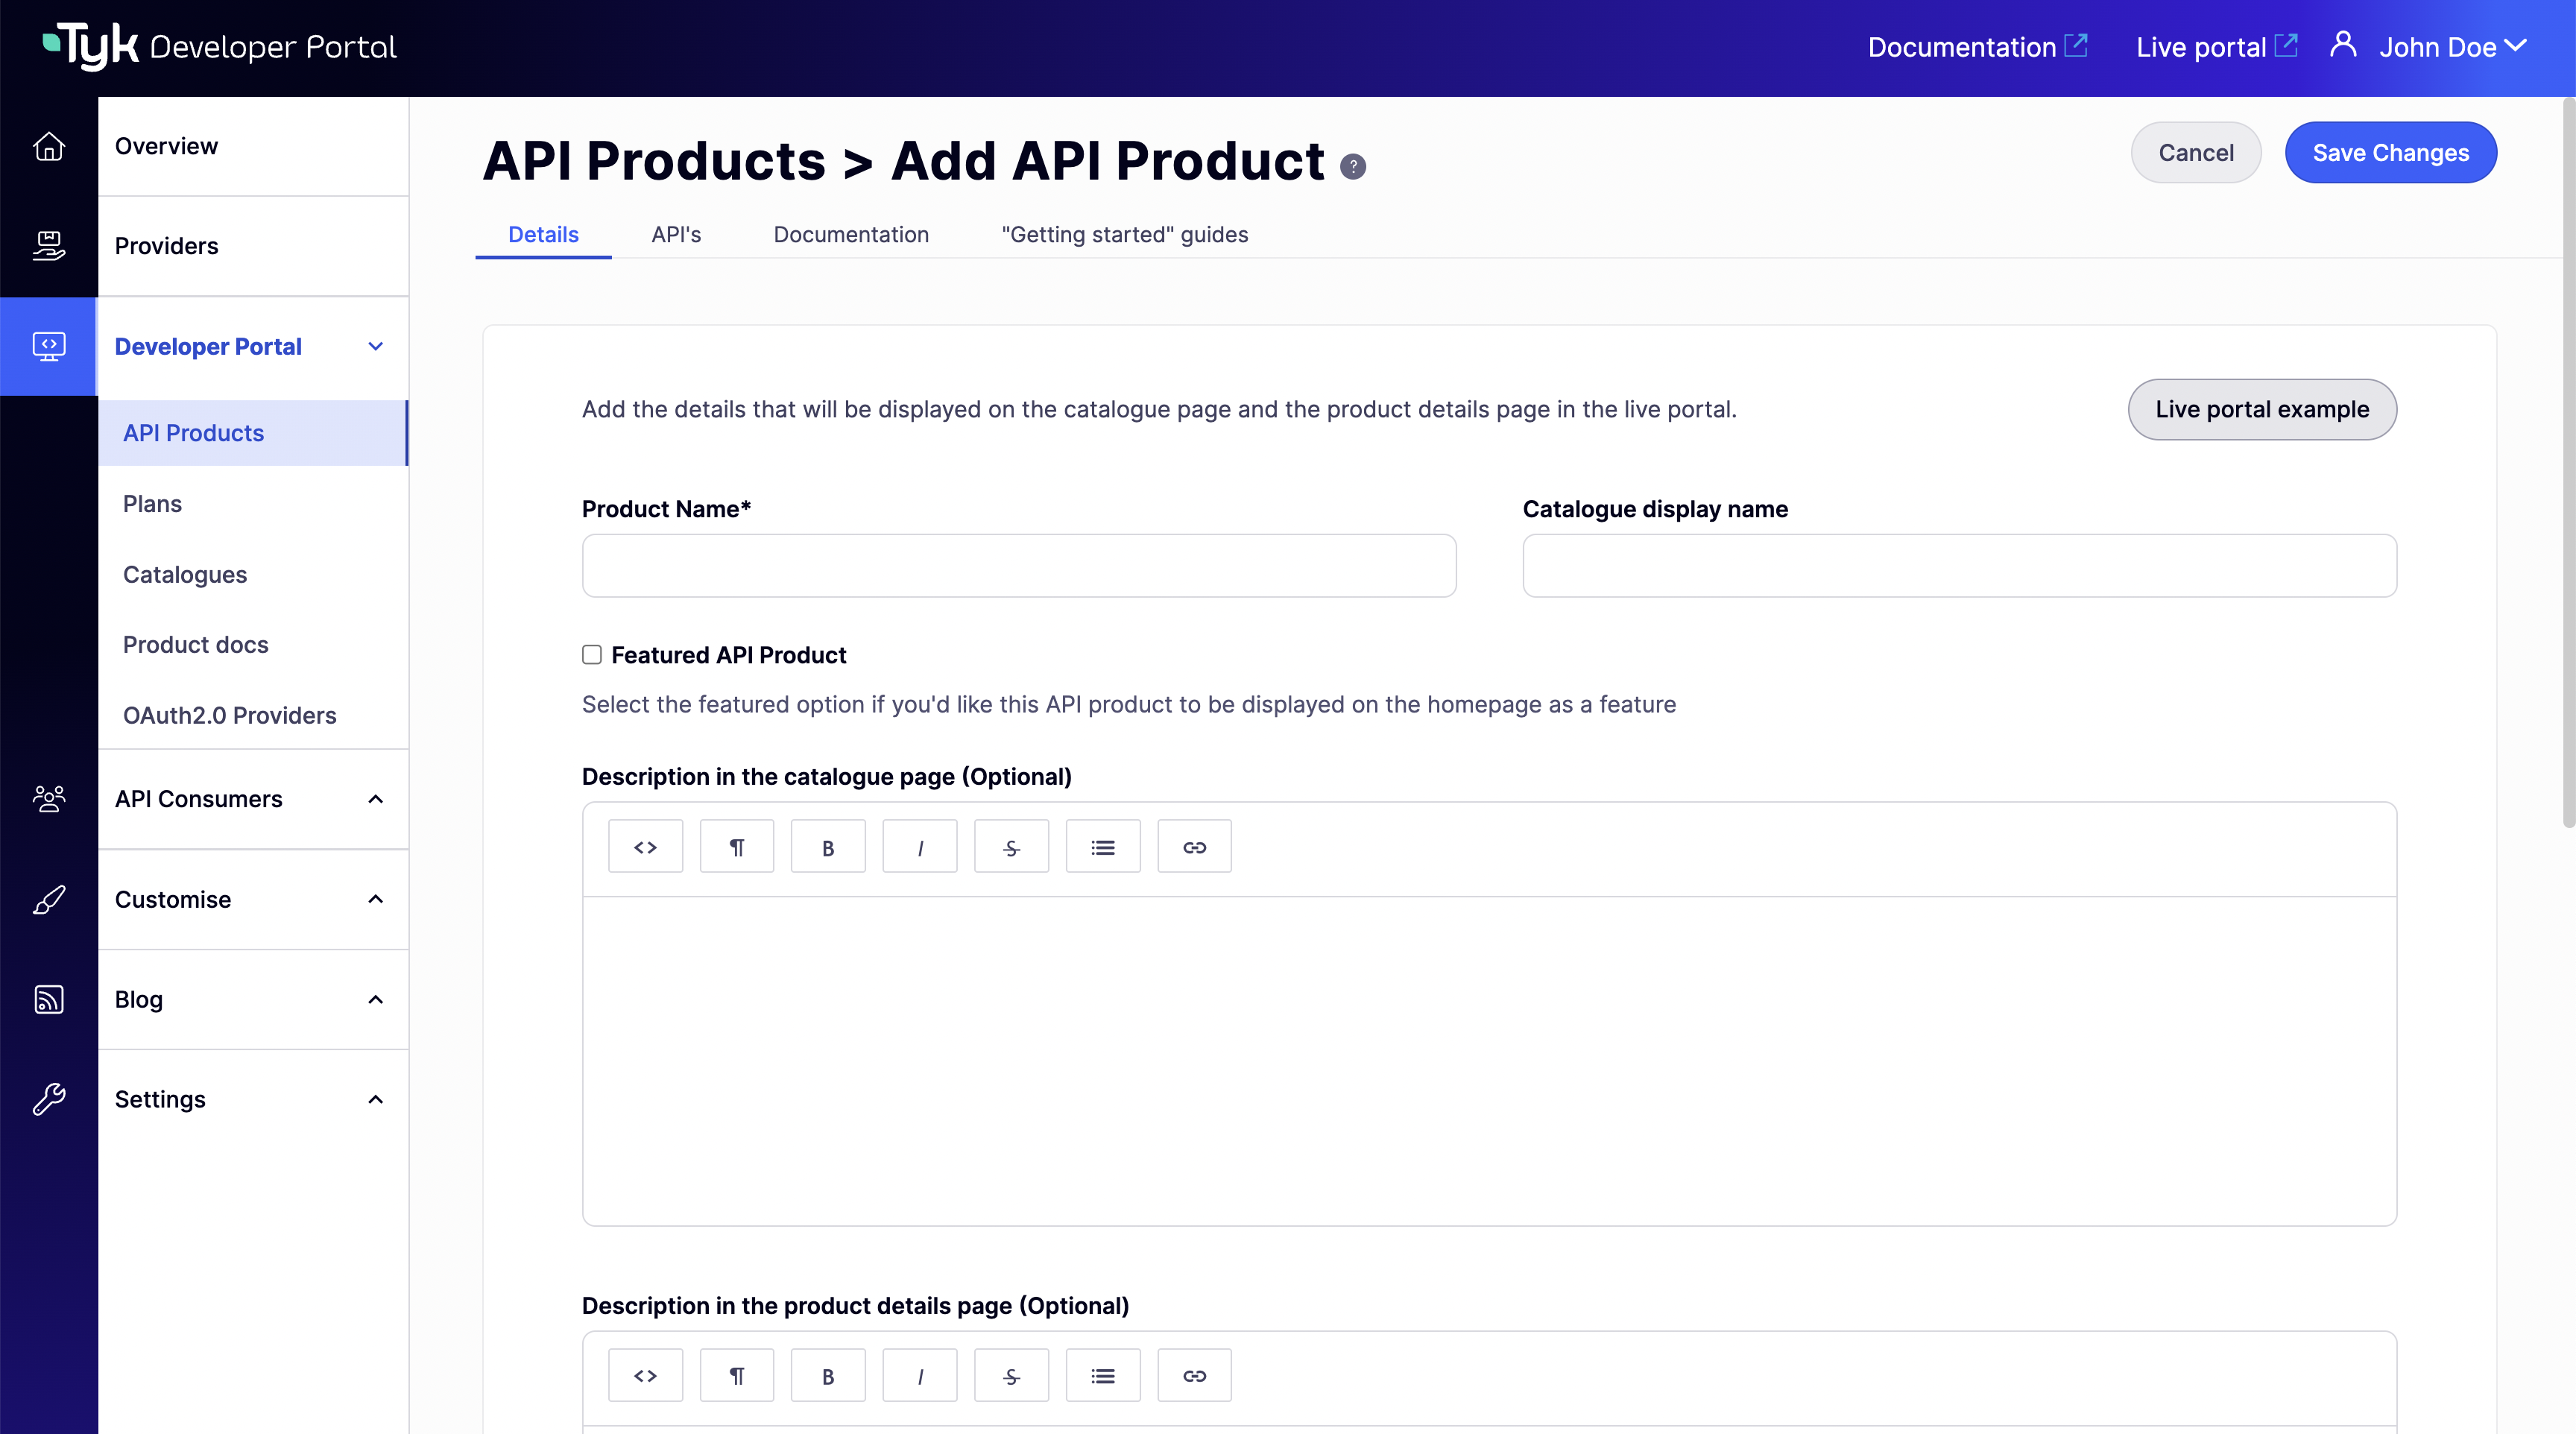
- Go to the Documentation tab and click Add API specification.
-
Set the specification type to GraphQL SDL, then upload your schema file.
Accepted formats are
.graphql,.graphqls,.gql, and.json.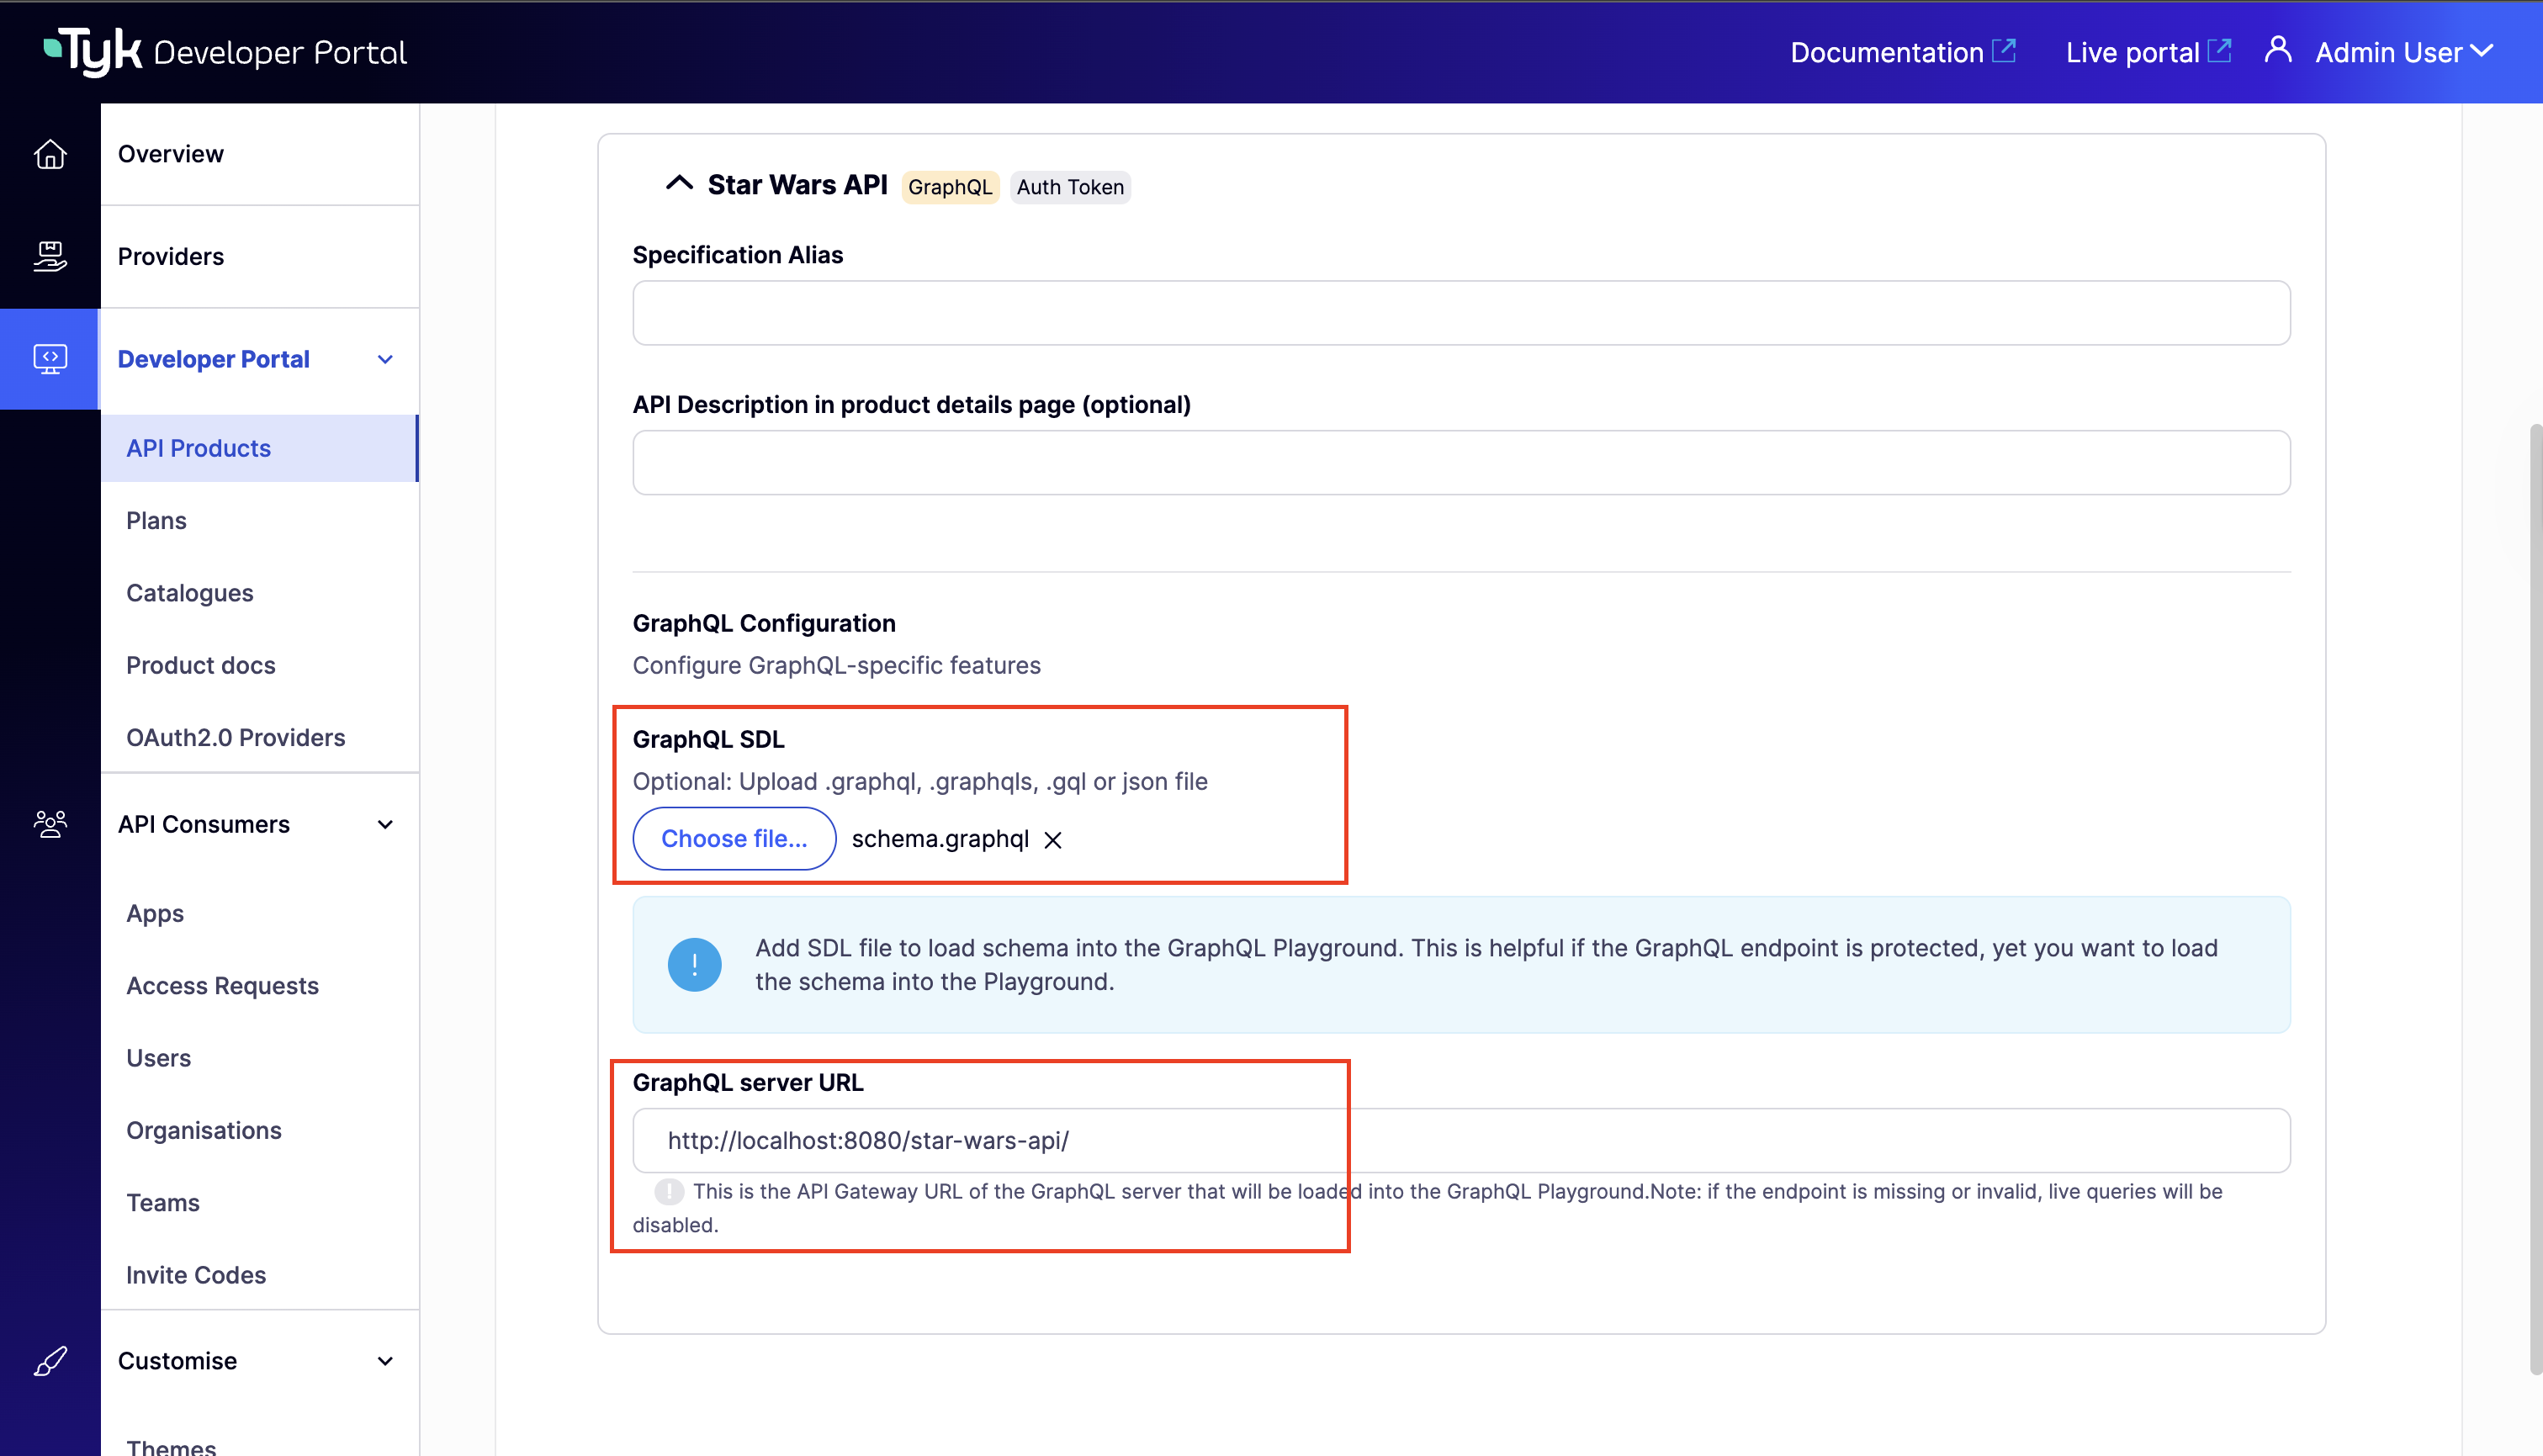
-
Set the GraphQL Server URL to the live endpoint of your GraphQL API on the Tyk Gateway (for example,
http://gateway.example.com/my-graphql-api/). From v1.16.0, this is auto-populated from the Provider’s Gateway Base URL and the API’s listen path; you can always edit the value manually.The URL must end with a trailing slash. A missing trailing slash causes a 404 error in the Playground. - Click Save Changes.
-
Open your Live Portal, go to Product Catalogues, locate the product, and click Docs.
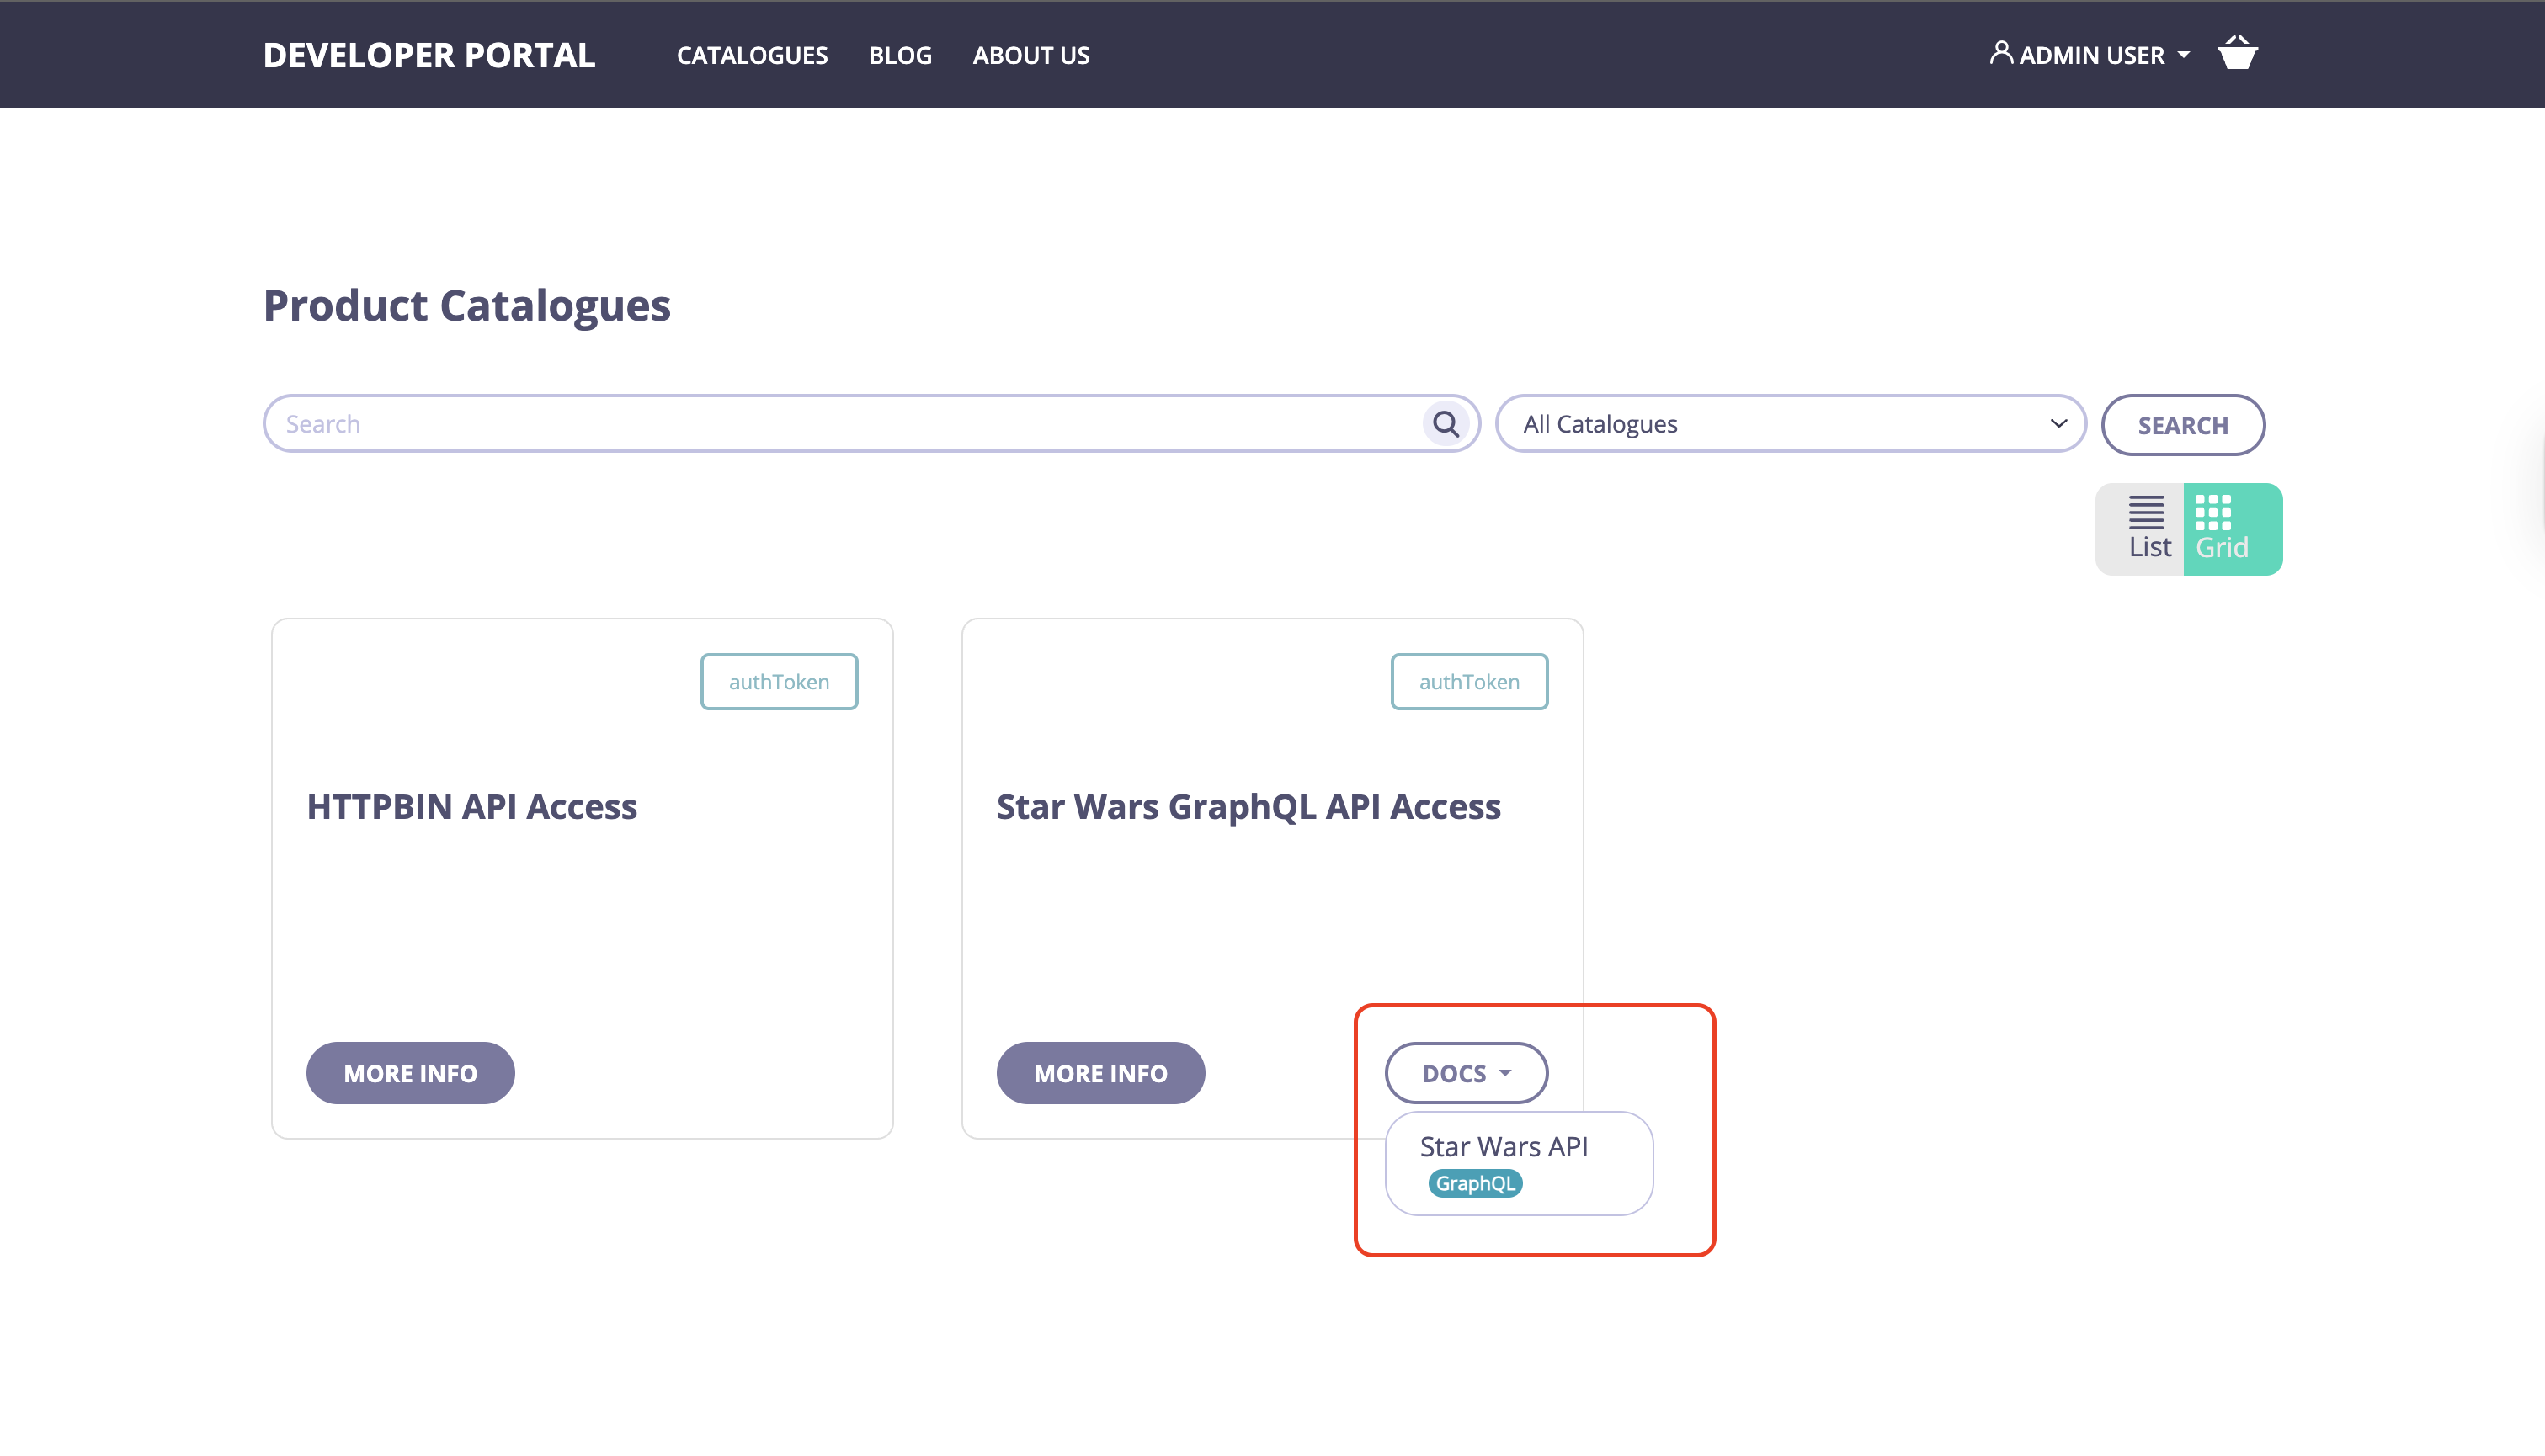
-
You should now see the GraphQL Playground, ready for interactive query testing.
To test authenticated APIs, set the required headers in the Playground. The Star Wars GQL API uses Auth Token authentication.Add the
Authorizationheader using the Key ID you saved in step 1:TheBearerprefix is optional, Tyk Gateway strips it automatically if present. The exact header name depends on your API’s authentication configuration.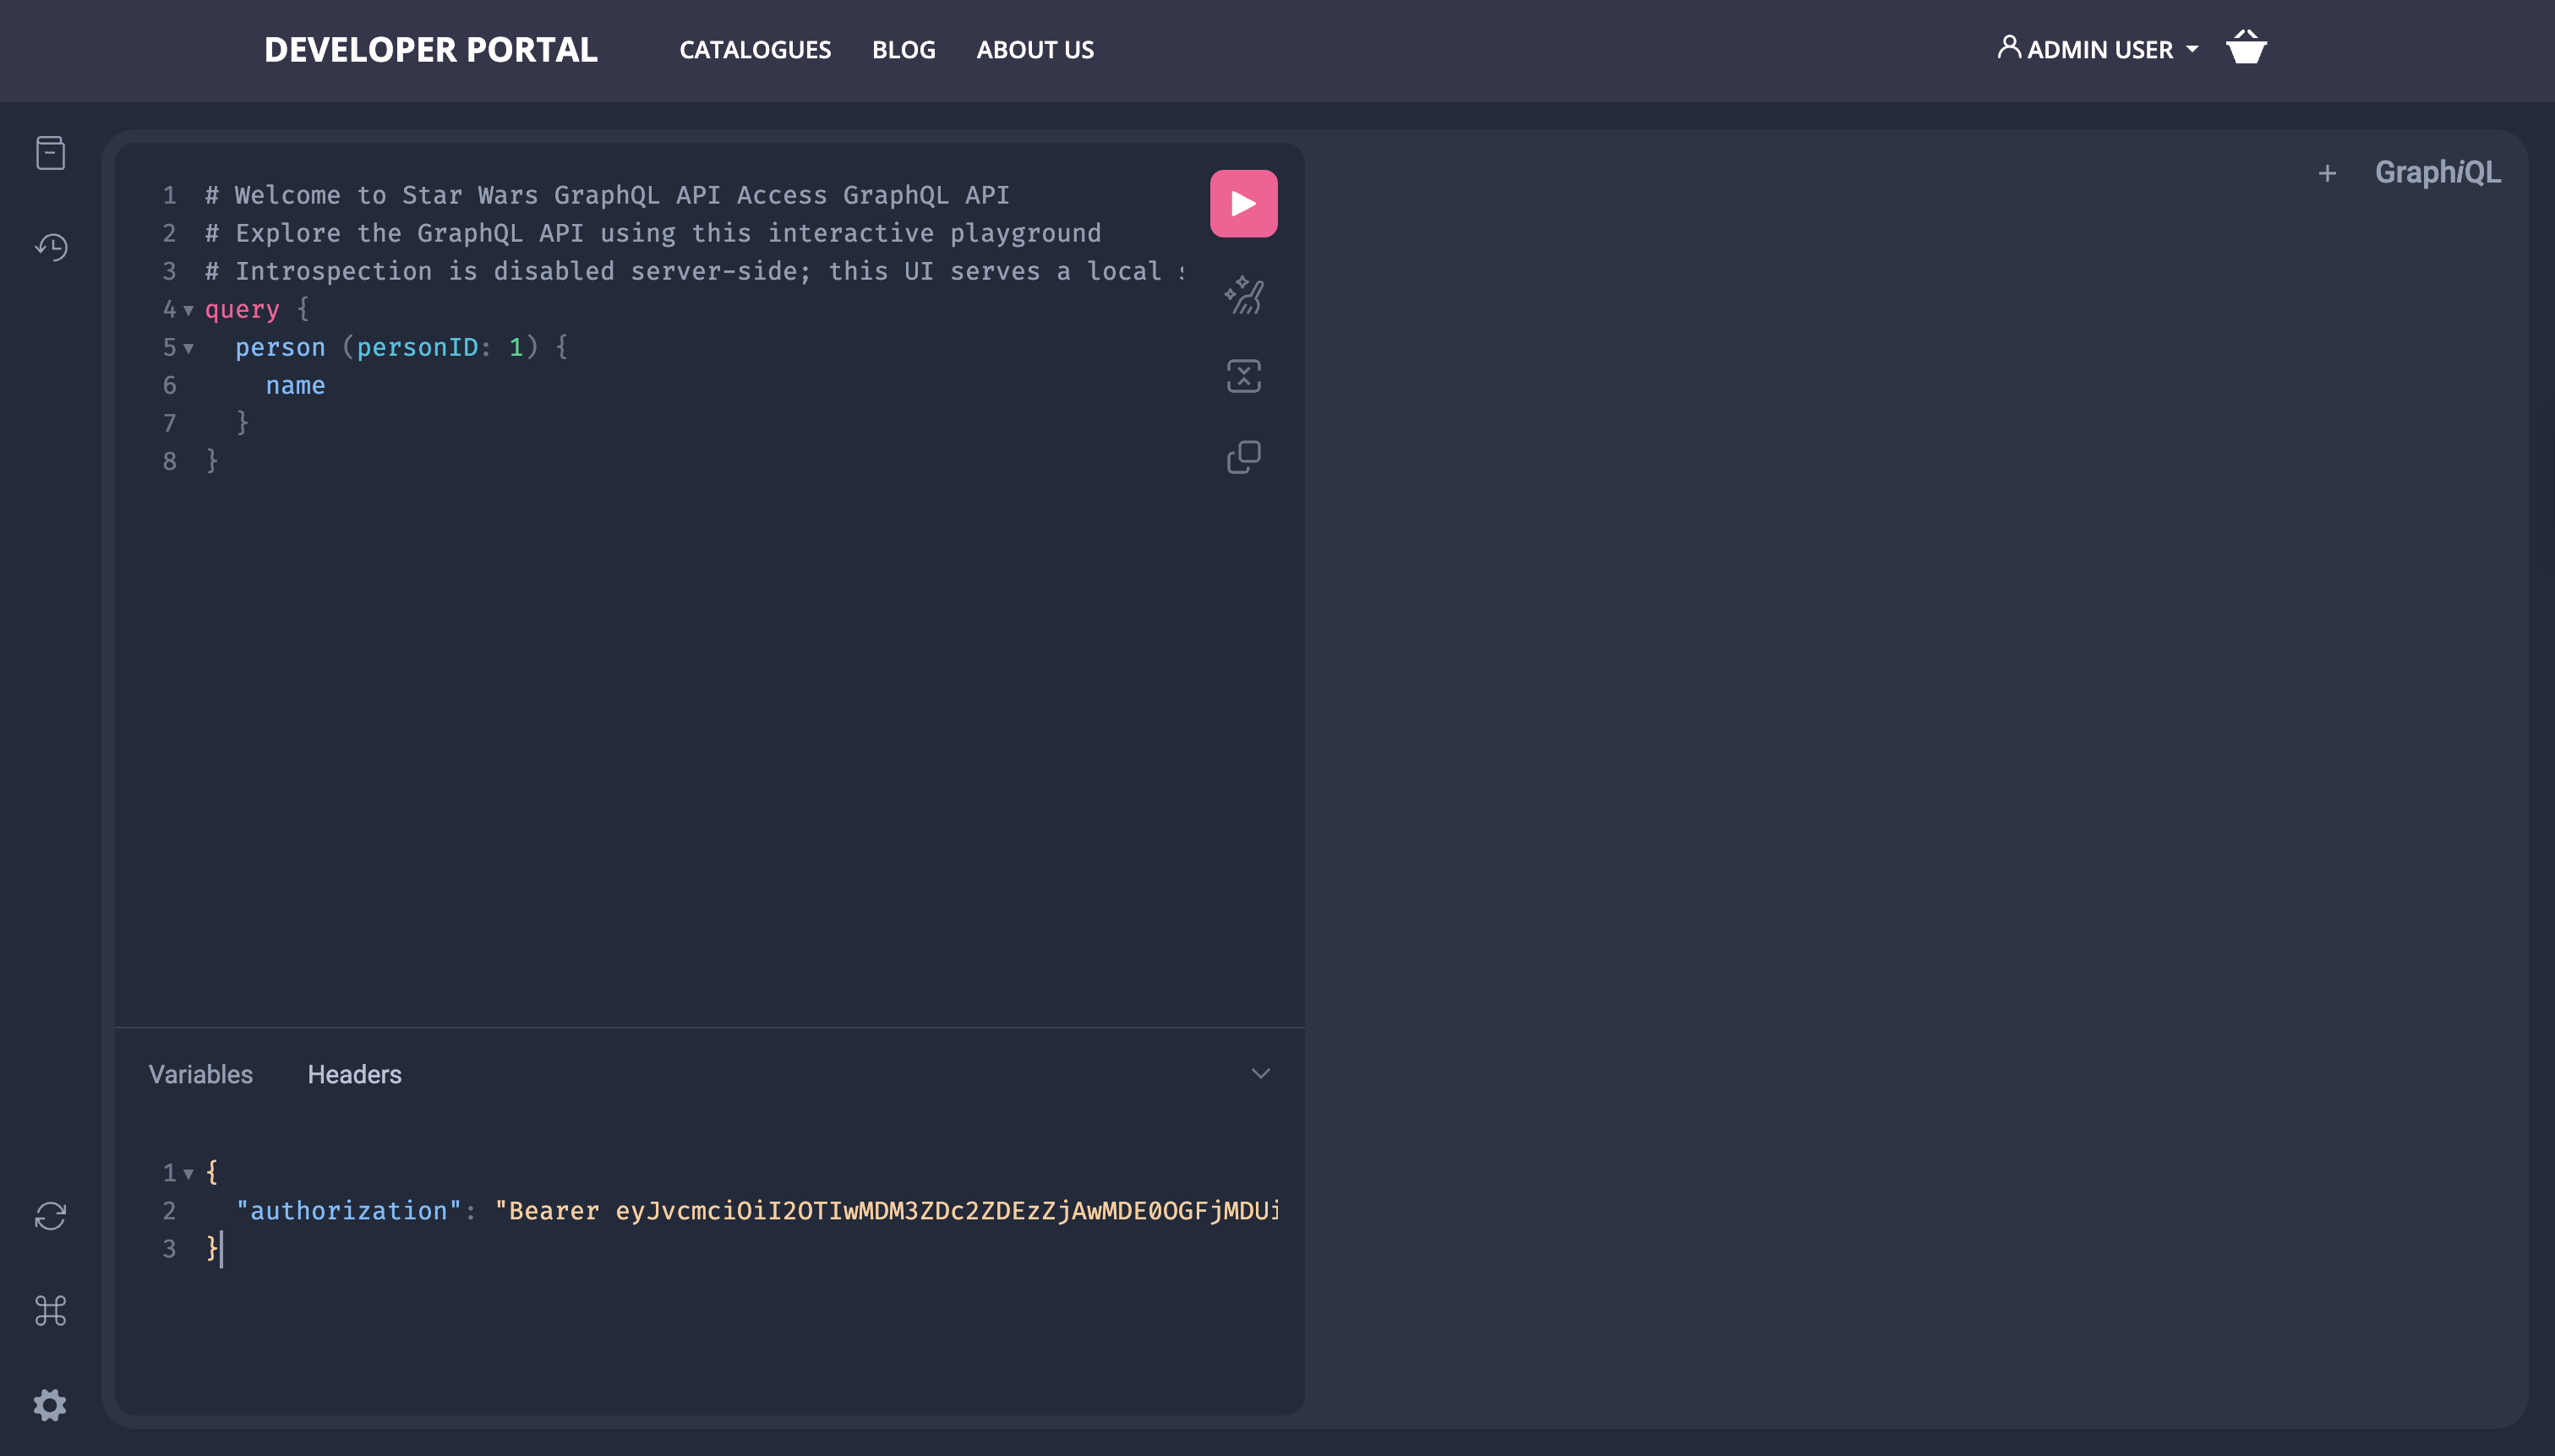
GraphQL Server URL and Baseline URL
The GraphQL Server URL is the endpoint the Playground sends queries to. It must point to your GraphQL API on the Tyk Gateway. From v1.16.0, the Developer Portal automatically constructs this URL from two values:https://gateway.example.com). Set it in Admin Portal > Providers > [your provider] > Baseline URL.
If the Gateway Base URL is not configured, the server URL field displays <<gateway url>>. Enter the full URL manually before saving.
SDL and Introspection Behavior
GraphQL introspection is a built-in feature that allows clients to query an API’s schema to discover its available types and operations. The Playground uses introspection to display the schema when no SDL file has been uploaded. The Playground loads its schema in the following order:
For APIs that require authentication, uploading an SDL file is strongly recommended. Introspection is blocked on protected endpoints, and without an SDL file the Playground will fall back to read-only mode.
Universal Data Graph APIs
From v1.16.0, Universal Data Graph (UDG) APIs appear alongside standard GraphQL APIs in the API selection list. Configure the Documentation tab for a UDG API the same way: upload the SDL file and set the GraphQL Server URL. Limitation: REST data sources in a UDG API do not support GraphQL subscriptions. Subscription operations will not be available in the Playground for those data sources.Credential Injection in the Playground
When an API Consumer’s Developer App has been approved to access a Product, their credentials are automatically pre-populated in the Playground’s HTTP headers. No additional configuration is required. The header format matches the authentication scheme of the APIs in the Product. For example, for an Auth Token API:Troubleshooting
404 GraphQL API Not Found error in the Playground
404 GraphQL API Not Found error in the Playground
The Playground cannot locate your GraphQL API endpoint.Ensure the GraphQL Server URL ends with a trailing slash. For example, use
http://localhost:8080/my-graphql-api/ not http://localhost:8080/my-graphql-api.You can find the correct endpoint URL in the Core Settings tab of your GraphQL API in Tyk Dashboard."Failed to fetch" error in the Playground
"Failed to fetch" error in the Playground
This error is caused by CORS (Cross-Origin Resource Sharing) restrictions on the API. The browser blocks requests from the Live Portal origin to the Gateway.Add the following CORS configuration to your GraphQL API definition, replacing the
allowed_origins value with the URL of your Live Portal:Playground is in read-only mode
Playground is in read-only mode
The Playground enters read-only mode when no SDL file has been uploaded and live introspection of the endpoint fails.To resolve this, try one of the following:
- Upload a GraphQL SDL file on the Documentation tab of the API Product.
- Verify the GraphQL Server URL is correct and reachable from the Portal server.
- If the API requires authentication, upload an SDL file; introspection is blocked on authenticated endpoints.