Introduction
Once you have installed your Developer Portal, you’ll need to connect it to a Provider (Tyk Dashboard) so that it can synchronise API Products and Subscription Plans to appear in your Catalog. You can use a single Developer Portal to publish Catalogs from multiple Providers. In this section we’ll take you through the steps to connect to a single Tyk Dashboard installation.Registering the Developer Portal with Tyk Dashboard
Tyk Dashboard exposes a management API with a user management system that performs fine-grained Role Based Access Control (RBAC). The Developer Portal uses this API to configure and control security policies on the Dashboard. These policies implement the Developer Portal’s API Products and Plans, and are used in the creation and maintenance of access credentials for API Consumers. The Developer Portal thus needs access to the Tyk Dashboard API, so you will need to create a dedicated user on your Tyk Dashboard, following the steps indicated here. Ensure that this user has the following permissions:Locating the Access Credentials in Tyk Dashboard
- Select Users from the User Management section.
- In the users list, click Edit for the user you have created for the Developer Portal
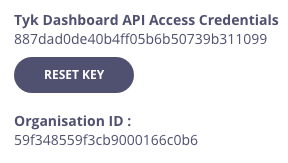
- The Secret is the Tyk Dashboard API Access Credentials
- If required, the Organization ID is underneath Reset key
Configuring the Provider
- Go to the Provider section in the Admin Portal
- Click Add new Provider
- Add your provider details
- Click Save Changes
Testing the Connection
After creating the Provider in your Developer Portal you can test the connection by clicking on Synchronize on the Providers screen in the Admin Portal. This will display a confirmation message if the connection is made successfully, pulling any policies relating to Products and Plans (with the appropriate Policy tags) over to the Portal.Create an Organizational Structure
After connecting your Developer Portal to a Provider, the next step is to set up the organizational structure for your API consumers. This structure determines how external developers will access and interact with your APIs. In this guide, you’ll learn how to create Organisation (Orgs), Teams, and API Consumer Admin users, which form the foundation of your Developer Portal’s access control system. When the Portal was bootstrapped a default org is created; this is intended to act as a backstop for any API Consumer users that have not been assigned to another Organisation; we do not recommend publishing API Products and Plans in the default Organisation. Every Org is automatically provisioned with a default team which, again, is intended as a backstop for any user not assigned to another team. Note that if you remove a User from all teams in an org, they will automatically be assigned to the default Team.Step 1: Create an Organisation
Organisation represent companies or business units that will consume your APIs. Start by creating your first Organisation:- Log in to the Developer Portal using your API Owner credentials
- this will take you to the Admin Portal view
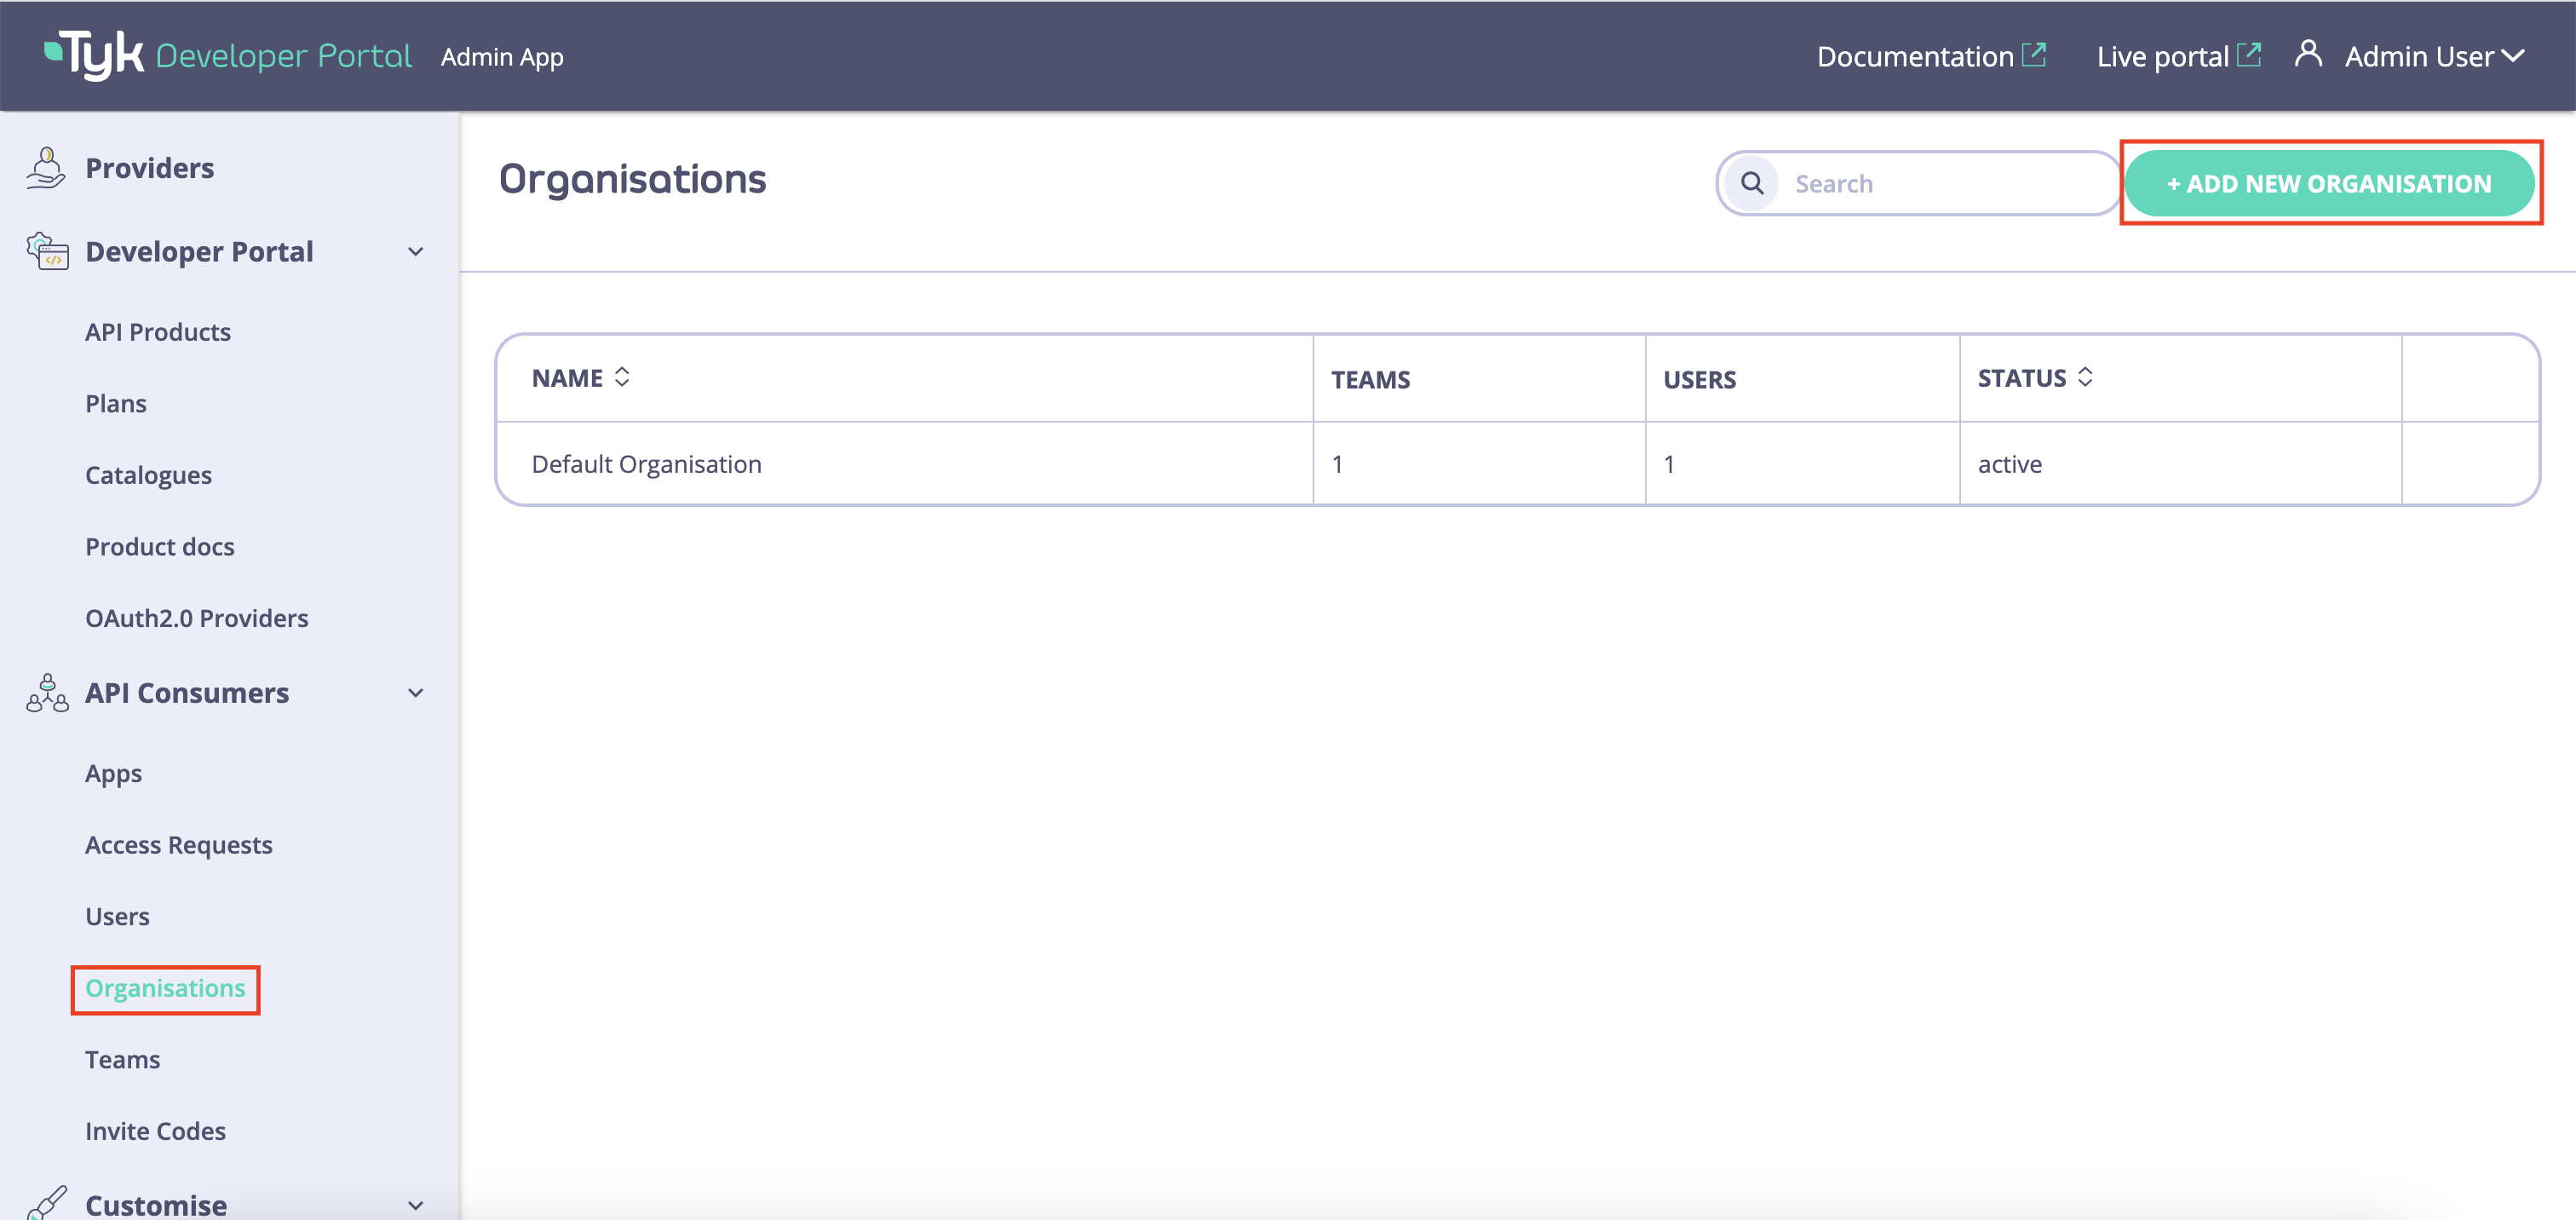
- Navigate to API Consumers > Organisation
- Click Add Organisation
- Enter a Name for the Organisation
- this will only be used within the Admin Portal view to identify the org
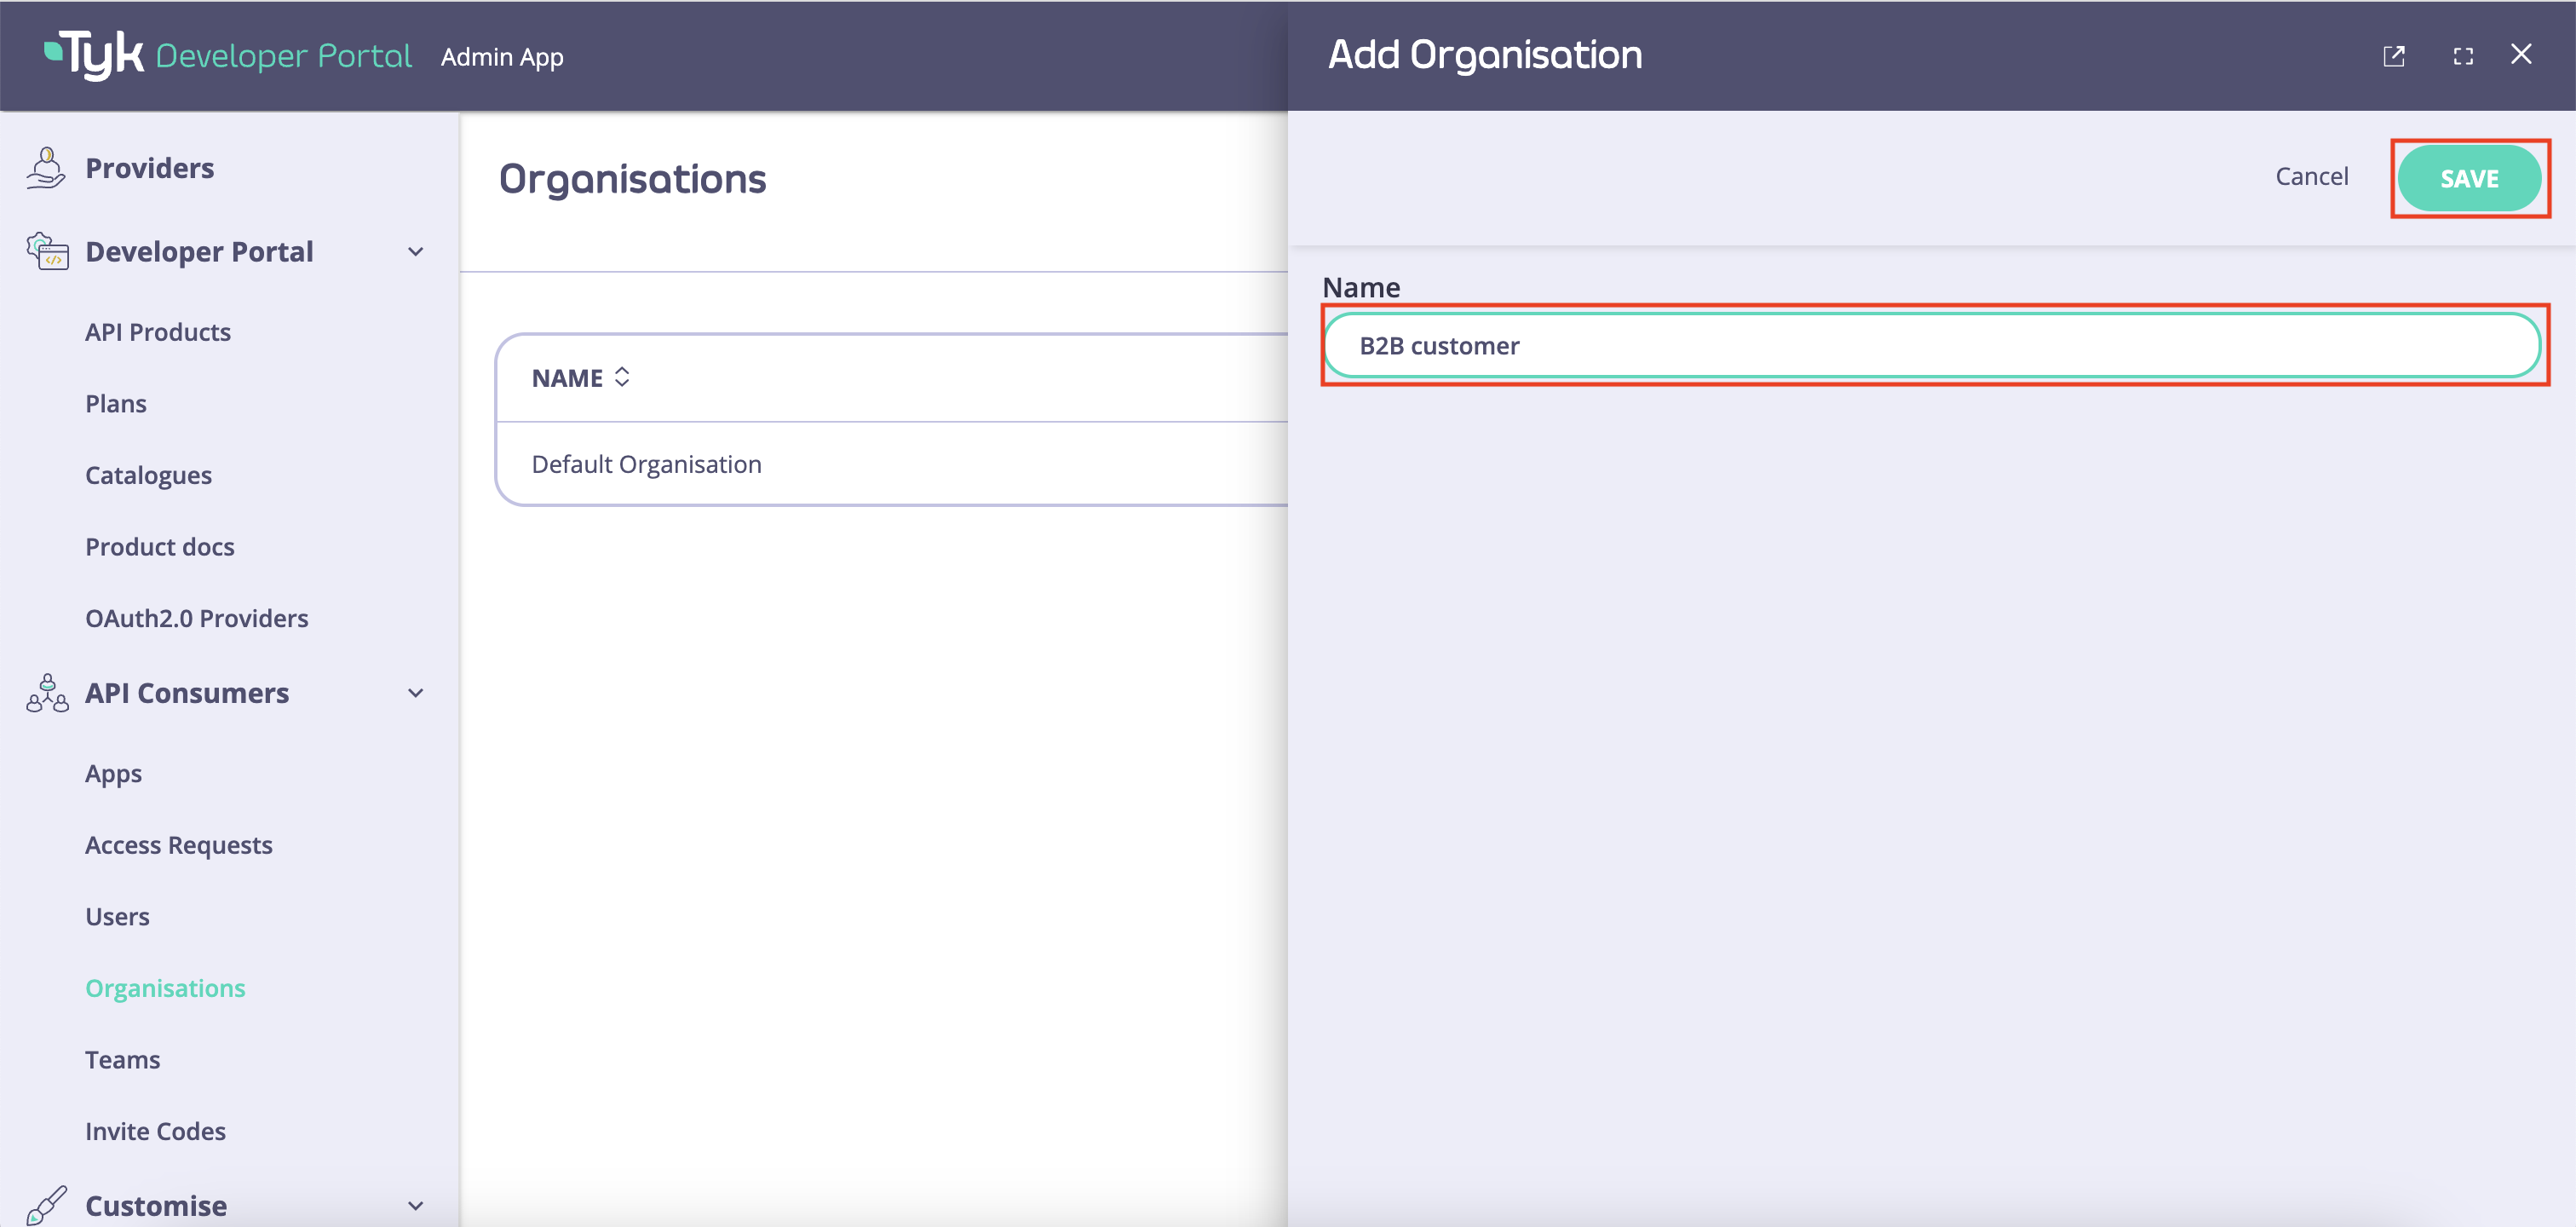
- Click Save Changes
- note that a default team is automatically created within the new org
Step 2: Create a Team Within the Organisation
Teams allow you to group users within an Organisation who need similar API access:- Navigate to API Consumers > Teams
- Click Add new team
- Enter the following details:
- Name: A descriptive name (e.g., “Mobile Developers”)
- Organisation: Select the org that you created in step 1
- Click Save changes
- Repeat this process to create all the teams you need within the Organisation.
Step 3: Create an API Consumer Admin User
API Consumer Admin users have special privileges to manage other users within their Organisation:- Navigate to API Consumers > Users
- Click Add new user
- Enter the user’s details:
- Click Save changes
What’s Next?
Congratulations You have successfully connected your Developer Portal to your Tyk Dashboard provider and created a basic organizational structure for your Developer Portal with an API Consumer Admin user account for your client’s use. Next, you probably want to add some content to the Portal for them to consume. It’s time to create your first API Catalog.Best Practices
- Plan your hierarchy: Design your organizational structure before creating Orgs and Teams
- Use descriptive names: Make Organisation and Team names clear and meaningful
- Start simple: Begin with a basic structure and expand as needed
- Document your structure: Keep a record of your Organisation, Teams, and their purposes
- Regular review: Periodically review and clean up unused Organisation and Teams