- create a new layout.
- create a new template from the file system.
- create a new page from the admin dashboard.
- Access to the file system
- Access to your Tyk Self-Managed installation
Create a New Page using an Existing Template
Follow the example below to create a new page called “My first page” using an existing template.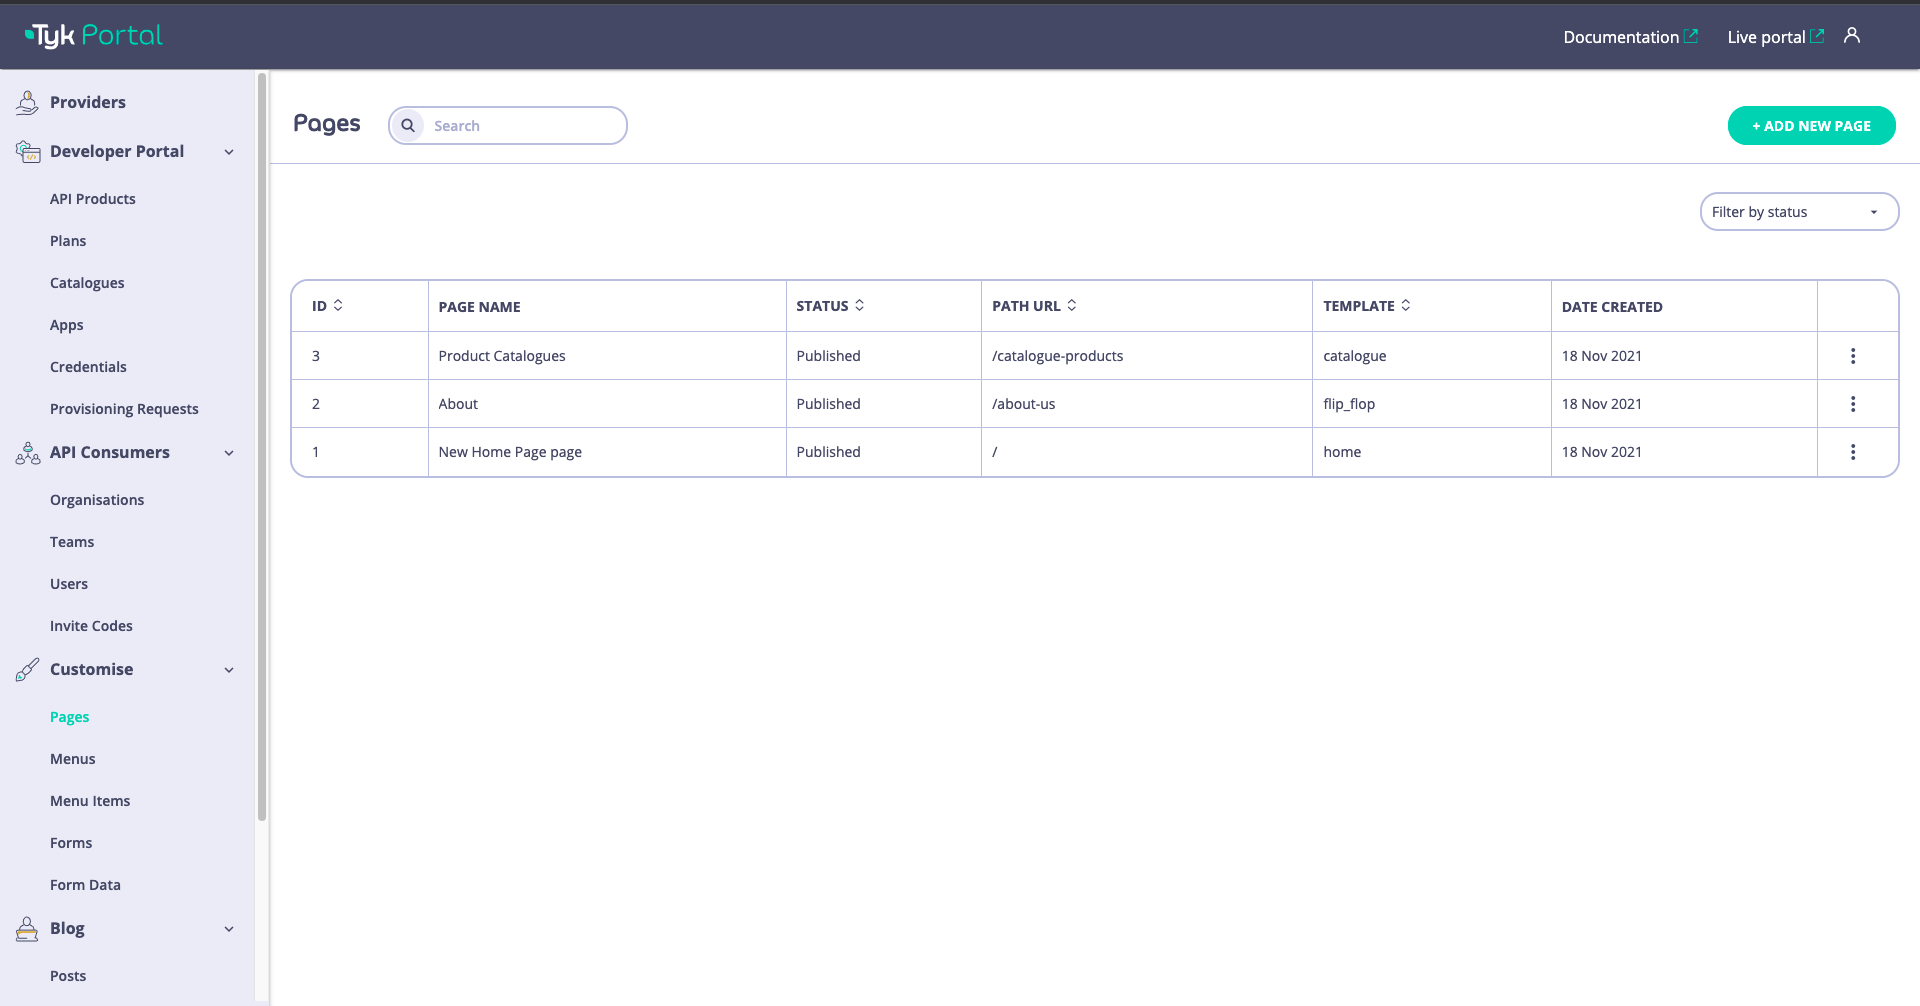
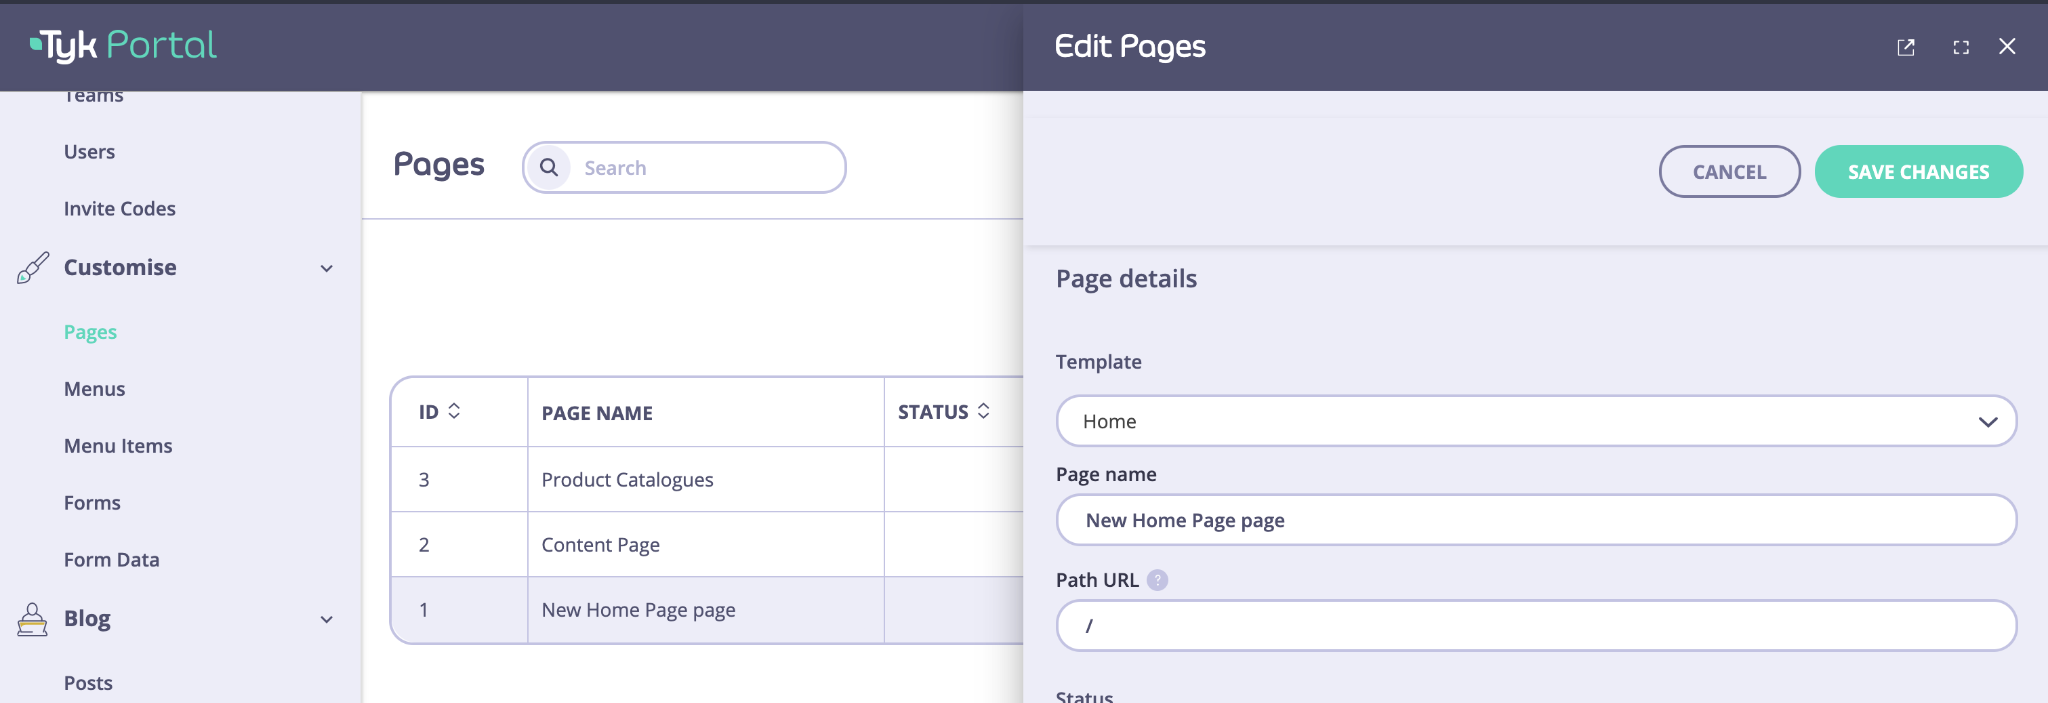
- Log in to the Admin Dashboard.
- Navigate to Pages from the side bar menu.
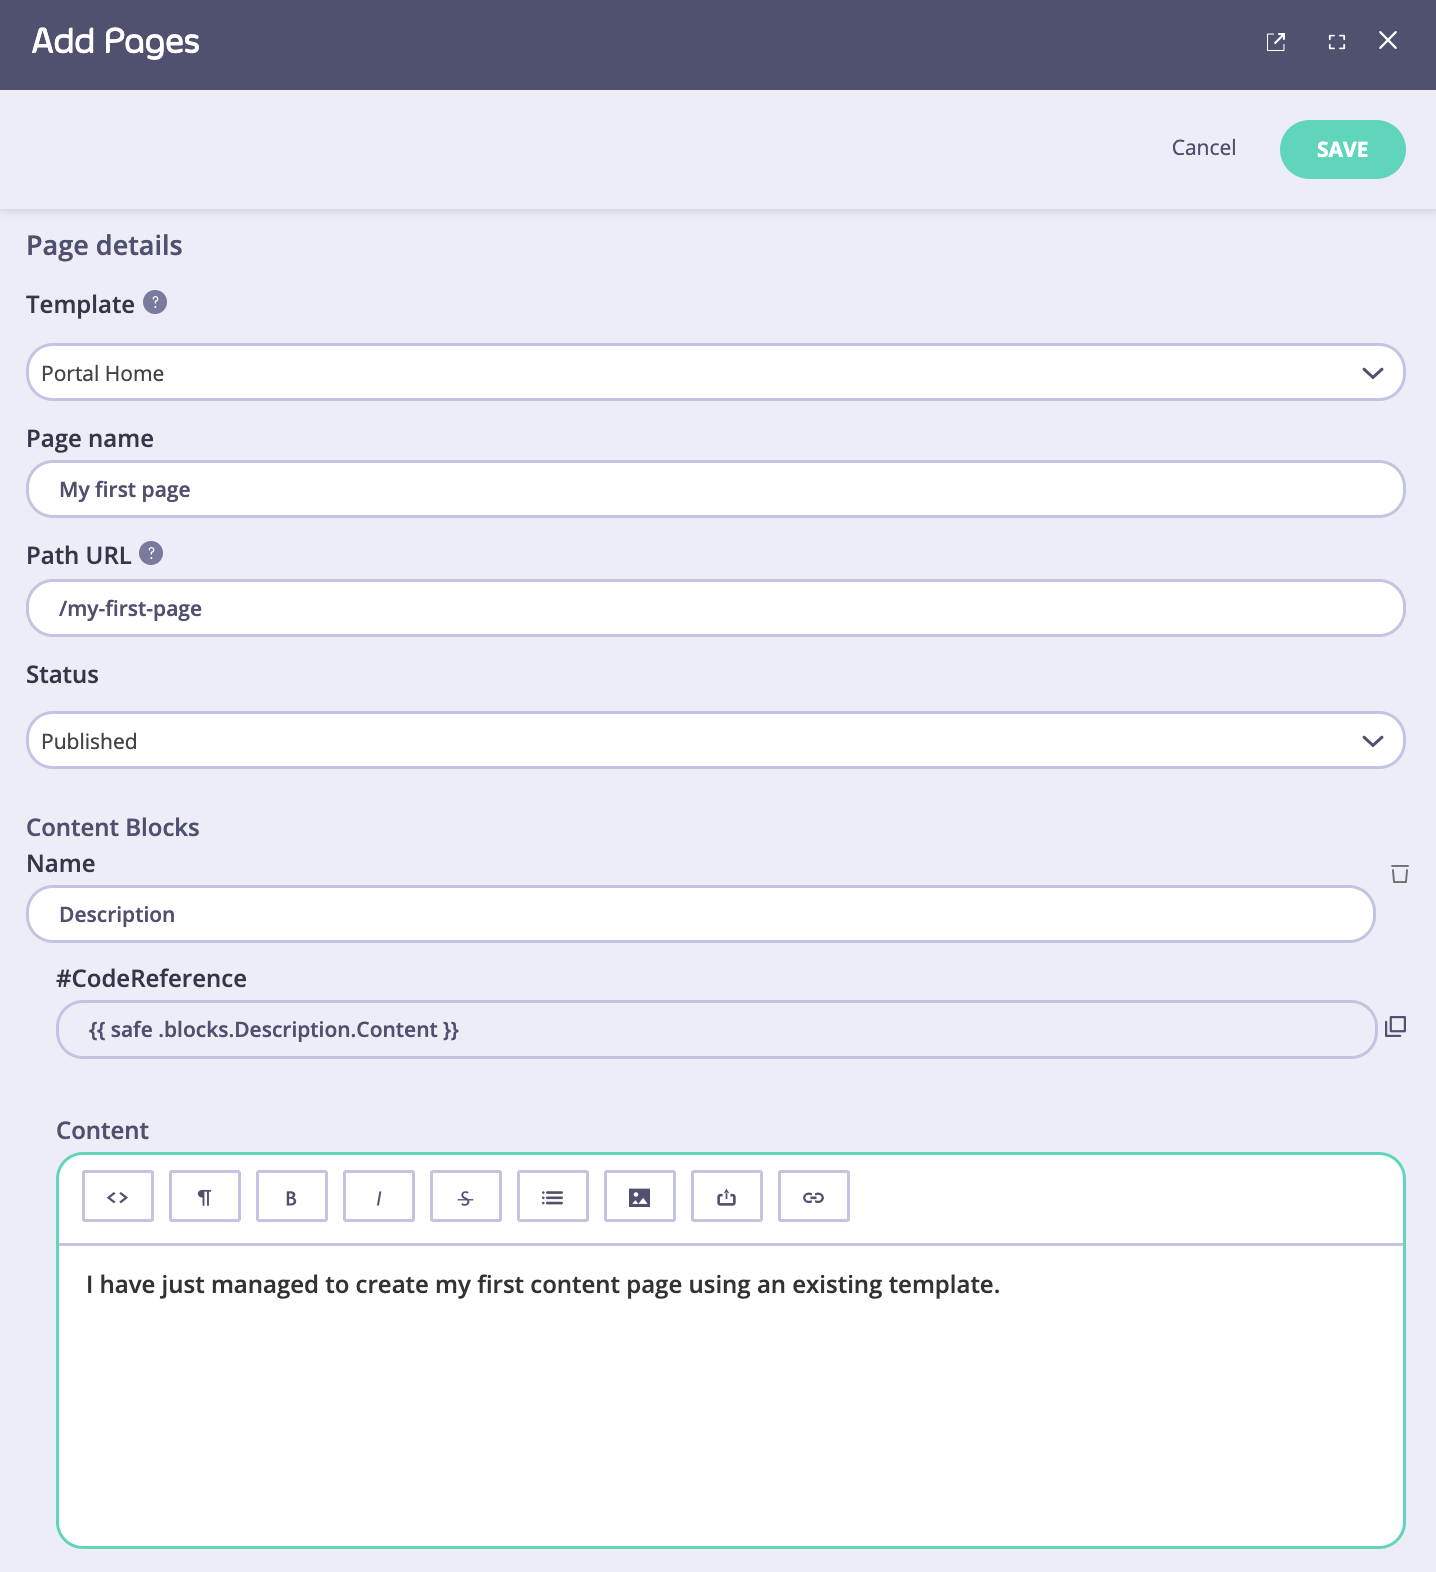
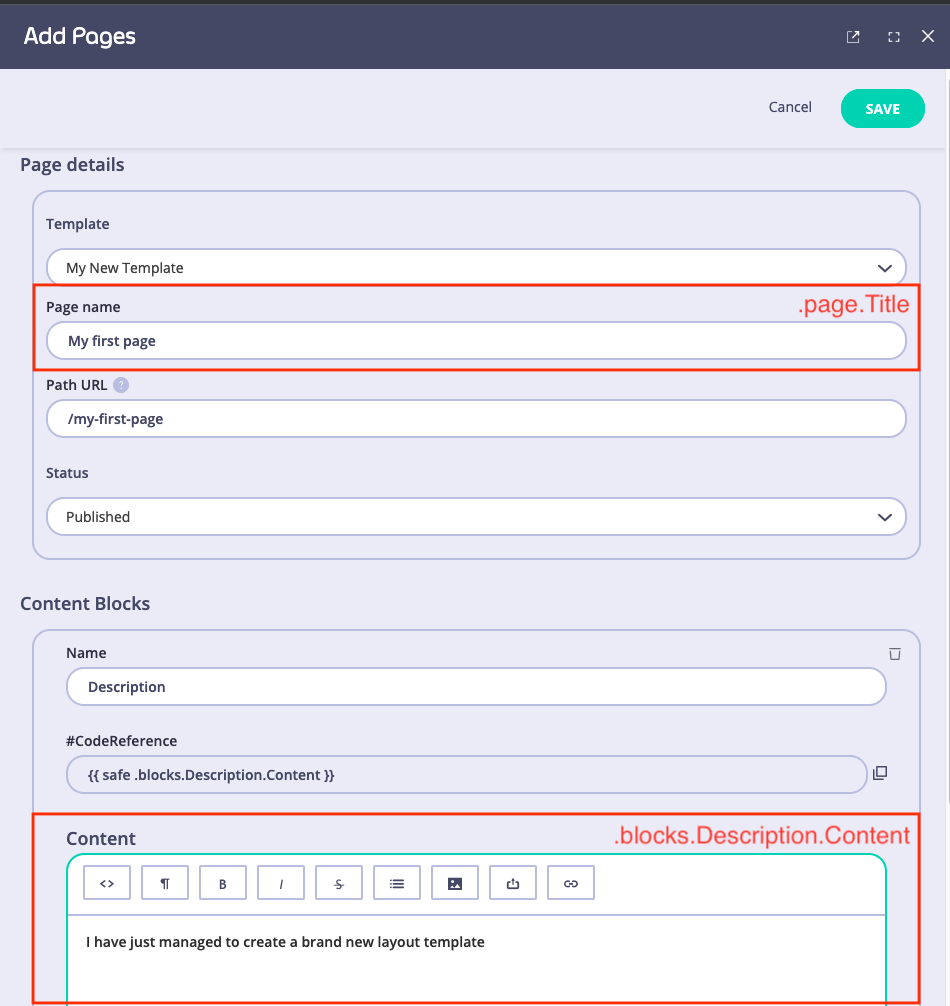
- Click Add and enter the following values:
Create a New Page
Create the Layout File
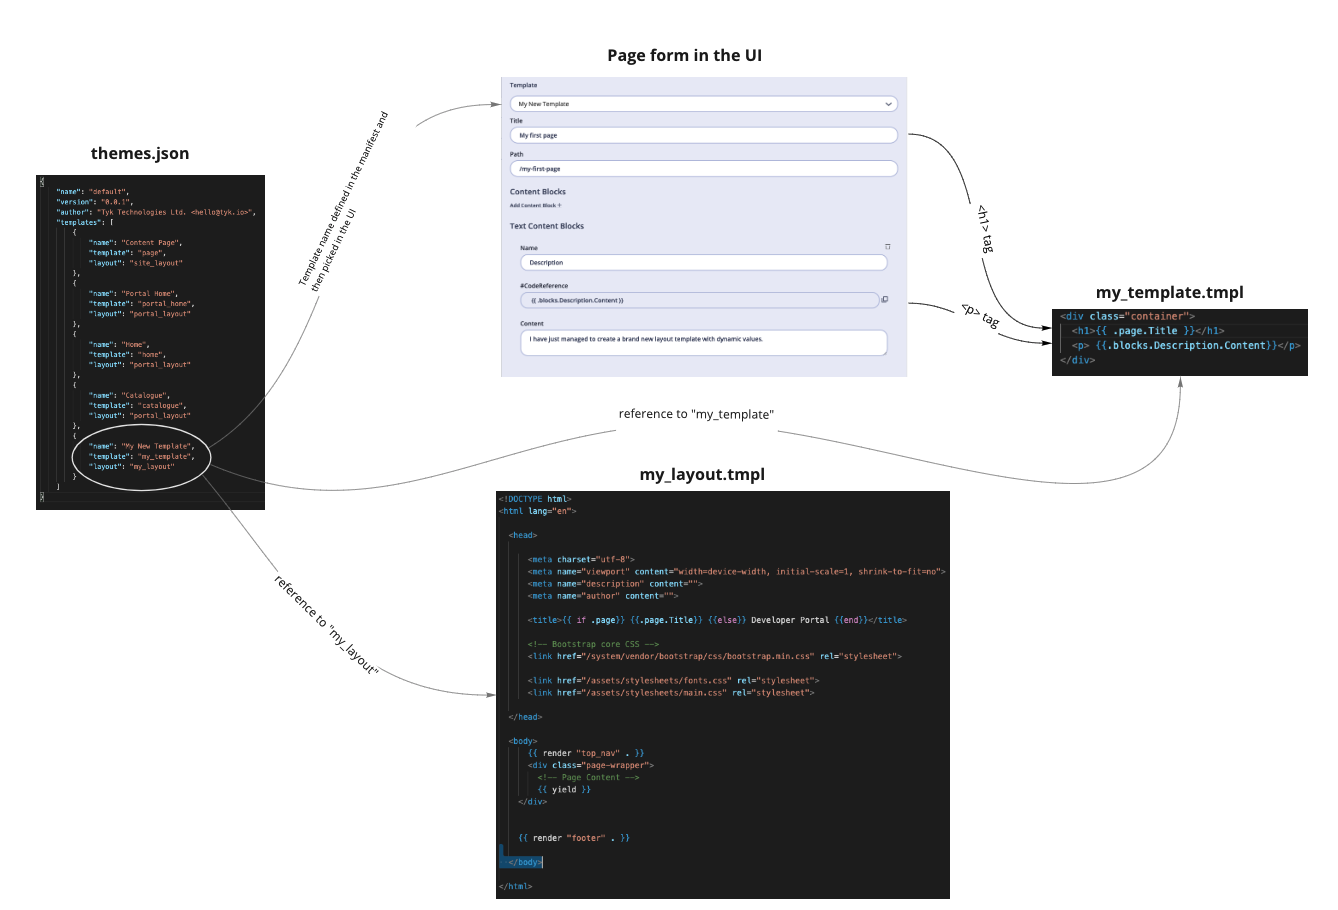
A layout behaves like a component that can be reused to inject templates in order to avoid duplicating elements such as<head> and <link>.So let’s create one that looks like the one below.
- From the file system navigate to
/themes/default/layouts. - Create a new file named
my_layout.tmpl. - Copy the code below, paste it to your new layout file and save it.
The above snippet is taking into account the default developer portal setup, directories and references of the appropriate styling files.
{{ render "top_nav" . }} and {{ render "footer" . }} respectively.
Create the Template File
Only follow this step after creating a new template file in Section 1 above, unless you want to use an existing template.
- From the file system; navigate to
/themes/default/views. - Create a new file (template)
- In this example, we will keep it simple and create a couple of HTML tags. Copy and paste the following code:
- Inside the template’s
<h1>we use{{ .page.Title }}to display the page name. - Inside the template’s
<p>we use{{ .blocks.Description.Content }}to display the page content.
- Name this
my_template.tmpland save it. - You now need to reference your new layout and template. From your Manifest file (
themes.json) add a new key to the object that will look like this:
- Now restart your developer portal service and go through the tutorial on how to add a new page. The template dropdown within the add new page form should have a new entry called
My new Template, so create a page that will look like this:
- Now navigate to the path we have entered on your browser (
my-domain.io/my-first-page) and you should be able to see your new page with the content added via the UI:

Edit Page Content
Content managers or similar roles that are responsible for the content displayed on the developer portal can edit and manage pages within the Page section of the Developer Portal. Prerequisites- Install the Developer portal
- Log in to the portal dashboard
- Default pages available or a page created by a developer which has the custom theme linked to it
Instructions
- From the Pages section, open an existing page. This could be a page based on the default template or a new page that one of your developers set up when creating a new custom template.
- Edit the page meta data. Change the name of the page if needed. Set or change the path URL if needed.
-
Edit the page content within the existing content blocks. Each content block can be switched to Markdown individually. See the Markdown reference for supported features and limitations.
The content block name is linked to the content block name in the template html file. If this name is changed, and not reflected in the template html, the page will get an error and won’t show.
- Publish the page and view it from the external portal URL. If you want the page to be published and visible on the external portal, you need to change the state to Published.