Introduction
It is possible with the Multi-Cloud and the Self-Managed version of Tyk to manage multiple environments across data centers. This can be very useful if you have QA, UAT and Production environments that are physically or geographically separate and you want to move API configurations between environments seamlessly.What is API Sharding ?
It is possible to use tags in various Tyk objects to change the behavior of a Tyk cluster or to modify the data that is sent to the analytics engine. Tags are free-form strings that can be embedded in Gateway configurations, API definitions, Policies and Individual Keys. Tags are used in two ways: To segment a cluster into various “zones” of API management, and secondly, to push more data into the analytics records to make reporting and tracking easier.API Sharding
API Sharding is what we are calling our approach to segmenting a Tyk cluster (or data centers) into different zones. An example of this in action would be to imagine you have separate VPCs that deal with different classes of services, lets say: Health, Banking and Pharma. You don’t need the nodes that handle all the traffic for your Pharma APIs to load up the definitions for the other zones’ services, this could allow someone to send unexpected traffic through (it may not go anywhere). Alternatively, you could use segmentation to have separate API definitions for multiple data centers. In this way you could shard your API definitions across those DC’s and not worry about having to reconfigure them if there is a failover event.Using Sharding to handle API life-cycle with multiple data centers
You can use sharding to very quickly publish an API from adevelopment system to staging or live, simply by changing the tags that are applied to an API definition.
With Tyk Community Edition and Tyk Pro, these clusters must all share the same Redis DB.
If you are an Enterprise user, then you can go a step further and use the Tyk Multi Data Center Bridge to have full multi-DC, multi-zone cluster segmentation, and manage APIs in different segments across different database back-ends.
Analytics and Reporting
In order to use tags in analytics, there are two places where you can add a"tags":[] section: a Policy Definition, and a Session object for a token.
Policy tags completely replace key tags, these tags are then fed into the analytics system and can be filtered in the dashboard.
Node Tags
If your API is segmented, node tags will be appended to the analytics data, this will allow you to filter out all traffic going through a specific node or node cluster.If you set
use_db_app_options.node_is_segmented to true for multiple gateway nodes, you should ensure that management_node is set to false. This is to ensure visibility for the management node across all APIs.management_node is available from v2.3.4 and onwards.
See Tyk Gateway Configuration Options for more details on node tags.
Move APIs Between Environments
It is possible to move APIs between Tyk environments in the following ways:In Shared Dashboard Environments
If the environments are both Self-Managed installations and are sharing a Tyk Dashboard (and optionally an MDCB instance) then you can use API and Gateway tagging to transparently and effortlessly move an API from one environment to another. See API Tagging for more details.API Sharding
You can also use API Sharding to move APIs in a Shards (and or MDCB) Tyk Self-Managed installation.In Separate Dashboard Environments
If the API dashboards are separate and you wish to migrate API Definitions between two completely segregated environments (e.g. migrating to new hardware or a new DC), then you can use the Export functionality of the Dashboard to download the API definition as JSON and import it into your new installation.Steps for Configuration:
-
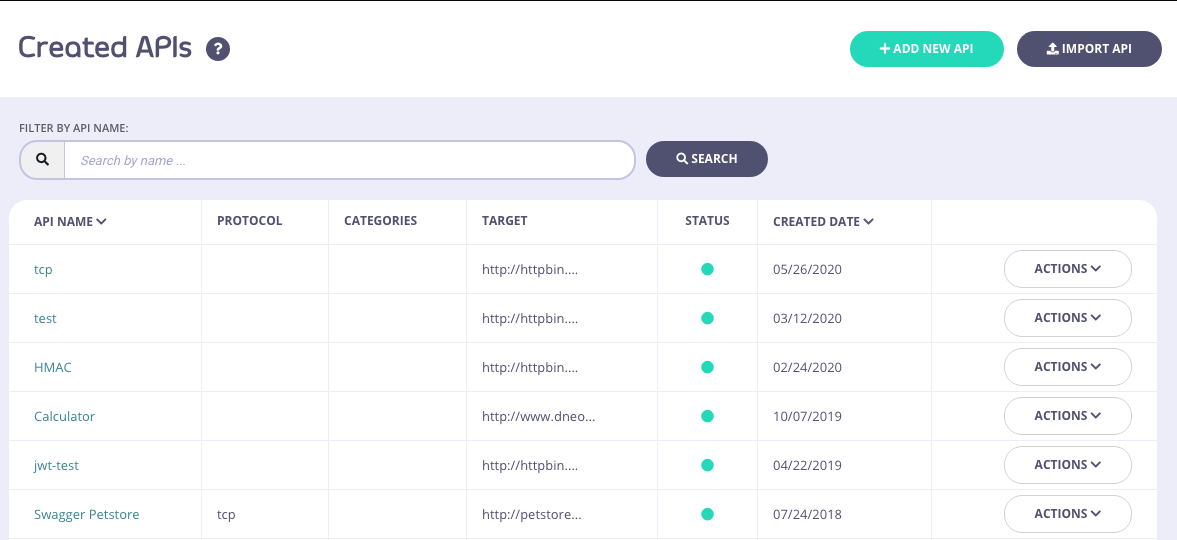
Select Your API
From the API Designer, select your API:
-
Export the API
Click EXPORT:

- Save the API Save and rename the JSON file:
-
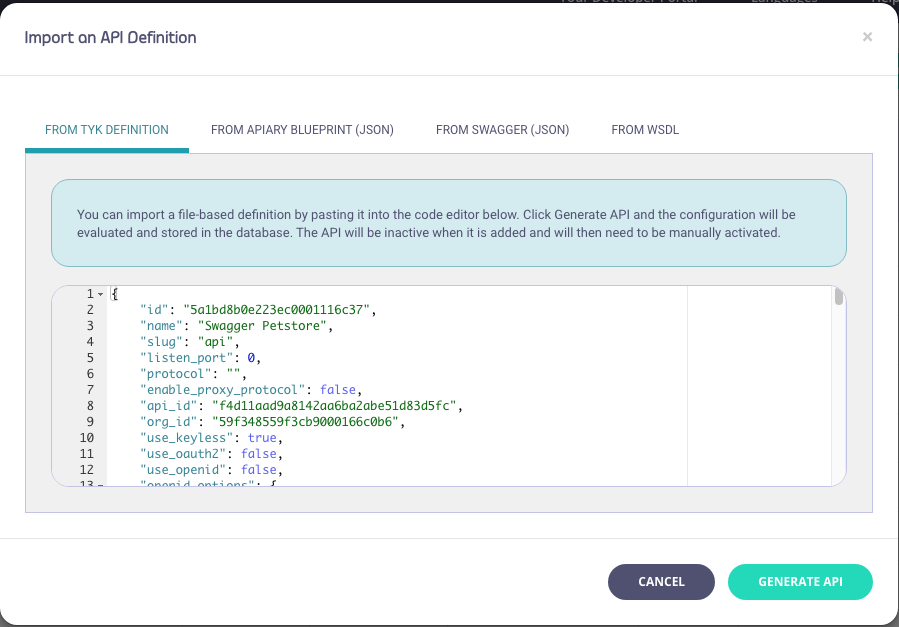
Import into your New Environment
In your new environment, click IMPORT API:

-
Generate the new API
Select the From Tyk Definition tab and paste the contents of the JSON file into the code editor and click GENERATE API:
 The ID you use in with any Dashboard API integrations will change as the documents physical ID will have changed with the import.
Use Tyk-Sync
You can also use our new Tyk-Sync tool which allows you to sync your APIs (and Policies) with a Version Control System (VCS). You can then move your APIs between environments. See Tyk-Sync for more details.Move Keys Between Environments
Tyk currently does not have a facility to export a group of keys from one environment and reissue them in another and still be able to manage those keys from within the Dashboard. However, it is possible to temporarily allow access to existing keys in a new environment, but it should be noted that these keys should eventually be expired and re-generated within the new environment.Moving Keys Between Environments / Creating Custom Keys
In order to use a legacy key in a new environment, simply extract the key from the old environment using the Tyk REST APIs and then create them in the new environment using the custom key creation API. To create a key with a custom identifier, ie Token, simply use the Gateway (OSS) or Dashboard (Pro) REST APIs to import a custom key.Move Policies Between Environments
Moving policies between two (Dashboard) environments is not as easy as moving API definitions and requires working with the Dashboard API to first retrieve the policies, and then modifying the document to reinsert them in your new environment:Preparation
First you must set up your new environment to respect explicit policy IDs. To do so, edit thetyk.conf and tyk_analytics.conf files in your new environment and set the policies. allow_explicit_policy_id setting to true (the setting is just allow_explicit_policy_id at the root level of the Dashboard configuration). In order to retain your api_id when moving between environments then set enable_duplicate_slugs to true in your target tyk_analytics.conf.
Steps for Configuration
-
Get your Policy
-
Edit the file we just created
The original file will look something like this, notice the two ID fields:
-
Move the id field value
Remove the
_idfield and put the value of the_idfield into theidfield, sopolicy.jsonshould look like this: -
Update the policy via the API
Save the new
policies.jsonfile and then let’s POST it back to the new environment:
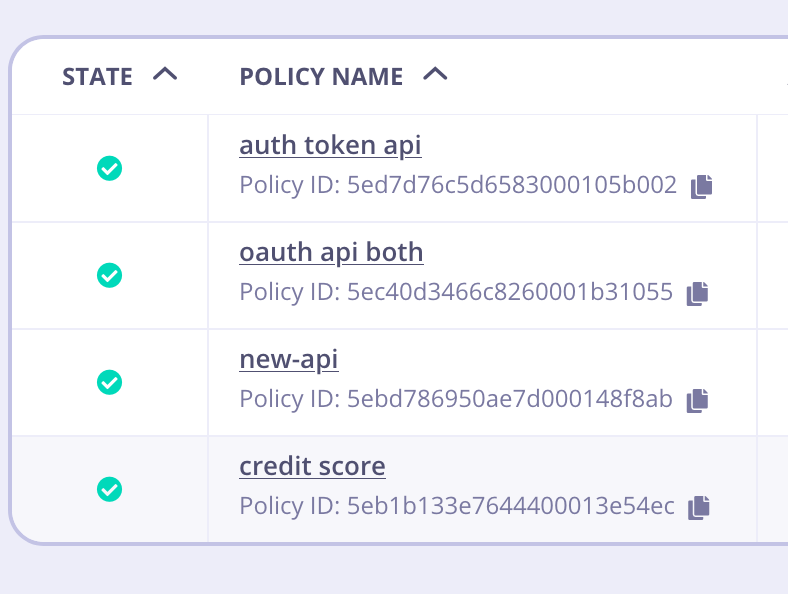
Policy IDs in the Dashboard
After migrating a Policy from one environment to another, it is important to note that the displayed Policy ID is not going to match. That is okay. It happens because Tyk Dashboard displays theMongo ObjectId, which is the _id field, but the id is the important part.
For example:
Policies in source environment
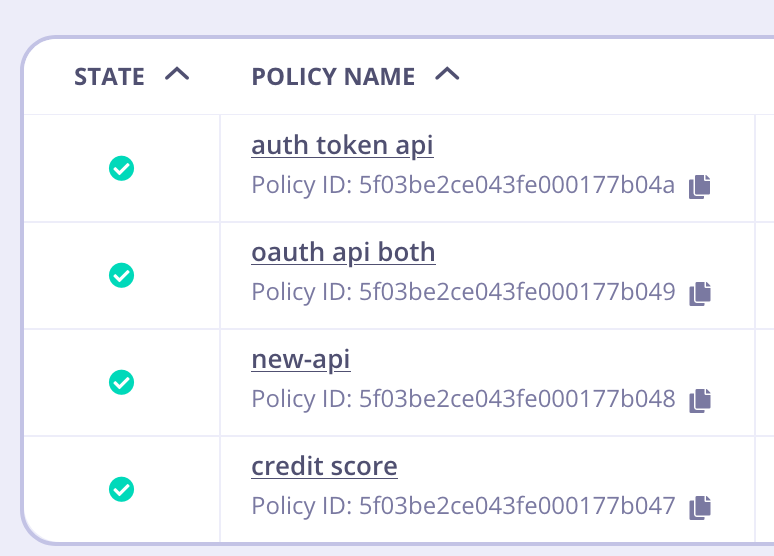
id, you can see it’s been mapped properly in the target environment.
id. That is the value that will be referred to inside Key Creation, etc.
Use Tyk-Sync
You can also use our new Tyk-Sync tool which allows you to sync your Policies (and APIs) with a Version Control System (VCS). You can then move your Policies between environments. See Tyk-Sync for more details.Gateway Sharding
With Tyk, it is easy to enable a sharded configuration, you can deploy Gateways which selectively load APIs. This unlocks abilities to run Gateways in multiple zones, all connected to the same Control Plane. This allows for GDPR deployments, development/test Gateways, or even DMZ/NON-DMZ Gateways. Couple this functionality with the Tyk Multi Data Center Bridge to achieve a global, multi-cloud deployment.Configure a Gateway as a shard
Setting up a Gateway to be a shard, or a zone, is very easy. All you do is tell the node in the tyk.conf file what tags to respect and that it is segmented:qa or uat.
Tag an API for a shard using the Dashboard
From the API Designer, select the Advanced Options tab:

Tag an API for a shard using Tyk Operator
Add the tag names to the tags mapping field within an API Definition as shown in the example below:Tyk Self Managed
Gateway & API Sharding
Tyk Gateway has a very powerful functionality that allows you to selectively choose which APIs are to be loaded on which Gateways. Imagine the case where you have two sets of APIs, Internal & External. You want to prevent your Internal APIs from being accessed or visible outside your protected network. Well, sharding makes it extremely easy to configure your Tyk Gateways from the Dashboard. Steps for Configuration:-
Configure a Gateway as a shard
Setting up a gateway to be a shard, or a zone, is very easy. All you do is tell the node in the tyk.conf file what tags to respect and that it is segmented:
Tags are always treated as OR conditions, so this node will pick up all APIs that are marked as
private-gworedge.
In order to expose more details about the Gateway to the Dashboard, you can now configure the edge_endpoints section in the tyk-analytics.conf, and the Dashboard UI will pick that up and present you a list of Gateways you can chose from when creating an API.
-
Tag an API for a shard using the Dashboard
To add an API Tag to a an API configuration in the Dashboard, Select Edit from your API options, and select the Advanced Options tab:
Exposed Gateway tags to Dashboard UI
From version 3.2.2 of the Tyk Dashboard, if edge_endpoints are being configured in tyk-analytics.conf, your Dashboard will automatically pick that list up for you, and display it in the UI when you create your API.
edge_endpoints configuration.

