

Introduction
Tyk Self-Managed is a full-featured API management platform that you deploy and control on-premise, within your own infrastructure. This page will guide you through setting up and exploring your Self-Managed Tyk environment.What’s included in your trial
Your Tyk Self-Managed trial includes:- Tyk Gateway: The core API Gateway that handles all your API traffic
- Tyk Dashboard: A REST API with a web interface for managing your APIs, policies, and monitoring
- Developer Portal: A customizable API portal to securely publish and manage API access for your consumers.
- Monitoring: Detailed insights into API usage and performance
- Sample APIs: Pre-configured APIs to help you explore Tyk’s capabilities
System Requirements
- Docker: Docker Engine 24.0 or newer
- Docker Compose: Docker Compose v2.20 or later
- CPU & Memory: Minimum 4 GB RAM and 2 CPU cores
- License Key: A valid Tyk Self-Managed license key. You can quickly get started with a self-managed trial license by completing the registration on our website. After registering, you’ll receive an email containing your license key. If you’d rather have guided assistance, we recommend checking out our Tyk Technical PoC Guide.
Trial Duration and Limitations
Your trial license is valid for 14 days from activation. During this period, you have access to all Enterprise features. After the trial period, you’ll need to purchase a license to continue using Tyk Self-Managed. To continue using Tyk Self-Managed after your trial, please contact our team to discuss licensing options.Quick Setup
This section provides a step-by-step guide to quickly set up Tyk Self-Managed using Docker.Prerequisites
- Install Docker Engine 24.0 or newer and Docker Compose v2.20 or later
- Install the following CLI tools:
- Tyk Self-Managed license key (from your trial email)
- If you are having issues with your trial license, please contact info@tyk.io
Installation
-
Clone the repository and navigate to the self-managed Docker directory:
-
Copy the example environment file and add your license keys:
Open
.envand set your license keys: -
Start the Tyk stack:
This command starts all the necessary containers and automatically bootstraps the environment with pre-configured APIs, policies, and portal setup. The process may take up to 60 seconds on first run. Containers started:
- Tyk Gateway
- Tyk Dashboard
- Developer Portal
- Redis (caching and session storage)
- PostgreSQL (data storage)
- Tyk Pump (analytics)
- Sample API service (httpbin)
-
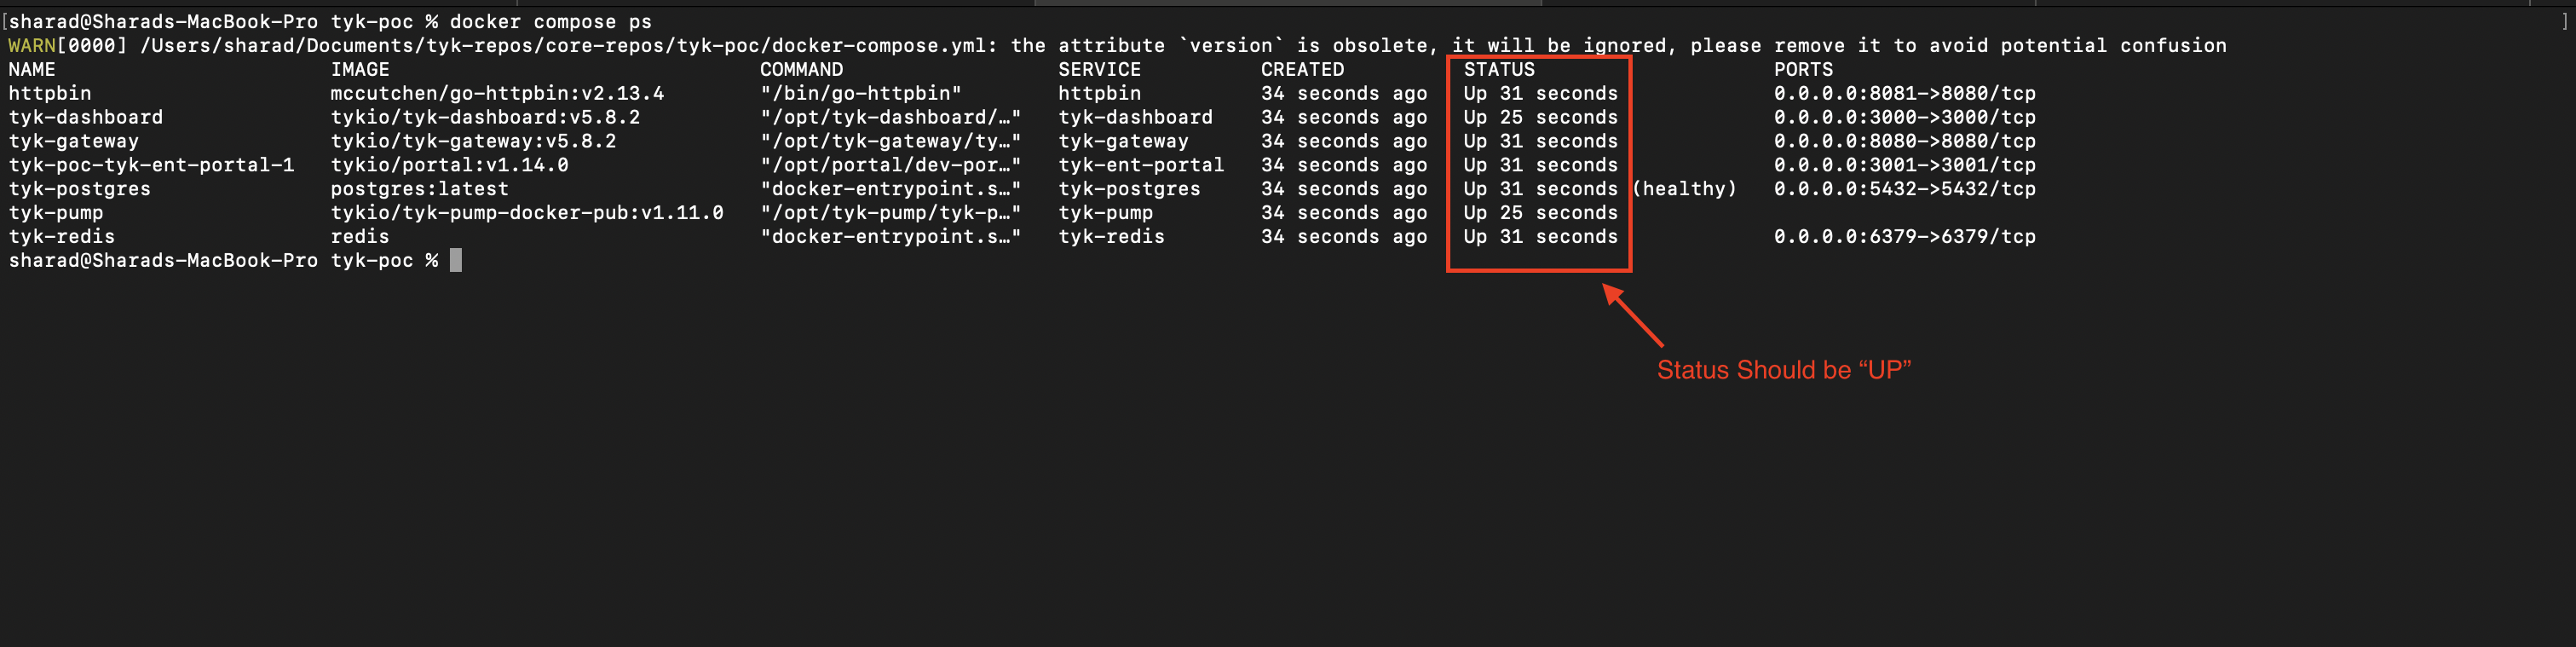
Once all containers are running, you can verify their status with:
You should see all services listed as “Up”.
Default Credentials and Access Points
Once the installation is complete, you can access the following components:Verifying Your Installation
-
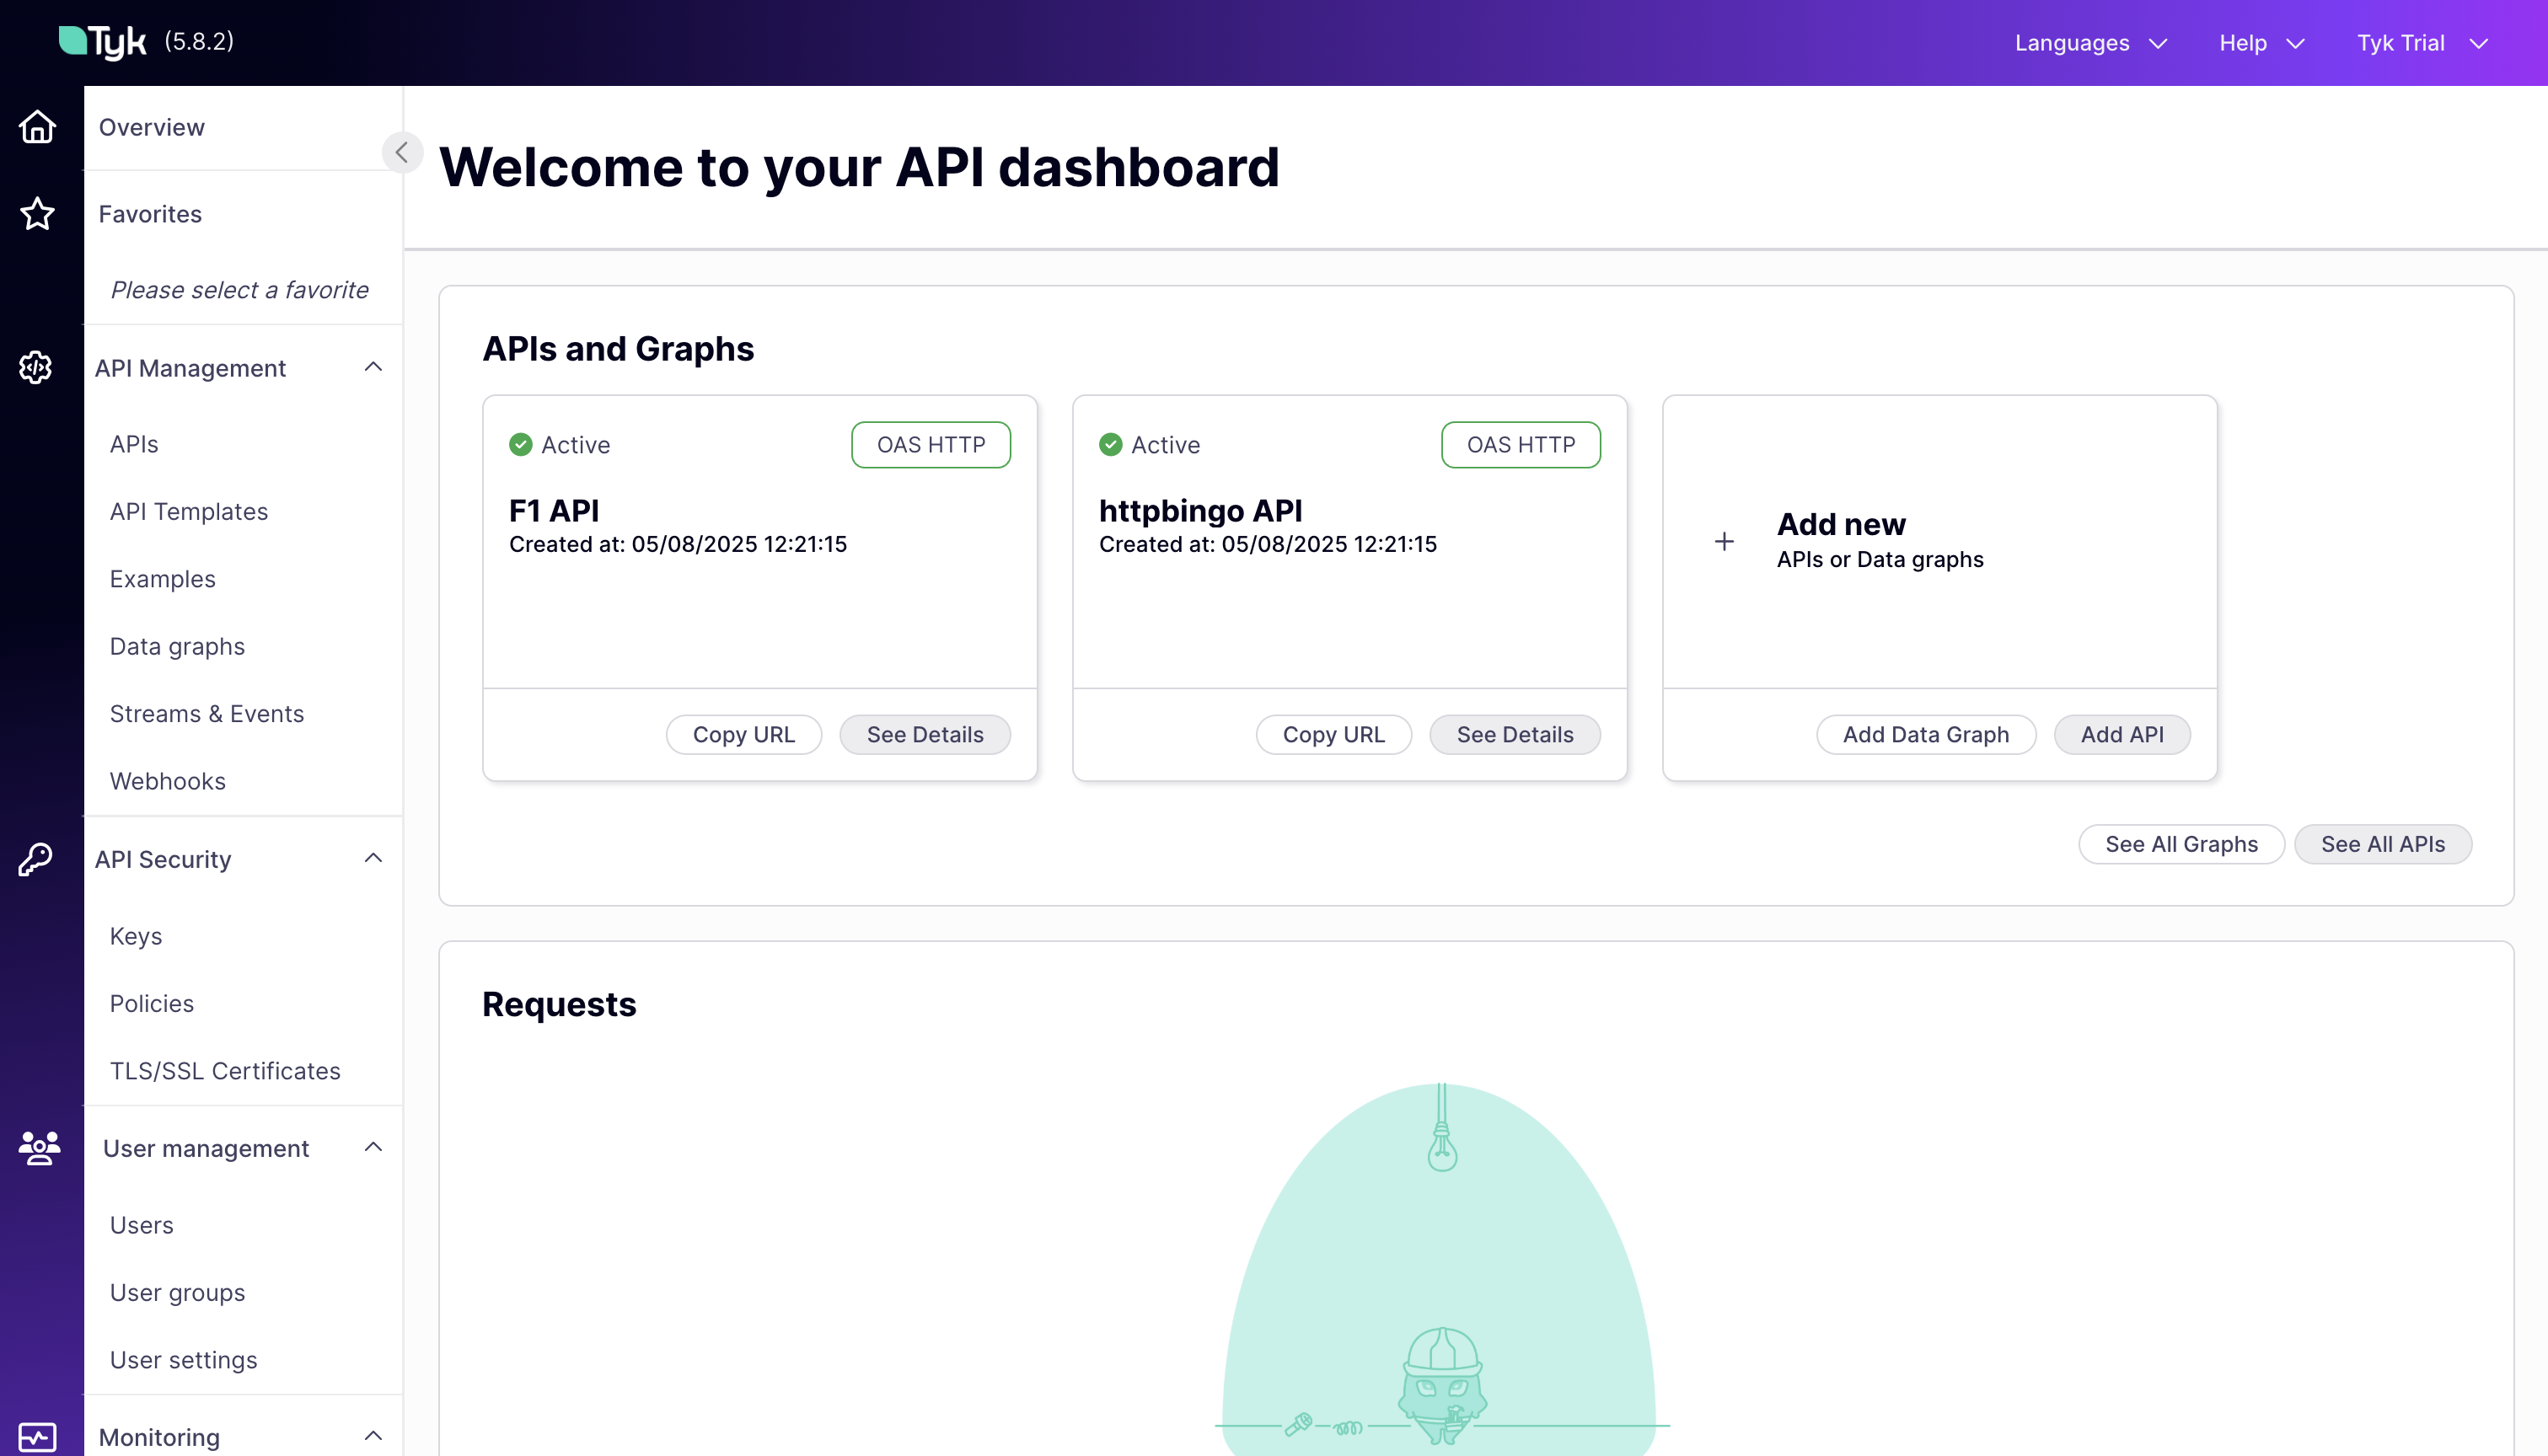
Verify Dashboard Access:
- Open your browser and navigate to
http://localhost:3000 - Log in with the default credentials (developer@tyk.io / specialpassword)
- You should see the Tyk Dashboard with pre-configured APIs and monitoring
- Open your browser and navigate to
-
Verify Gateway Access:
- Open a terminal and run:
- You should receive a JSON response from the API, confirming that the Tyk Gateway is functioning correctly.
-
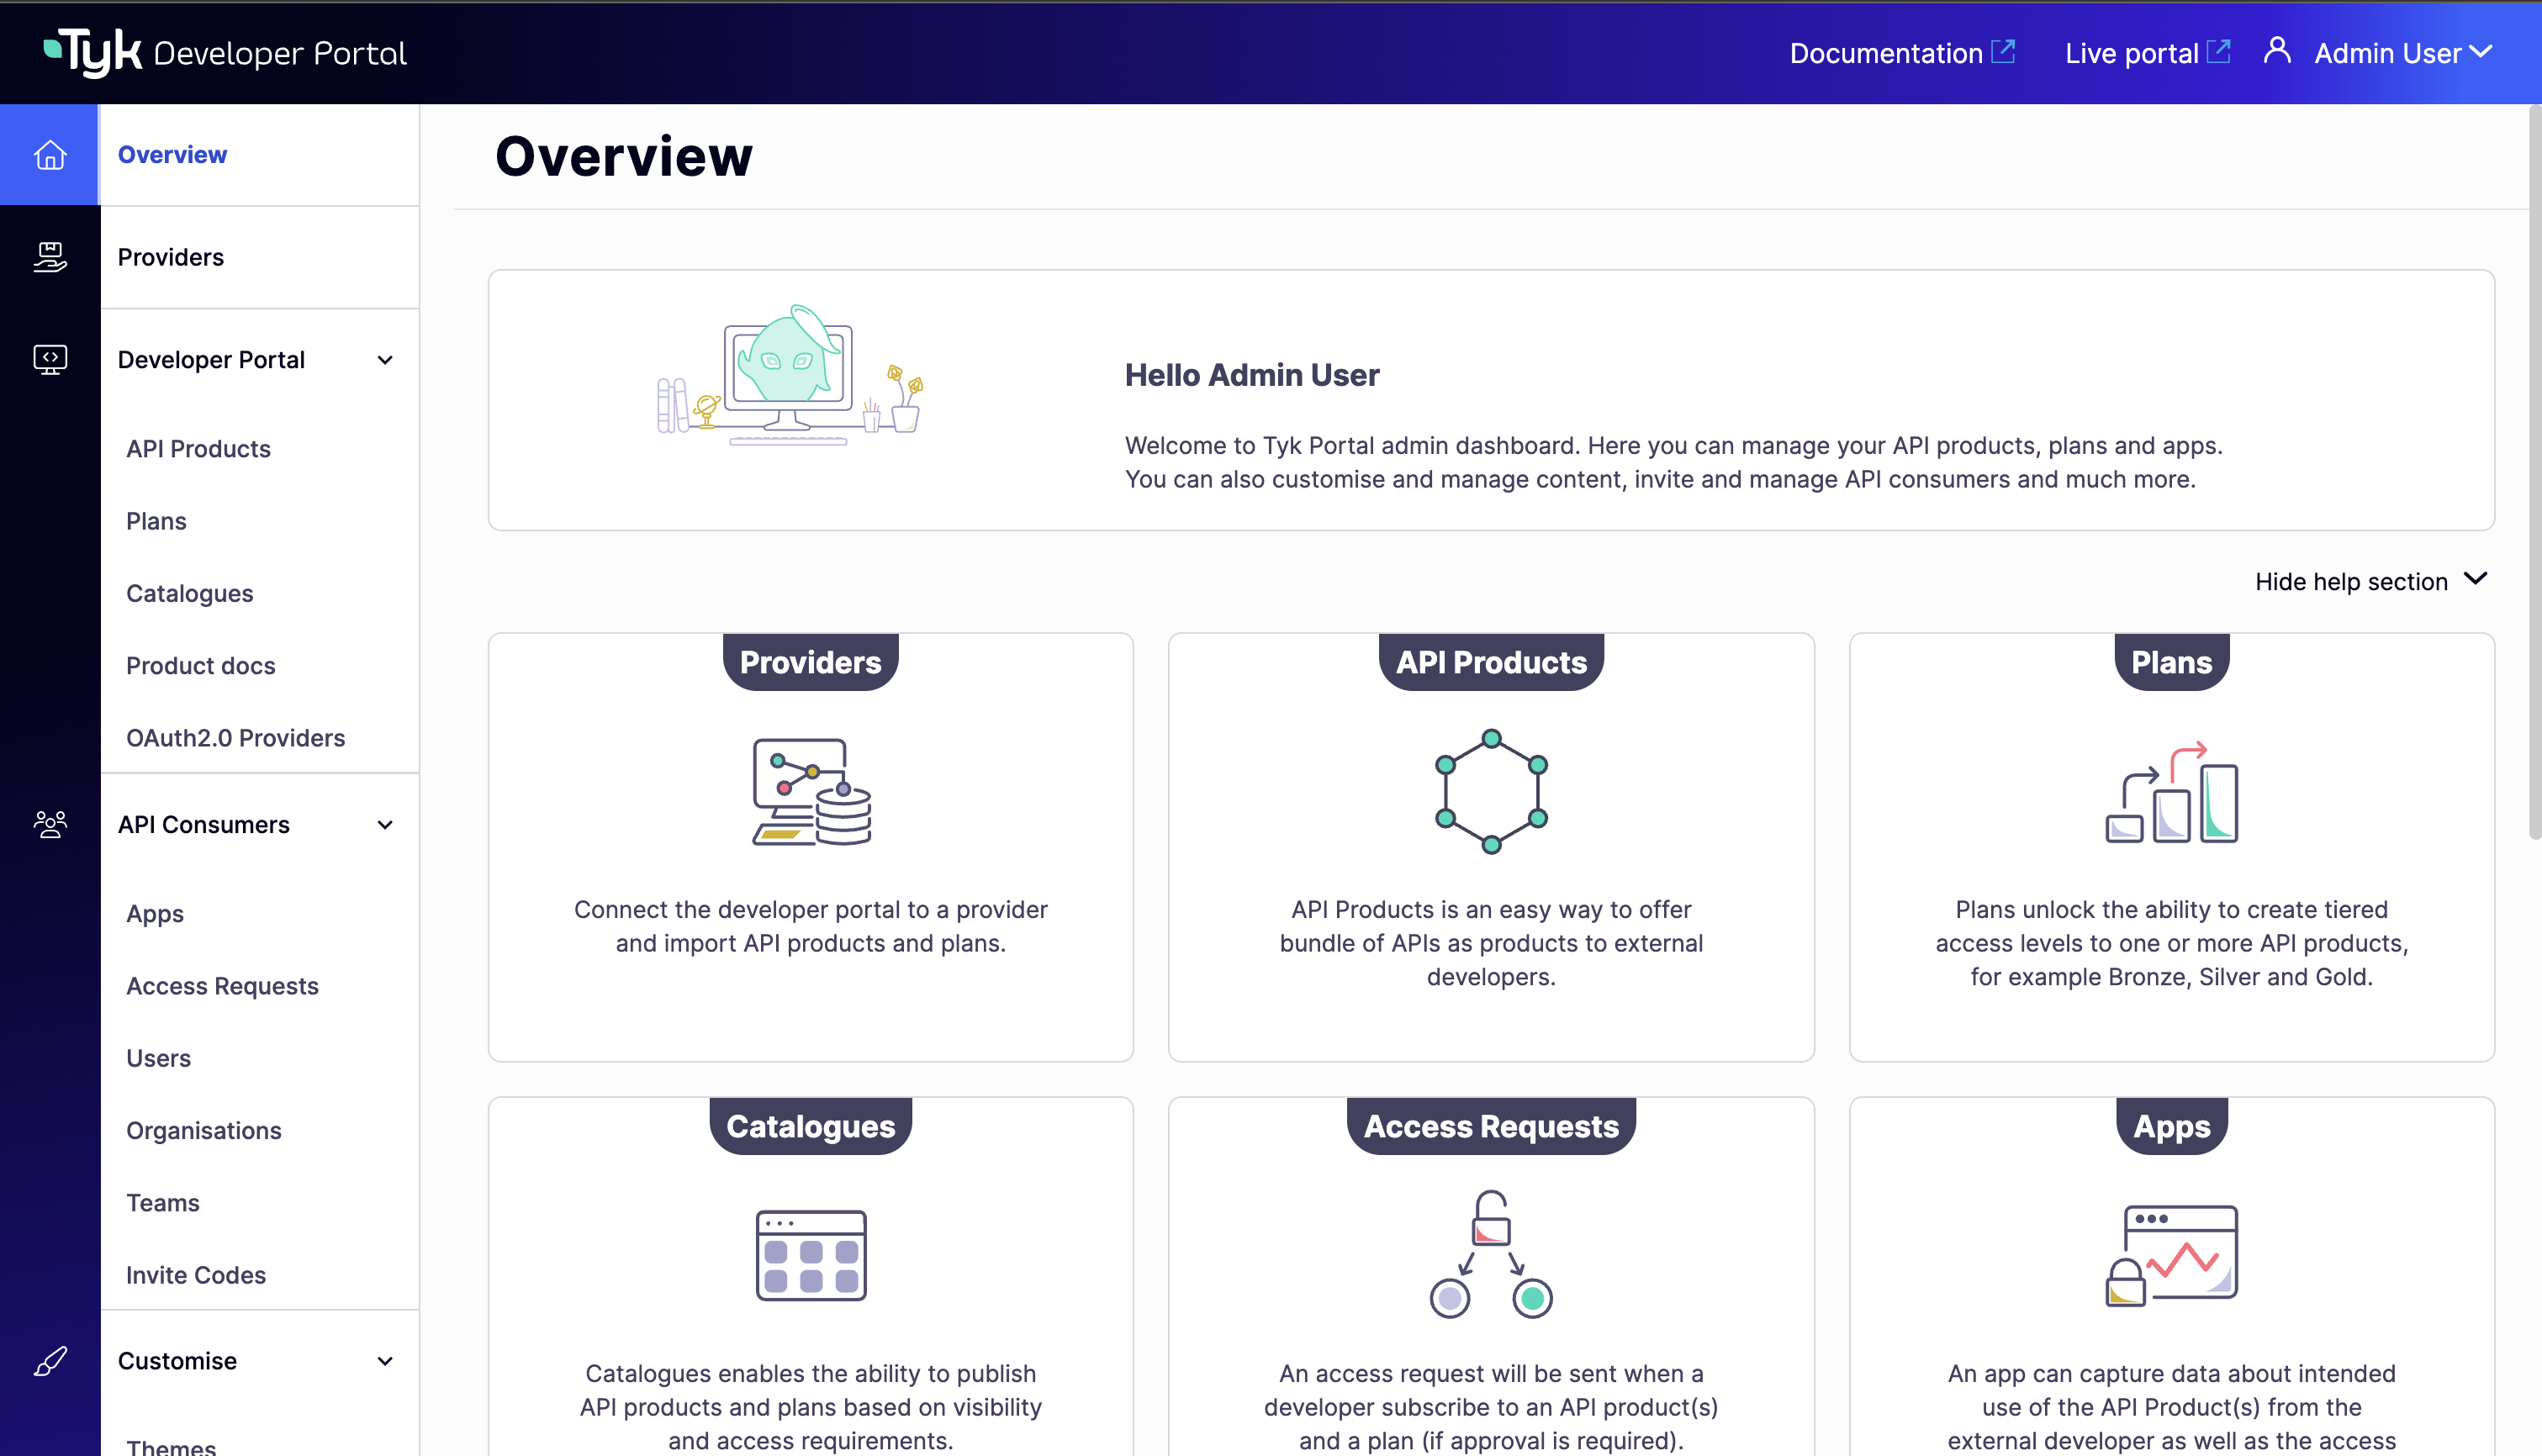
Verify Developer Portal Access:
- Open your browser and navigate to
http://localhost:3001 - Log in with the default credentials (portaladmin@tyk.io / specialpassword)
- You should see the
Overviewsection of the Developer Portal.
- Open your browser and navigate to
Exploring Your Pre-Configured Environment
When you run the Docker Compose command in the previous section, several interconnected components are deployed to create a complete Tyk API Management ecosystem. Let’s explore what’s installed and how these components work together. The following diagram illustrates the components of your Tyk Self-Managed installation and how they interact: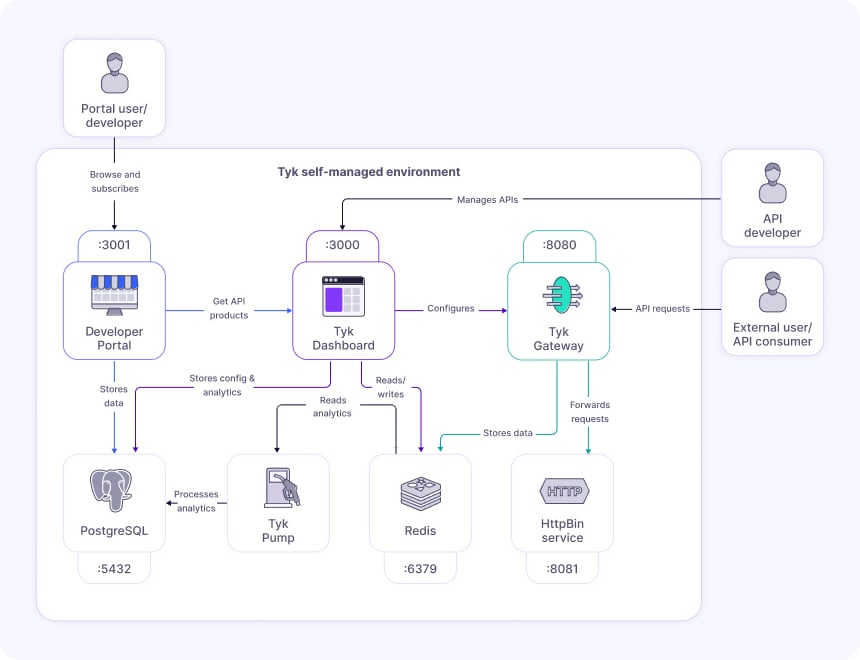
- Tyk Gateway (tyk-gateway): The core API Gateway that processes all API requests, applies policies, and enforces security. Exposed on port 8080.
- Tyk Dashboard (tyk-dashboard): The management interface for configuring APIs, policies, and viewing monitoring data. Exposed on port 3000.
- Developer Portal (tyk-ent-portal): A customizable portal for API consumers to discover, test, and subscribe to APIs. Exposed on port 3001.
- Redis (tyk-redis): Used for caching, session management, and real-time communication between components. Exposed on port 6379.
- PostgreSQL (tyk-postgres): Stores configuration data, user information, and analytics. Exposed on port 5432.
- Tyk Pump (tyk-pump): Reads the analytics data that the Gateway writes to Redis and moves it to the database for reporting.
- HttpBin (httpbin): A sample API service that provides various endpoints for testing. Exposed on port 8081.
Dashboard Tour
The Tyk Dashboard is your central hub for managing APIs, monitoring performance, and configuring security settings.Navigating the Tyk Dashboard
Dashboard is organized into a few key categories:- API Management: In API Management, you can access and edit all your APIs, create data graphs, and add webhooks.
- API Security: In API Security, you can manage keys, Policies, and certificates to customize your security settings.
- User Management: In User Management, you can control permissions and access for users and user groups. You can also create profiles that help you manage third party identity providers for specific Tyk actions like signing into the portal or logging into the dashboard.
- Monitoring: In Monitoring, you can view activity reports, logs, and analytics related to your APIs.
- System Management: In System Management, you can affect OPA rules that define fine-grained access control for managing and enforcing permissions on various actions and resources in Tyk’s API management system.
- Classic Portal: In Classic Portal, you can affect permissions and configurations related to your developer portal. The Tyk Developer Portal is a platform that enables you to publish, manage, and promote your APIs to external developers.
Understanding the Pre-loaded APIs
Your trial environment comes with pre-configured sample APIs to help you explore Tyk’s capabilities: 1. httpbingo API Overview:- Purpose: A test API with various endpoints for exploring API management features
- Base URL:
http://localhost:8080/httpbingo - Authentication: API Key authentication (via Authorization header)
- Rate Limiting: Configured through policies (Sandbox and Production plans)
/get: Returns request data (headers, query parameters)/headers: Shows all request headers/ip: Returns the client’s IP address/xml: Demonstrates response transformation (XML to JSON)/status/{code}: Returns specified HTTP status code/mock: Returns a mock response generated by Tyk
- Purpose: Demonstrates JWT authentication with a real-world API providing Formula 1 racing data
-
Base URL:
http://localhost:8080/f1-api(proxies to https://f1api.dev/api/) -
Authentication: JWT HMAC authentication
JWT Authentication Details:
- Shared Secret:
topspecial256sharedbitlongsecret - JWT Generation: You can use jwt.io to generate valid tokens
- Header Format:
Authorization: Bearer <your_jwt_token>
- Shared Secret:
- Rate Limiting: 4 requests per 15 seconds (configured through policy)
/drivers: Information about F1 drivers/seasons: Data about F1 racing seasons/circuits: Details about F1 racing circuits/teams: Information about F1 teams
- In the Dashboard, go to the “APIs” section
- Click on either “httpbingo API” or “F1 API”
- Navigate through the tabs to see the various configuration options
- Pay special attention to the
Endpointstab to see how individual endpoints are configured
Developer Portal Preview
The Developer Portal provides a dedicated space for API consumers to discover, learn about, and subscribe to your APIs. It bridges the gap between API providers and consumers.Exploring Available API Products and Catalogs
Login into the portal as an Admin user with credentials provided in the previous section to explore the resources created in the portal. The Developer Portal organizes APIs into a structured hierarchy: Products, Plans, and Catalogs:- Products: API offerings that developers can consume. In your trial, there’s a pre-configured product for the httpbingo API.
-
Plans: Subscription tiers with different access levels and rate limits. Your trial includes:
- Sandbox Plan: Limited rate (3 requests per 10 seconds) for testing and development
- Production Plan: Higher capacity (100 requests per 60 seconds) for production use
- Catalogs: Collections of products and plans that can be made available to different audiences. Your trial has a public catalog containing the httpbingo API product and both plans.
Understanding the developer experience
To experience the portal from a developer’s perspective:- You can access the live portal using the admin account. This is the public-facing interface for API consumers.
- From here the API consumer can:
- Browse the API catalog to see available products
- View the API documentation, which is automatically generated from the API definition
- Create apps and then Subscribe to a plan to get access credentials
- Test the API using the provided examples and your credentials