

Availability
Experimental Feature: Agents depend on Agent plugins, which are currently experimental. The API and behavior may change in future releases.An Agent is an administrator-managed object in Tyk AI Studio. It connects an Agent plugin to an App, and controls which Teams can use it. Once you activate an Agent, it appears as a conversational AI option for its users in the AI Portal. This page covers the Agent object, managed in the Agents section of the AI Studio dashboard. For the plugin code that powers an Agent’s conversation logic, see AI Studio Agent Plugins.
Agent vs Agent Plugin
These two terms sound alike, but they refer to different things.
An Agent plugin is reusable. You can create several Agents from the same plugin, each linked to a different App, configuration, and set of Teams.
Prerequisites
Before you create an Agent, confirm that you have:- An active Agent plugin (hook type
agent) in the Plugins section of the AI Studio dashboard. See AI Studio Agent Plugins to build or install one. - An active App with an active credential and at least one LLM assigned. The App supplies the LLMs, Tools, and Data Sources that the Agent can use.
Configuration
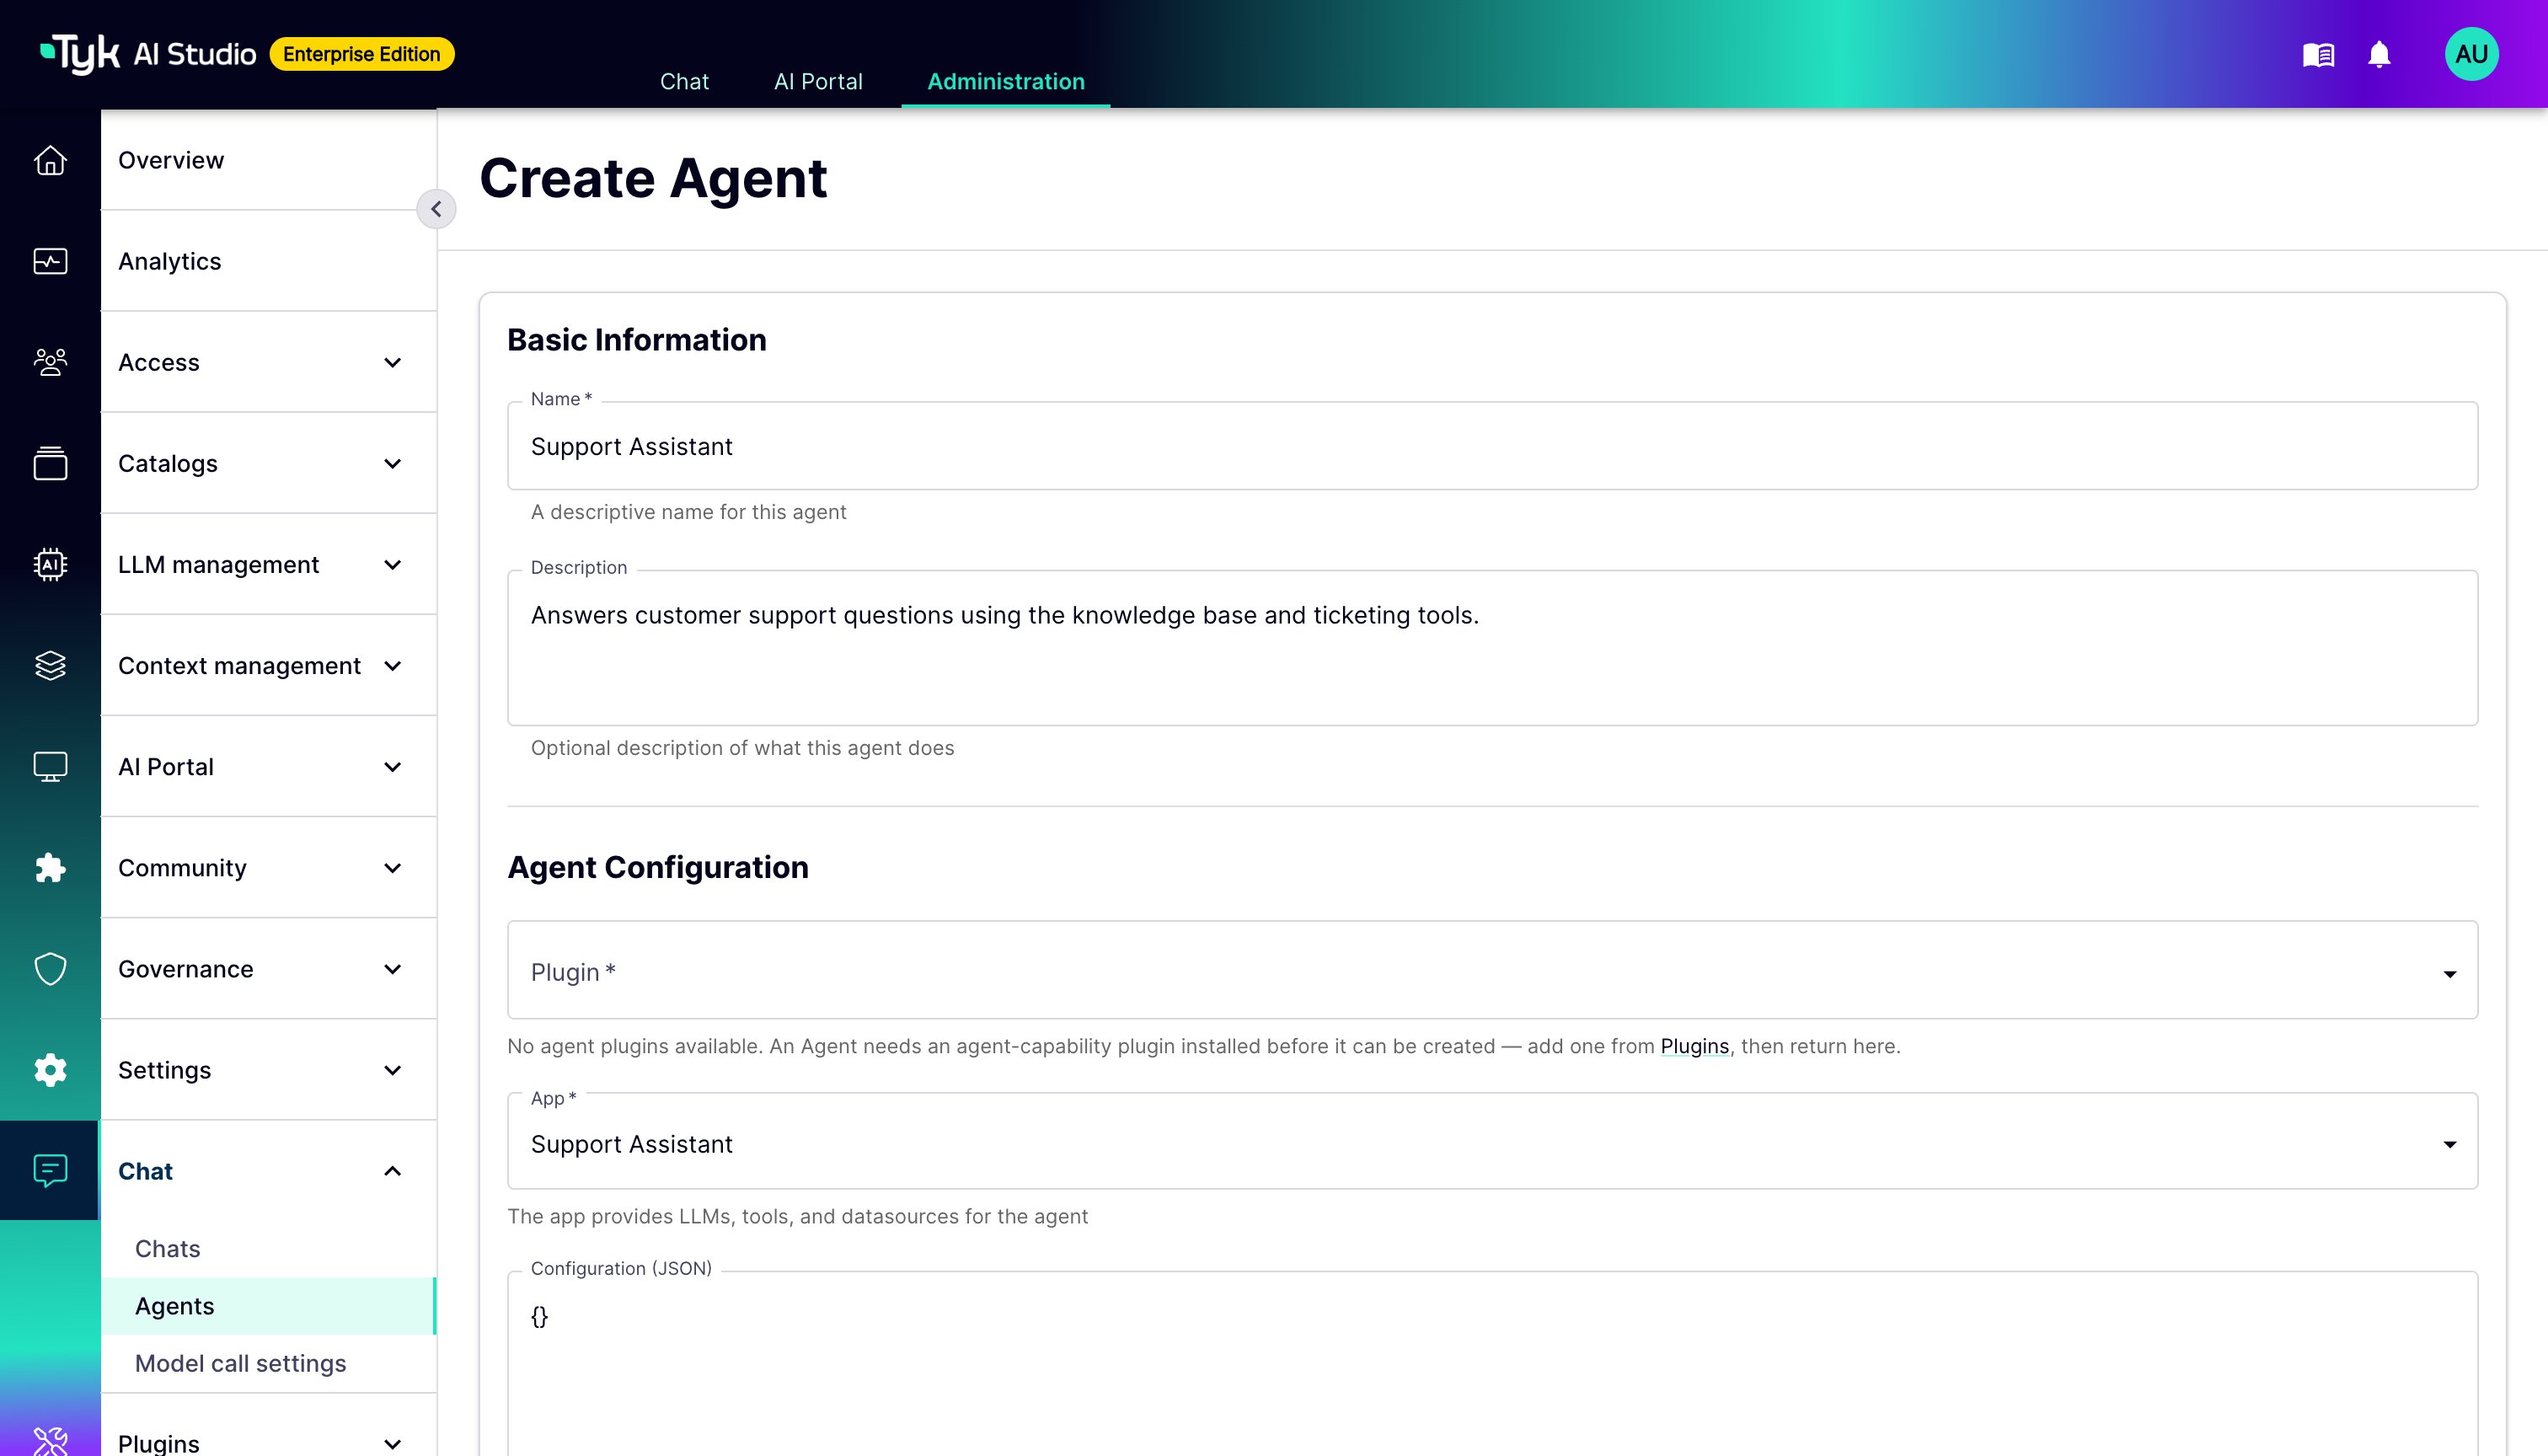
The Create Agent form has these fields:- Name: A descriptive name for the Agent. Required.
- Description: An optional description of what the Agent does. Users see this description in the AI Portal.
- Plugin: The Agent plugin that powers this Agent’s conversations. The list shows only active plugins with the
agenthook type. Required. - App: The App that supplies LLMs, Tools, and Data Sources to this Agent. Required.
- Configuration (JSON): Plugin-specific settings, such as a system prompt or a temperature value. AI Studio checks that this value is valid JSON before you save. It does not validate the content against the plugin’s configuration schema.
- Teams: The Teams that can use this Agent. Leave this field empty to make the Agent available to all users. Some Agent screens label this same access control Groups.
- Active: Whether the Agent is available to users. This is on by default.
How to Create an Agent
- Navigate to the Agents section in the AI Studio dashboard.
- Click Create Agent.
- Enter a Name and, optionally, a Description.
- Select the Plugin that will power the Agent’s conversations.
- Select the App that provides the Agent’s LLMs, Tools, and Data Sources.
- Enter any plugin-specific settings in the Configuration (JSON) field.
- Optionally, restrict access by selecting one or more Teams. Leave this field empty for public access.
- Click Create to save the Agent.
What Happens When You Save
Only Studio Administrators can create, update, activate, deactivate, or delete Agents. When you save an Agent, AI Studio checks that:- The selected Plugin exists, is active, and supports the
agenthook type. - The selected App exists, is active, has an active credential, and has at least one LLM assigned.
Chat API
Users open an Agent from the Chat Interface at/chat/agent/:id. From v2.2.0, the chat front end (CHAT_UI_V2_ENABLED, on by default) uses the same per-turn API for Agents as for chat rooms:
An Agent session stays in memory between turns for
CHAT_SESSION_IDLE_TTL (default 10 minutes). The session keeps a transcript in memory. AI Studio sends the transcript to the plugin as history on every turn. The plugin SDK contract (HandleAgentMessage, AgentMessageChunk) did not change. The v1 SSE endpoints (/common/agents/:id/stream and /common/agents/:id/message) still work.
AI Studio maps the plugin chunks to the stream as follows:
AI Studio adds a
tool_call_id to TOOL_CALL and TOOL_RESULT chunks, so that the chat can pair them. Plugins do not need to set it.
To show specific tool calls of an Agent with a custom web component, use a plugin tool renderer. Refer to Custom Tool Renderers From Plugins.
Managing Existing Agents
From the Agents list, you can filter by status. For each Agent, you can view its details, edit it, activate or deactivate it, or delete it.Agent Details
The Agent details page shows:- Overview: The Agent’s description, slug, and creation date.
- Configuration: Links to the underlying Plugin and App, and the current Configuration (JSON) value.
- Available Resources: The LLMs, Tools, and Data Sources that the Agent inherits from its App.
- Access Control: The Teams that can use the Agent, or Public if none are set.
- Test Interface: A built-in chat panel. Use it to send test messages to an active Agent from within the admin UI, and see its streamed response.