Login into the Dashboard using Okta - Guide
This is an end-to-end worked example of how you can use Okta and our Tyk Identity Broker (TIB) to log in to your Dashboard. This guide assumes the following:
- You already have authorised access to Tyk’s Dashboard. If you haven’t, get the authorisation key by following this doc.
- For simplicity, you are running TIB locally on port 3010
- You are able to edit TIB’s configuration file.
Okta’s side
-
Create a developer account on the Okta Developer site. You’ll get a domain such as
https://<okta-org>.okta.com/.well-known/openid-configuration -
Login and create a Web Application as follows:
- Under
Application, clickAdd Application - Choose
Web - Change the name of the app
- Tick
Authorization Code - Click
Done
Note: These instruction are for the new Okta’s
Developer Console, for theClassic UIinstructions are slightly different. - Under
-
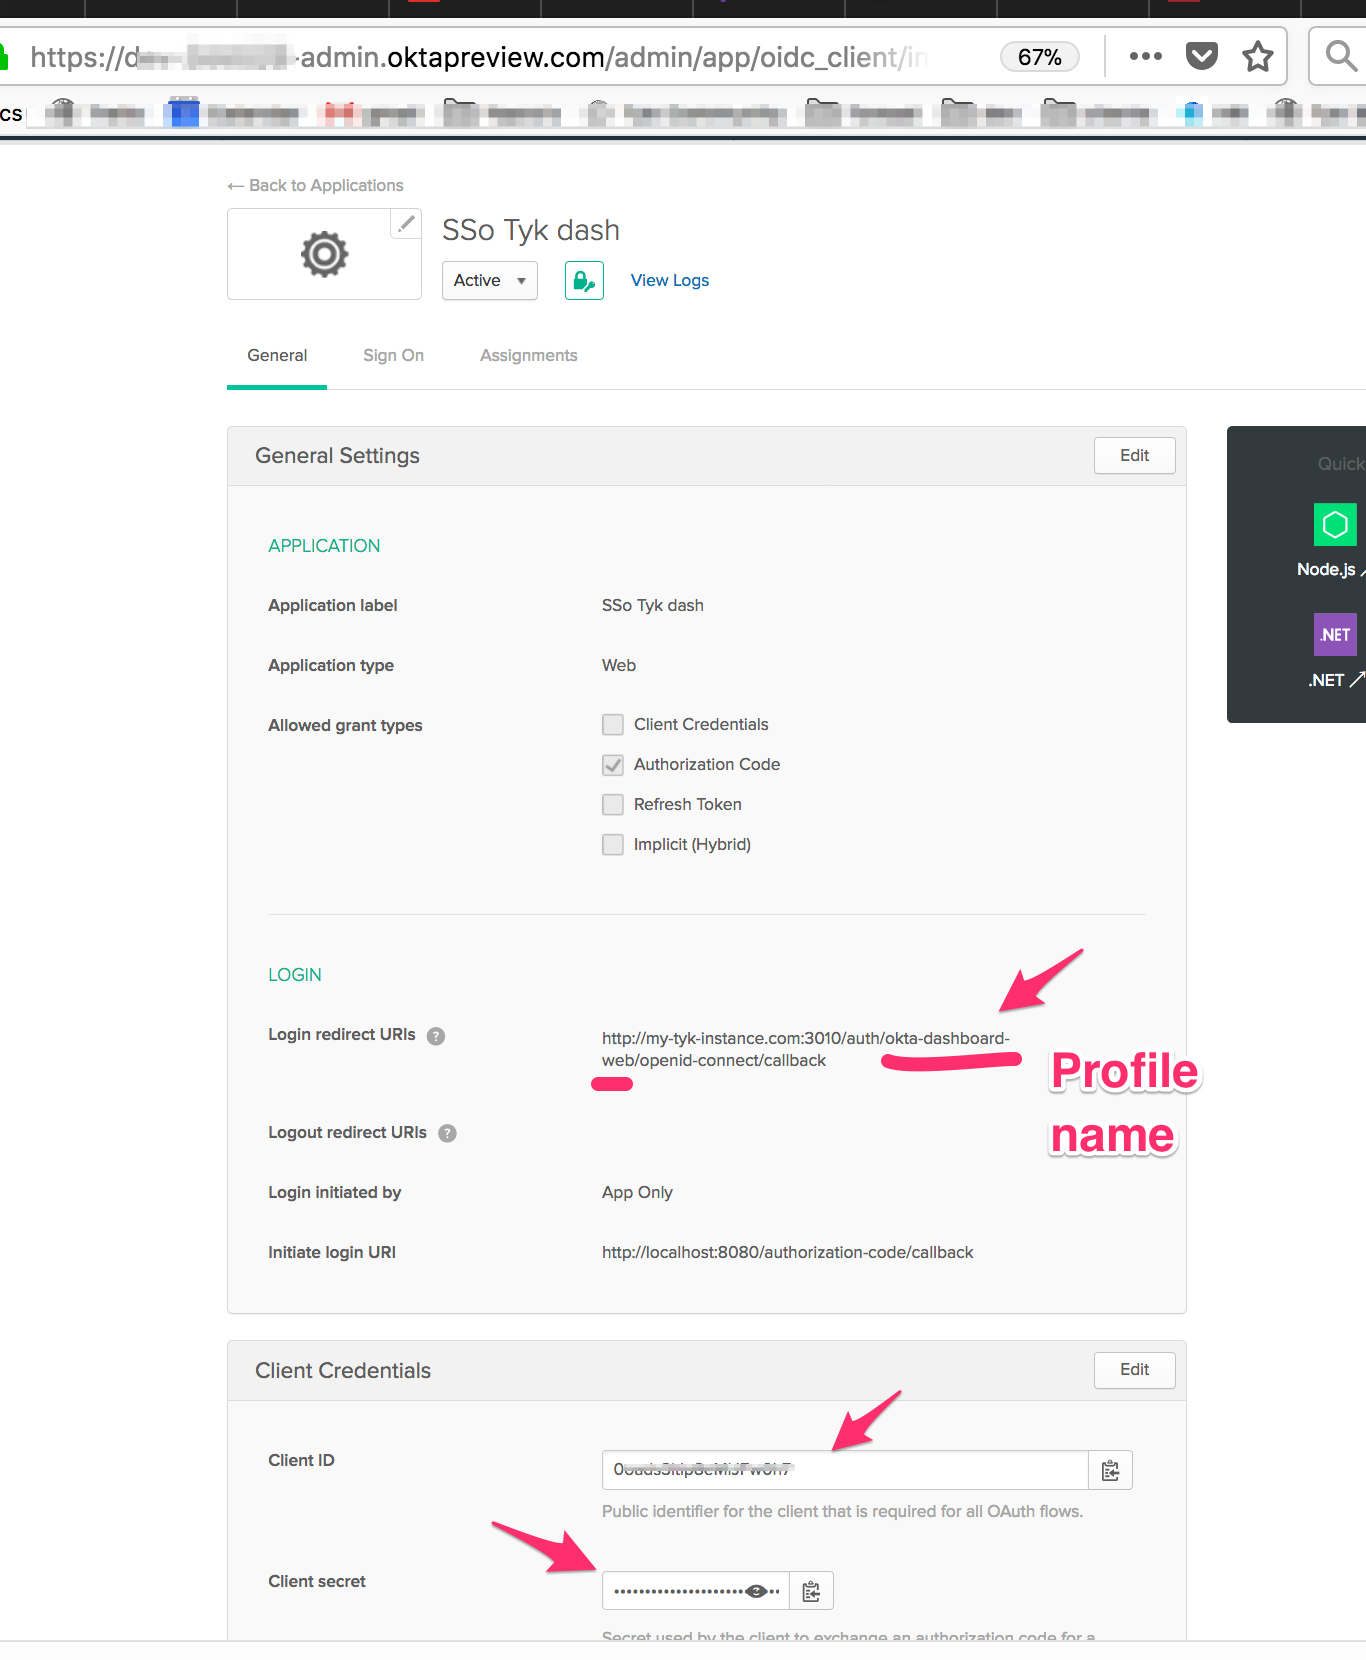
Add a callback to TIB in your application:
- Under
General, clickEditand update theLogin redirect URIsfield with the endpoint on TIBhttp://localhost:3010/auth/{PROFILE-NAME-IN-TIB}/openid-connect/callback. {PROFILE-NAME-IN-TIB}- this can be any string you choose, as long as you use the same one for the profile in TIB.
- Under
-
Permissions to login via Okta: Under the
Assignmentstab, make sure group assignments is set to everyone (for now, you will change this later!). -
This is how it should look like after step #4
TIB’s Side
-
Set the profile in
profiles.jsonas follows:- Copy from your Okta client the
cliend IDtoProviderConfig.UseProviders[].key - Copy from your Okta client the
Client secrettoProviderConfig.UseProviders[].secret - Add Okta’s discovery url
"https://<okta-org>.okta.com/.well-known/openid-configuration"toProviderConfig.UseProviders[].DiscoverURL
Example of a
profiles.jsonfile: - Copy from your Okta client the
[{
  "ActionType": "GenerateOrLoginUserProfile",
  "ID": "{PROFILE-NAME-IN-TIB}",
  "OrgID": "5a54a74550200d0001975584",
  "IdentityHandlerConfig": {
    "DashboardCredential": "{DASHBOARD-SECRET}"
  },
  "ProviderConfig": {
    "CallbackBaseURL": "http://{TIB-DOMAIN}:{TIB-PORT}",
    "FailureRedirect": "http://{DASHBOARD-DOMAIN}:{DASHBOARD-PORT}/?fail=true",
    "UseProviders": [
    {
      "Key": "{Okta-App-Client-ID}",
      "Secret": "{Okta-App-Client-SECRET}",
      "Scopes": ["openid", "email"],
      "DiscoverURL": "https://<okta-org>.okta.com/.well-known/openid-configuration",
      "Name": "openid-connect"
    }
  ]
  },
  "ProviderName": "SocialProvider",
  "ReturnURL": "http://{DASHBOARD-DOMAIN}:{DASHBOARD-PORT}/tap",
  "Type": "redirect"
}]
- Start TIB by running the binary (
profiles.jsonis in the same CWD) See Install TIB for detailed instructions on how to install TIB - Test that it works:
From the broswer call
http://localhost:3010/auth/{PROFILE-NAME-IN-TIB}/openid-connect- If it’s working you’ll be redirected to Okta’s web page and will be asked to enter your Okta user name and password.
- If you were successfully authenticated by Okta then you’ll be redirected to the Tyk Dashboard and login into it without going through the login page. Job’s done!
- If you need to update your profile then you can use TIB’s REST API as follows:
curl http://{TIB-DOMAIN}:{TIB-PORT}/api/profiles/{PROFILE-NAME-IN-TIB} -H "Authorization: {MY-SECRET}" -H "Content-type: application/json" -X PUT --data "@./my-new-dashboard-profile.json" | prettyjson
- POST and DELETE calls apply as normal
- You can post a few profiles to TIB.
- See TIB REST API for more details.
The magic - The flow behind the scenes:
- The initial call to the endpoint on TIB was redirected to Okta
- Okta identified the user
- Okta redirected the call back to TIB endpoint (according to the callback you set up on the client earlier in step 3) and from TIB
- TIB, via REST API call to the dashboard, created a nonce and a special session attached to it.
- TIB redirected the call to the dashboard to a special endpoint
/tap( it was defined on the profile underReturnURL) with the nonce that was created. - The Dashboard on the
/tapendpoint finds the session that is attached to thenonce, login the user and redirect to the dashboard first page
Enhancements
Once it’s working you can also add two more enhancements - SSO and MFA
SSO login into the Dashboard via a login page
You will need to:
- set up a web server with a login page and a form for user and password
- Update tyk_analytics.conf to redirect logins to that url
Explicit details are in steps 6-7
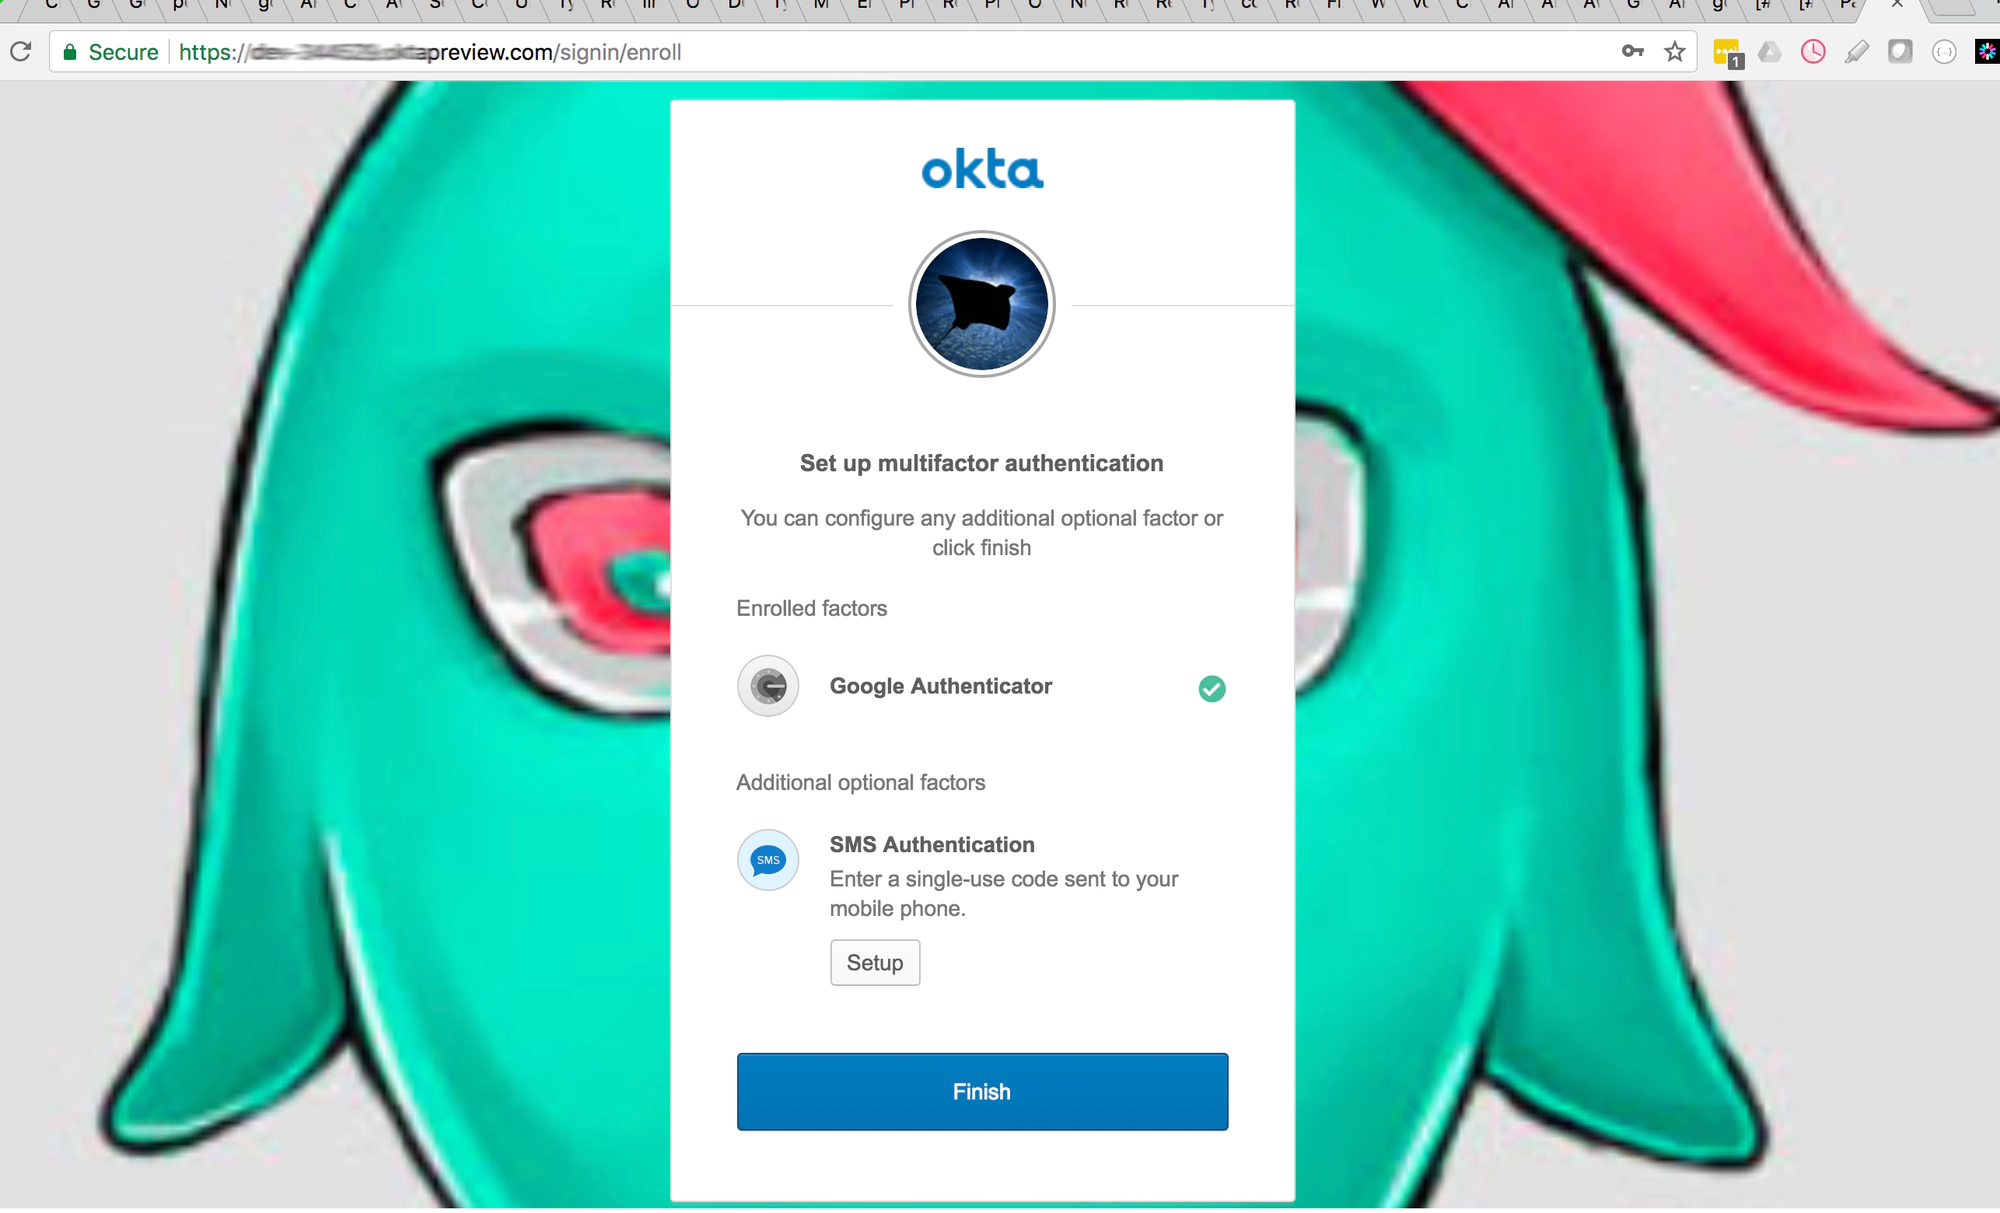
Multi-Factor-Authentication (MFA) Support
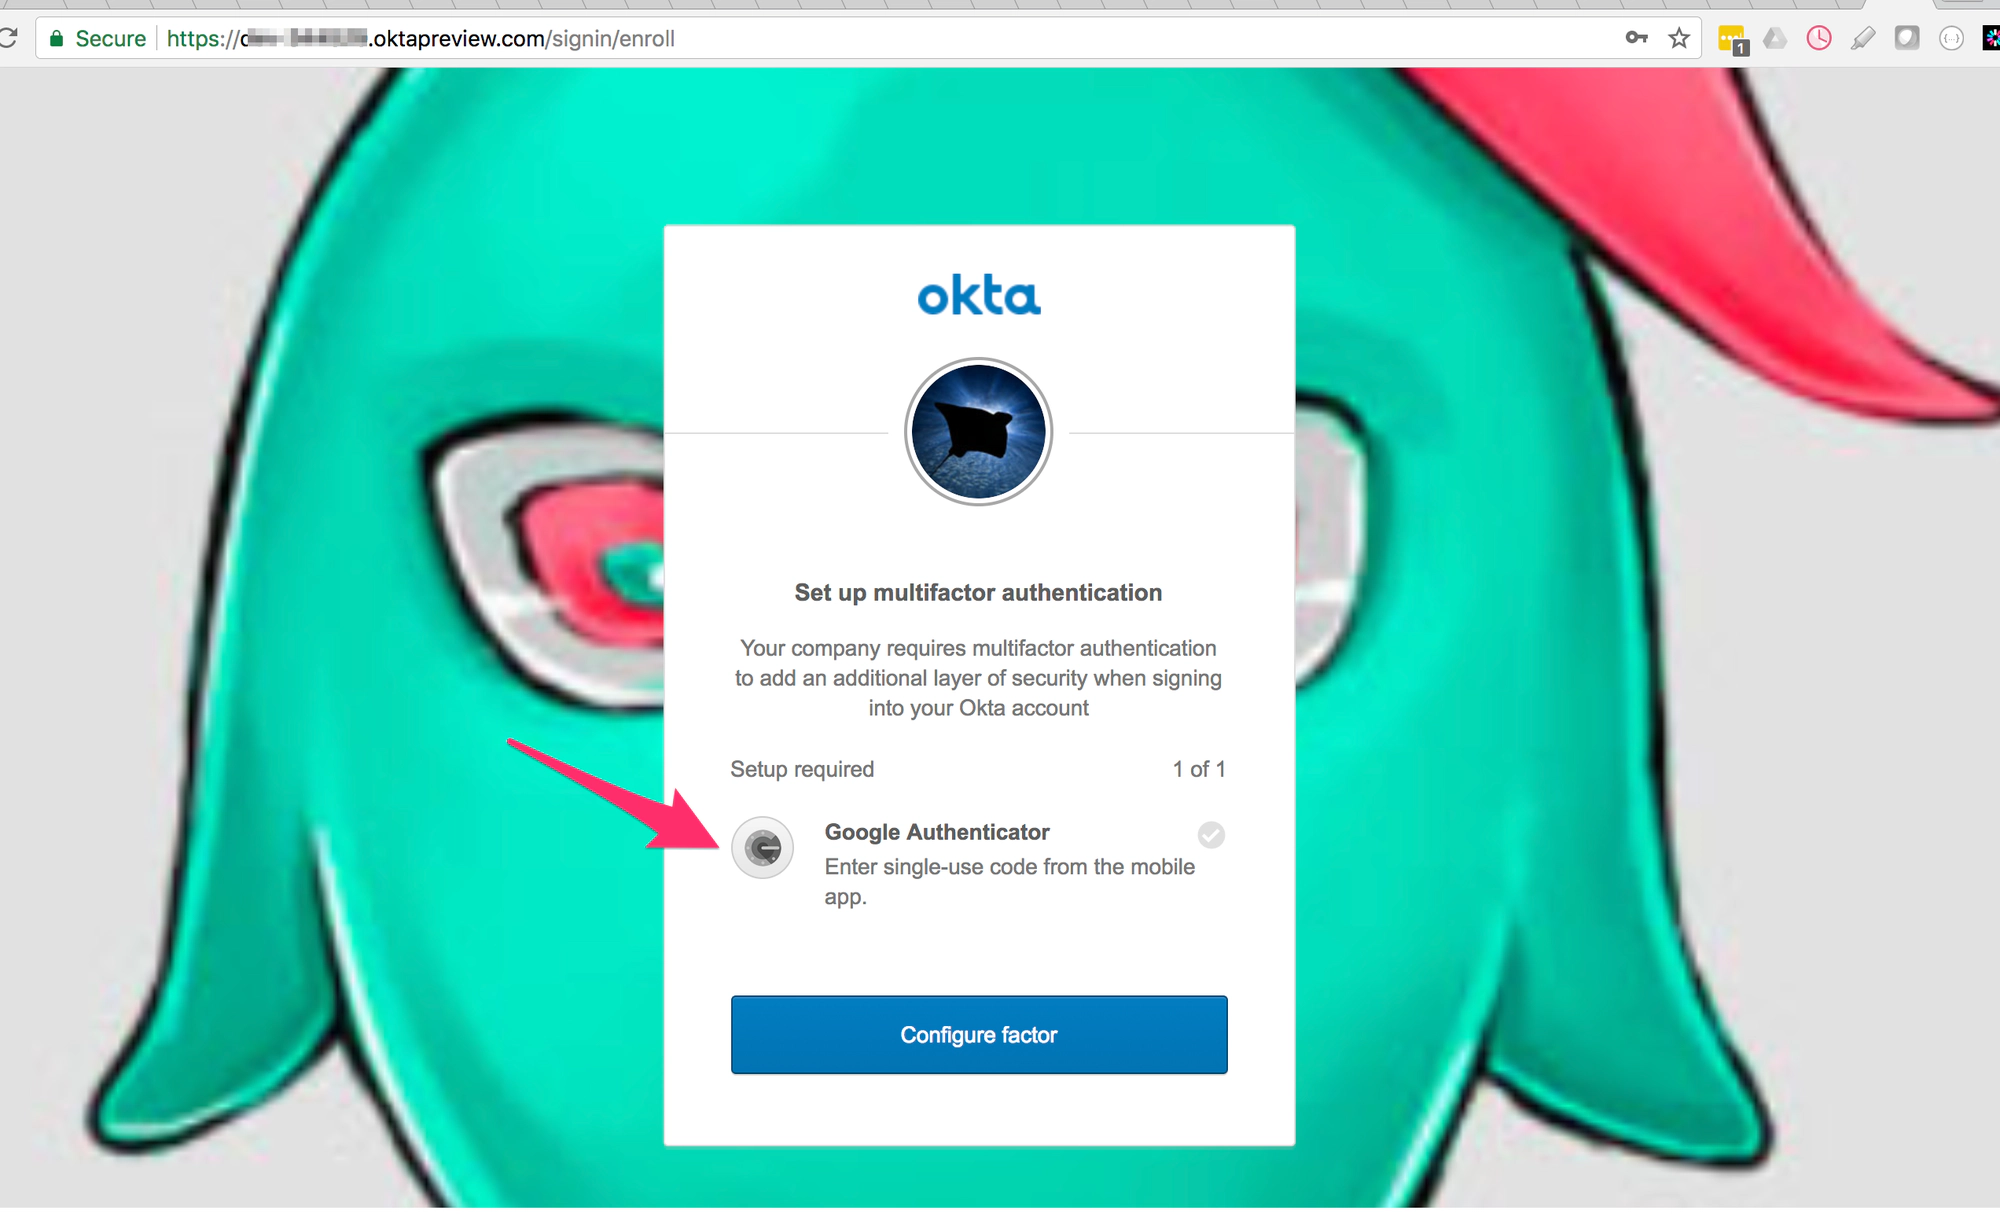
MFA works out-of-the-box in Tyk since luckily Okta supports it. you would need to add it to the configuration of the account holder. Under Security --> Multifactor --> Factor types you can choose the types you want. For instance I chose Google Authenticator.
-
While trying to login to the Dashboard, Okta enforced the MFA and asked me to use the Google Authenticator:
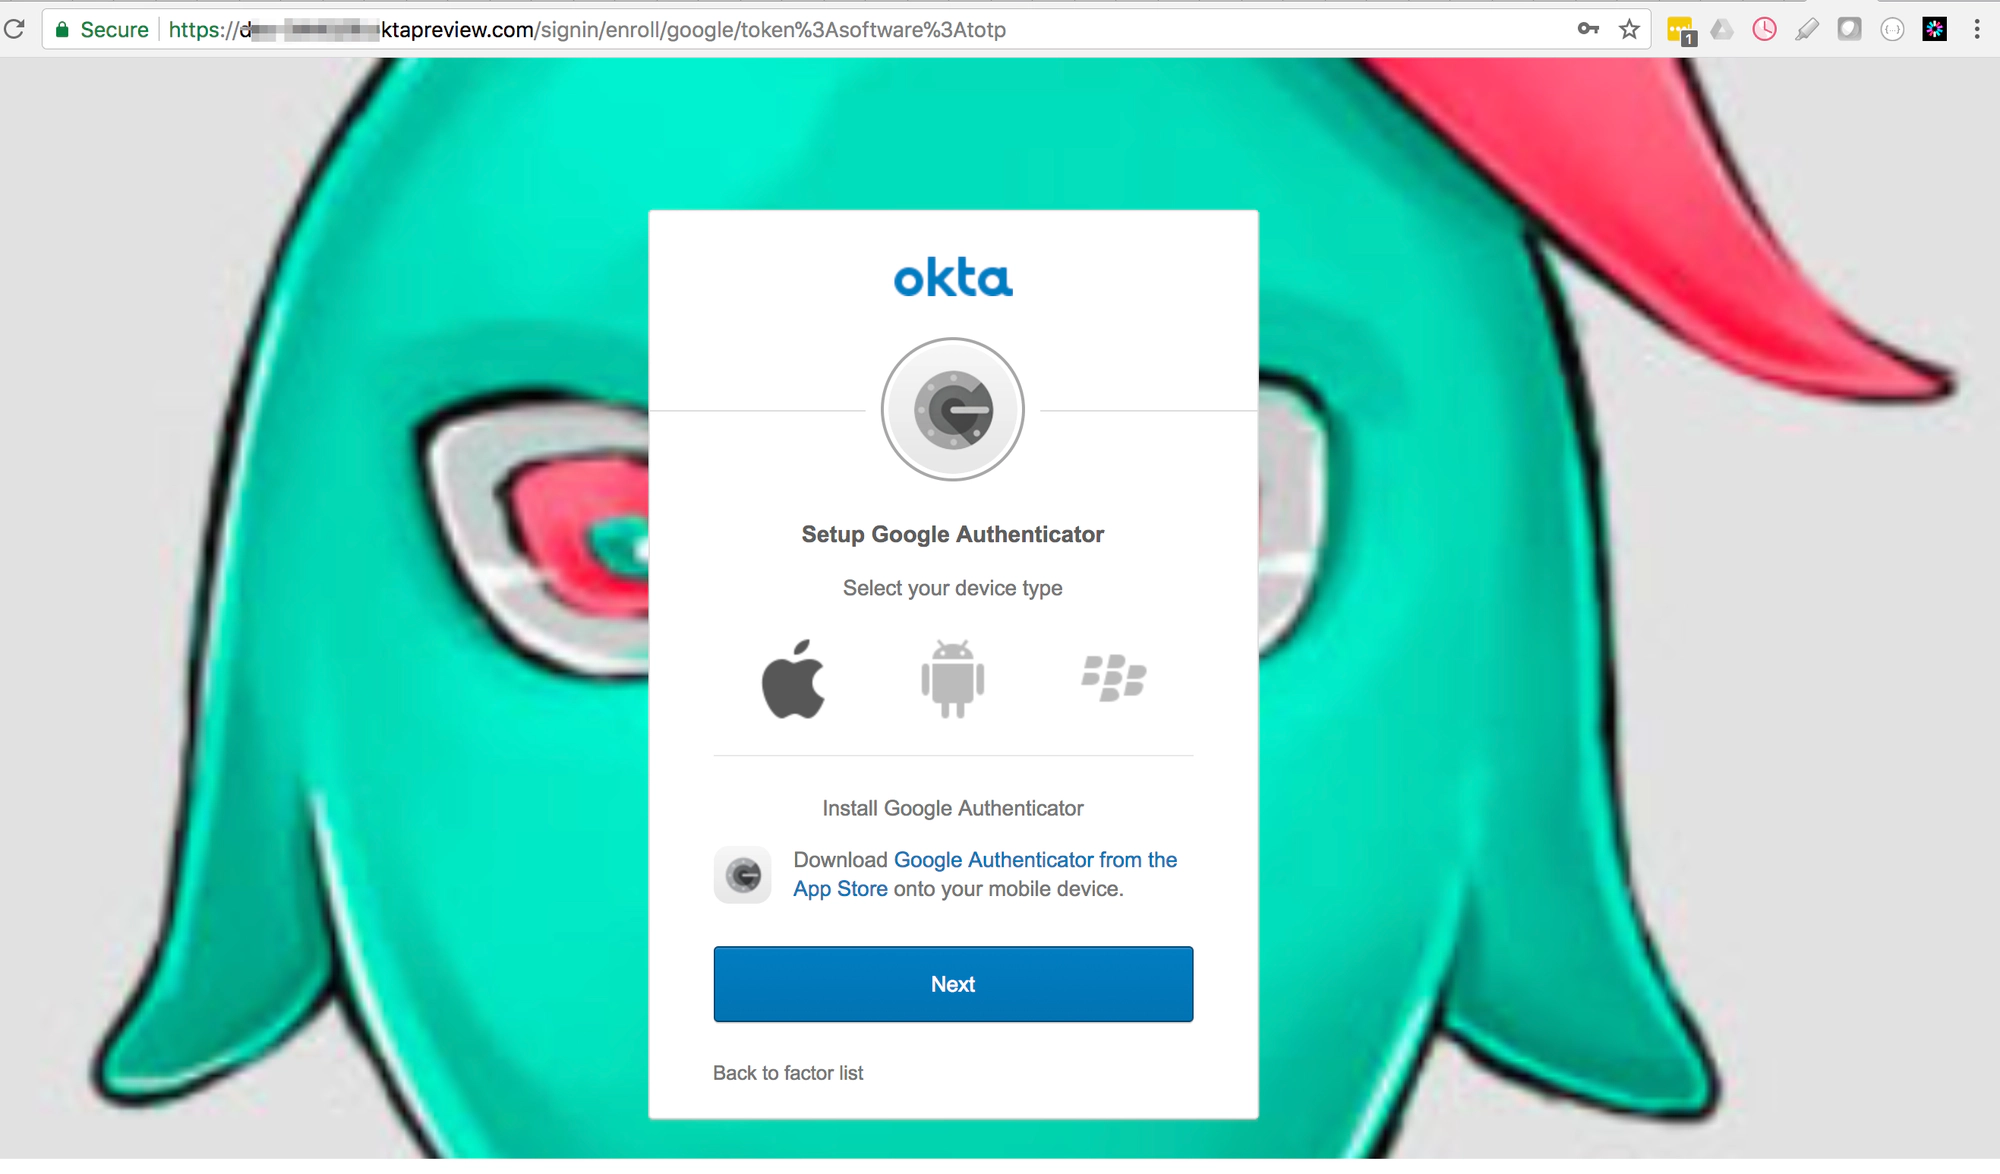
-
I had to download the Google Authenticator and identify with the generated code
-
I successfully authenticated with Google Authenticator
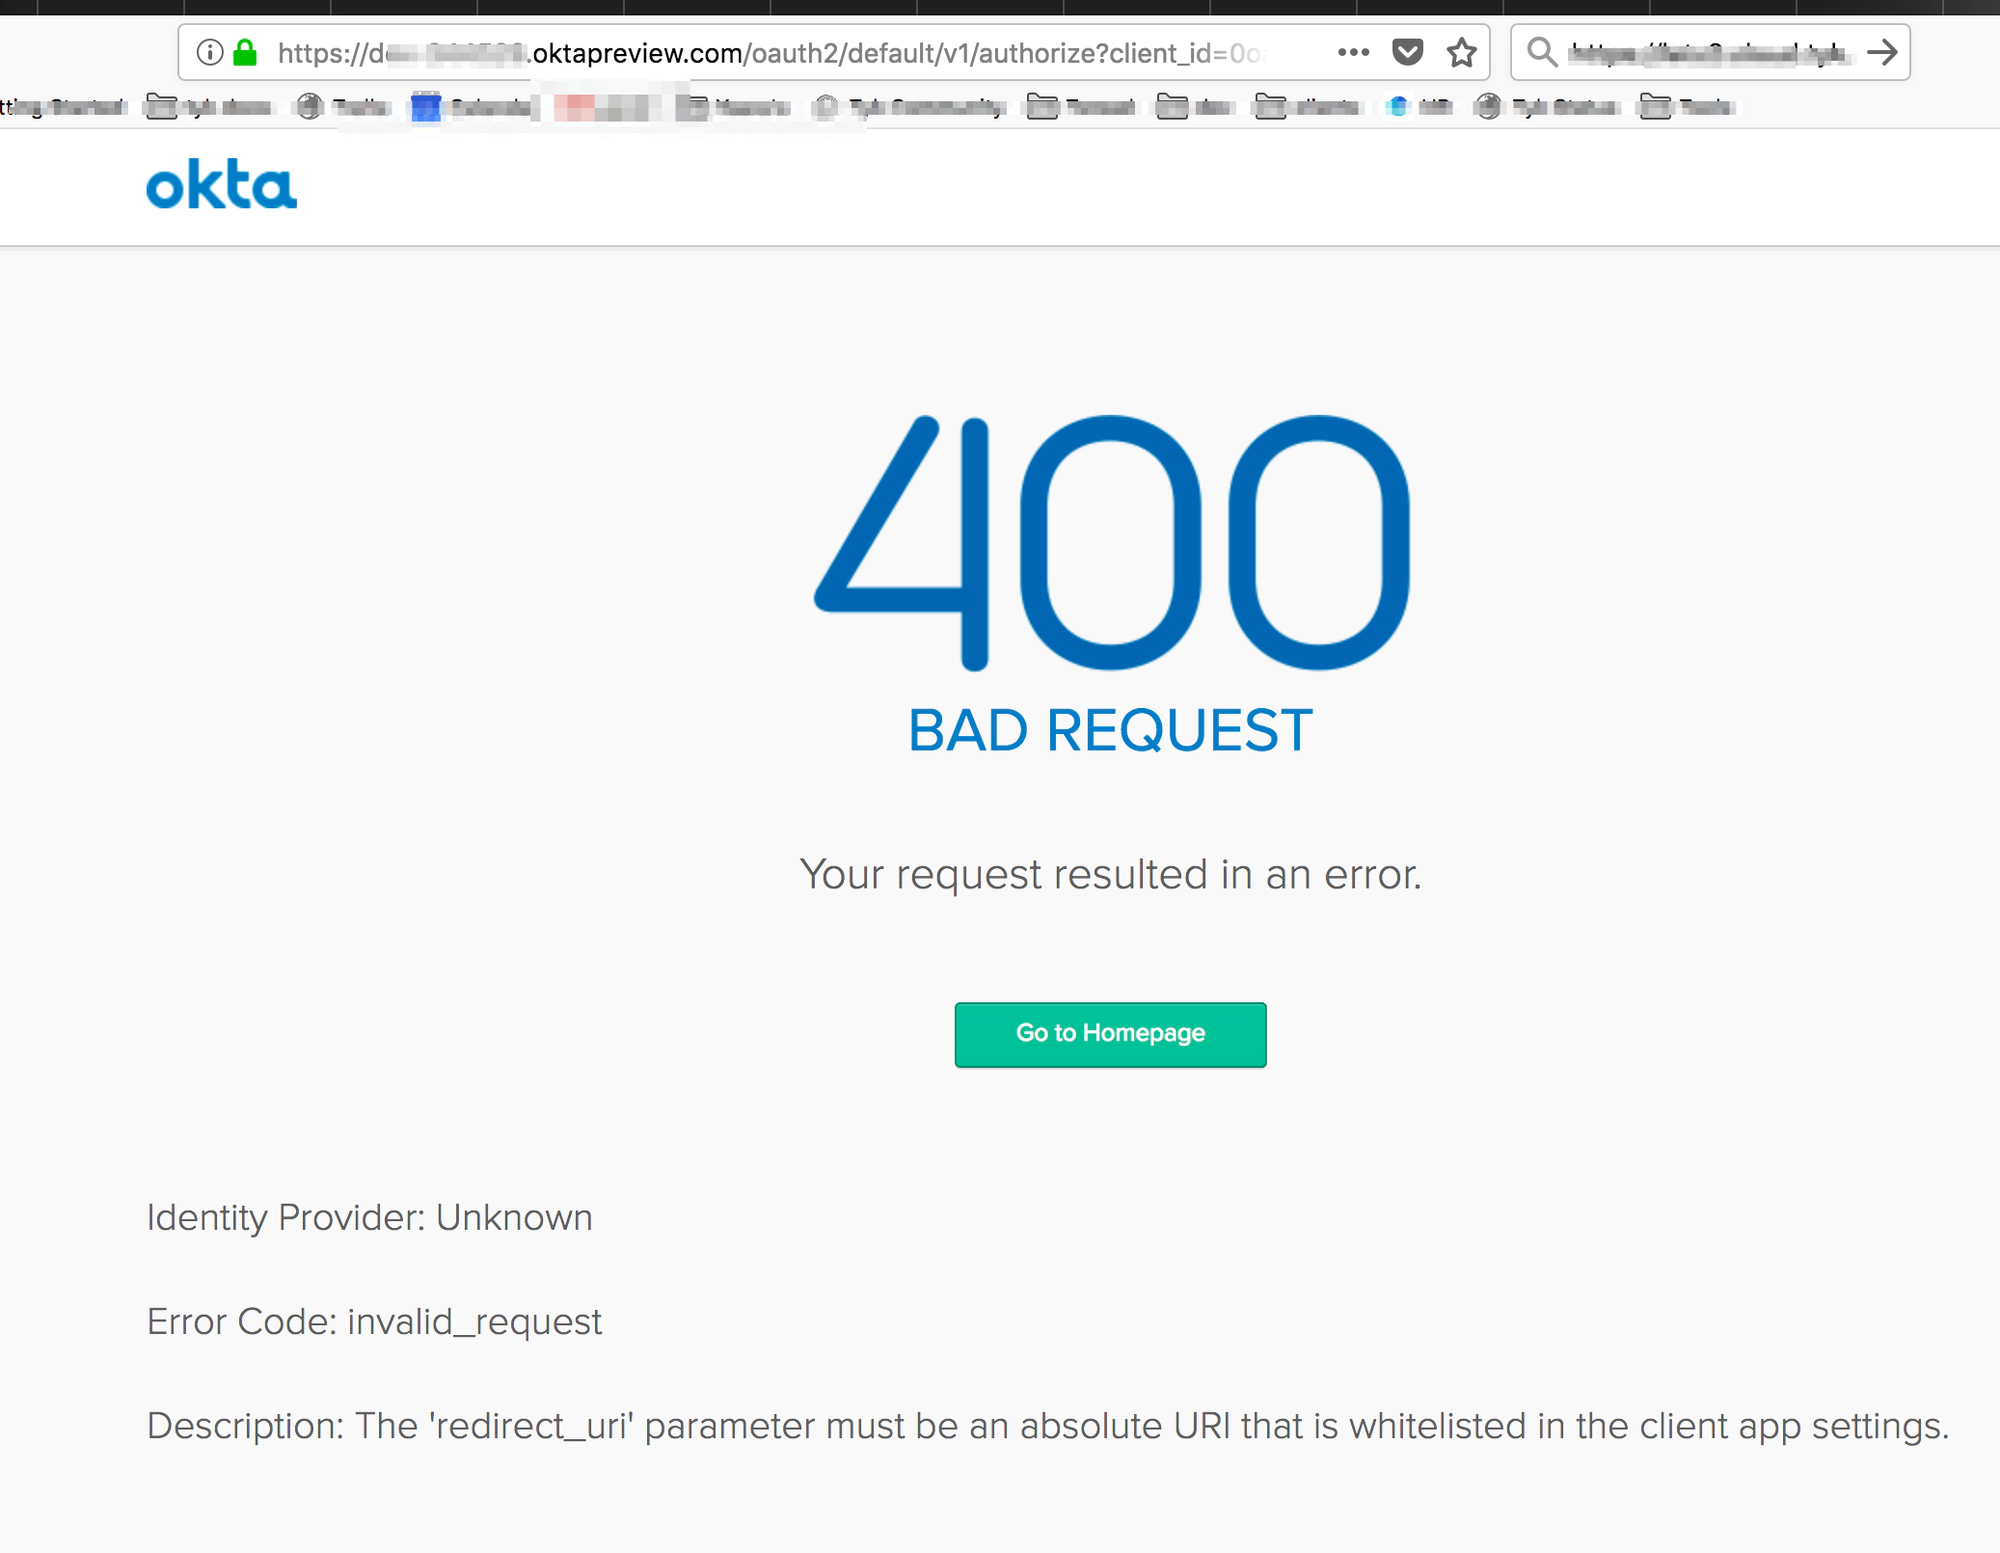
Common Error
If you get a 400 Bad Request it means the profile name in the login endpoint is not identical to the profile name in the callback that you set up on Okta’s app:
- On Okta’s app -
Login redirect URIs:http://localhost:3010/auth/{PROFILE-NAME-IN-TIB}/openid-connect/callback. - The endpoint to test -
http://localhost:3010/auth/{PROFILE-NAME-IN-TIB}/openid-connect