Docker on Windows - Docker Pro Demo
The Tyk Pro Docker demo is our full On-Premises Pro solution, which includes our Gateway, Dashboard, and analytics processing pipeline. This demo will run Tyk Self-Managed Pro on your machine, which contains 5 containers: Tyk Gateway, Tyk Dashboard, Tyk Pump, Redis and MongoDB. This demo is great for proof of concept and demo purposes, but if you want to test performance, you will need to move each component to a separate machine.
Warning
This demo is NOT designed for production use or performance testing.
Note
You use this at your own risk. Tyk is not supported on the Windows platform. However you can test it as a proof of concept using our Pro Demo Docker installation.
Prerequisites
- MS Windows 10 Pro
- Docker Desktop for Windows running with a signed in Docker ID
- Git for Windows
- PowerShell running as administrator
- Postman for Windows
- Our Pro Demo Docker GitHub repo
- A free Tyk Self-Managed Developer licence
Step One - Clone the Repo
Clone the repo above to a location on your machine.
Step Two - Edit your hosts file
You need to add the following to your Windows hosts file:
127.0.0.1 www.tyk-portal-test.com
127.0.0.1 www.tyk-test.com
Step Three - Add your Developer Licence
You should have received your free developer licence via email. Copy the licence key in the following location from your \confs\tyk_analytics.conf file:
{
  ...
  "license_key": "<LICENSE-KEY>"
  ...
}
Step Four - Run the Docker Compose File
From PowerShell, run the following command from your installation folder:
docker-compose up
This will will download and setup the five Docker containers. This may take some time and will display all output.
Step Five - Test the Tyk Dashboard URL
Go to:
127.0.0.1:3000
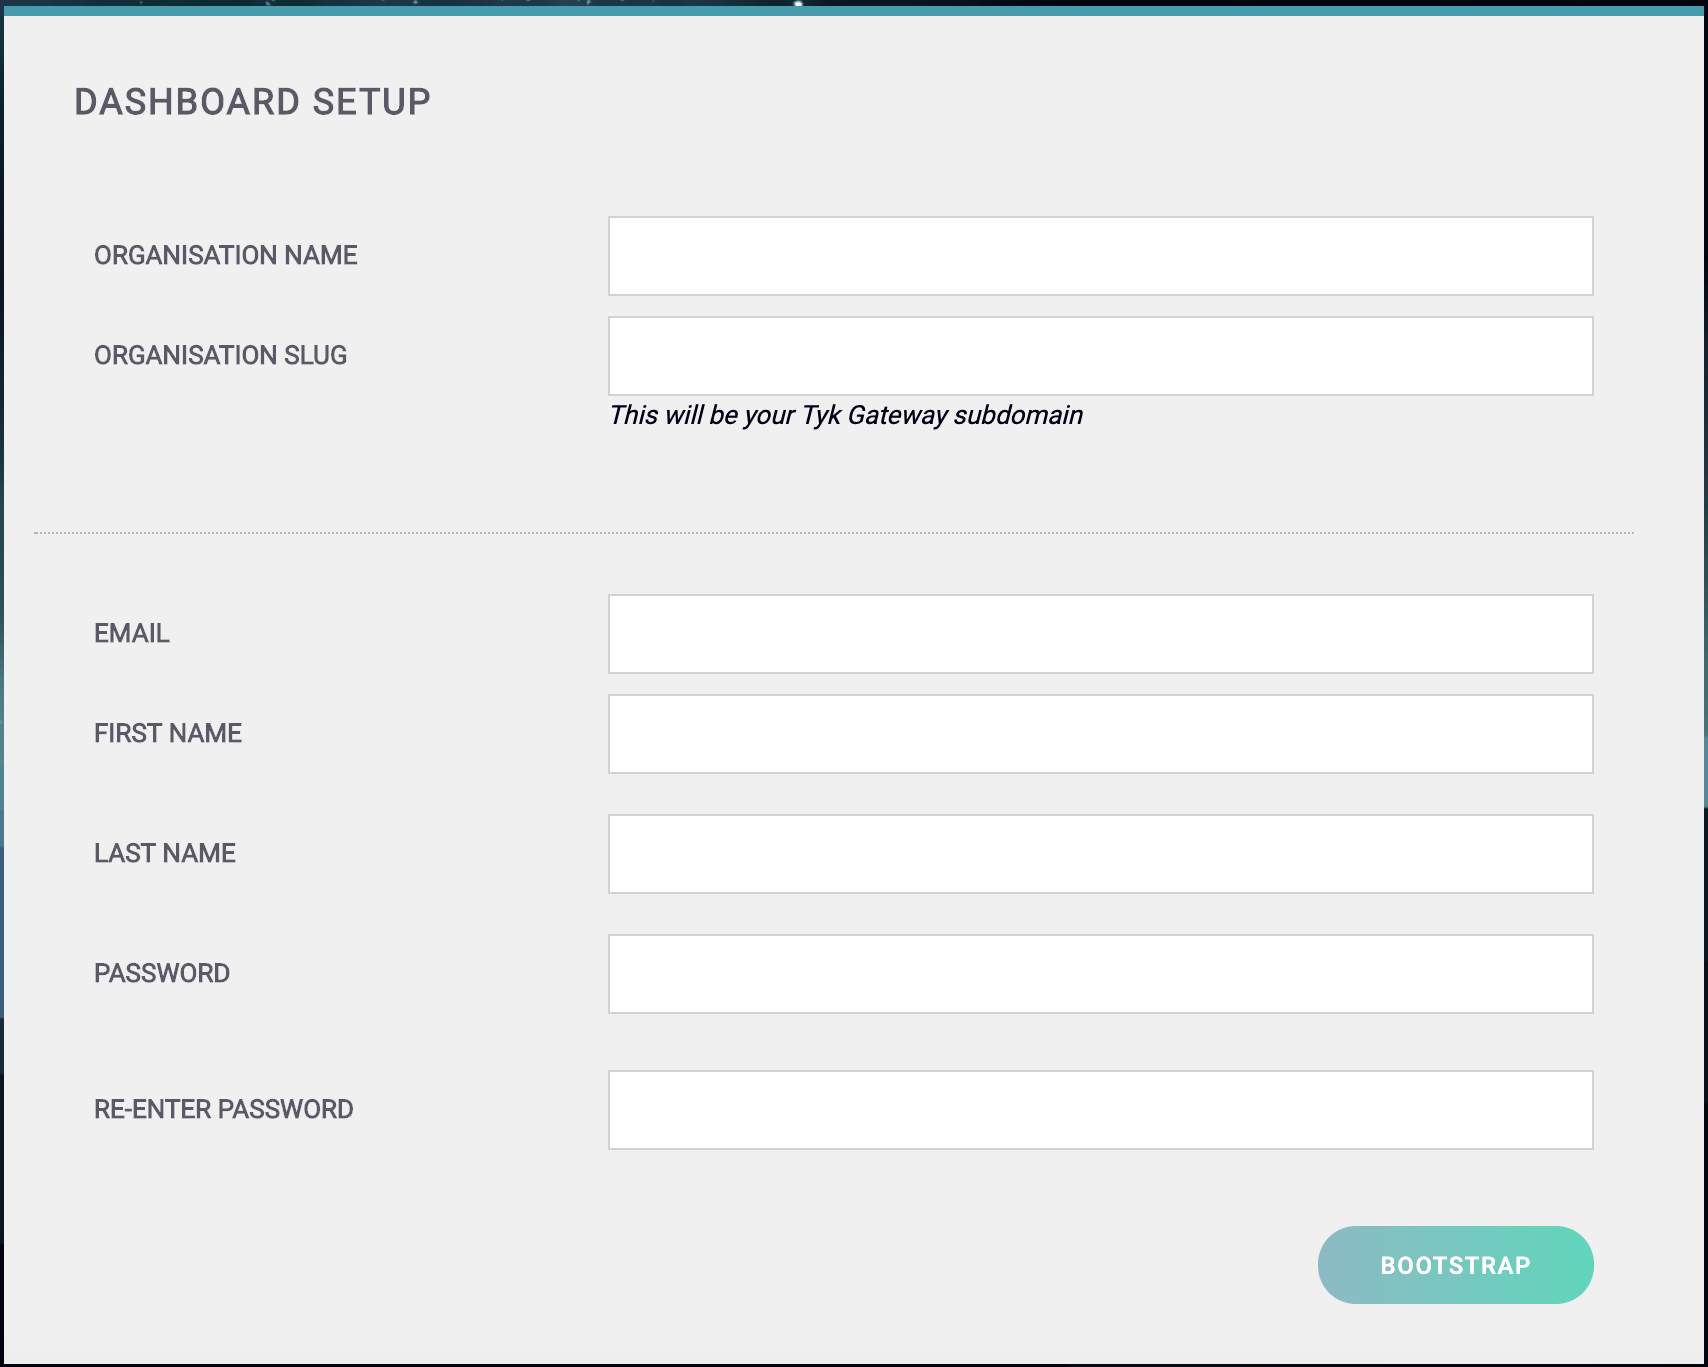
You should get to the Tyk Dashboard Setup screen:

Step Six - Create your Organisation and Default User
You need to enter the following:
- Your Organisation Name
- Your Organisation Slug
- Your User Email Address
- Your User First and Last Name
- A Password for your User
- Re-enter your user Password
Note
For a password, we recommend a combination of alphanumeric characters, with both upper and lower case letters.
Click Bootstrap to save the details.
You can now log in to the Tyk Dashboard from 127.0.0.1:3000, using the username and password created in the Dashboard Setup screen.
Step Seven - Set up a Portal Catalogue
This creates a portal catalogue for your developer portal. For the Authorization Header, the Value you need to enter is the access_key value from the create user request. In the body add the org_id value created in Step One.
- Request: POST
- URL:
127.0.0.1:3000/api/portal/catalogue - Header: Key
AuthorzationValueSECRET_VALUE - Body (raw set to application/json):
Sample Request
{ "org_id": "5d07b4b0661ea80001b3d40d" }
Sample Response
{
  "Status": "OK",
  "Message": "5d07b4b0661ea80001b3d40d",
  "Meta": null
}
Step Eight - Create your default Portal Pages
This creates the default home page for your developer portal. For the Authorization Header, the Value you need to enter is the access_key value from the create user request.
- Request: POST
- URL:
127.0.0.1:3000/api/portal/catalogue - Header: Key
AuthorzationValueSECRET_VALUE - Body (raw set to application/json):
Sample Request
{
  "fields": {
    "JumboCTALink": "#cta",
    "JumboCTALinkTitle": "Your awesome APIs, hosted with Tyk!",
    "JumboCTATitle": "Tyk Developer Portal",
    "PanelOneContent": "Panel 1 content.",
    "PanelOneLink": "#panel1",
    "PanelOneLinkTitle": "Panel 1 Button",
    "PanelOneTitle": "Panel 1 Title",
    "PanelThereeContent": "",
    "PanelThreeContent": "Panel 3 content.",
    "PanelThreeLink": "#panel3",
    "PanelThreeLinkTitle": "Panel 3 Button",
    "PanelThreeTitle": "Panel 3 Title",
    "PanelTwoContent": "Panel 2 content.",
    "PanelTwoLink": "#panel2",
    "PanelTwoLinkTitle": "Panel 2 Button",
    "PanelTwoTitle": "Panel 2 Title",
    "SubHeading": "Sub Header"
  },
  "is_homepage": true,
  "slug": "home",
  "template_name": "",
  "title": "Tyk Developer Portal"
}
Sample Response
{
  "Status": "OK",
  "Message": "5d07b4b0661ea80001b3d40d",
  "Meta": null
}
Step Nine - Setup the Portal URL
This creates the developer portal URL. For the Authorization Header, the Value you need to enter is the secret value from your /confs/tyk_analytics.conf.
- Request: POST
- URL:
127.0.0.1:3000/api/portal/configuration - Header: Key
AuthorzationValueSECRET_VALUE - Body (raw set to application/json):
Sample Request
{SECRET_VALUE}
Sample Response
{
  "Status": "OK",
  "Message": "5d07b4b0661ea80001b3d40d",
  "Meta": null
}
