Minimising latency with MDCB
Overview
As described previously, Acme Global Bank has operations and customers in both the EU and USA.
To decrease the latency in response from their systems and to ensure that data remains in the same legal jurisdiction as the customers (data residency), they have deployed backend (or, from the perspective of the API gateway, “upstream”) services in two data centres: one in the US, the other in the EU.
Without a dedicated solution for this multi-region use case, Acme Global Bank would deploy a Tyk Gateway cluster in each data centre and then have the operational inconvenience of maintaining two separate instances of Tyk Dashboard to configure, secure and publish the APIs.
By using Tyk’s Multi-Data Centre Bridge (MDCB), however, they are able to centralise the management of their API Gateways and gain resilience against failure of different elements of the deployment - data or control plane - improving the availability of their public APIs.
In this example we will show you how to create the Acme Global Bank deployment using our example Helm charts.
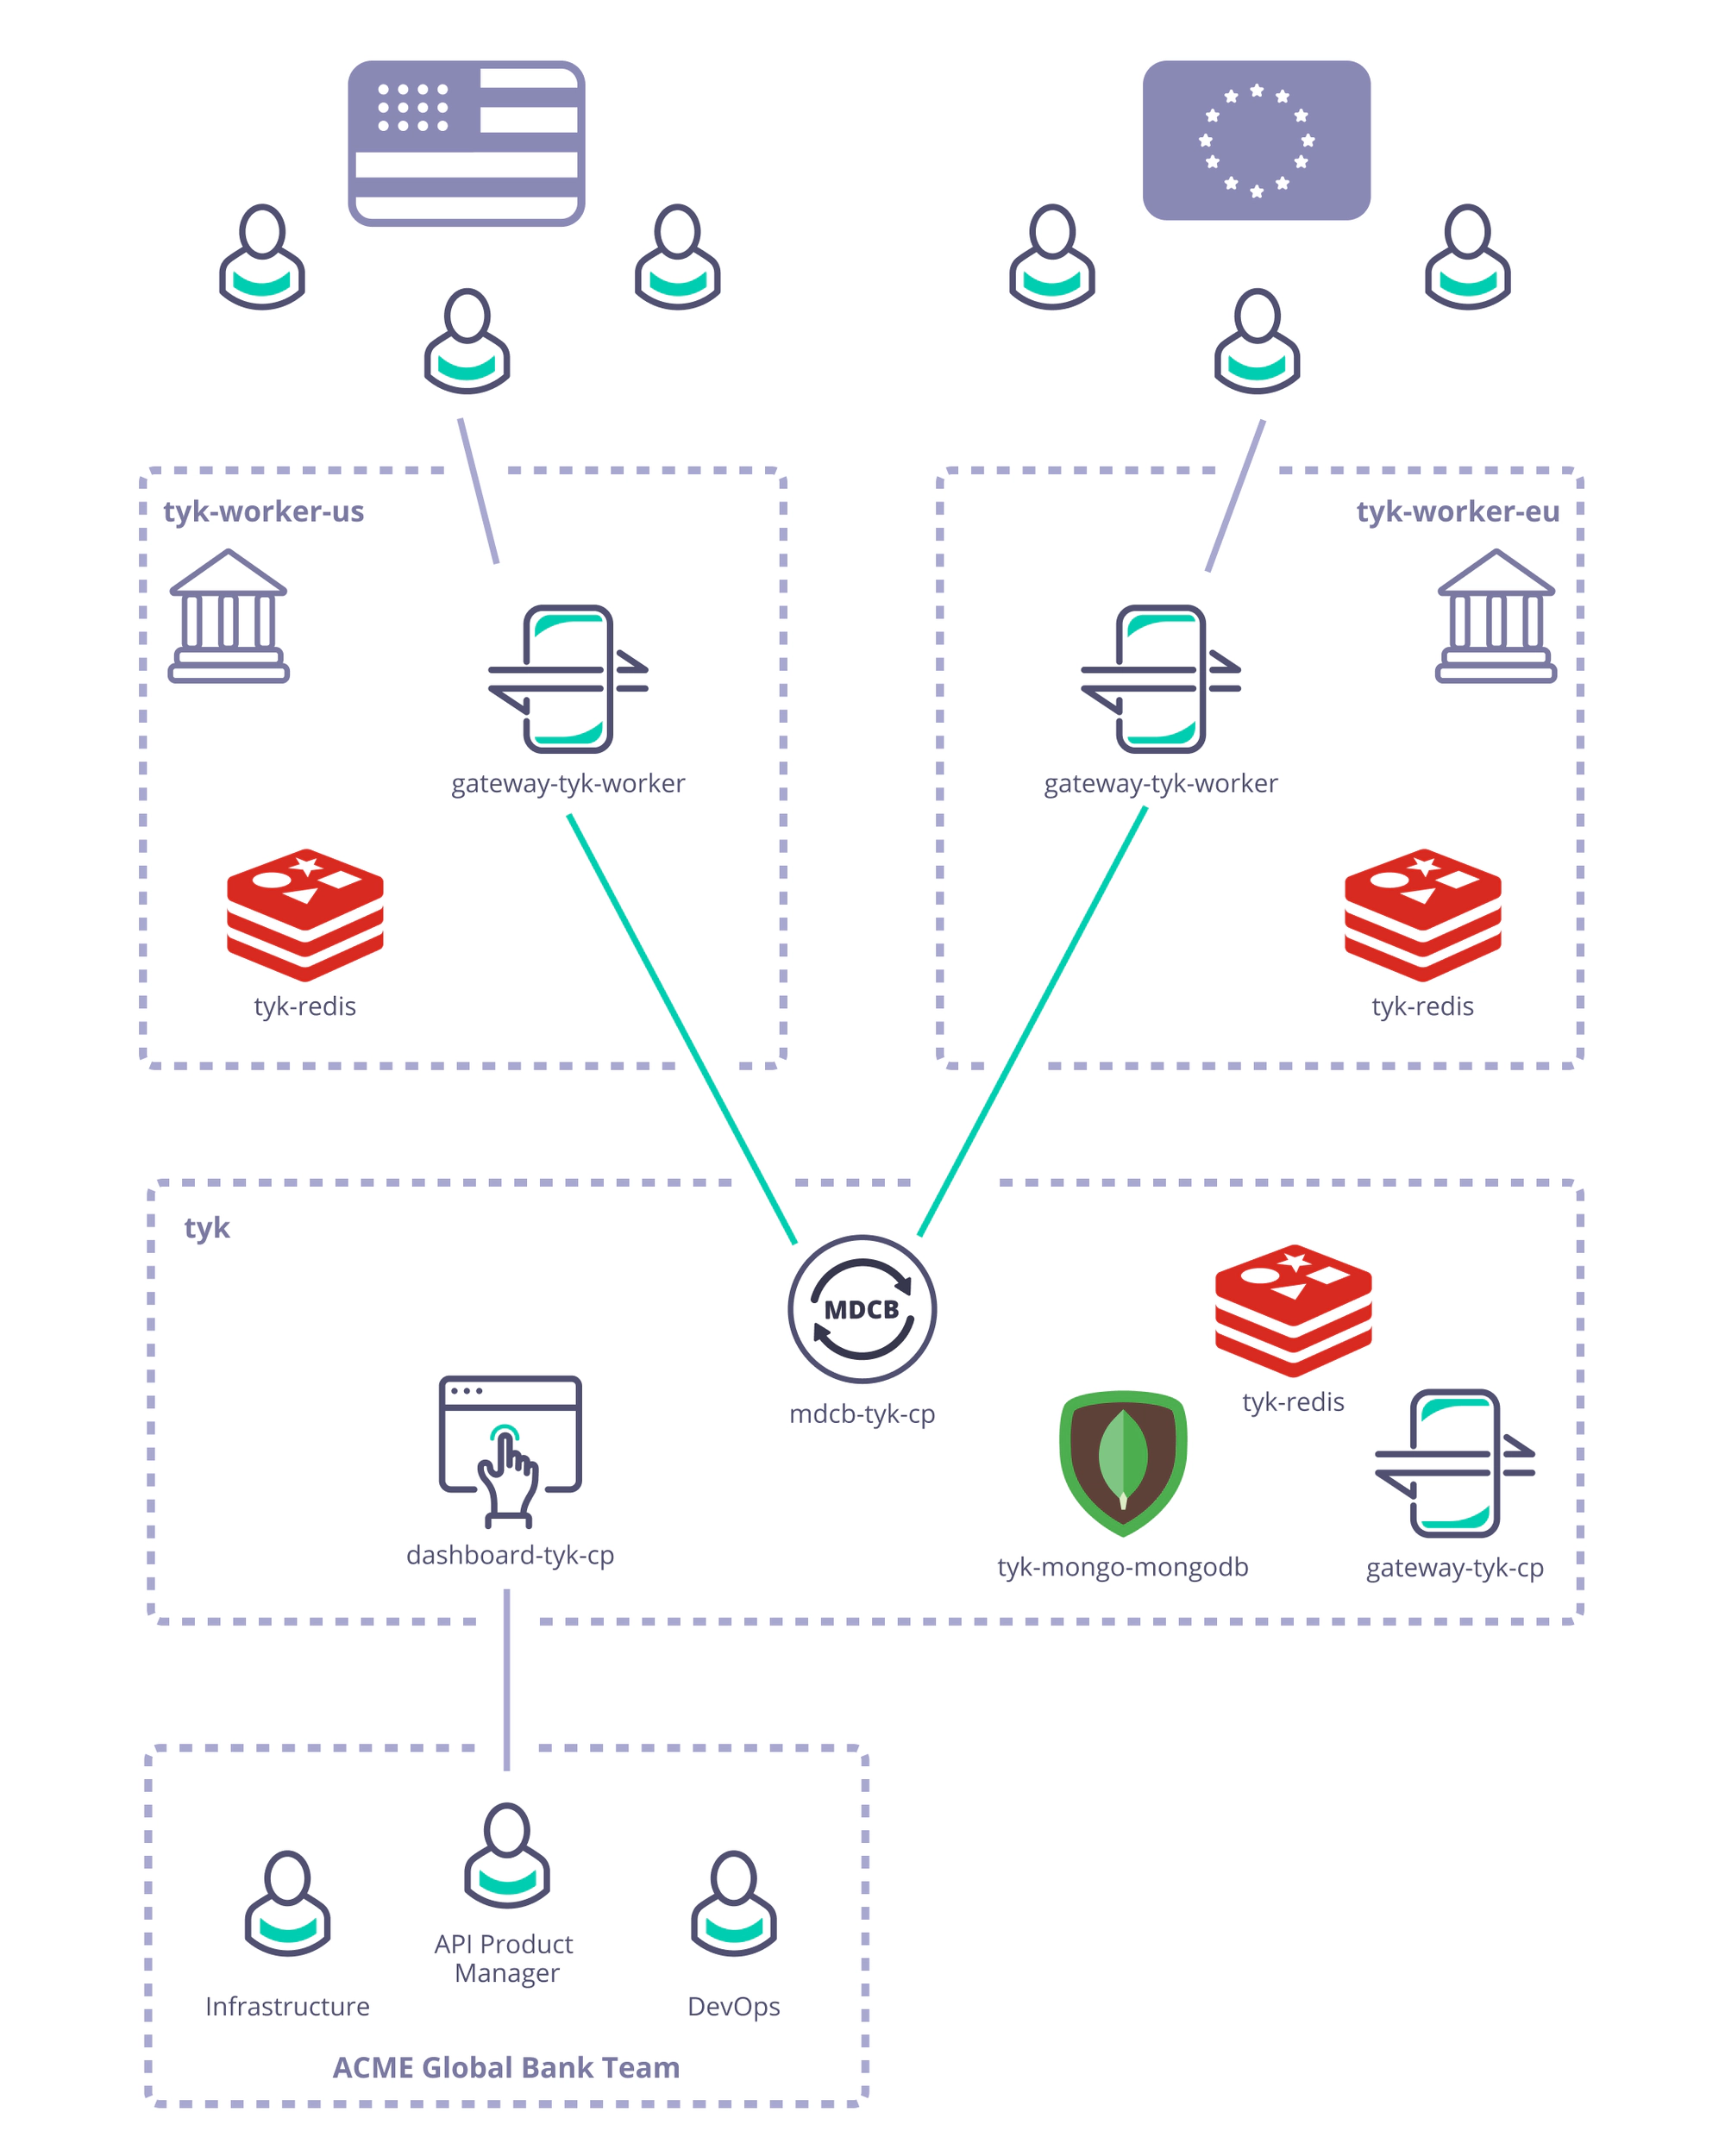
Step-by-step instructions to deploy the Acme Global Bank scenario with Kubernetes in a public cloud (here we’ve used Google Cloud Platform):
Pre-requisites and configuration
-
What you need to install/set-up
- Tyk Pro licence (Dashboard and MDCB keys - obtained from Tyk)
- Access to a cloud account of your choice, e.g. GCP
- You need to grab this Tyk Demo repository: GitHub - TykTechnologies/tyk-k8s-demo
- You need to install
helm,jq,kubectlandwatch
-
To configure GCP
- Create a GCP cluster
- Install the Google Cloud SDK
- install
gcloud ./google-cloud-sdk/install.sh
- install
- Configure the Google Cloud SDK to access your cluster
gcloud auth logingcloud components install gke-gcloud-auth-plugingcloud container clusters get-credentials <<gcp_cluster_name>> —zone <<zone_from_gcp_cluster>>—project <<gcp_project_name>>
- Verify that everything is connected using
kubectlkubectl get nodes
-
You need to configure the Tyk build
- Create a
.envfile within tyk-k8s-demo based on the provided.env.examplefile - Add the Tyk licence keys to your
.env:LICENSE=<dashboard_licence>MDCB_LICENSE=<mdcb_licence>
- Create a
Deploy Tyk Stack to create the Control and Data Planes
- Create the Tyk Control Plane
./up.sh -r redis-cluster -e load-balancer tyk-cp
Deploying the Tyk Control Plane
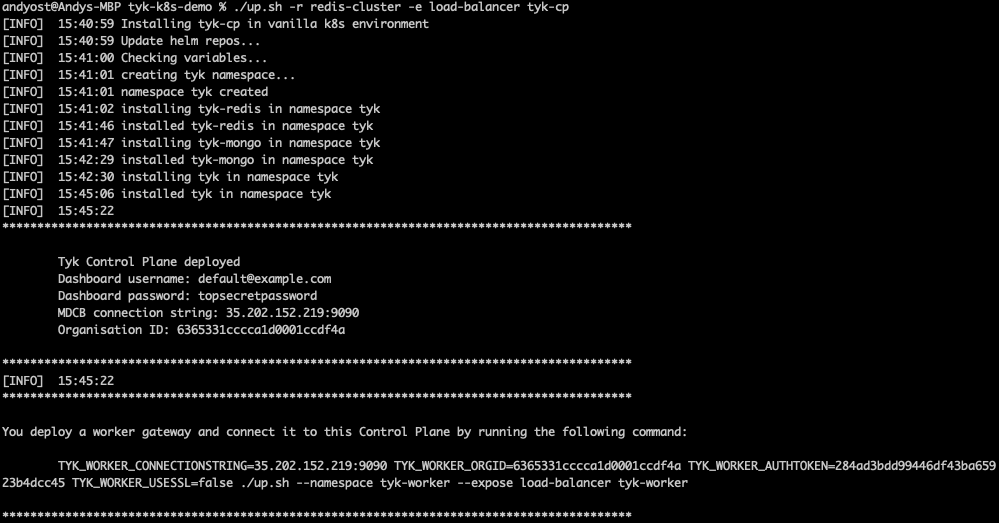
- Create two logically-separate Tyk Data Planes (Workers) to represent Acme Global Bank’s US and EU operations using the command provided in the output from the
./up.shscript:TYK_WORKER_CONNECTIONSTRING=<MDCB-exposure-address:port> TYK_WORKER_ORGID=<org_id> TYK_WORKER_AUTHTOKEN=<mdcb_auth_token> TYK_WORKER_USESSL=false ./up.sh --namespace <worker-namespace> tyk-worker
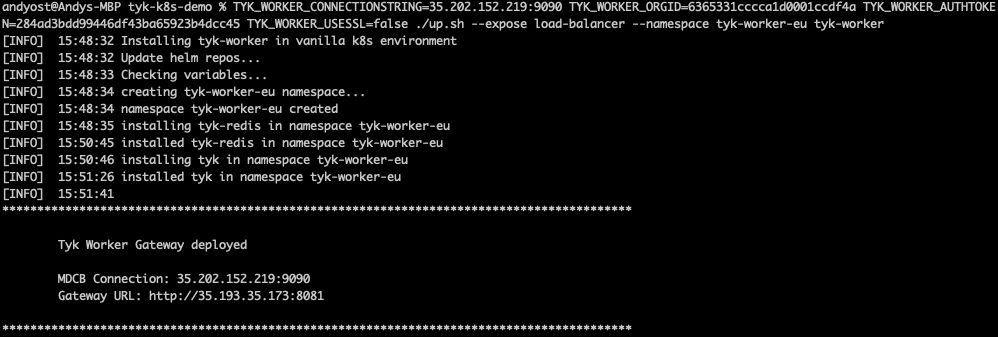
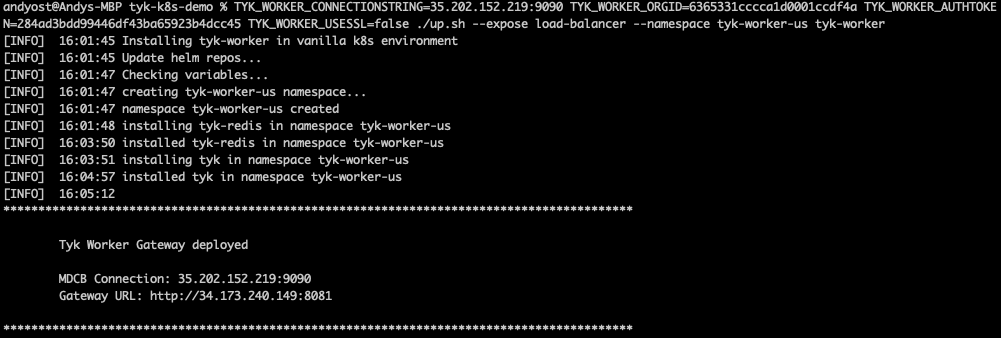
Note that you need to run the same command twice, once setting <worker-namespace> to tyk-worker-us, the other to tyk-worker-eu (or namespaces of your choice)
Deploying the tyk-worker-us namespace (Data Plane #1)
Deploying the tyk-worker-eu namespace (Data Plane #2)
- Verify and observe the Tyk Control and Data Planes
- Use
curlto verify that the gateways are alive by calling their/helloendpoints
- Use
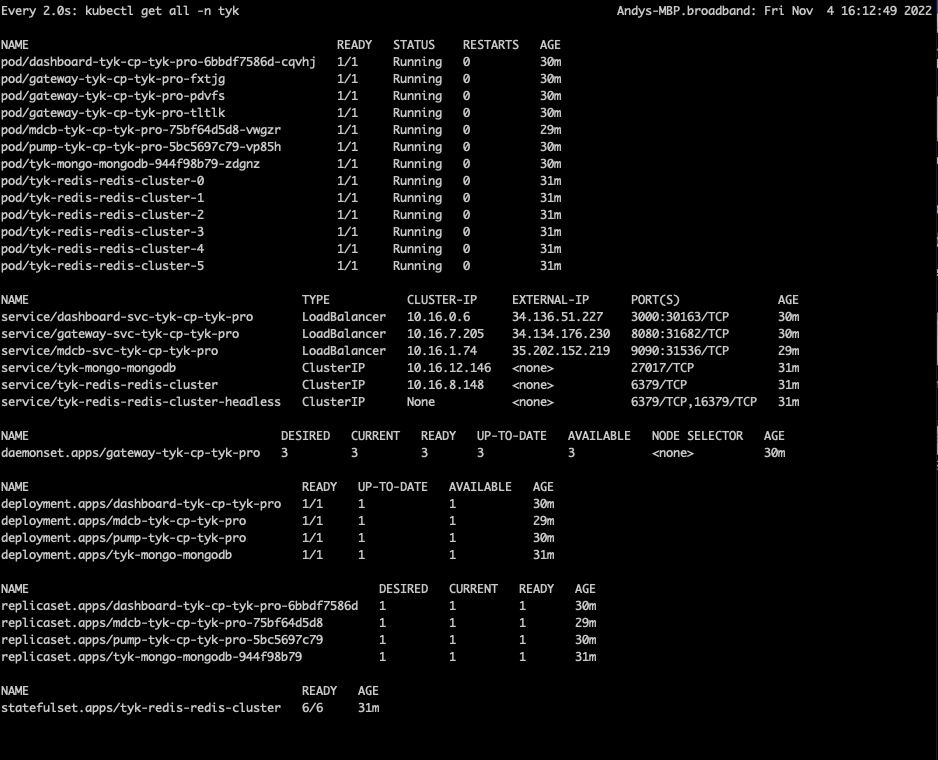
- You can use `watch` to observe each of the Kubernetes namespaces
tyk-cp (Control Plane)
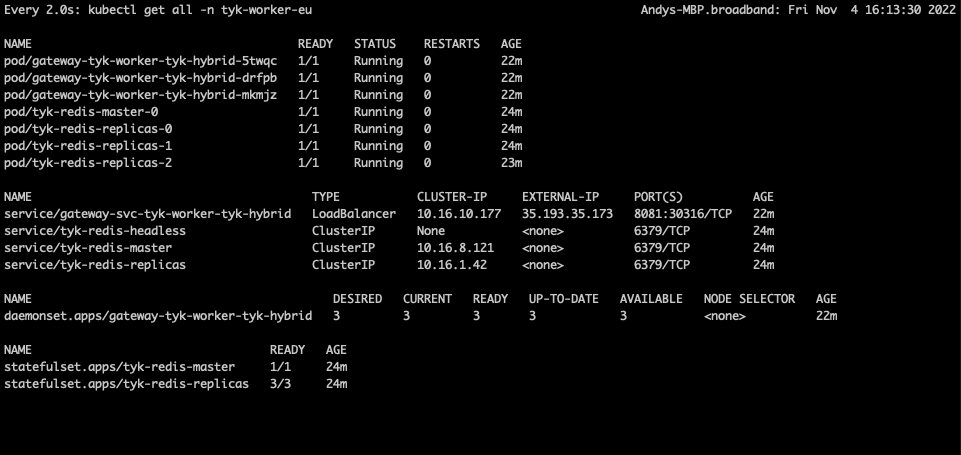
tyk-worker-us (Data Plane #1)
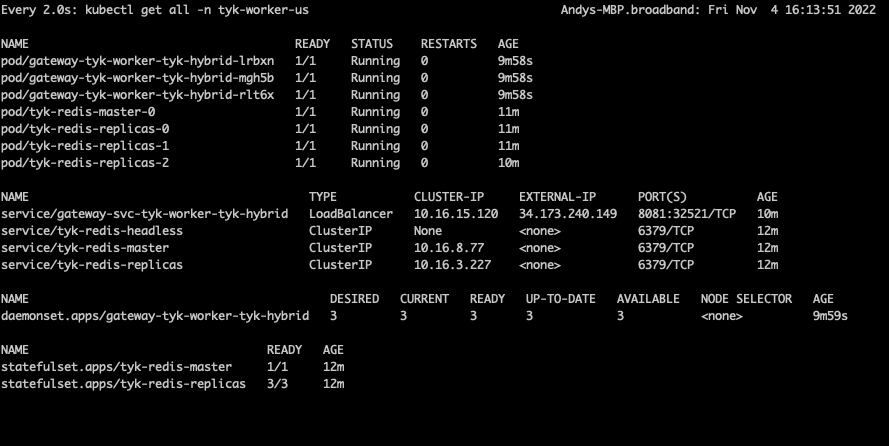
tyk-worker-eu (Data Plane #2)

Testing the deployment to prove the concept
As you know, the Tyk Multi Data Centre Bridge provides a link from the Control Plane to the Data Plane (worker) gateways, so that we can control all the remote gateways from a single dashboard.
- Access Tyk Dashboard
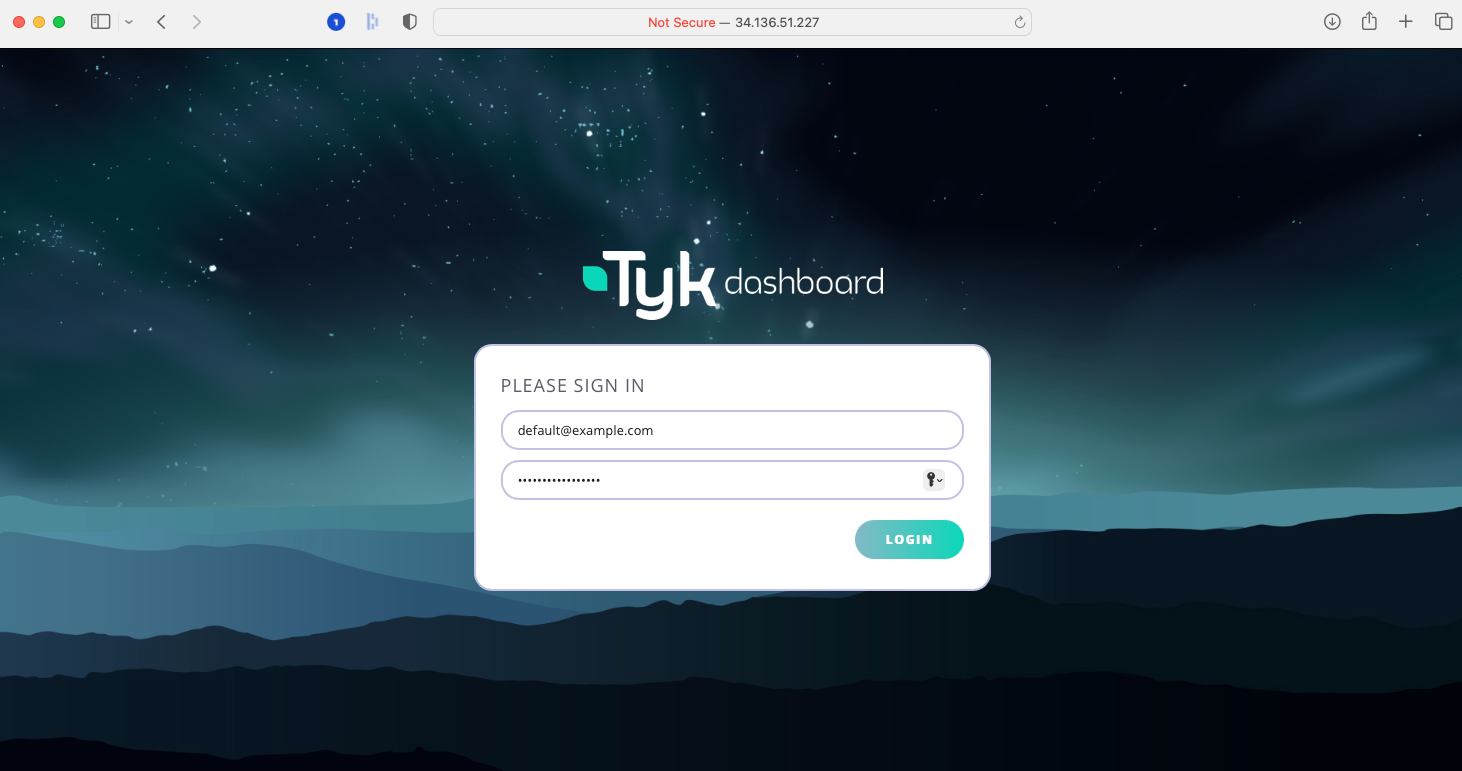
- You can log into the dashboard at the external IP address reported in the watch window for the Control Plane - in this example it was at
34.136.51.227:3000, so just enter this in your browser - The user name and password are provided in the
./up.shoutput:- username:
default@example.com - password:
topsecretpassword(or whatever you’ve configured in the.envfile)
- username:
- You can log into the dashboard at the external IP address reported in the watch window for the Control Plane - in this example it was at
- Create an API in the dashboard, but don’t secure it (set it to
Open - keyless); for simplicity we suggest a simple pass-through proxy tohttbin.org. - MDCB will propagate this API through to the workers - so try hitting that endpoint on the two Data Plane gateways (their addresses are given in the watch windows: for example
34.173.240.149:8081for mytyk-worker-usgateway above). - Now secure the API from the dashboard using the Authentication Token option. You’ll need to set a policy for the API and create a key.
- If you try to hit the API again from the workers, you’ll find that the request is now rejected because MDCB has propagated out the change in authentication rules. Go ahead and add the Authentication key to the request header… and now you reach
httpbin.orgagain. You can see in the Dashboard’s API Usage Data section that there will have been success and error requests to the API. - OK, so that’s pretty basic stuff, let’s show what MDCB is actually doing for you… reset the API authentication to be
Open - keylessand confirm that you can hit the endpoint without the Authentication key from both workers. - Next we’re going to experience an MDCB outage - by deleting its deployment in Kubernetes:
kubectl delete deployment.apps/mdcb-tyk-cp-tyk-pro -n tyk - Now there’s no connection from the data placne to the control plane, but try hitting the API endpoint on either worker and you’ll see that they continue serving your users’ requests regardless of their isolation from the Control Plane.
- Back on the Tyk Dashboard make some changes - for example, re-enable Authentication on your API, add a second API. Verify that these changes do not propagate through to the workers.
- Now we’ll bring MDCB back online with this command:
./up.sh -r redis-cluster -e load-balancer tyk-cp - Now try hitting the original API endpoint from the workers - you’ll find that you need the Authorisation key again because MDCB has updated the Data Planes with the new config from the Control Plane.
- Now try hitting the new API endpoint - this will also have automatically been propagated out to the workers when MDCB came back up and so is now available for your users to consume.
Pretty cool, huh?
There’s a lot more that you could do - for example by deploying real APIs (after all, this is a real Tyk deployment) and configuring different Organisation Ids for each Data Plane to control which APIs propagate to which workers (allowing you to ensure data localisation, as required by the Acme Global Bank).
Closing everything down
We’ve provided a simple script to tear down the demo as follows:
./down.sh -n tyk-worker-us./down.sh -n tyk-worker-eu./down.sh
Don’t forget to tear down your clusters in GCP if you no longer need them!
Next Steps
