

Introduction
Tyk Cloud hosts and manages the control planes for you. You can deploy the data planes across multiple locations:- as Cloud Gateways: Deployed and managed in Tyk Cloud, in any of our available regions. These are SaaS gateways, so there are no deployment or operational concerns.
- as Hybrid Gateways: This is a self-managed data plane, deployed in your infrastructure and managed by yourself. Your infrastructure can be a public or private cloud, or even your own data center.
Prerequisites
- Tyk Cloud Account, register here if you don’t have one yet:
- A Redis instance for each data plane, used as ephemeral storage for distributed rate limiting, token storage and analytics. You will find instructions for a simple Redis installation in the steps below.
- No incoming firewall rules are needed, as the connection between Tyk Hybrid Gateways and Tyk Cloud is always initiated from the Gateways, not from Tyk Cloud.
Tyk Hybrid Gateway configuration
The hybrid gateways in the data plane connect to the control plane in Tyk Cloud using the Tyk Dashboard API Access Credentials. Follow the guides below to create the configuration that we will be used in later sections to create a deployment: Login to your Tyk Cloud account deployments section and click onADD HYBRID DATA PLANE
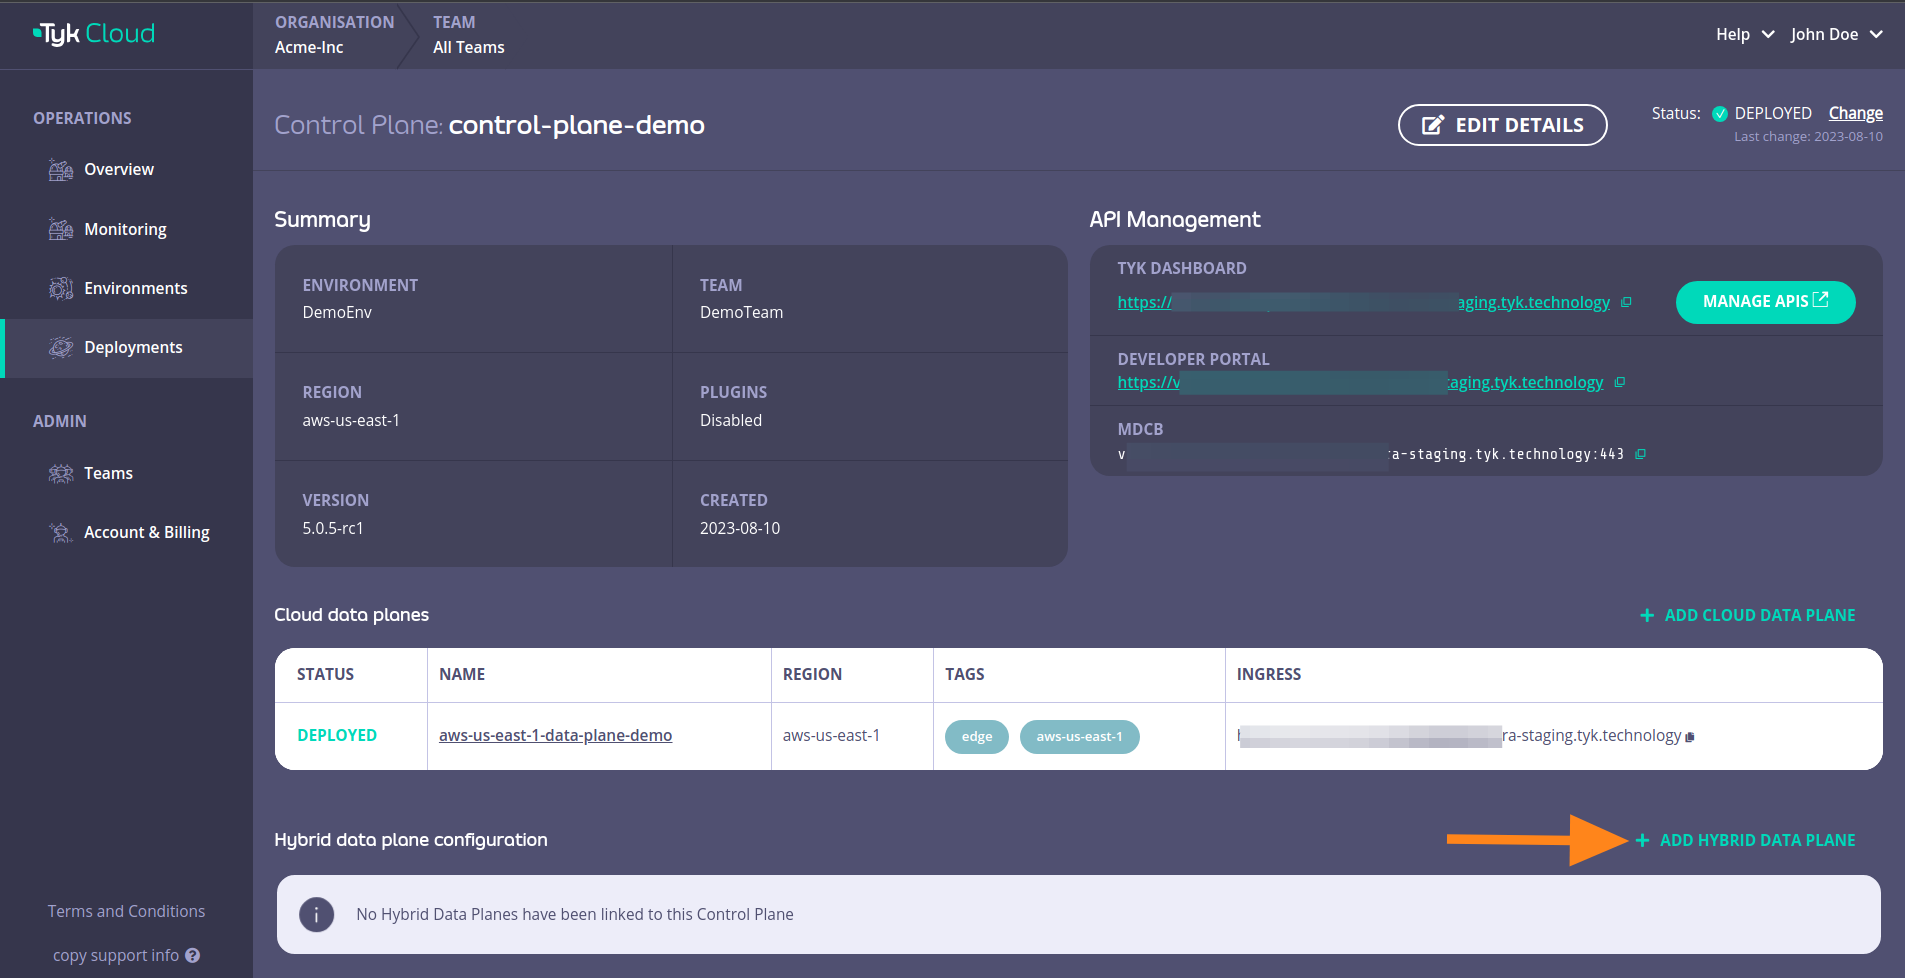
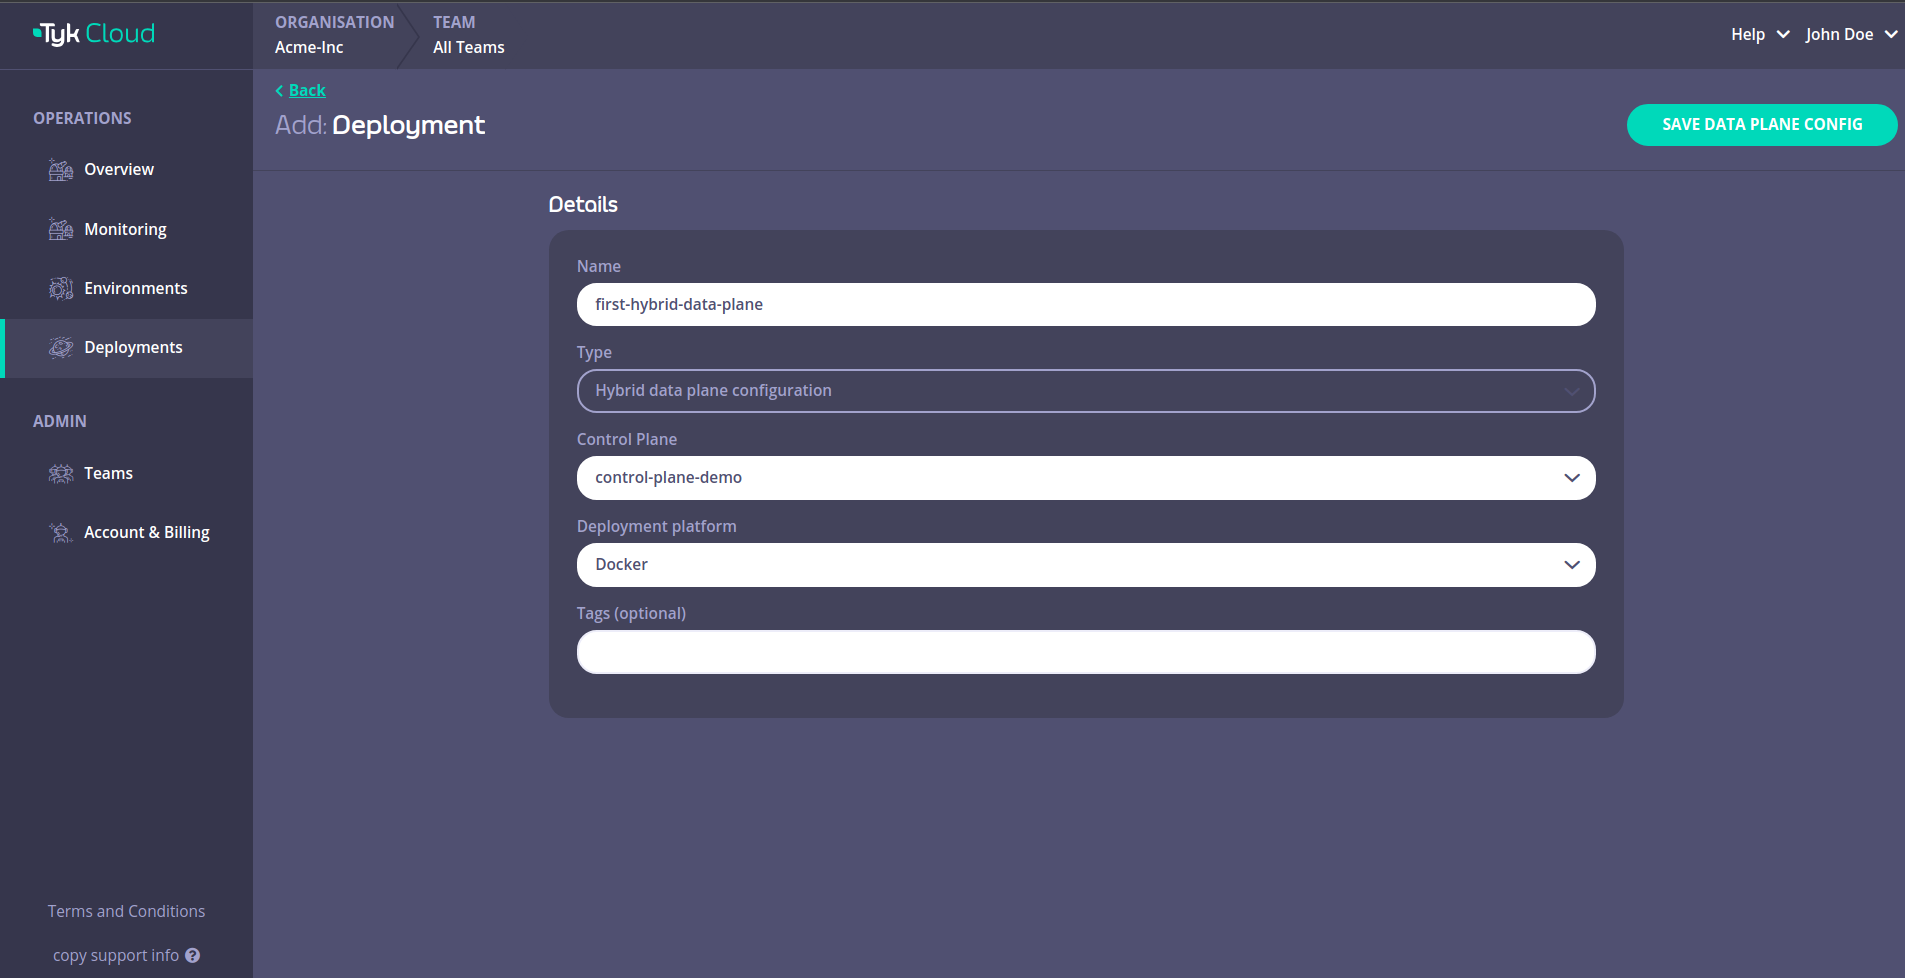
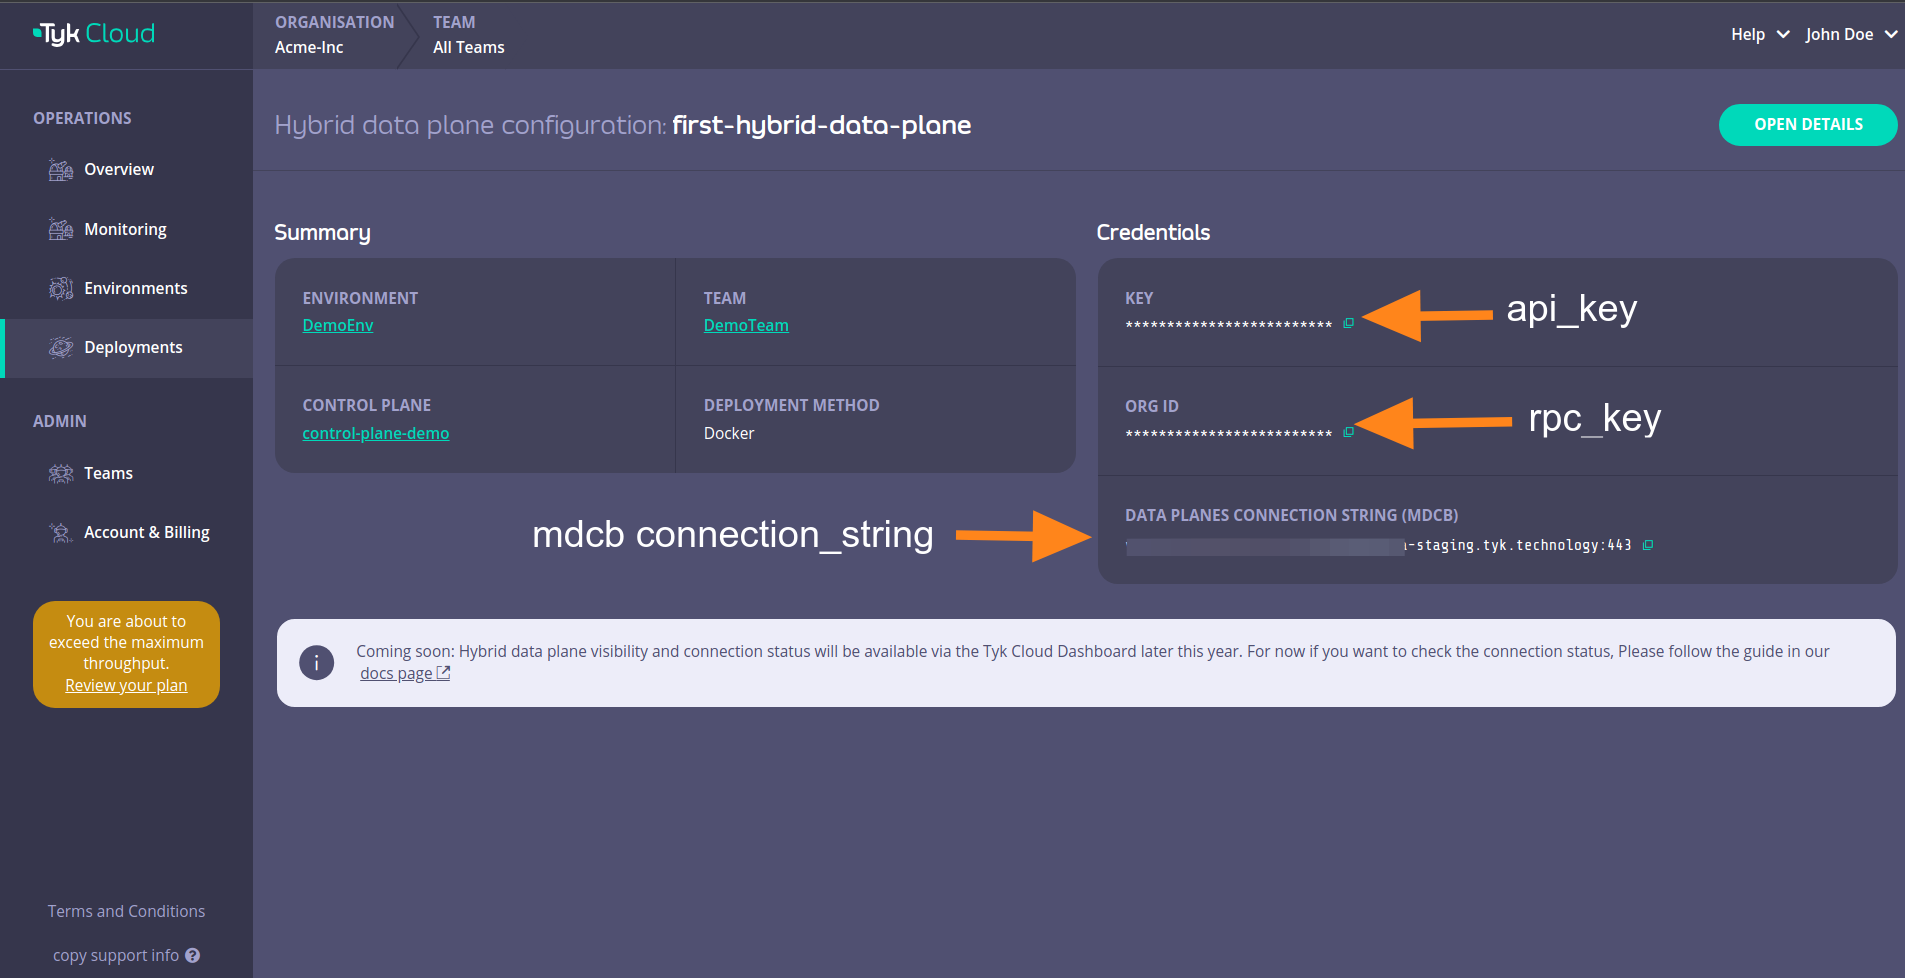
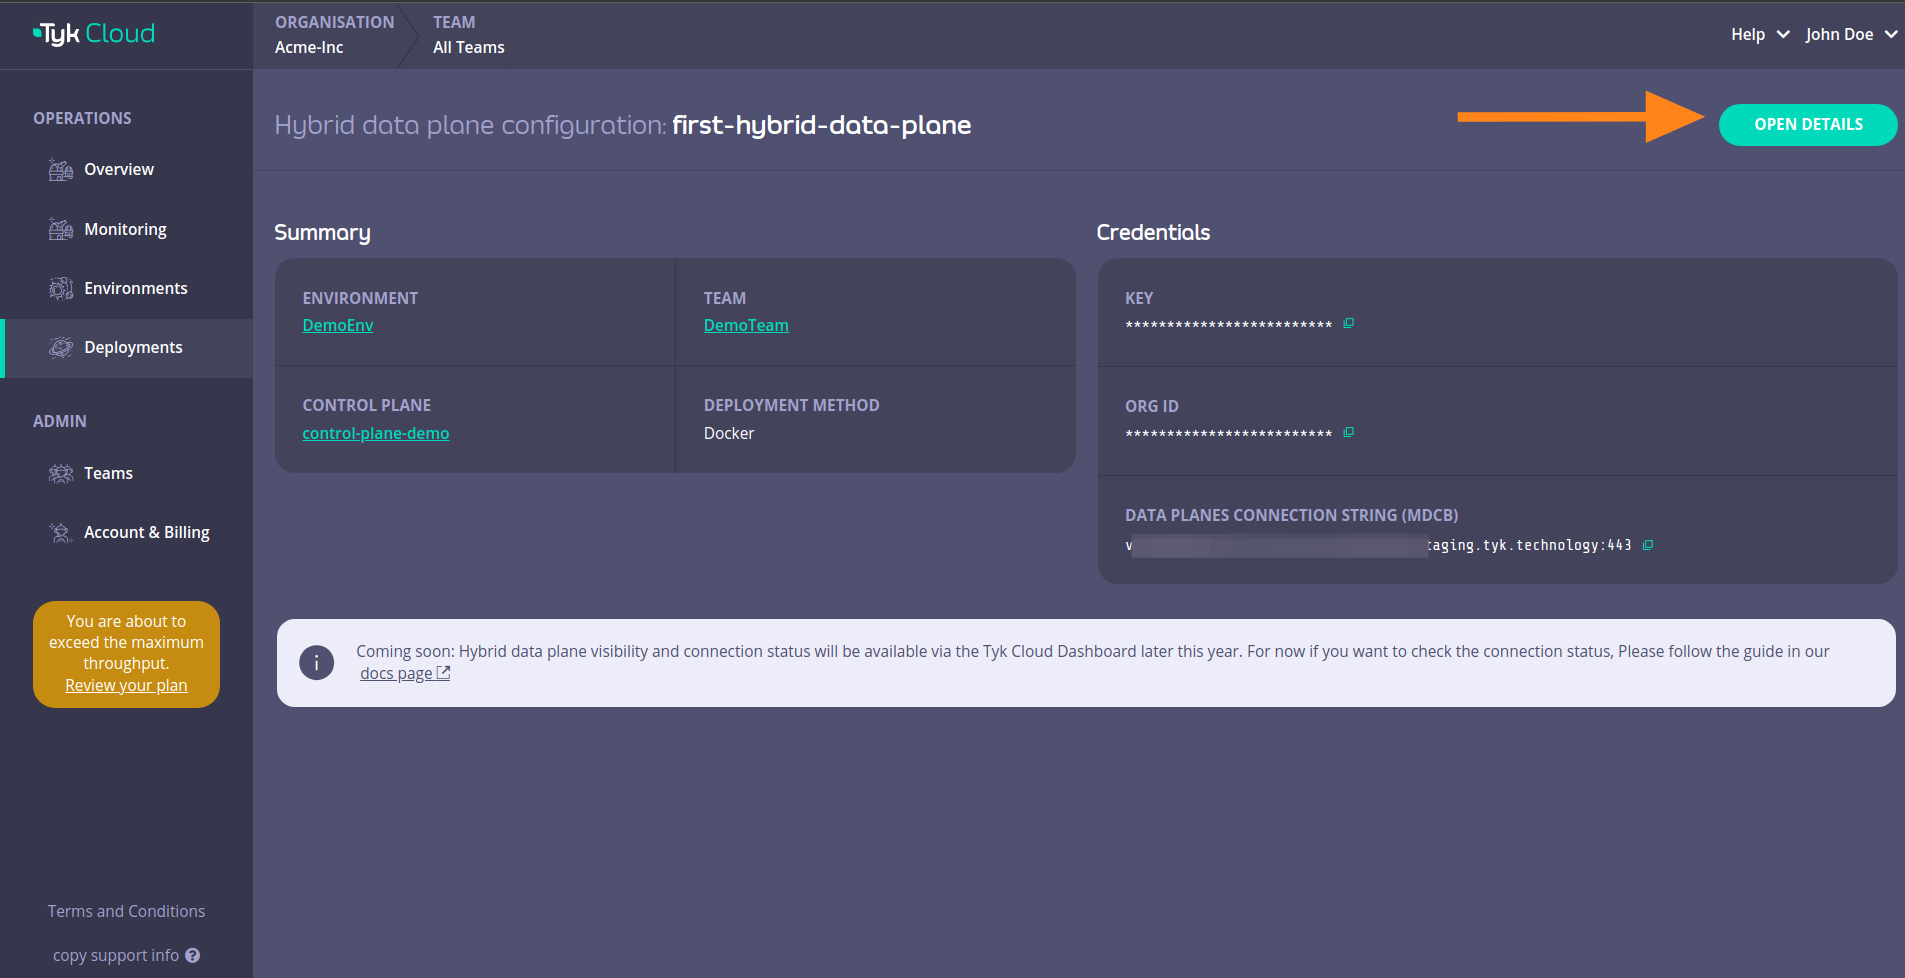
You can also click on OPEN DETAILS
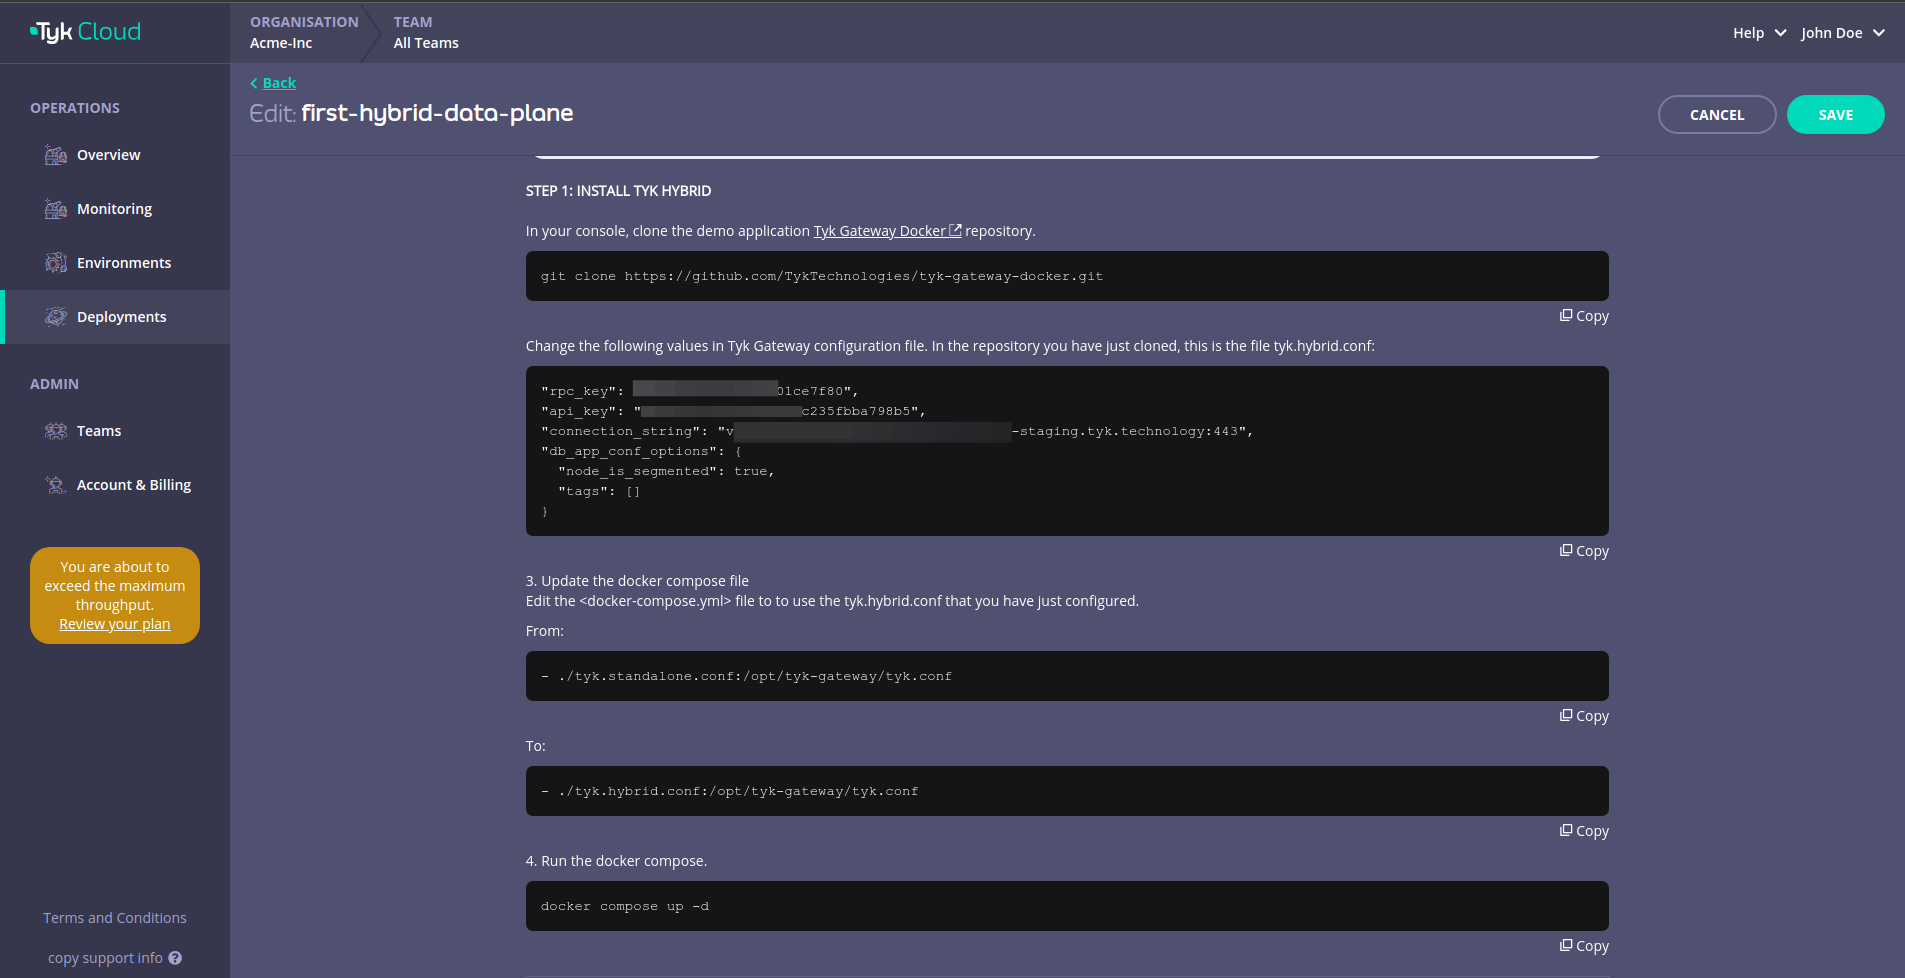
Deploy with Docker
Step 1: Clone and configure
-
Clone the tyk-install repository and navigate to the hybrid directory:
Step 2: Configure the Gateway connection to the control plane
Editconfs/tyk.env and set your MDCB credentials:
To enable API sharding (optional), add to
confs/tyk.env:
Step 3: Configure the Pump connection to the control plane
Editconfs/pump.env with the same MDCB credentials:
Step 4: Start services
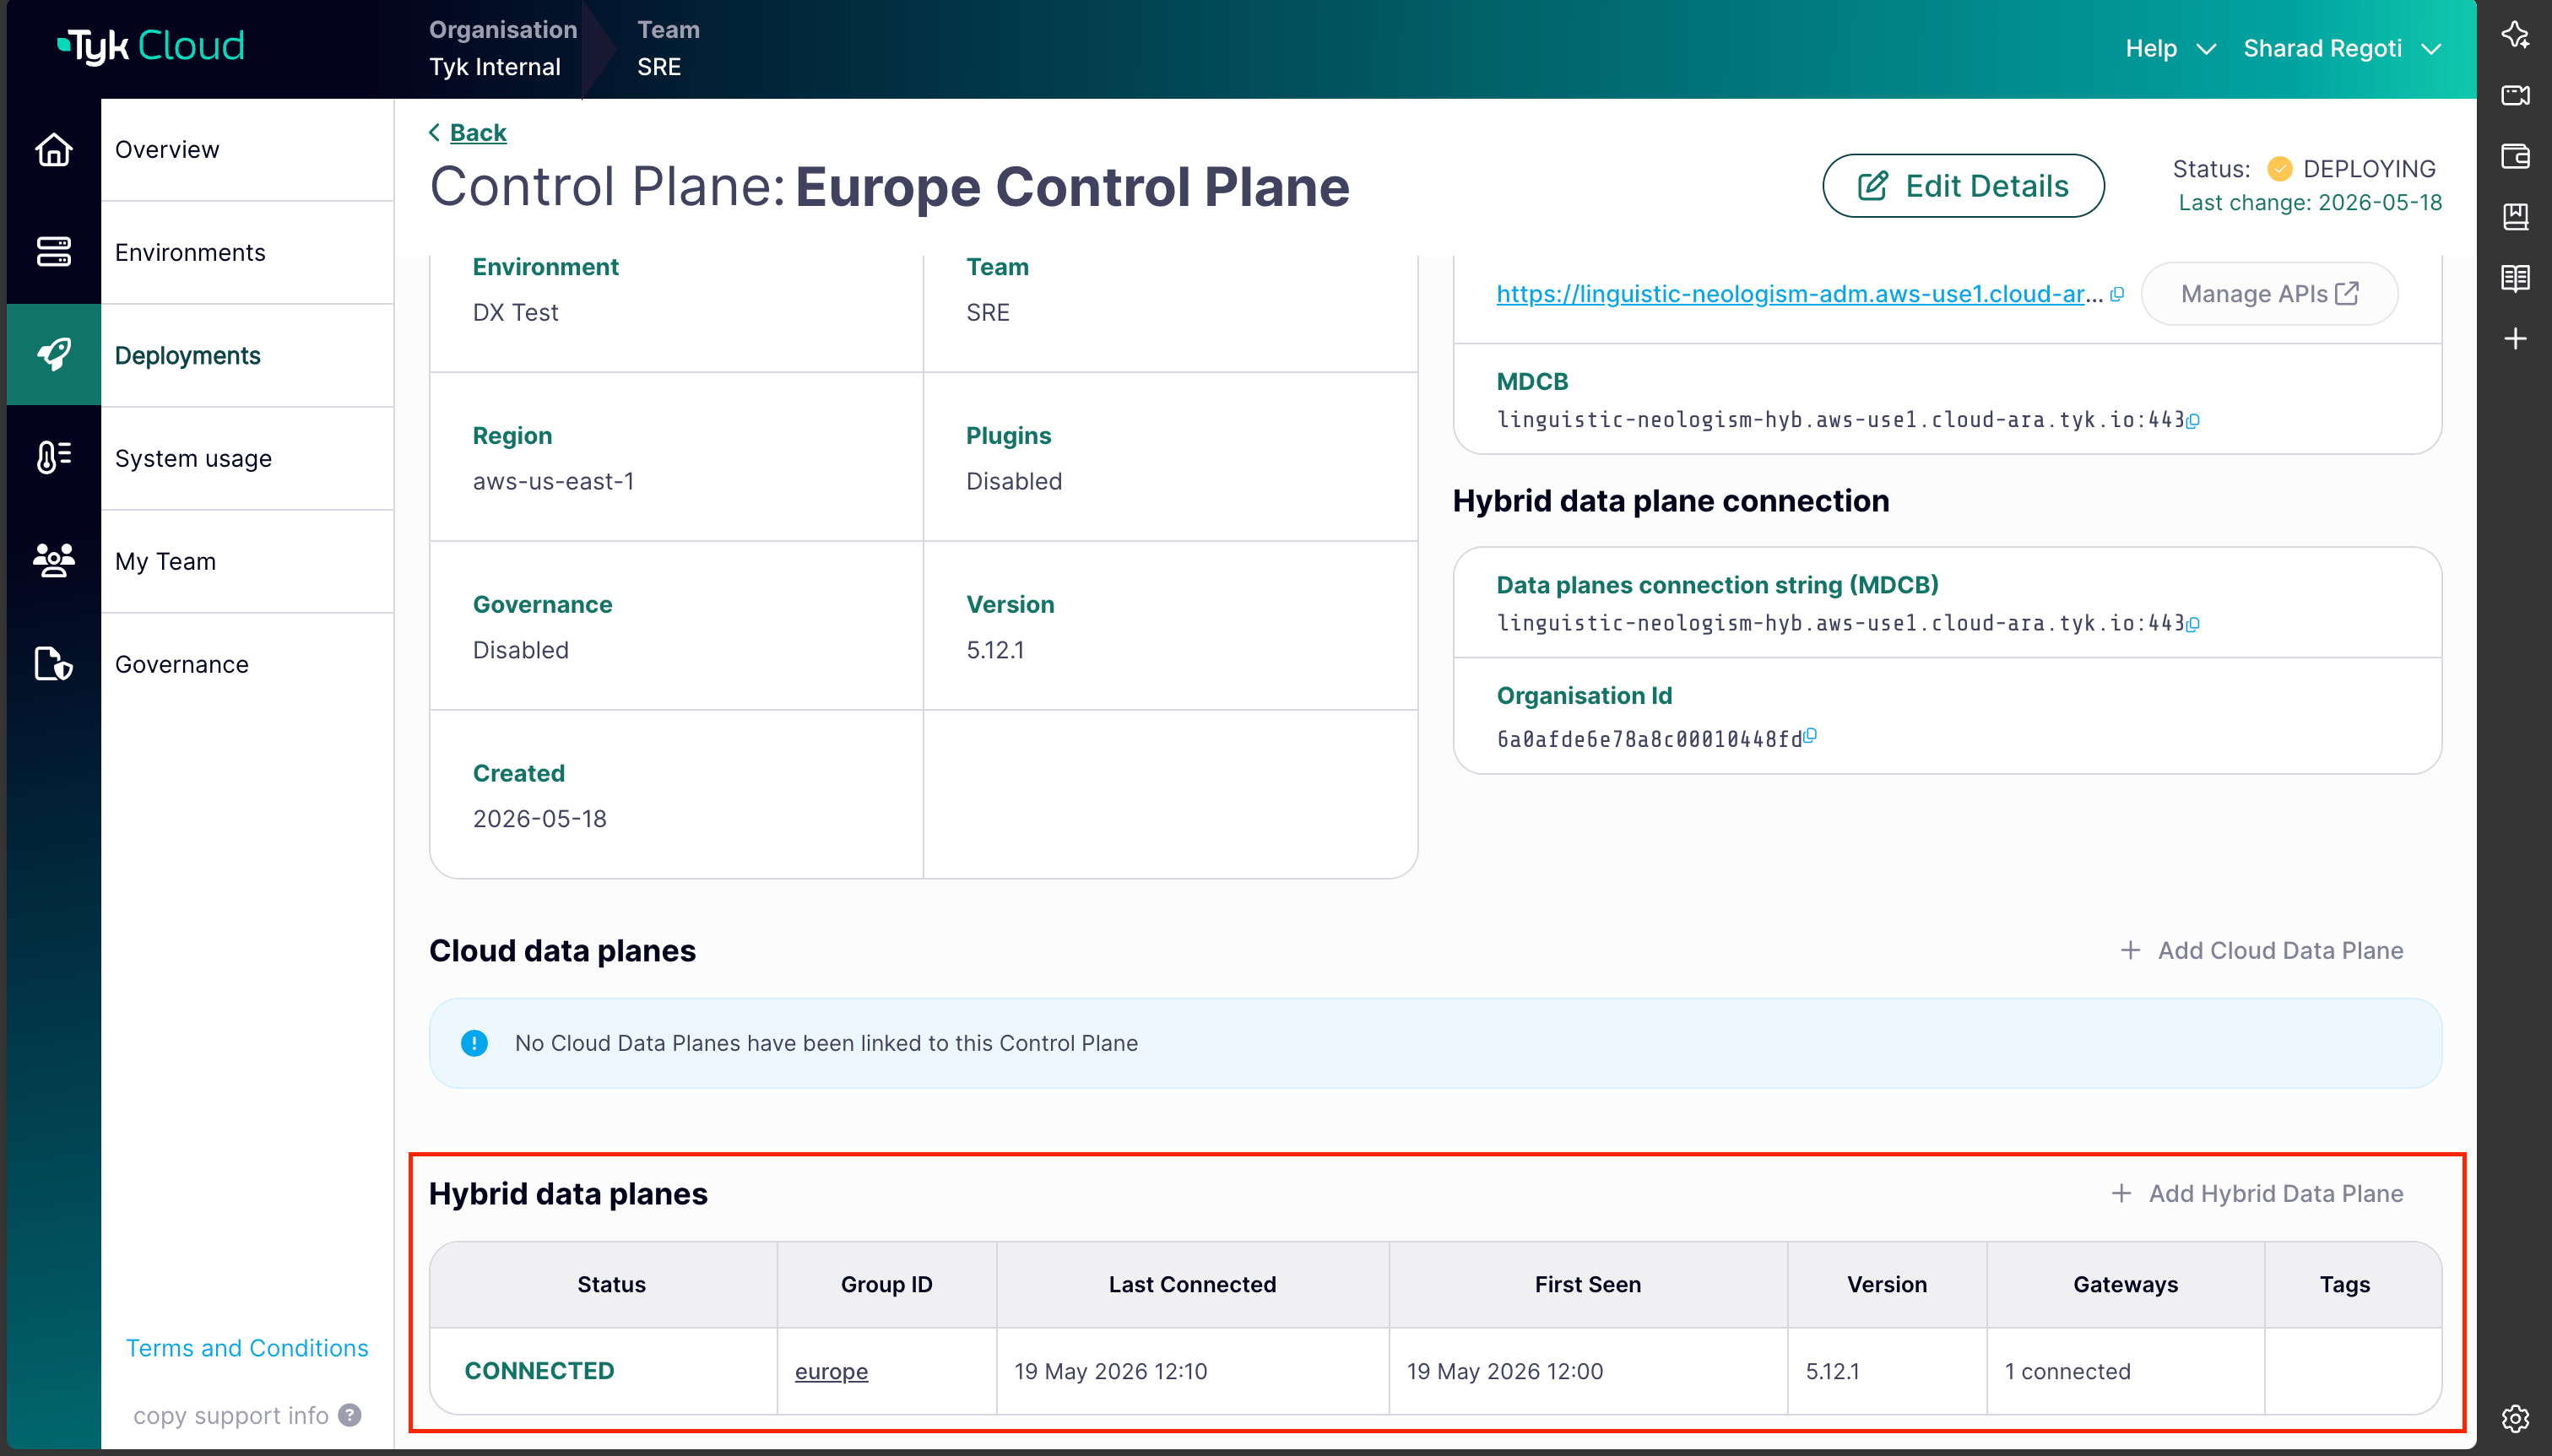
Step 5: Verify the connection
Deploy in Kubernetes with Helm Chart
Prerequisites- Kubernetes 1.19+
- Helm 3+
- Connection details to remote control plane from the above section.
- Redis for key storage
- Tyk Pump to send analytics to Tyk Cloud and Prometheus
gateway-svc-hybrid-dp-tyk-gateway at port 8080. Pump is also configured with Hybrid Pump which sends aggregated analytics to Tyk Cloud, and Prometheus Pump which expose metrics locally at :9090/metrics.
1. Set connection details
Set the below environment variables and replace values with connection details to your Tyk Cloud remote control plane. See the above section on how to get the connection details.
gateway-svc-hybrid-dp-tyk-gateway at port 8080. Pump is also configured with Hybrid Pump which sends aggregated analytics to Tyk Cloud, and Prometheus Pump which expose metrics locally at :9090/metrics.
For the complete installation guide and configuration options, please see Tyk Data Plane Chart.
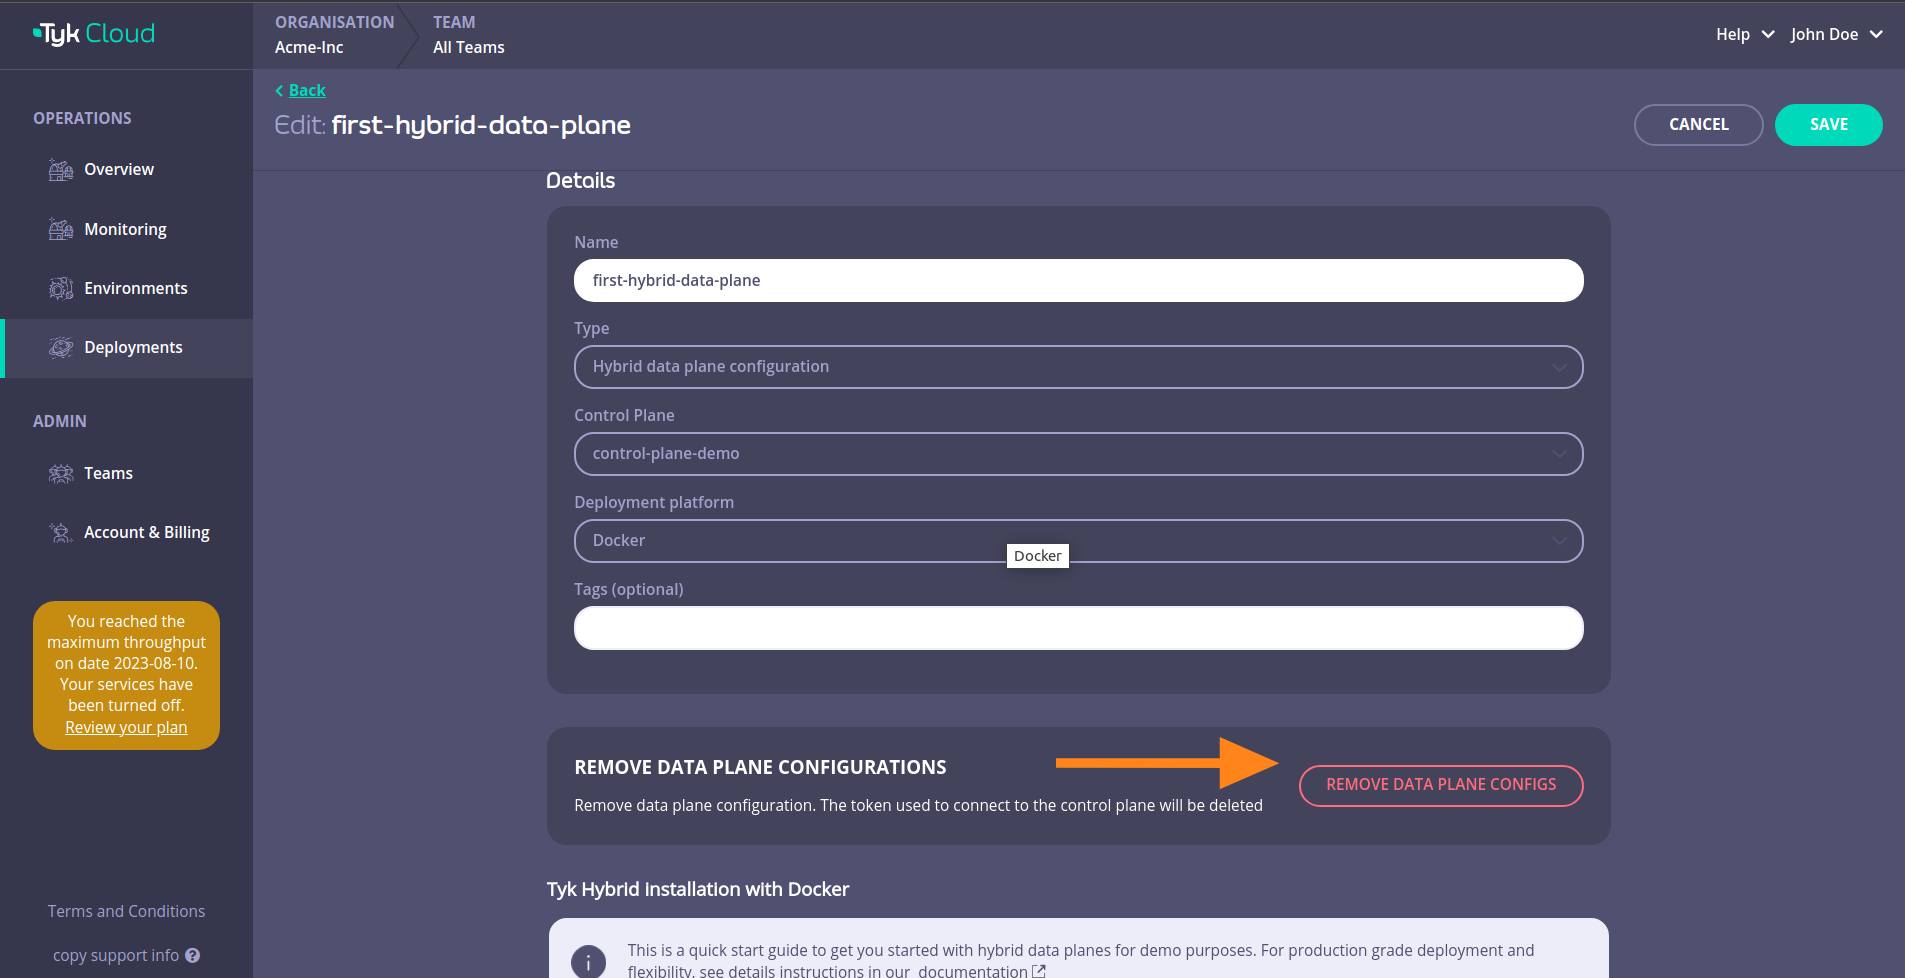
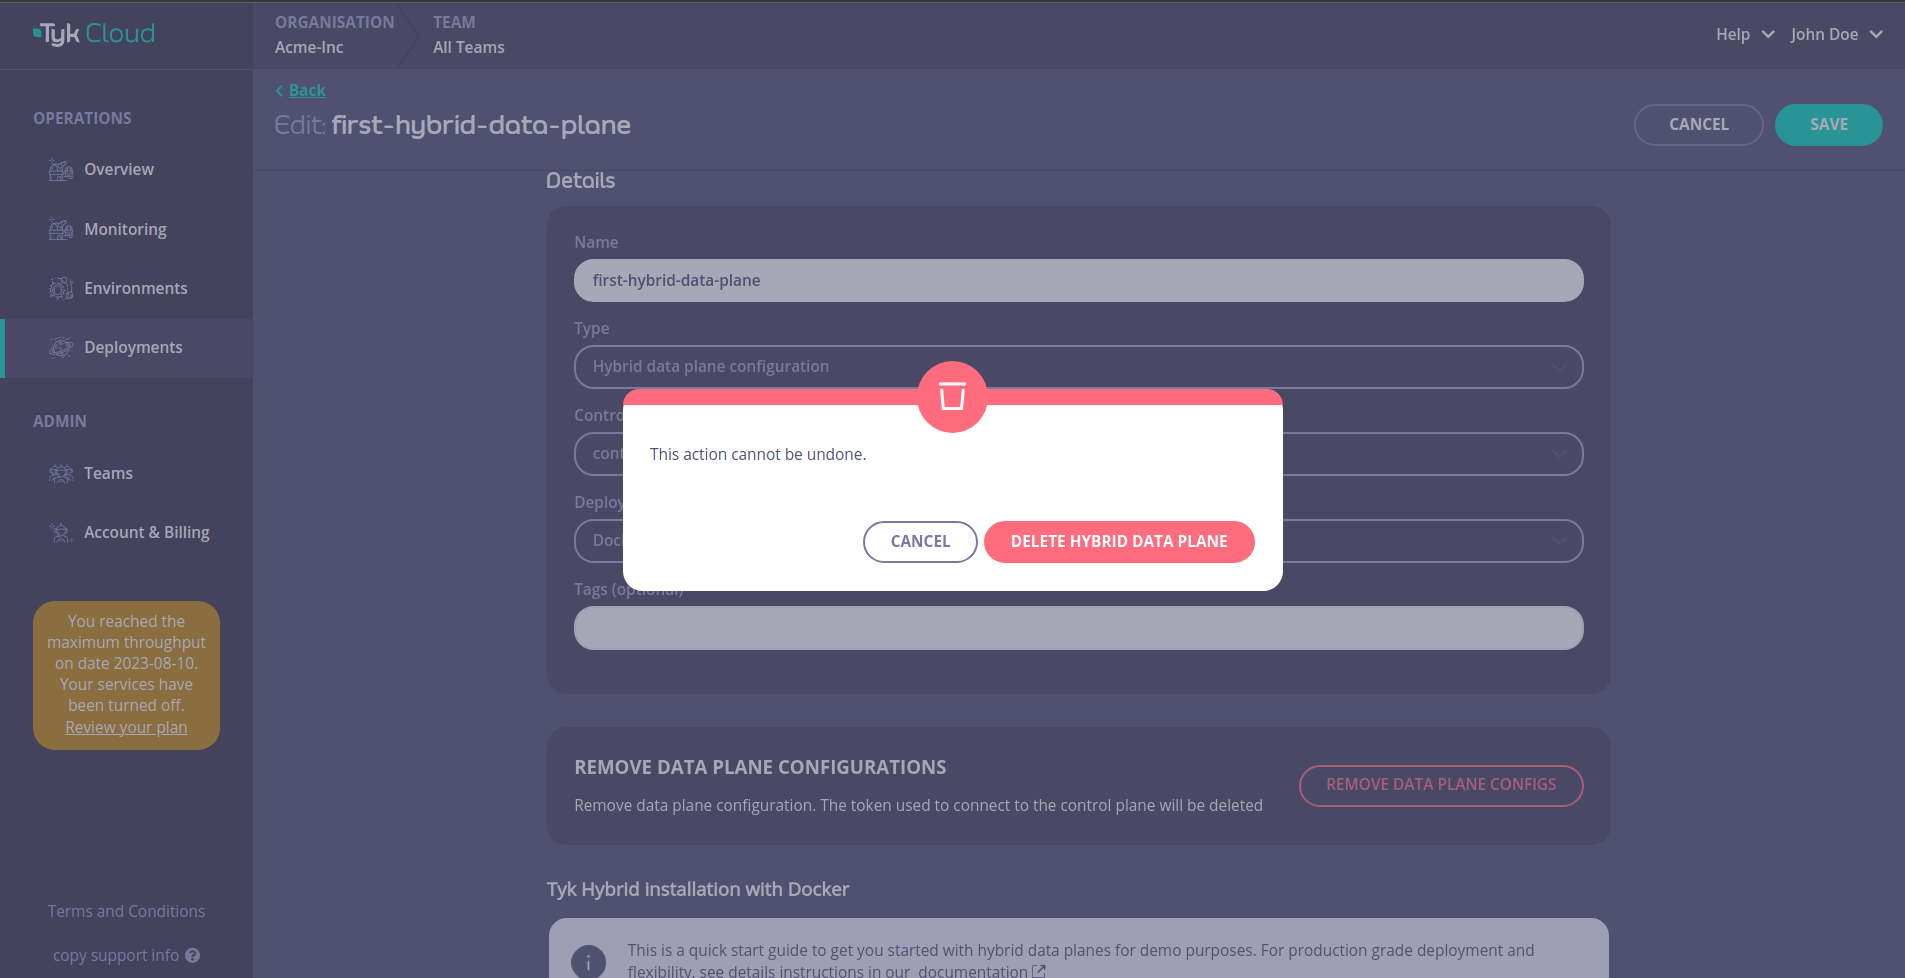
Remove hybrid data plane configuration
Tyk Cloud MDCB Supported versions
This section lists the supported MDCB version for hybrid setupDeploy Legacy Hybrid Gateways
- Add the Tyk official Helm repo
tyk-helmto your local Helm repository
- Then create a new namespace that will be hosting the Tyk Gateways
- Get the default values.yaml for configuration
- Configure Tyk Gateway and its connection to Tyk Cloud
values.yaml file:
gateway.rpc.apiKey- Tyk Dashboard API Access Credentials of the user created earliergateway.rpc.rpcKey- Organization IDgateway.rpc.connString- MDCB connection stringgateway.rpc.group_id(optional) - if you have multiple data plane (e.g. in different regions), specify the data plane group (string) to which the gateway you are deploying belong. The data planes in the same group share one Redis instance.gateway.sharding.enabledandgateway.sharding.tags(optional) - you can enable sharding to selectively load APIs to specific gateways, using tags. By default, sharding is disabled and the gateway will load all APIs.
- Configure the connection to Redis
Please make sure you are installing Redis versions that are supported by Tyk. Please refer to Tyk docs to get list of supported versions.
values.yaml file:
redis.addrs: the name of the Redis instance including the port as set by Bitnamityk-redis-master.tyk.svc.cluster.local:6379redis.pass: password set in redis ($REDIS_PASSWORD). Alternatively, you can use —set flag to set it during helm installation. For example--set redis.pass=$REDIS_PASSWORD.
- Install Hybrid data plane
- Check that the installation was successful
tyk namespace are running:
gateway-svc-tyk-hybrid:
Note: you may need to port forward if you’re testing on a local machine, e.g. kubectl port-forward service/gateway-svc-tyk-hybrid -n tyk 8080:443