Introduction
Control Planes are situated in your Organization’s home region and provide links to an instance of the Tyk Dashboard and the Developer Portal. The Dashboard is where you perform all your API tasks. The developer portal allows your 3rd party developers access to your APIs. Cloud Data Planes are then connected to your Control Planes.Prerequisites
All user roles can edit, deploy, undeploy, restart, redeploy all deployments within a team. Only the Organization Admin and the Team Admin can create or delete deployments.Adding a new Control Plane
Watch our video on setting up a Control Plane and a Cloud Data Plane.The number of Control Planes you can add is dependent on your plan
- From the Deployments screen click Add Deployment (you can also add a Deployment from within an Environment overview)
- Enter a name for the new Control Plane
- Select Control Plane from the Type drop-down list
- Select the Bundle Channel and Version
- (Optional) Enter a custom domain if required
- (Optional) Enable plugins if required
Edit Control Planes
You can edit the following Control Plane settings:- Change the Control Plane name
- Add a custom domain
- Change the Bundle Channel and Bundle Version
-
Enable plugins
The use of custom domains is dependent on your plan
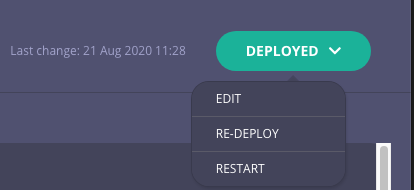
- From the Deployments screen, click the Control Plane Name from the list
- Select Edit from the Deployed drop-down list
Upgrade Cloud Control Planes
There are two ways to upgrade a Control Plane.Manual Upgrade
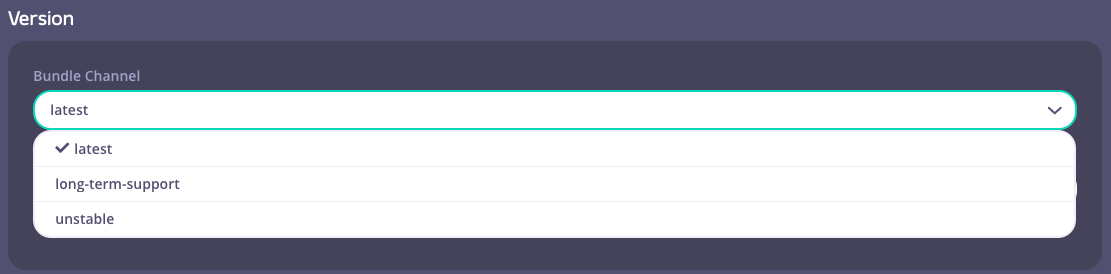
To upgrade an existing Control Plane:- Go to the Control Plane settings using the Edit Control Planes instructions and scroll down to the Version section.
- Select a Bundle Channel.
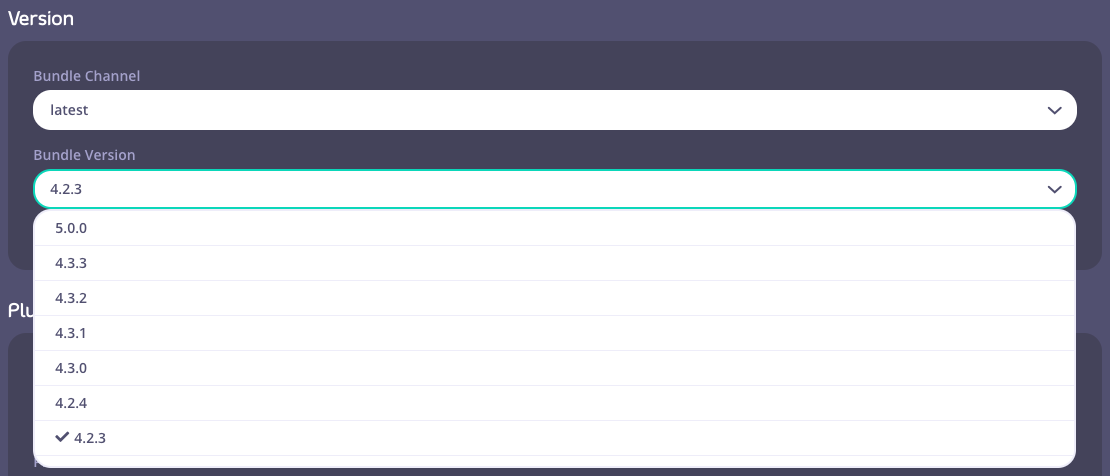
- Next, select a Bundle Version.
- To apply your changes, click the “Save and Re-Deploy” button located at the top right. After a few seconds, you will be redirected to the overview page of the Control Plane and a “Deploying” indicator button will appear.

- A “Deployed” button indicates a successful upgrade.

Auto Upgrade
The Auto Upgrade feature enables users to automatically upgrade their deployments to the latest version based on their selected bundle channel (E.g., Latest, LTS) without requiring manual intervention. This feature helps users stay on the latest features and security enhancements by automating the upgrade process according to a scheduled maintenance window.Availability
Auto Upgrade is available for:- Control Plane deployments
- When enabled on a Control Plane, it will automatically upgrade the corresponding data planes related to this control plane
How to Enable Auto Upgrade
You can enable Auto Upgrade when creating a new Control Plane or editing an existing Control Plane.New Control Plane Deployments
- Navigate to the “Add Deployment” page
- Fill in the required deployment details
- In the “Version” section, select your preferred Bundle Channel (Latest or LTS)
- Select the desired Bundle Version
- Toggle on the “Auto-upgrade” option
-
Schedule the maintenance window by selecting:
- Day: Choose a day of the week (Monday-Sunday)
- Time: Select an hour (0-23, in UTC timezone)
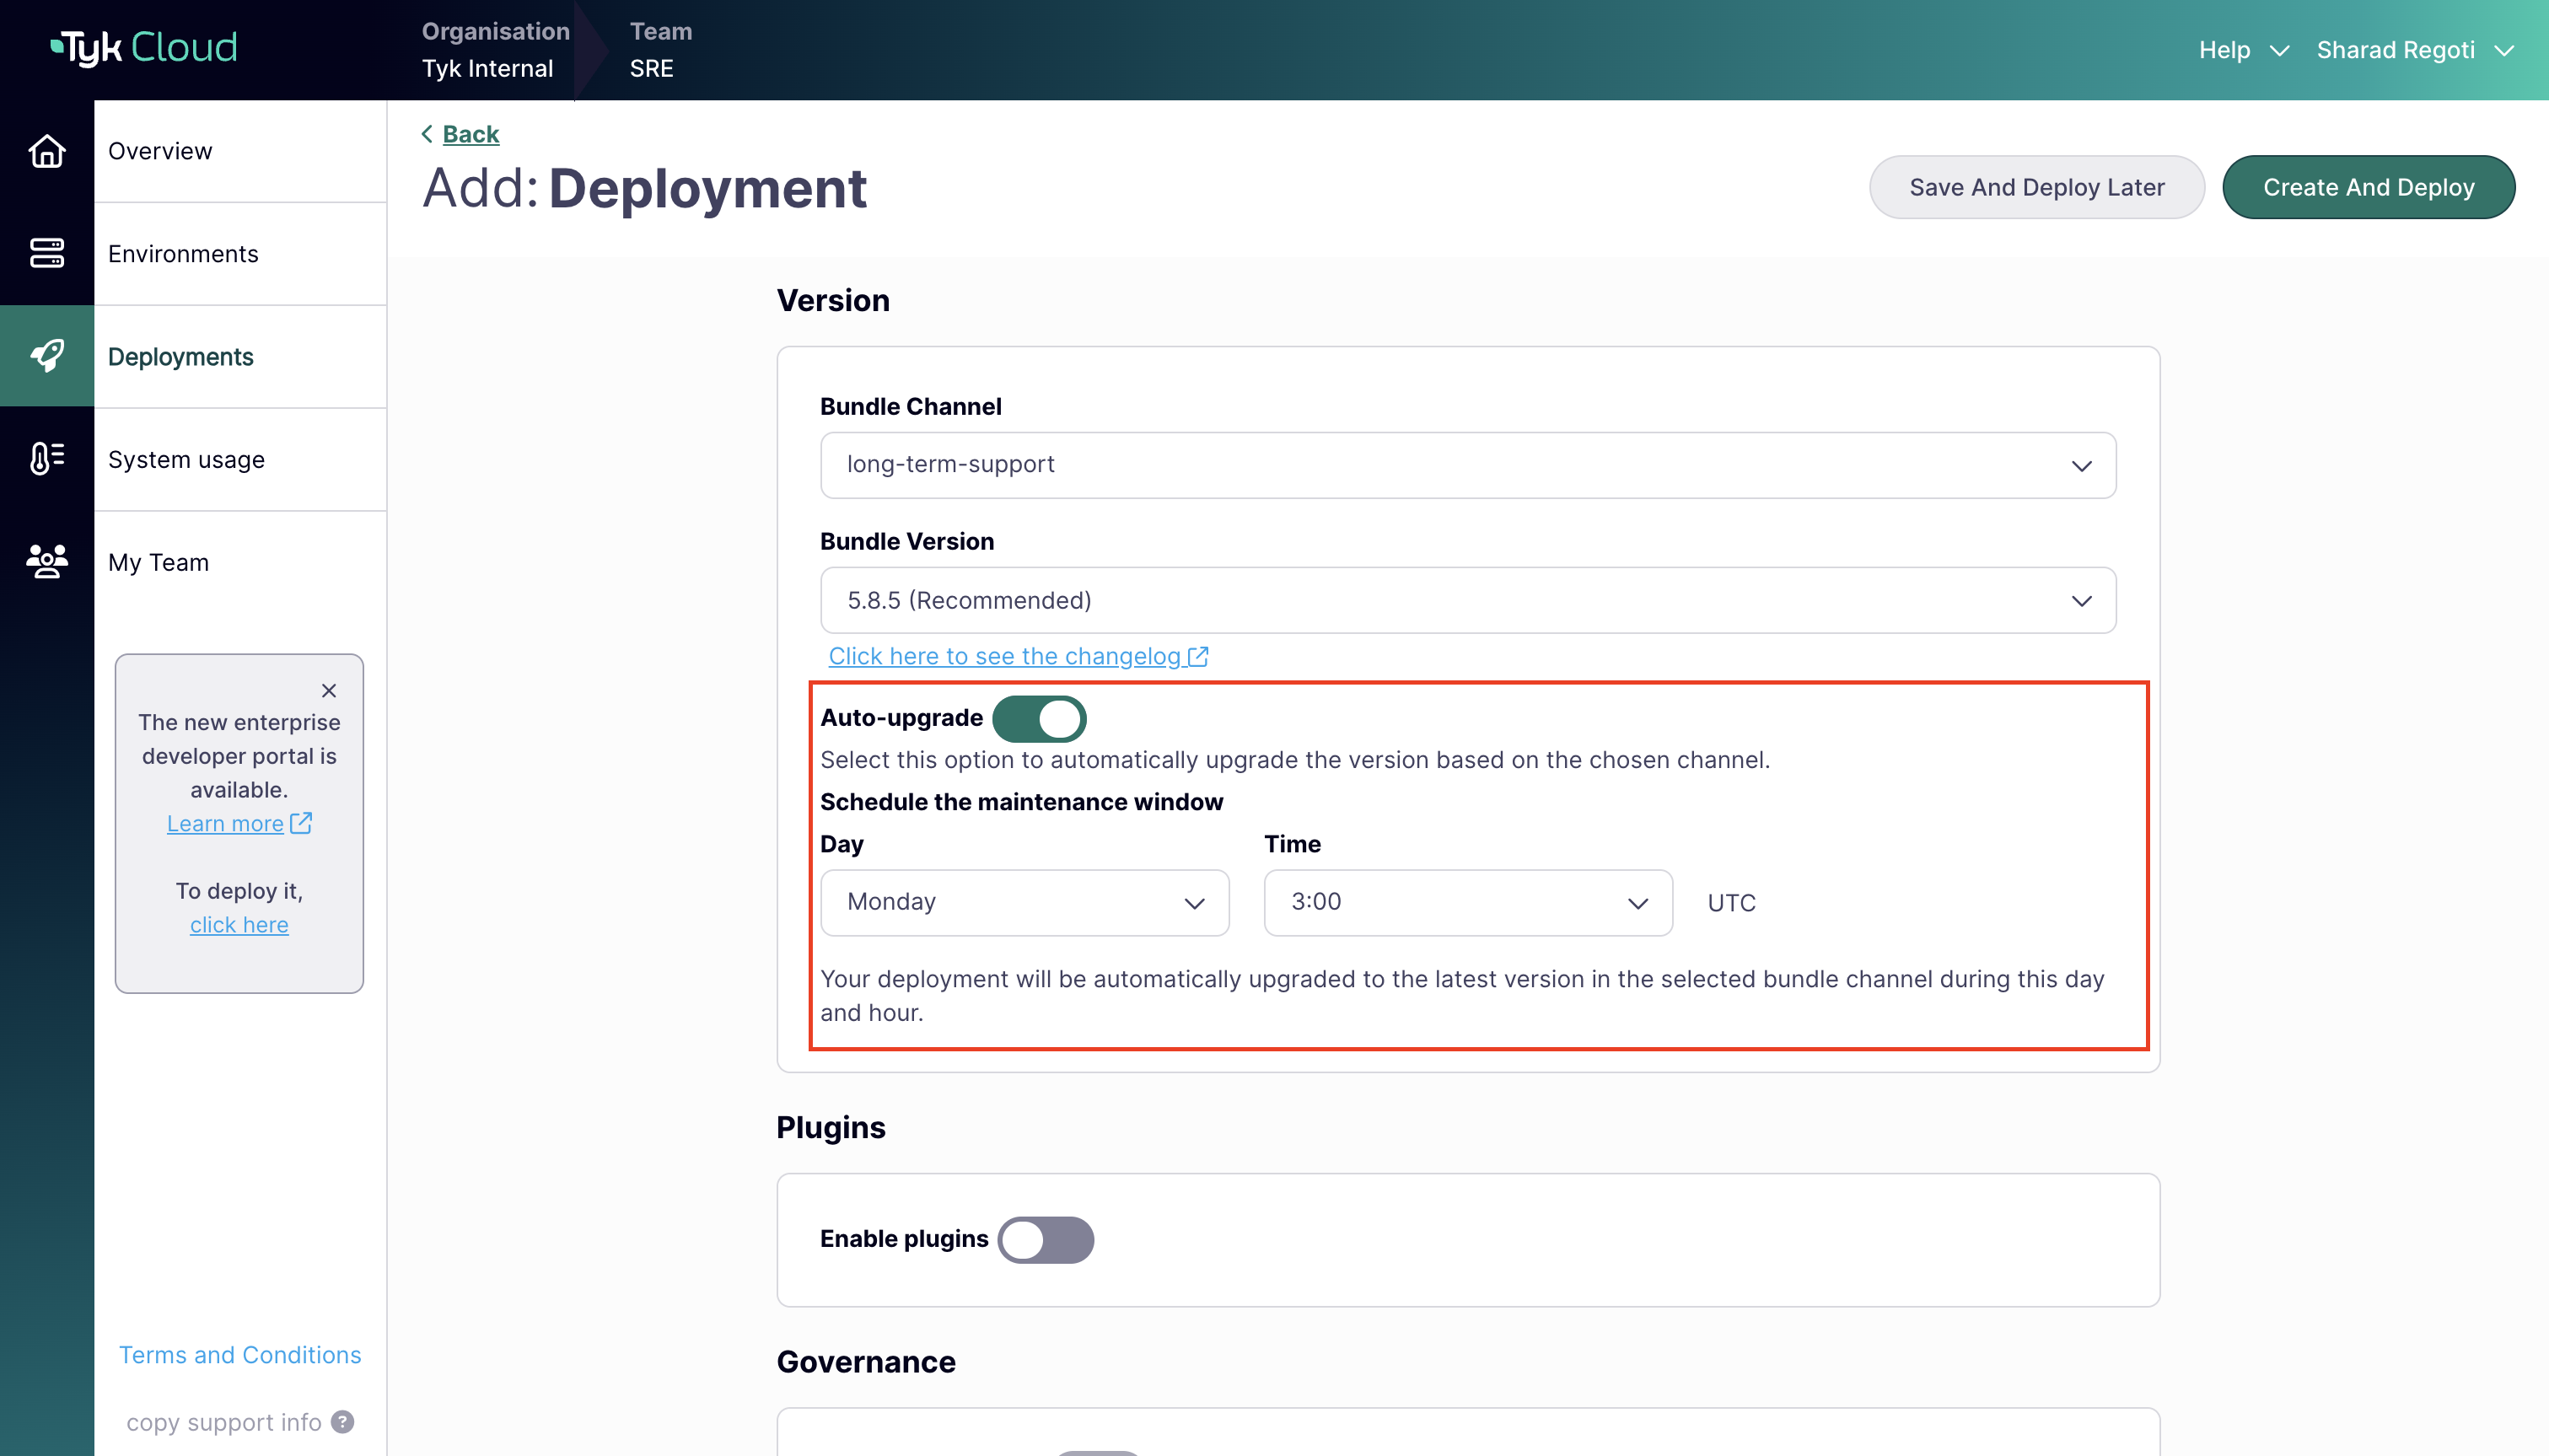
- Complete the deployment creation process
Existing Control Plane Deployments
- Navigate to the deployment dashboard
- Click “Edit” in the top-right corner
- In the “Version” section, toggle on “Auto-upgrade”
- Schedule the maintenance window by selecting the day and time
- Click “Save and re-deploy”
Limitations and Considerations
- Control Plane Only: Auto Upgrade can only be enabled on Control Plane deployments
- Plugin Compatibility: Auto Upgrade cannot be enabled when plugins are enabled
- Production Caution: Not recommended for production environments without prior testing in lower environments
- UTC Timezone: All scheduled times are in UTC
- Bundle Channel: Upgrades will always follow the selected bundle channel (Latest or LTS)
- Email Notifications: Organization and team admins will receive email notifications when auto-upgrades occur