Introduction
API Plans, sometimes referred to as Subscription Plans, define the terms and conditions under which developers can access your API Products. They establish the usage limits, approval requirements, and commercial tiers that govern API consumption. While API Products define what functionality is available, API Plans determine how much of that functionality can be used and under what conditions. API Plans transform access policies into business offerings by:- Establishing clear usage boundaries through rate limits and quotas
- Creating tiered access levels that align with different customer segments
- Supporting various business models from free to premium offerings
- Enabling controlled API adoption through appropriate usage constraints
Understanding the Relationship Between Portal and Provider
API Plans represent a powerful abstraction layer that sits on top of your underlying API infrastructure. Understanding how the Developer Portal interacts with the Provider (Tyk Dashboard) is essential for effective product management:Data Distribution and Management
All metadata relating to the API Product is stored within the Developer Portal, including:- Plan name and description
- Catalog assignments and visibility settings
- Custom fields
Once a consumption limit policy has been linked to an API Plan you are strongly recommended not to make changes to it from the Provider, but to manage the Plan in the Developer Portal.
Creation Workflows
You can create API Plans through two primary workflows:Portal-First Approach (Recommended)
When you create a Plan in the Developer Portal:- The Portal creates a corresponding consumption limit policy in the Tyk Dashboard
- This policy defines what rate limits and quota allowances to permit for access keys using the Plan
- The policy is automatically linked to the Plan in the Portal
- You can then enhance the Plan with documentation and other metadata
Dashboard-First Approach
Alternatively, you can:- Create a partitioned consumption limit policy directly in the Tyk Dashboard
- When you synchronize the Developer Portal with the Provider, a new API Plan will be created automatically
- This Plan will be “bare bones” with a name derived from the Dashboard policy but no description or other metadata
- You can then enhance this auto-created Plan through the Admin Portal interface
- This approach is useful when you already have policies defined in your Dashboard
Creating a New API Plan
You can create a new API Plan in the Developer Portal by following these simple steps:- Log in to the Developer Portal as an API Owner
- Select the Provider that hosts the APIs you want to use
- Enter a descriptive Name for your Product
- Set the Plan limits that you wish this Plan to grant
- Select Save Changes
Dynamic Client Registration
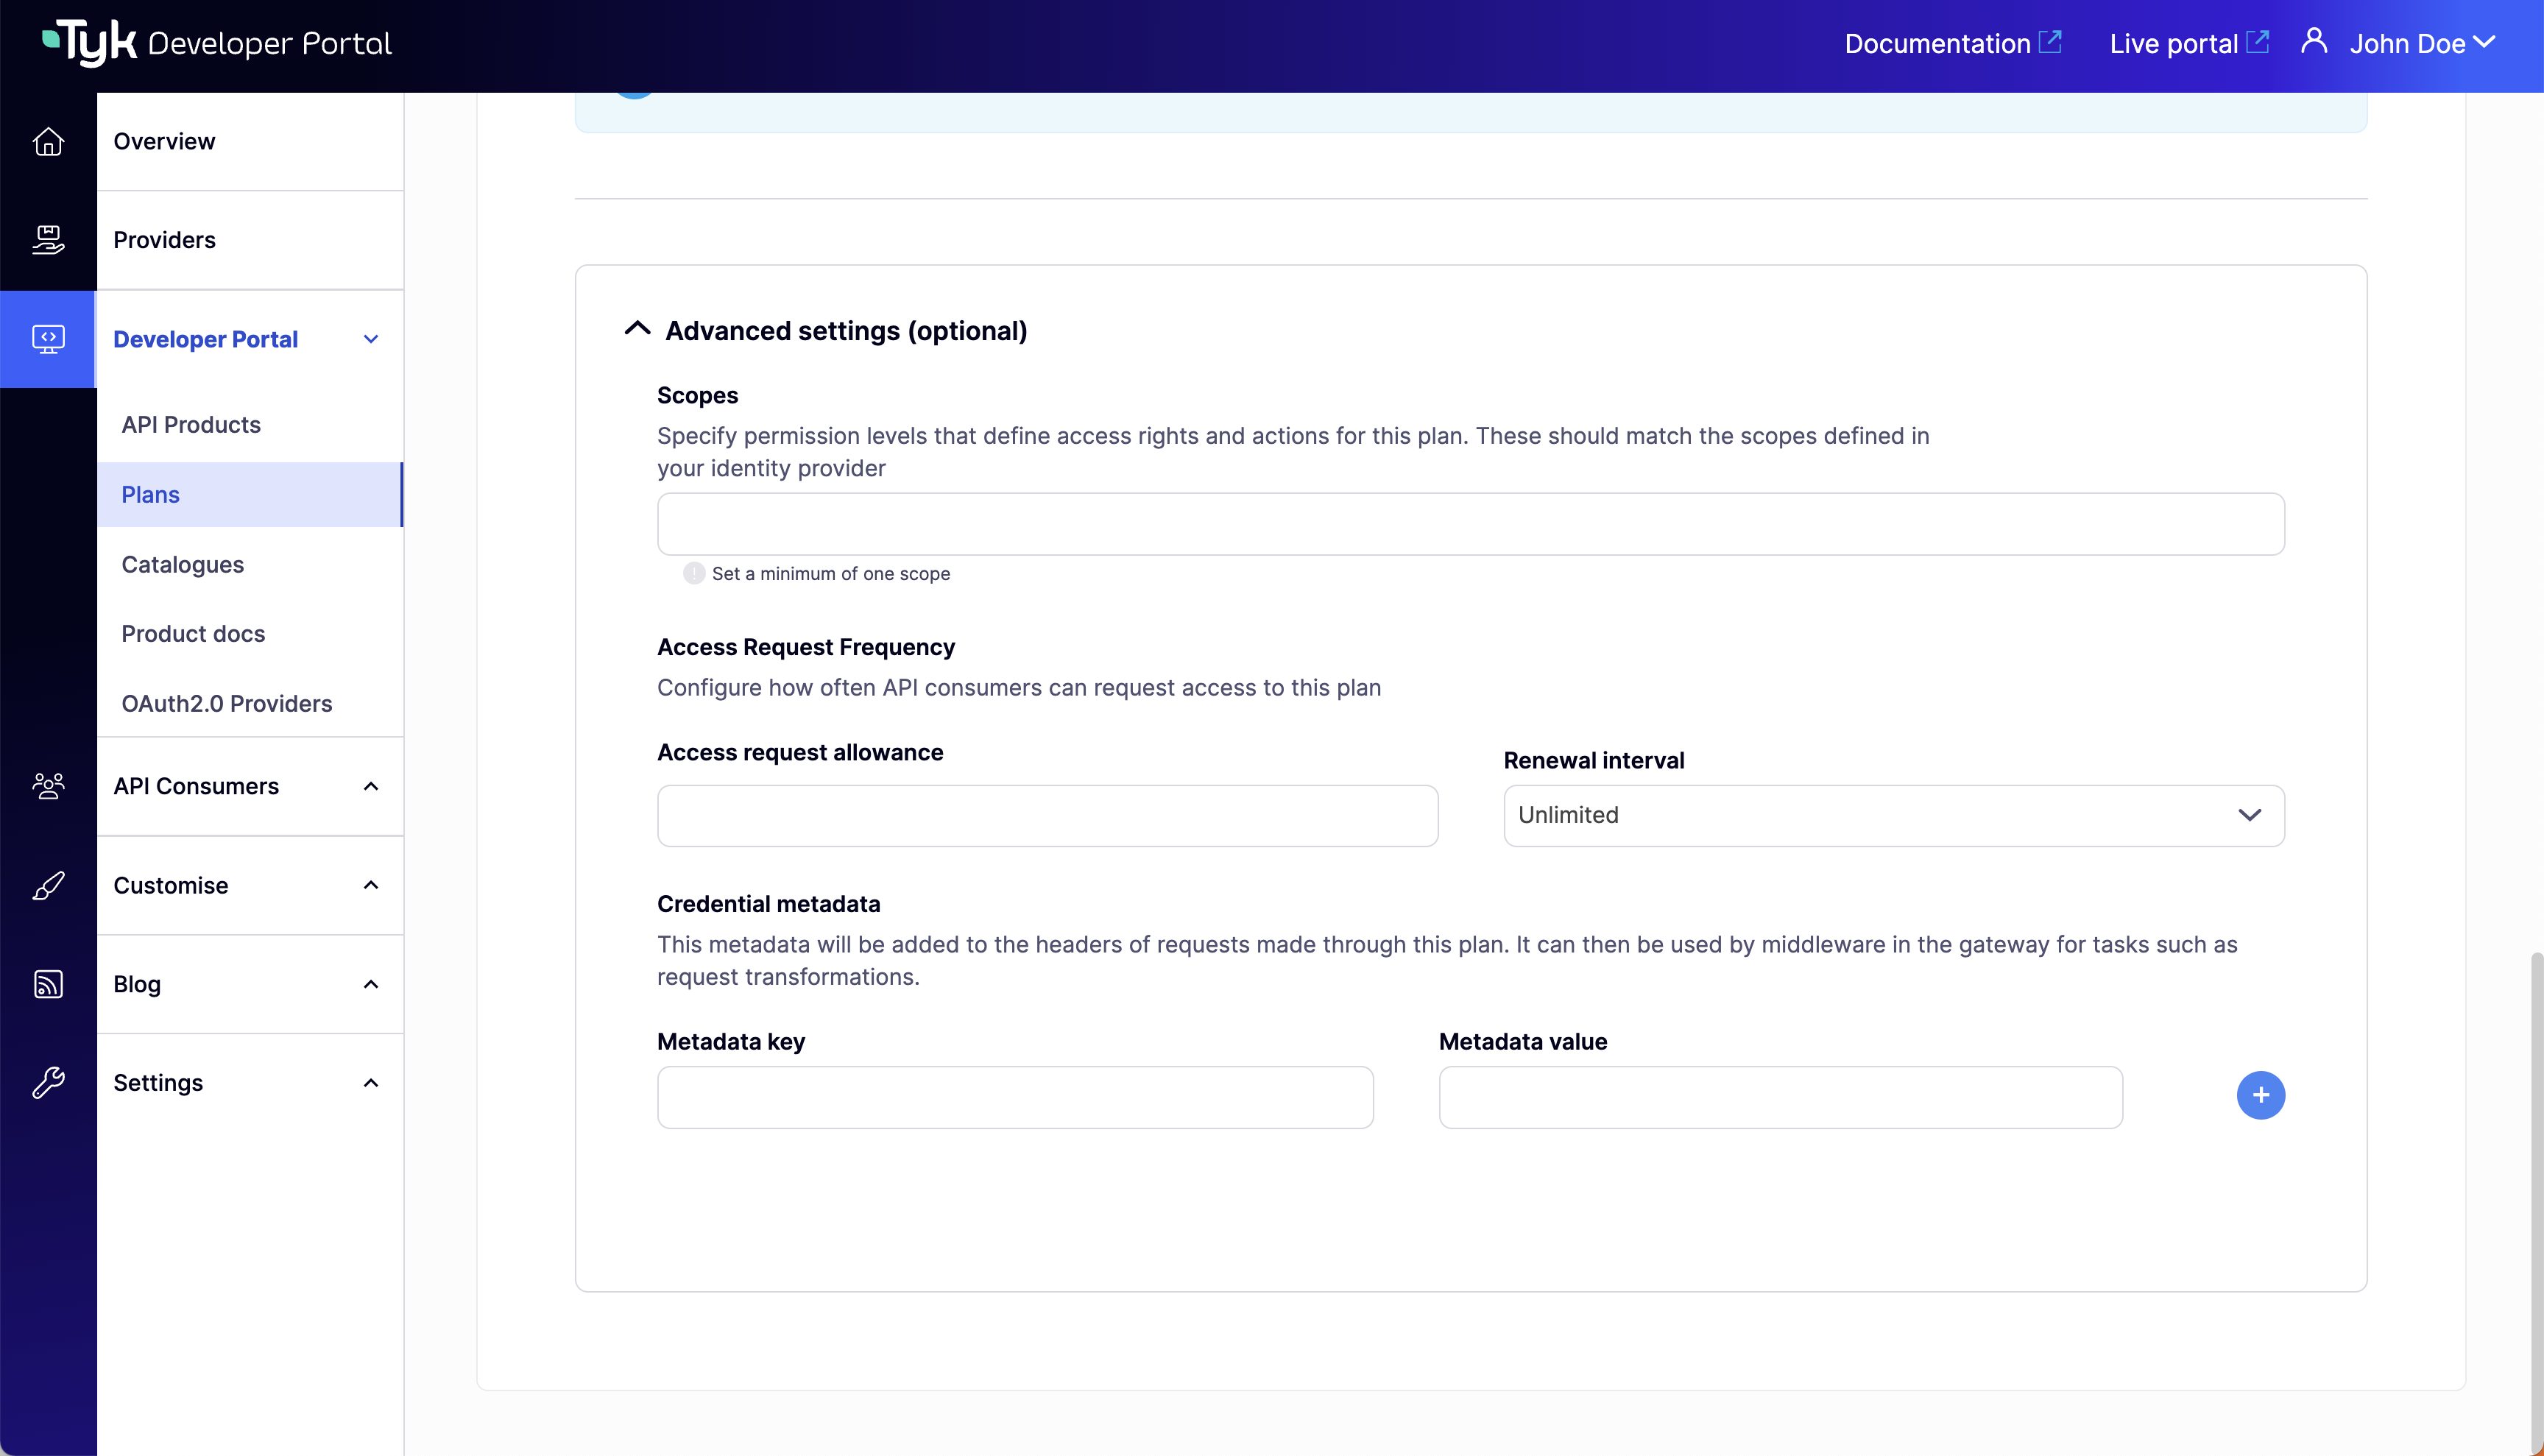
Dynamic Client Registration (DCR) allows the Tyk Developer Portal to automatically register OAuth 2.0 clients with your Identity Provider when an API Consumer is granted access. Each API Plan used with DCR must have a unique OAuth 2.0 scope assigned. To configure a Plan for DCR:- Navigate to Plans and open the Plan you want to use with DCR.
- Select Advanced Settings.
- In the Scopes field, enter the OAuth 2.0 scope name for this Plan.
- Select Save Changes.
API Plan Reference Guide
This comprehensive reference guide details all the configurable options and features of API Plans in the Tyk Developer Portal.Core Features
Plan Name
The primary identifier for your API Plan.- Location: Plans > Add/Edit Plan > Plan name
- Purpose: Identifies the Plan within both the Developer Portal and the Provider
- Behavior: Used as the name for the partitioned rate limit/quota policy in the Provider
- Synchronization:
- Modifying the name in the Portal immediately updates the policy name in the Provider
- Modifying the policy name in the Provider updates the Plan name during the next Portal synchronization Best Practice: Choose a clear, descriptive name that reflects the Plan’s tier or purpose
Provider
The Tyk Dashboard instance that will enforce this Plan’s rate limits and quotas.- Location: *Plans > Add/Edit Plan > Provider
- Purpose: Links the Plan to the correct Provider instance (where the policy will reside)
- Selection: Choose from a dropdown list of all registered Providers
Plan Details
Usage Quota
Restricts the total number of requests a consumer can make over a time period, to enforce usage limits for consumption tiers.- Location: Plans > Add/Edit Plan > Usage quota
- Configuration: Enter the maximum number of requests and select time frame from dropdown
- Unlimited Requests: Select the checkbox to set an unlimited quota for this Plan
Rate Limit
Restricts the maximum rate of requests a consumer can make over a short period, to distribute API capacity fairly across all consumers.- Location: Plans > Add/Edit Plan > Rate limit
- Configuration: Enter the maximum number of requests and the time window (in seconds)
- Unlimited Requests: Select the checkbox to set no rate limit for this Plan; note that an API-level rate limit would still be applied if configured.
Key Lifetime
Configures the lifetime for access credentials (keys) issued when a Developer App subscribes to the Plan.- Location: Plans > Add/Edit Plan > Key expires after
- Purpose: Enforces security best practices by requiring periodic credential rotation
- Selection: Choose from a dropdown list of available key lifetimes
- Behavior: When credentials expire, developers must request new ones to maintain access
JWT Scopes
JWT scopes that will be used in the OAuth 2.0 flow to apply the Plan- Location: Plans > Add/Edit Plan > Advanced settings > Scopes
- Purpose: Defines the JWT scopes that the access token must present to the Gateway to apply this Plan
- Configuration: Space or comma-separated permission strings (e.g., “read:users”, “write:data”)
- Behavior: This configuration is required when the Plan is used with an API Product for which the Dynamic Client Registration flow has been activated
- The scope must already exist in your Identity Provider. The Portal associates it with the registered OAuth client when an access request is approved but does not create it.
- When an access request is approved, the scope is added to the API’s scope-to-policy mapping in the Identity Provider Registry (or directly in the API definition for pre-5.14.0 deployments).
- The scope does not appear in the consumption limit policy created on Tyk Dashboard.
- When a JWT presenting the Plan’s scope is received by Tyk Gateway, the Gateway applies the Plan to the session.
Additional Metadata
Custom key-value pairs that are attached to all access credentials issued under this Plan.- Location: Plans > Add/Edit Plan > Advanced settings > Credential metadata
- Purpose: Provides additional context to the Tyk Gateway for request processing and transformation
- Components:
- Metadata Key: The identifier for this metadata (e.g., “plan_tier”, “rate_group”)
- Metadata Value: The corresponding value (e.g., “premium”, “high_volume”)
- Behavior: This metadata is:
- Added to the headers of all requests made using credentials issued under this Plan
- Available to middleware in the Tyk Gateway for custom processing
- Use Cases:
- Request Transformation: Modify requests based on Plan tier
- Routing Logic: Direct traffic to different backend services
- Analytics Segmentation: Track API usage by Plan type
- Custom Middleware: Enable Plan-specific behaviors in custom plugins
- Example: A metadata pair of
plan_tier:premiumcould trigger special handling for premium subscribers - Best Practice:
- Use consistent naming conventions for metadata keys across all Plans
- Keys and values should be kept reasonably short to minimize header size
- Avoid sensitive information as metadata may be logged
Live Portal Presence
Catalog Assignment
Determines which API Catalogs include this Plan.- Location: Plans > Add/Edit Plan > Accessible in the following catalogues
- Purpose: Controls Plan availability for different developer audiences
- Options: Select one or more Catalogs where this Plan should appear
- Behavior: Plan will only be visible to developers with access to the selected Catalogs
Catalog Display Name
The Plan name as shown in the Live Portal.- Location: Plans > Add/Edit Plan > Catalogue display name
- Purpose: May differ from internal Plan name for marketing purposes
- Example: Internal name “Basic Rate Limit Policy” could have a display name “Bronze Access”
Plan Description
A brief summary of the Plan that will be visible to developers.- Location: Plans > Add/Edit Plan > Plan description
- Purpose: Helps developers understand what the Plan offers
- Format: Rich text editor supporting basic formatting
- Content: Typically includes key limits, features, and target use cases
Approval and Access Control
Auto-approve Provisioning Requests
Controls whether access requests require manual approval.- Location: Plans > Add/Edit Plan > Auto approve access request
- Purpose: Reduce developer friction for safe deployments and free access APIs
- Options:
- Enabled: Requests are automatically approved and credentials issued immediately
- Disabled: Requests require manual approval by a Portal administrator
- Best Practice: Enable for free or low-tier plans, and for internal developer portal use cases; disable for premium or partner plans
Access Request Limits
Control how often API consumers can request access to the plan.- Location: Plans > Add/Edit Plan > Advanced settings > Access request frequency
- Configuration:
- Access request allowance: The maximum number of access requests allowed
- Renewal interval: The period over which the request allowance should be measured
- Behavior: When a user attempts to request access to an API using a Plan that has these limits configured, the system checks if they’ve already reached their allowance within the current renewal period. If they have, the request is rejected with a “Plan access quota exceeded” error.
API Plan Best Practices
- Create a clear tier structure: Design a logical progression of Plans (e.g., Free, Basic, Premium, Enterprise) with meaningful differences in limits and capabilities between tiers.
- Align with user journey: Offer Plans that match different stages of the developer journey - from exploration (free, low limits) to production (higher limits, SLAs) to scale (enterprise-grade).
- Balance simplicity and flexibility: Provide enough Plan options to meet diverse needs without overwhelming developers with too many choices.
- Consider usage patterns: Set rate limits and quotas based on actual API usage patterns rather than arbitrary numbers - analyze typical consumption to establish meaningful thresholds.
- Document value clearly: For each Plan, clearly articulate what the developer gets, not just in terms of technical limits but also business value and use cases supported.