Before you begin
- A Tyk Gateway (v5.13 or later) connected to your Tyk Dashboard
- The Mock MCP Server running on
http://localhost:7878. See the quickstart. - An MCP proxy named Mock MCP Server already created. Also covered in the quickstart.
- Node.js 18 or later (to run MCP Inspector)
- A Dashboard user account with MCP write permissions
Instructions
Step 1: Enable authentication
- In the Tyk Dashboard sidebar, click MCP, then click Edit next to Mock MCP Server.
- In the designer, click the Authentication switch.
- Select Auth Token as the authentication method.
-
Set the token location to use header value and leave the header name as
Authorization.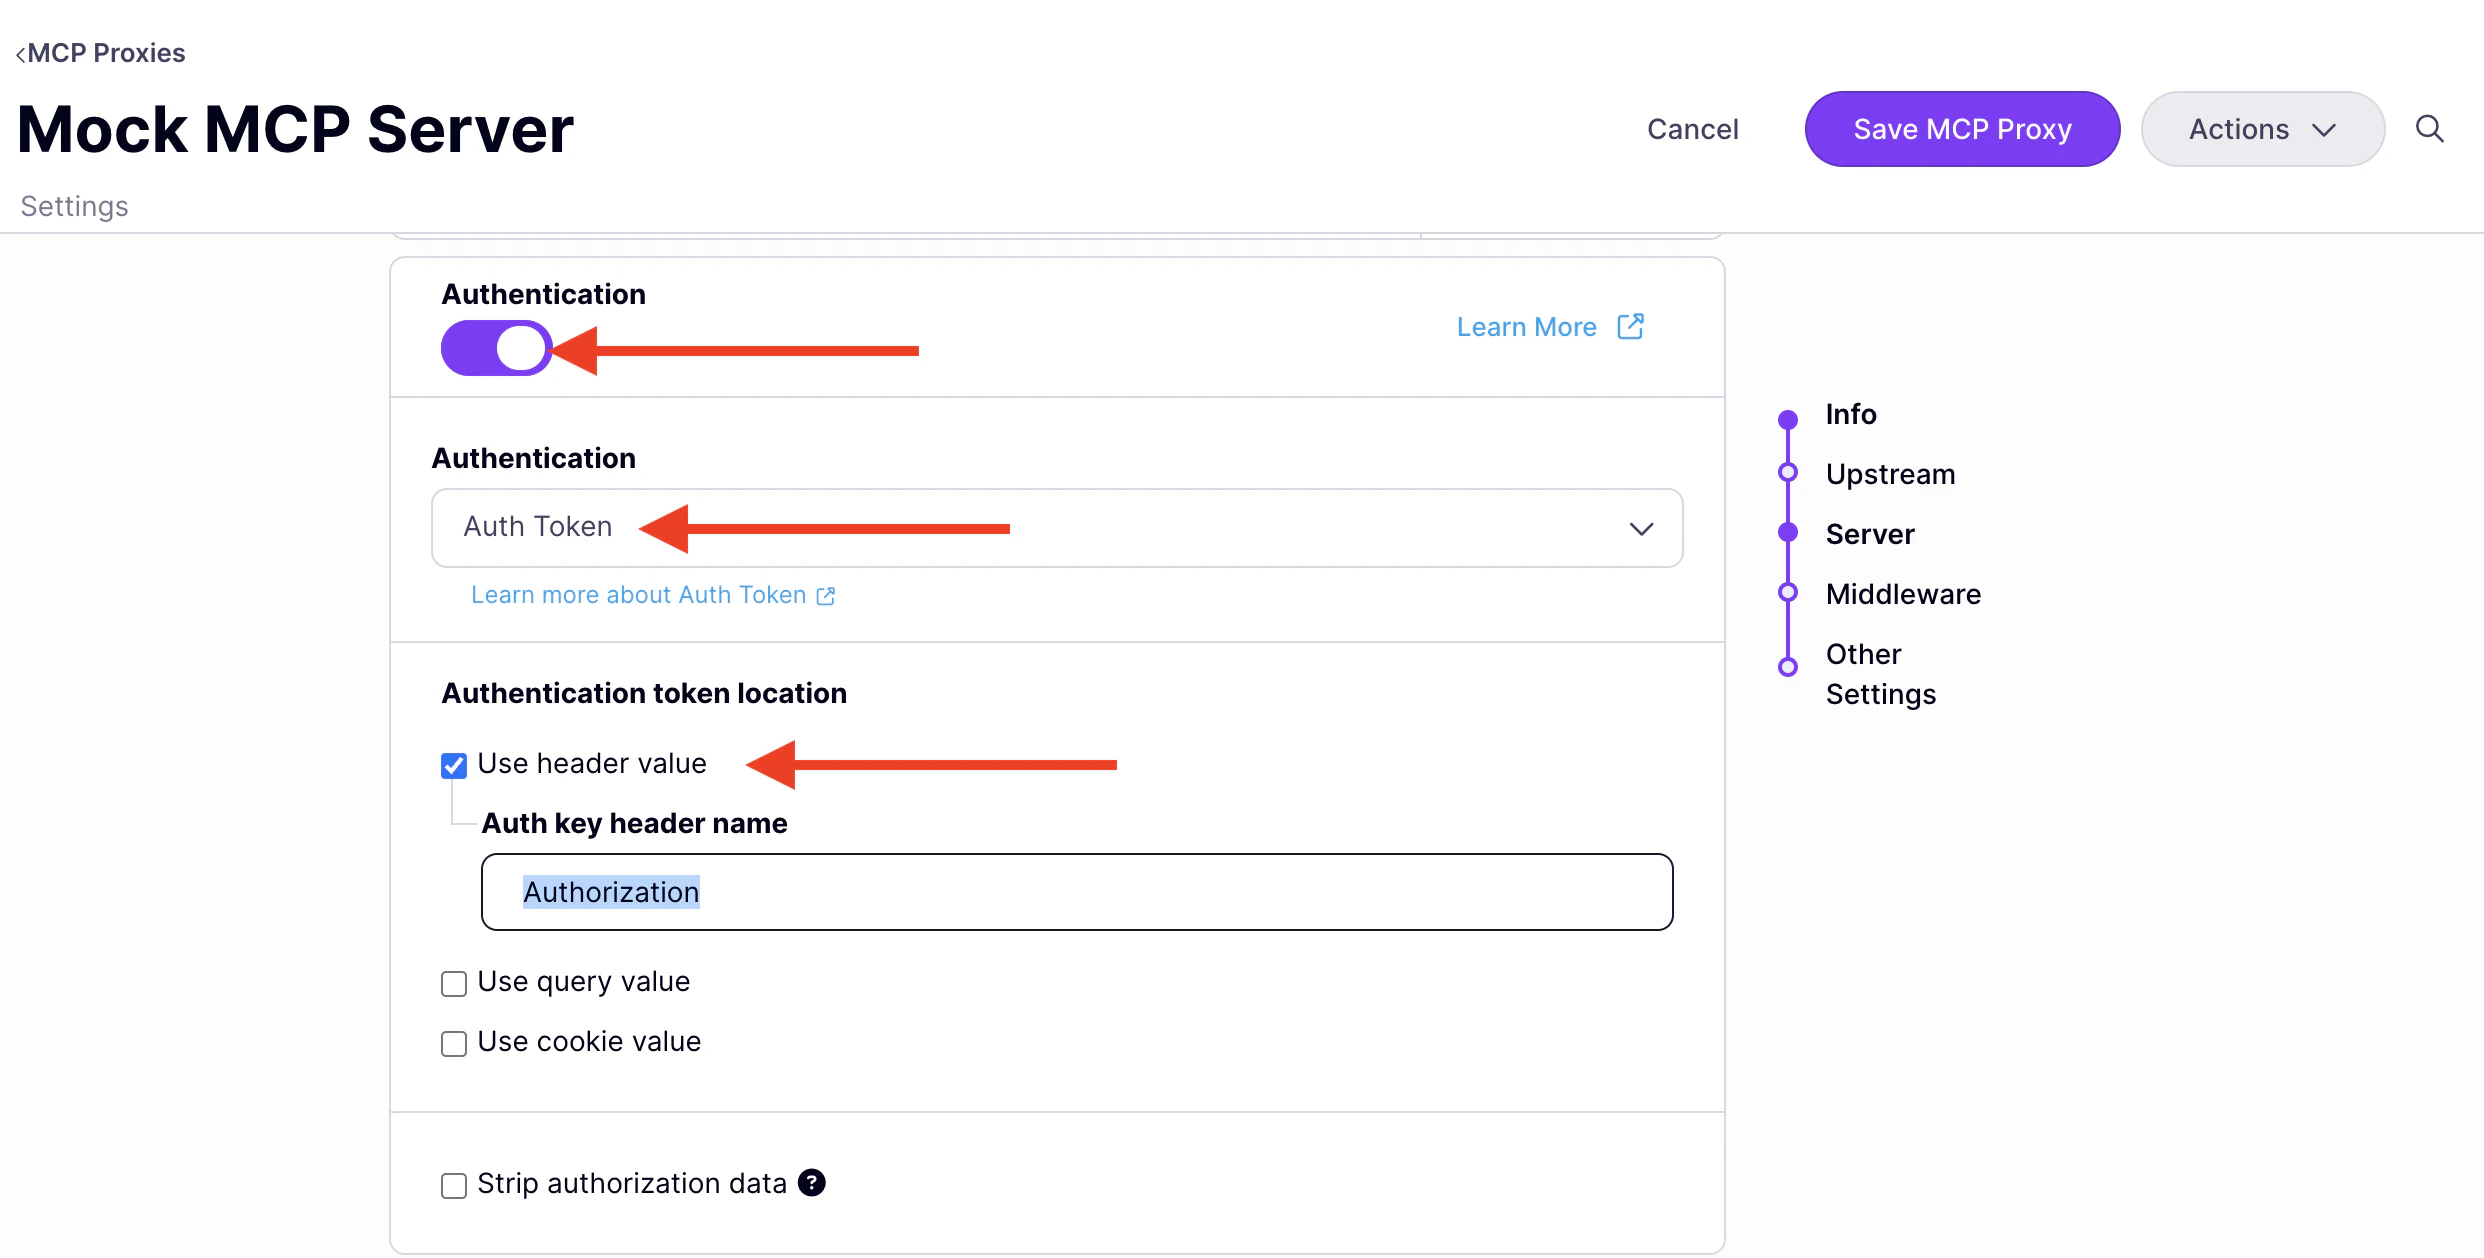
-
Click Save MCP Proxy.
The proxy now requires a bearer token on every request. Clients that connect without a valid key receive a
401 Unauthorizedresponse.
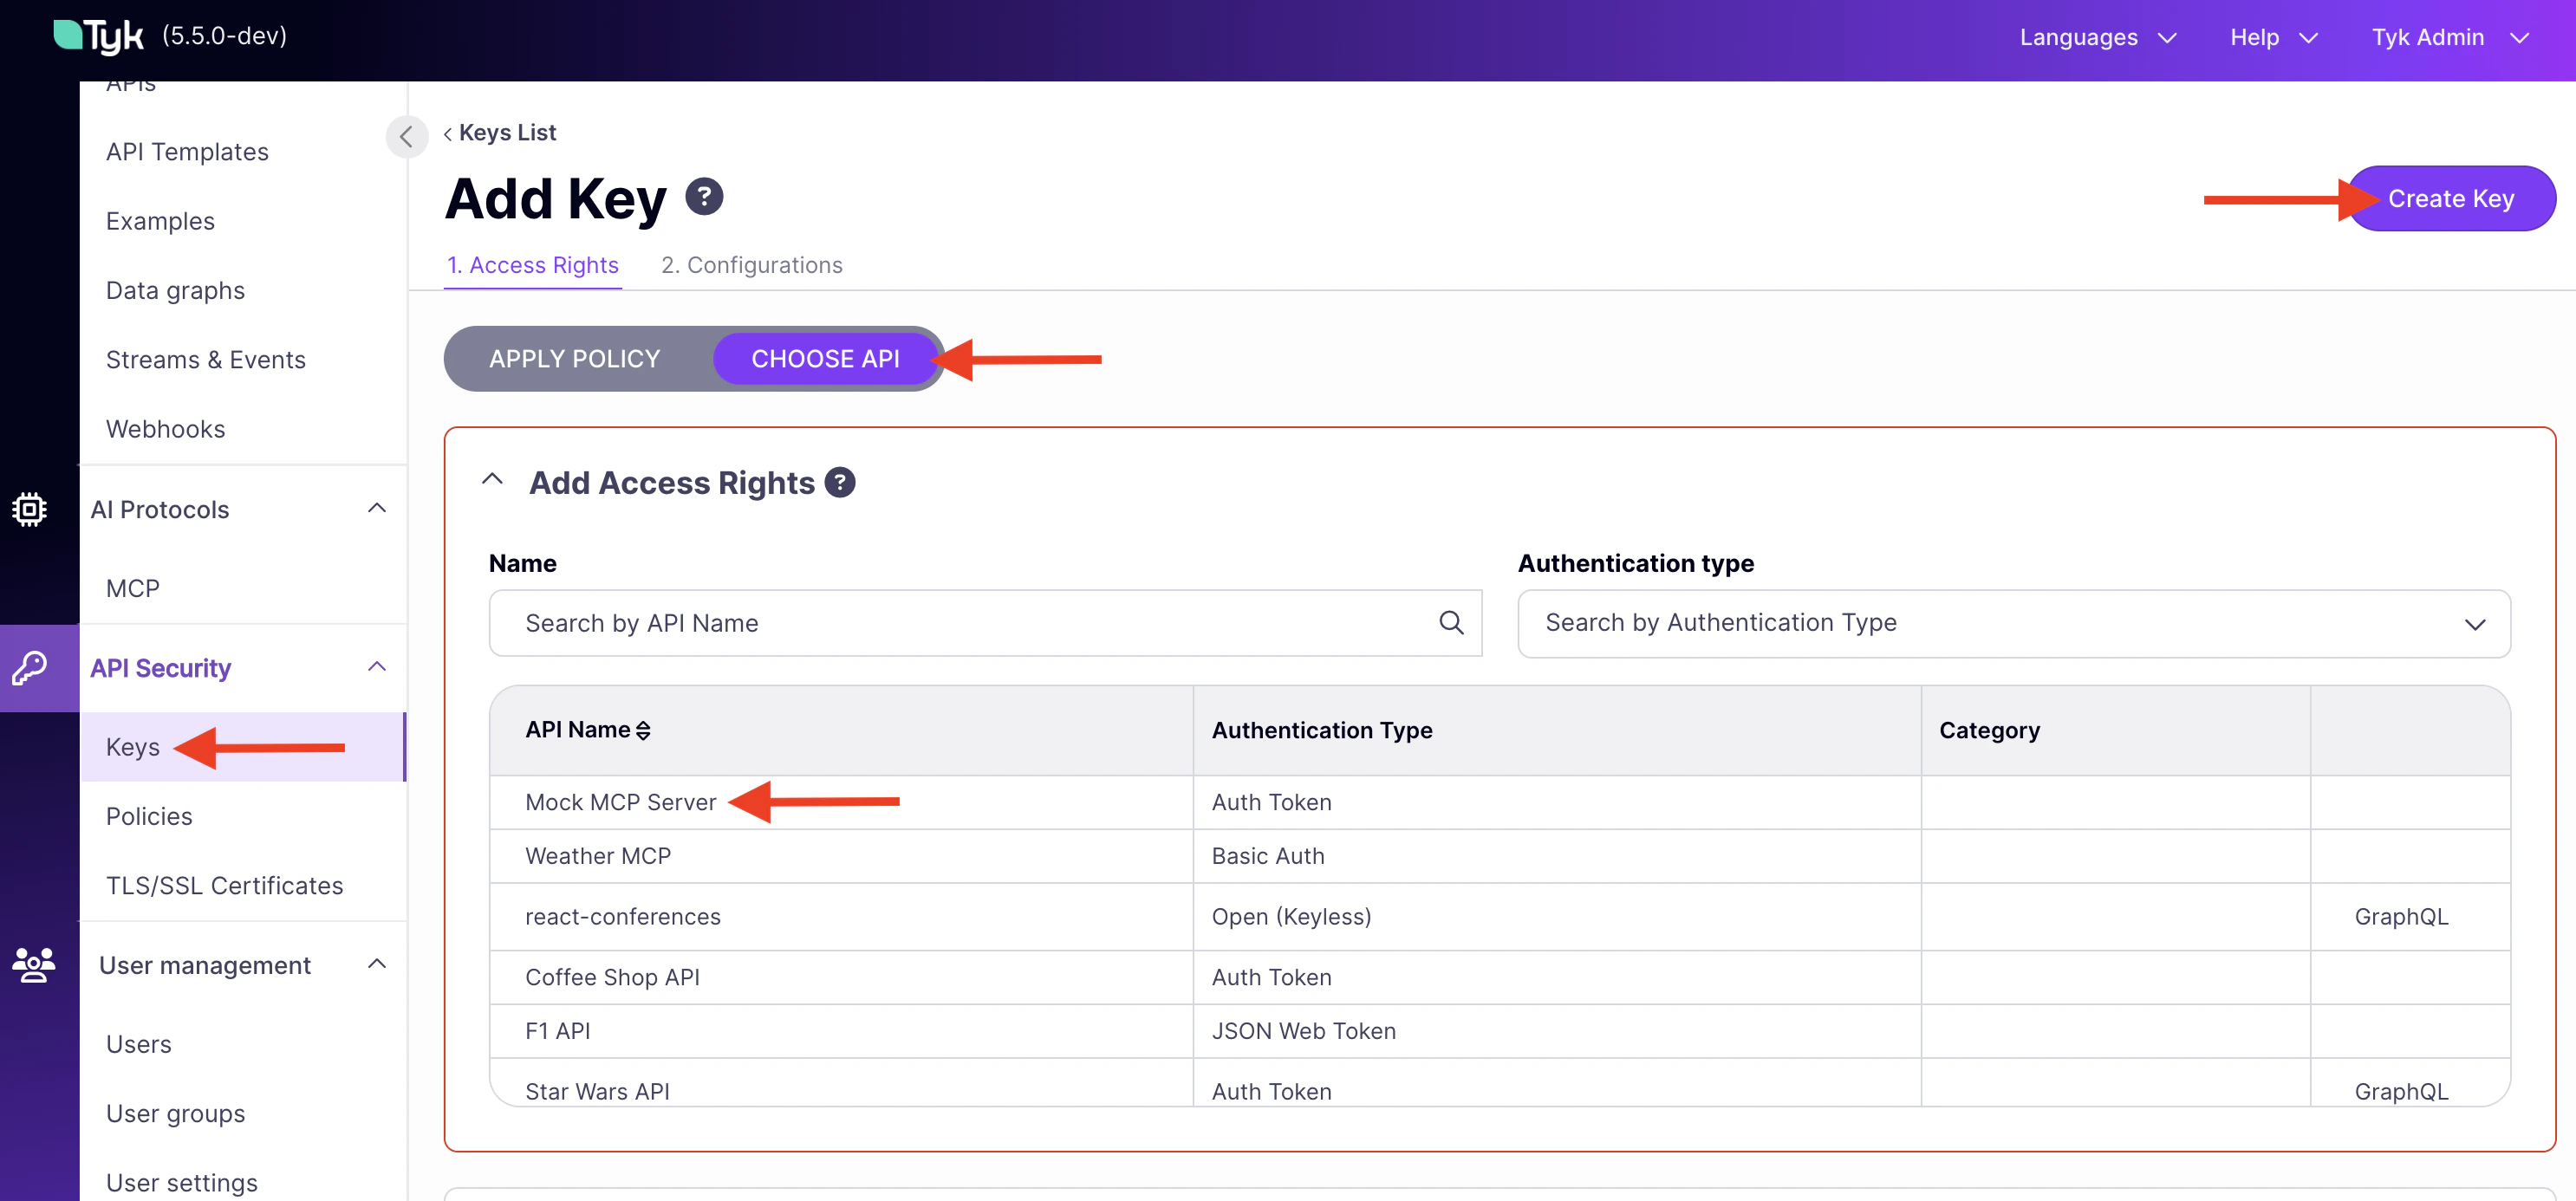
Step 2: Issue an API key
- In the Dashboard sidebar, click Keys, then click Add Key.
- Under Access rights, click Choose API and select Mock MCP Server.
-
Click Create Key. Copy the key shown — you cannot retrieve it after navigating away.
Step 3: Verify with MCP Inspector
-
Start MCP Inspector:
- Open the URL printed in your terminal.
-
Set Transport Type to
Streamable HTTP. -
Set URL to your MCP endpoint (find it under MCP Proxy URL in the proxy designer, then append
/mcp). -
Click Connect without adding an
Authorizationheader. The connection fails with a401 Unauthorizederror, confirming authentication is enforced. -
Add a header:
Authorization=Bearer {your-api-key}and click Connect again.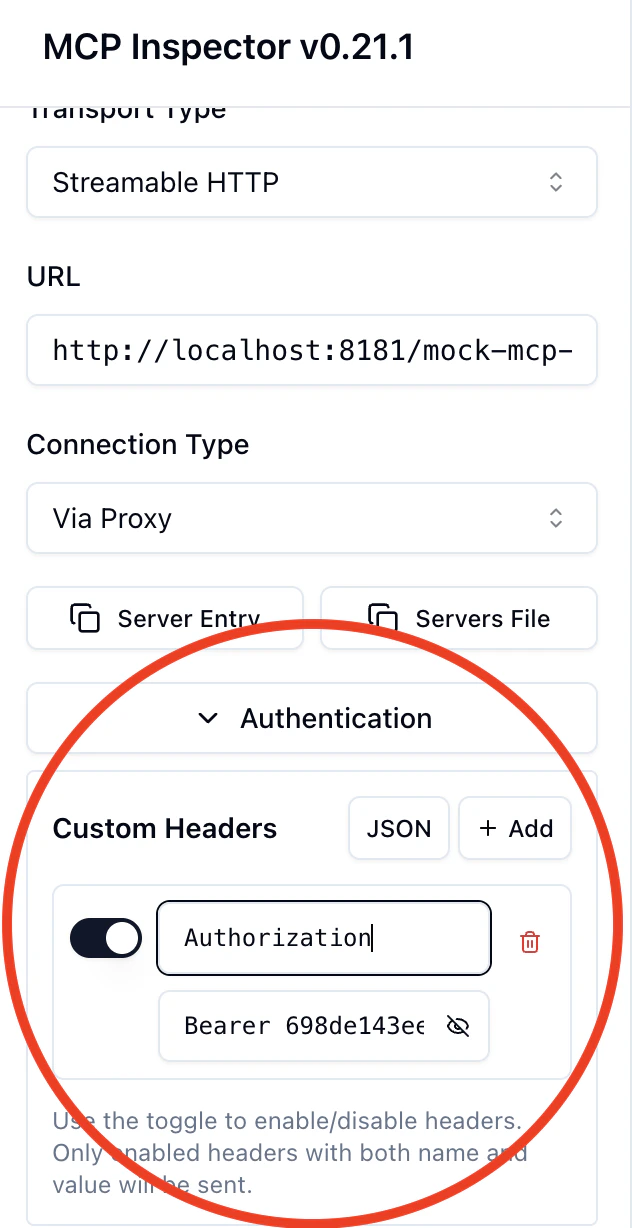
- Click the Tools tab. All 15 Mock MCP Server tools appear.