Open Policy Agent (OPA)
The Tyk Dashboard permission system can be extended by writing custom rules using an Open Policy Agent (OPA). The rules engine works on top of your Dashboard API, which means you can control not only access rules, but also behaviour of all Dashboard APIs (except your public developer portal).
To give you some inspiration here are some ideas of the rules you can implement now:
- Enforce HTTP proxy option for all APIs for which the target URL does not point at the internal domain
- Control access for individual fields. For example, do not allow changing the API “active” status (e.g. deploy), unless you have a specific permission set (and make new permissions to be available to the Dashboard/API). Custom permissions can be creating using the Additional Permissions API
- Have a user(or group) which has read access to one APIs and write to another OPA rule engine put on top of Dashboard API, which means you can control the behavior of all APIs (except public developer portal)
Video Walkthrough
We have a video that demonstrates how our Open Policy Agent enables you to add custom permissions.
Configuration
By default the Dashboard OPA engine is turned off, and you need to explicitly enable it via your Dashboard tyk_analytics.conf file.
You can then control OPA functionality on a global level via your tyk_analytics.conf file, or at an organisation level using either the OPA API or the Dashboard.
| Key | Type | Description | Example |
|---|---|---|---|
| security.open_policy.enabled | boolean | Toggle support for OPA | false |
| security.open_policy.debug | boolean | Enable debugging mode, prints a lot of information to the console | false |
| security.open_policy.enable_api | boolean | Enable access to the OPA API, even for users with Admin role | false |
| security.additional_permissions | string map | Add custom user/user_group permissions. You can use them in your rules, and they will be displayed in the Dashboard | {"key": "human name"} |
Example
"security": {
	"open_policy": {
		"enabled":true,
		"debug": true,
		"enable_api": true
	},
	"additional_permissions": {}
}
With the OPA turned on, the majority of the security rules will be dynamically evaluated based on these rules.
Additionally, users can modify OPA rules, and define their own, through the OPA API. For Self-Managed installations you can access and modify the OPA rules from your Tyk installation directory from schemas/dashboard.rego. Moreover, using these rules you can also modify request content. Our recommendation is to use those modifications in a development environment and remember to create a backup of the rego rules.
Language intro
The Open Policy Agent (OPA, pronounced “oh-pa”) is an open source, general-purpose policy engine that unifies policy enforcement across the stack. OPA provides a high-level declarative language (Rego) that lets you specify policy as code and simple APIs to offload policy decision-making from your software. (source: https://www.openpolicyagent.org/docs/latest/)
What is Rego?
OPA policies are expressed in a high-level declarative language called Rego. Rego (pronounced “ray-go”) is purpose-built for expressing policies over complex hierarchical data structures. For detailed information on Rego see the Policy Language documentation.
Rego was inspired by Datalog, which is a well understood, decades old query language. Rego extends Datalog to support structured document models such as JSON.
Rego queries are assertions on data stored in OPA. These queries can be used to define policies that enumerate instances of data that violate the expected state of the system.
Why use Rego?
Use Rego for defining a policy that is easy to read and write.
Rego focuses on providing powerful support for referencing nested documents and ensuring that queries are correct and unambiguous.
Rego is declarative so policy authors can focus on what queries should return rather than how queries should be executed. These queries are simpler and more concise than the equivalent in an imperative language.
Like other applications which support declarative query languages, OPA is able to optimise queries to improve performance.
Rego supports a variety of statements and functions. You can even use things like HTTP calls to build policies that depends on third-party APIs. See more about the language itself here.
Tyk policy primitives
The main building block which is required for controlling access is a “deny” rule, which should return a detailed error in case of a rejection. You can specify multiple deny rules, and they will all be evaluated. If none of the rules was matched, user will be allowed to access the resource.
A simple deny rule with a static error message can look like:
deny["User is not active"] {
  not input.user.active
}
You can also specify a dynamic error message:
# None of the permissions was matched based on path
deny[x] {
  count(request_permission) == 0
  x := sprintf("Unknown action '%v'", [input.request.path])
}
In addition, to deny rules, you can also modify the requests using patch_request.
You should respond with a JSON merge patch format https://tools.ietf.org/html/rfc7396
For example:
# Example: Enforce http proxy configuration for an APIs with category #external.
patch_request[x] {
  request_permission[_] == "apis"
  request_intent == "write"
  contains(input.request.body.api_definition.name, "#external")

  x := {"api_definition": {"proxy": {"transport": {"proxy_url": "http://company-proxy:8080"}}}}
}
Getting Tyk Objects
In some cases, you may want to write a rule which is based on existing Tyk Object.
For example, you can write a rule for a policy API, which depends on the metadata of the API inside it.
The policy engine has access to the TykAPIGet function, which essentially just does a GET call to the Tyk Dashboard API.
Example:
api := TykAPIGet("/apis/api/12345")
contains(api.target_url, "external.com")
Getting changeset of current request
For requests which modify the content, you can get a changeset (e.g. difference) using the TykDiff function, combined with a TykAPIGet call to get the original object.
Example:
# Example of the complex rule which forbids user to change API status, if he has some custom permission
deny["You are not allowed to change API status"] {
	input.user.user_permissions["test_disable_deploy"]

	# Intent is to to update API
	request_permission[_] == "apis"
	request_intent == "write"

	# Lets get original API object, before update
	# TykAPIGet accepts API url as argument, e.g. to receive API object call: TykAPIGet("/api/apis/<api-id>")
	api := TykAPIGet(input.request.path)

	# TykDiff performs Object diff and returns JSON Merge Patch document https://tools.ietf.org/html/rfc7396
	# For example if only state has changed diff may look like: {"api_definition":{"state": "active"}}
	diff := TykDiff(api, input.request.body)

	# API state has changed
	not is_null(diff.api_definition.active)
}
Developer guide
Since Opa rules are declarative, so in order to test them in the majority of the cases you can test your rules without using the Tyk Dashboard, and using this pre-build Rego playground https://play.openpolicyagent.org/p/x3ila2Q8Gb
When it comes to the TykAPIGet and TykDiff functions, you can mock them in your tests.
In order to understand how the Dashboard evaluates the rules, you can enable debugging mode by setting the security.open_policy.debug option, and in the Dashboard logs, you will see the detailed output with input and output of the rule engine. It can be useful to copy-paste the Dashboard log output to the Rego playground, fix the issue, and validate it on the Dashboard.
When you modify the dashboard.opa file, you will need to restart your tyk Dashboard.
Using the Open Policy Agent in the Dashboard
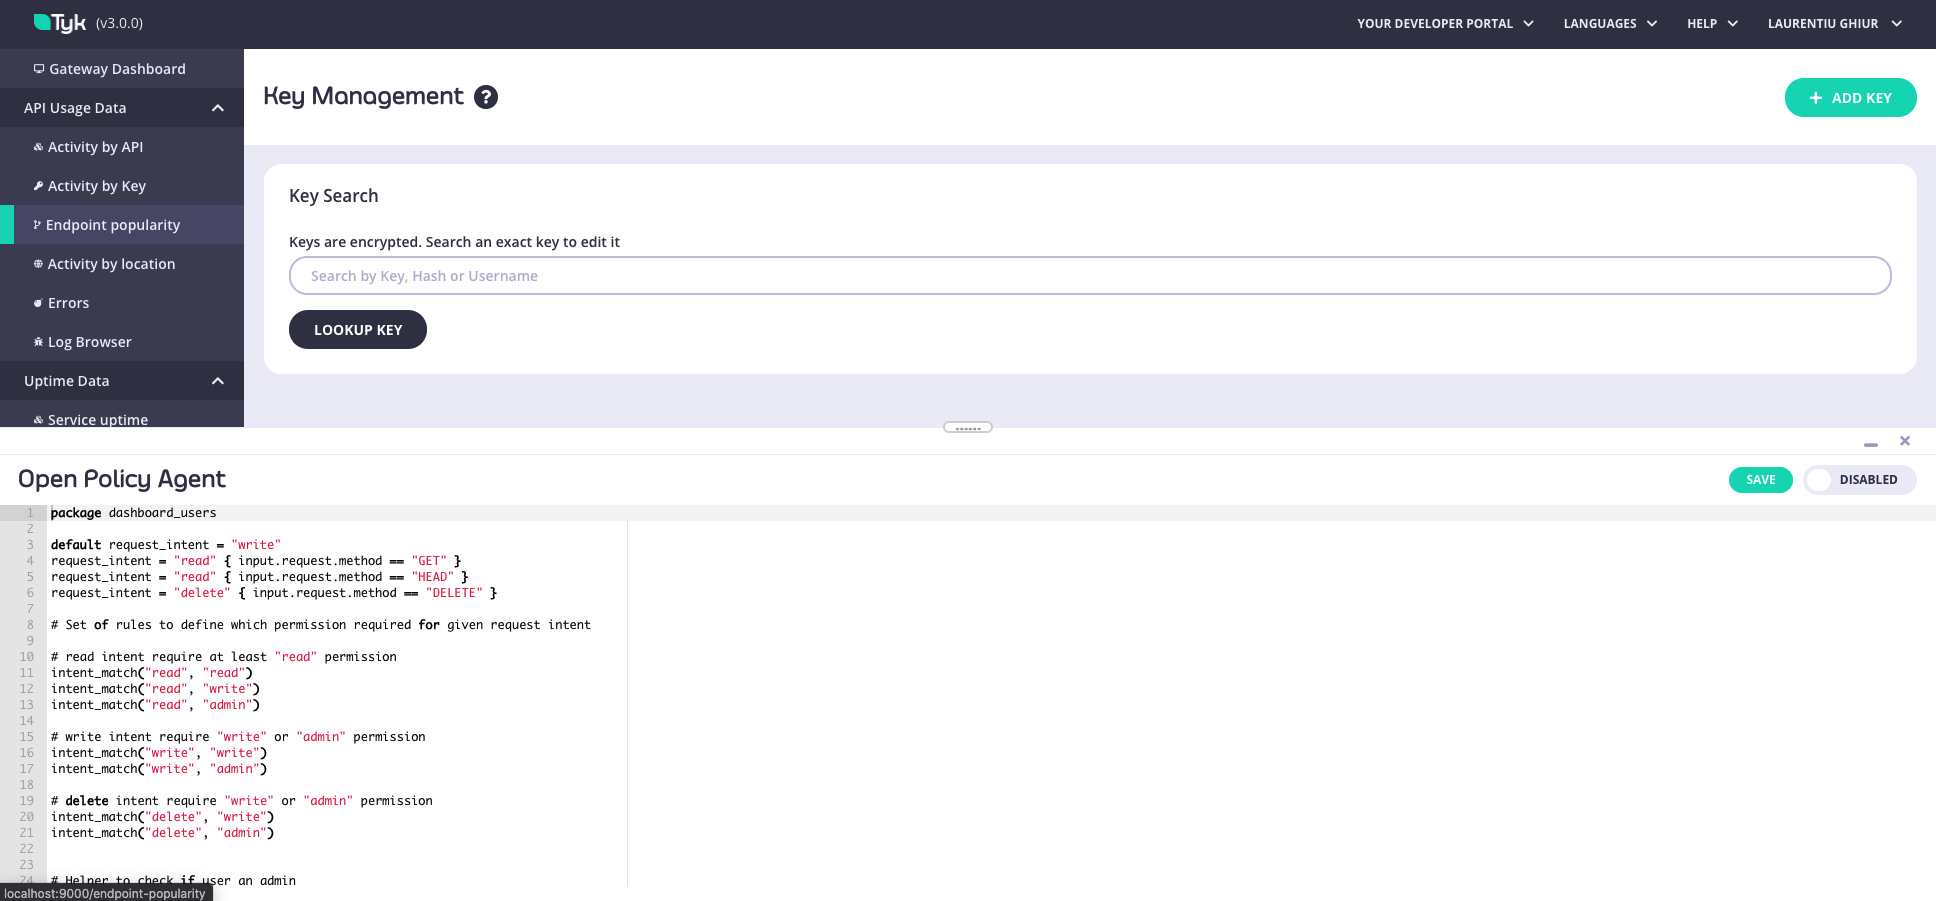
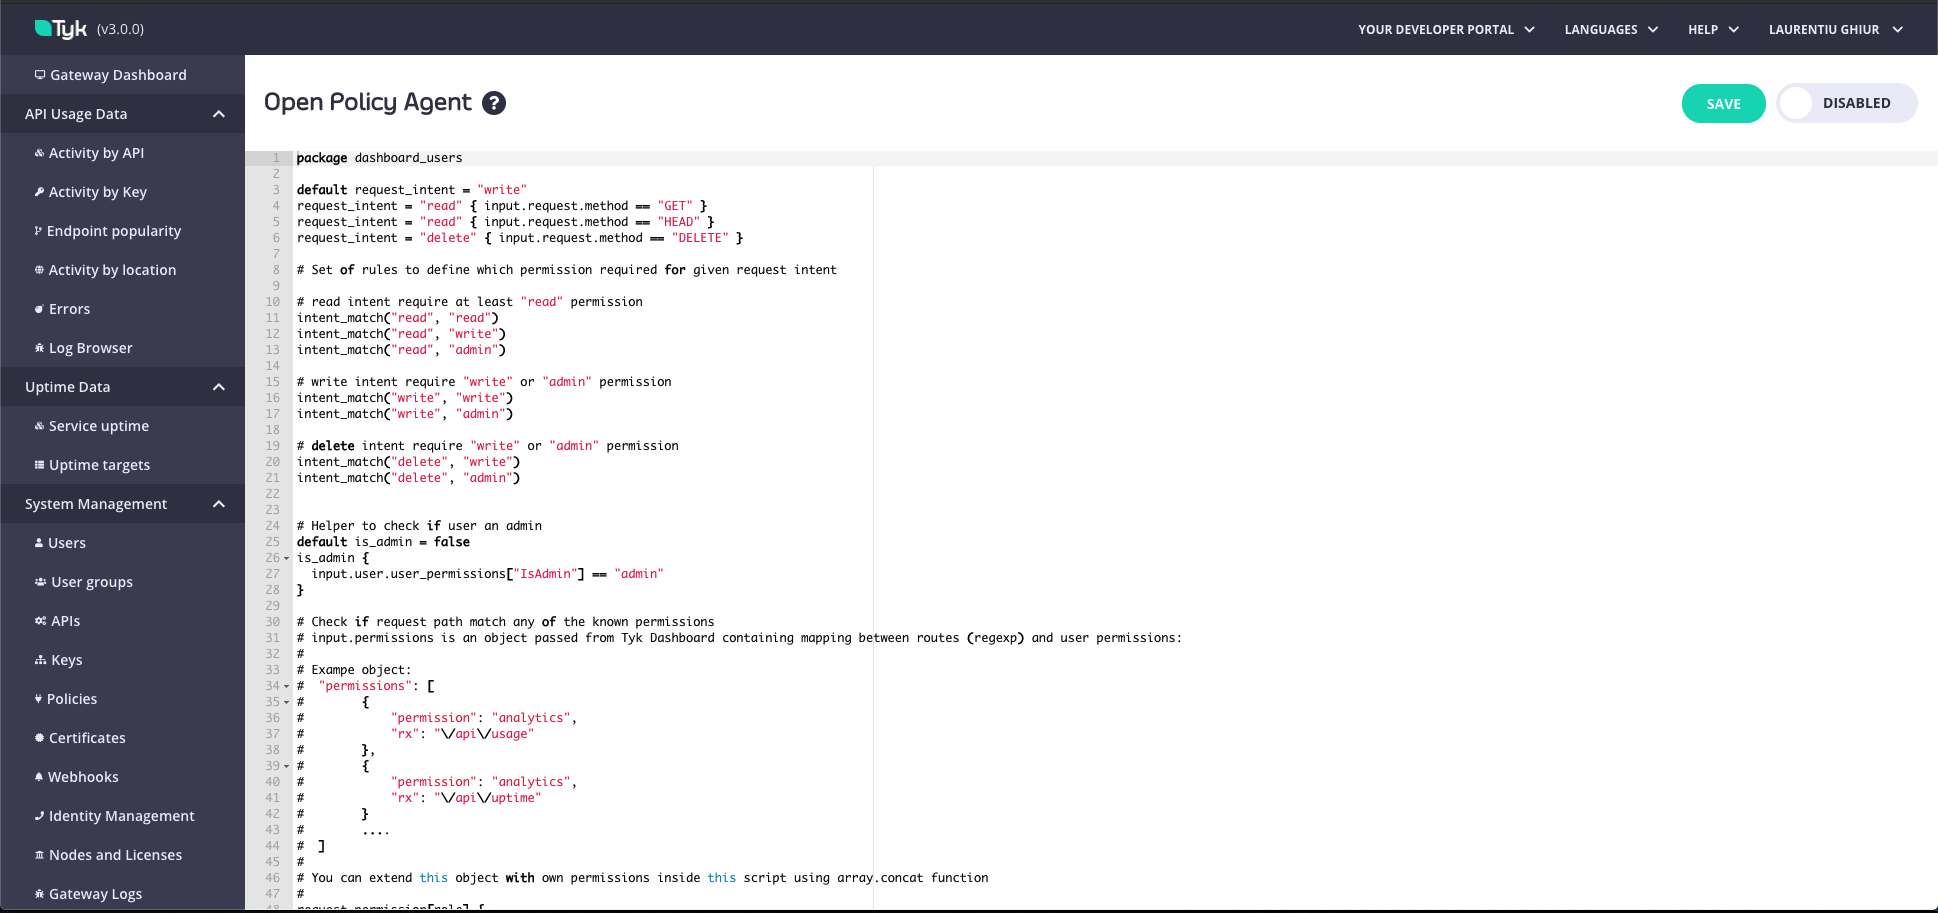
As well as configuring OPA rules through the API, admin users can view and edit OPA rules from within the Tyk Dashboard. The advantage of configuring your OPA rules in the Dashboard is that you can use a code editor for it, emulating a proper developer experience. There are two ways you can do this:
- From the OPA Rules menu. From the Dashboard Management menu, select OPA Rules. You can view and make any changes and select whether your OPA rules should be enabled or disabled.

- From Developer Tools. Using the keyboard shortcut
CMD+SHIFT+D(orCTRL+SHIFT+Dfor PC), you can open the Developer Tools panel on any page in the Dashboard and configure the permissions. Updates are applied in real-time.
Note
OPA rules can only be accessed by admin role users in the Dashboard.


