OAuth 2.0
Inserting an API gateway into an OAuth 2.0 flow is quite tricky, as OAuth assumes that the resource owner issuing the tokens is also the identity holder for authentication purposes.
Tyk has two methods you can use to enable OAuth 2.0
Option 1 - use standard auth tokens
The first is to integrate a standard OAuth 2.0 flow into your application using one of the many OAuth libraries that exist for popular frameworks and languages. And then when your API issues a token, use the Tyk Gateway REST API to create a key session for your own generated key.
Set up your API to use Auth Token as the Authentication Mode and set the Authorisation header to be Authorization, Tyk will now treat the auth_token as any other, respecting it’s expiry date and any access control mechanisms that may be in place. It may be the case that you will need to put the OAuth /access and /authorize endpoints into the ignored_paths list of your API version to ensure that those requests reach your API.
Option 2 - use the Tyk OAuth flow
Tyk can act as a full blown OAuth 2.0 provider for Authorisation an access tokens, and all your application would need to integrate with is Tyk’s API and notification endpoints.
Tyk supports the following grant types:
The Tyk OAuth flow is described in the following sections.
Authorisation token flow (e.g. server-side web apps)
- Resource owner registers a new Client ID with Tyk
- Client makes a request on behalf of an end user to
/oauth/authorize/on your Tyk instancelisten_path - Tyk will check the OAuth authorize request for validity (i.e. Does the Client ID exist and is the request properly formed to the OAuth 2.0 standard)
- If the request is valid and the Client ID has not expired, then the request will be passed through to your applications authorisation page - this page will essentially enable your user to log in and authenticate themselves and then give permission to this client ID to access their details (as one would expect from an OAuth integration).
- If the user accepts the Client access and has authenticated successfully, your app calls the Tyk Dashboard OAuth API Authorization endpoint (
/authorize-client/) with the POST parameters that the requesting client sent
Note
The Tyk Gateway also exposes an equivalent Gateway API authorization endpoint (/tyk/oauth/authorize-client/). In some scenarios, for example where access to the Dashboard API from the authentication server may be restricted, the Gateway API can be used instead.
- Tyk will generate an authorisation code and redirect URL to your application
- Your application redirects the user to the URL
- The API Client uses the auth code to request an access token from Tyk (
/oauth/token) - If the access token is valid, Tyk will generate an access token an notify your webapp via webhook that a new access token has been granted and also any other keys that are related (e.g. the auth-code mentioned earlier)
- Your app should store these details in order to tie the access token to your users identity
This seems like a complicated process and very verbose - however in actuality, the integration piece is very small. As an API owner, the only steps that require active integration are:
- Step (1) Creating OAuth Client ID’s (This would need to be done anyway)
- Step (4) Creating a page to receive the OAuth POST request, log the user in, authorise the client ID and redirect them back to the client app
- Step (9) Create a webhook endpoint that accepts a POST request in order to store and update OAuth key data
Access token flow (e.g. mobile apps, single-page web apps)
- Resource owner registers a new Client ID with Tyk
- Client makes a request on behalf of an end user to
/oauth/authorize/on your Tyk instancelisten_path - Tyk will check the OAuth authorize request for validity (i.e. Does the Client ID exist and is the request properly formed to the OAuth 2.0 standard
- If the request is valid and the Client ID has not expired, then the request will be passed through to your applications authorisation page - this page will essentially enable your user to log in and authenticate themselves and then give permission to this client ID to access their details (as one would expect from an OAuth integration).
- If the user accepts the Client access and has authenticated successfully, your app calls the Tyk Gateway API OAuth Authorization endpoint (
/tyk/oauth/authorize-client/) with the POST parameters that the requesting client sent - Tyk will generate an access code and redirect URL for your application
- Your application redirects the user to the URL
If this mode is used, only steps (1) and (4) are required, however the client cannot use refresh tokens to update access to the API.
Enabling OAuth via the Dashboard
Prerequisites
We assume that you have an API added and now want to protect it with OAuth.
1. Set the Authentication mode
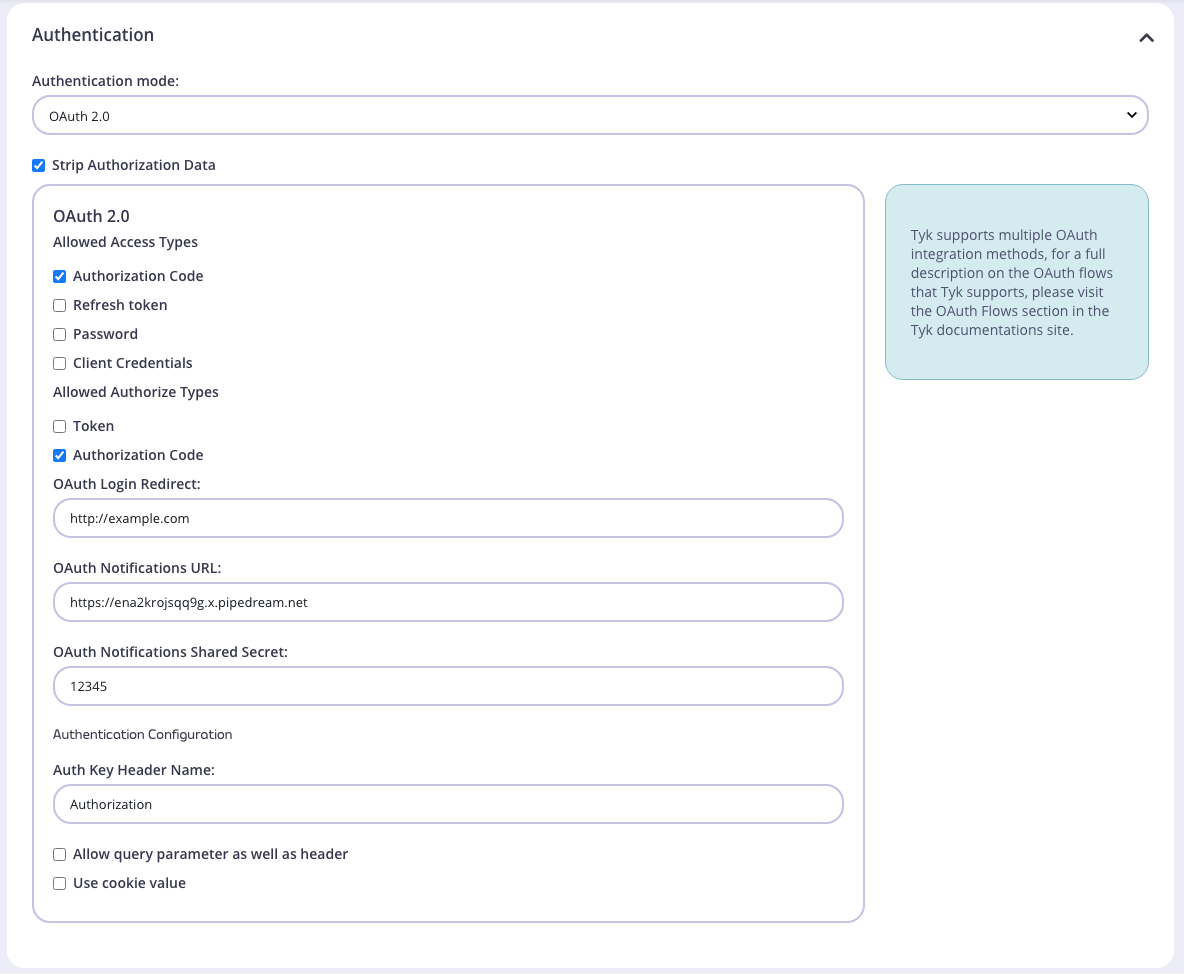
From the API Core Settings tab, select OAuth 2.0 as the Authentication mode:

2. Set Allowed Access Types and Allowed Authorize Types
Allowed Access Types and Allowed Authorize Types depends on the particular grant type you are supporting. For example, to support the Authorization Code grant type you should select Authorization Code for both Allowed Access Types and and Allowed Authorize Types. For other grant types select the appropriate option, e.g. for both Client Credentials and Username and Password grant types you should select Token for Allowed Authorize Types.
3. Set Redirect Fields
The remaining fields are only required for grant types which include a redirect, i.e. Authorization Code.
OAuth Login Redirect: This is the page that Tyk will redirect the user agent to if the authorize request is valid (as in, it has a valid client ID and the request meets the spec for OAuth).
OAuth Notifications URL: Will be notified every time a token is generated by this client, this is to enable any upstream server to maintain a clear idea of what tokens have been generated.
OAuth notifications Shared Secret: Is to ensure that the notification came from the Tyk Gateway
4. Create a Policy
Next, create a policy which includes this API on it’s Access rights.
5. Create an OAuth Client
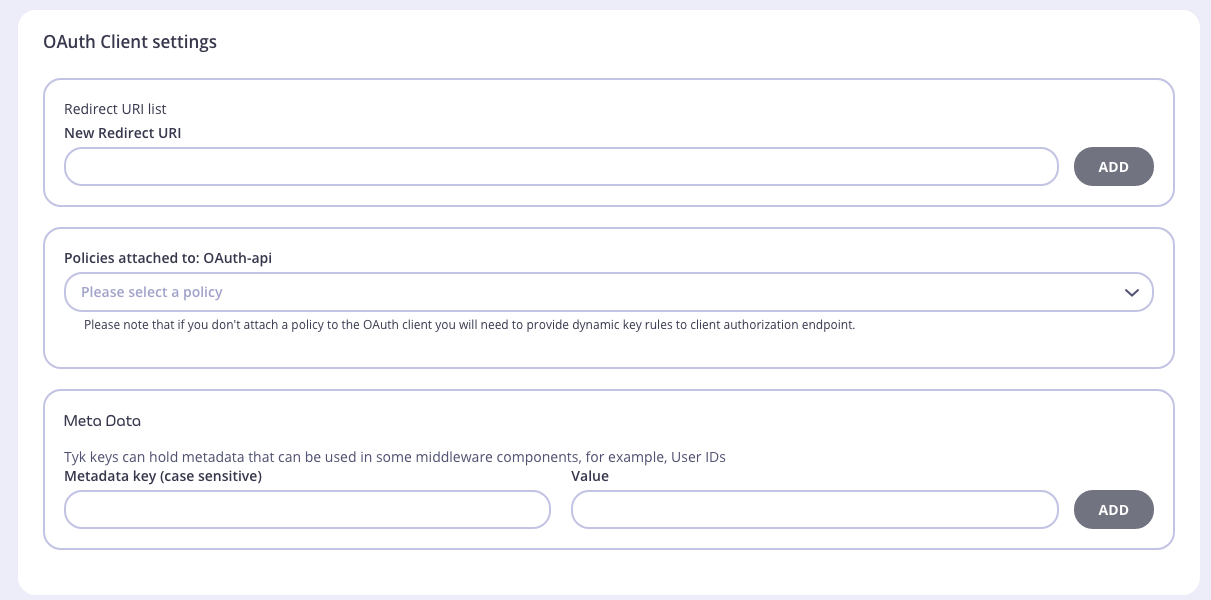
In order for any of these requests to work, you will need a valid OAuth client. To create an OAuth client, browse back to your API list and for the API you have created, select OAuth Clients under the Actions Dropdown list.

6. Add a New Client

You need to set a redirect URI, which can be any URI for Client Credentials and Password grant types. For the Authorization Code grant type this is the pre-registered redirect URL that the authorization server will redirect the client to. During the OAuth flow, the value set in the inbound request must match what is set here.
Select the policy you created earlier. This policy will be applied to each token that gets generated by this client ID.
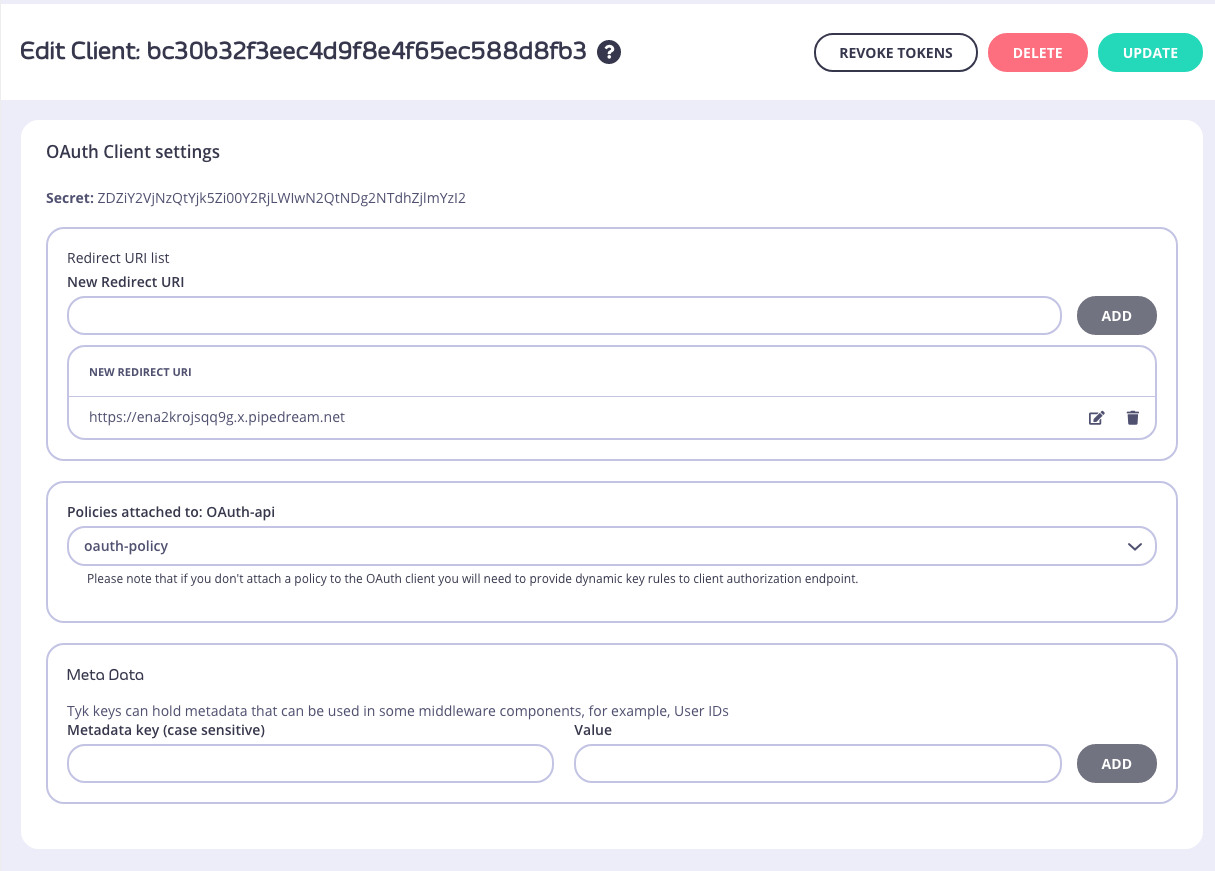
7. View Client ID and Secret
Once the client is created, you can view it’s ID and secret in the detail view.

Enabling OAuth via an API
To get OAuth set up in your API configuration, you will need to set up your API Definition like so:
    {
      name: "OAuth Test API",
      ...
      use_oauth2: true,
      oauth_meta: {
        allowed_access_types: [
          "authorization_code",
          "refresh_token"
        ],
        allowed_authorize_types: [
          "code",
          "token"
        ],
        auth_login_redirect: "http://lonelycode.com/login"
      },
      notifications: {
        shared_secret: "9878767657654343123434556564444",
        oauth_on_keychange_url: "http://posttestserver.com/post.php?dir=oauth_notifications"
      },
      ...
    }
As can be seen - a lot more configuration is required than with other methods. See API Definition Objects for more details.
The key elements to take into account here are the enabling of the use_oauth2 flag and the notifications section.
Setting quotas and limits
(See also bound policies)
Once your application authorises a client to access data on a users behalf (Step 5 -> Step 6), your app will send a request to the Tyk REST API endpoint /tyk/oauth/authorize-client/ with the POST data from the initial client request. It will also need to add one field to the POST data: key_rules.
key_rules is a form-encoded string representing a standard session object:
{
  "allowance": 1000,
  "rate": 1000,
  "per": 60,
  "expires": -1,
  "quota_max": -1,
  "quota_renews": 1406121006,
  "quota_remaining": 0,
  "quota_renewal_rate": 60,
  "access_rights": {
    "APIID1": {
      "api_name": "HMAC API",
      "api_id": "APIID1",
      "versions": [
        "Default"
      ]
    }
  },
  "org_id": "1",
  "oauth_client_id": "client-id-here",
  "hmac_enabled": false,
  "hmac_string": ""
}
You’ll notice the inclusion of the oauth_client_id field, this is for analytics usage as it will be fed into any hit data this key generates for later analysis.
What Tyk does with this data is as follows:
- If the request is an auth-code request, then when an access token is requested, the
key_rulesis decoded and used to generate the new key. - If the request is by your app and is for a token, then the key is generated directly from this data.
Using bound policies with OAuth Client IDs
Instead of passing a key_rules parameter when authorizing a client, Tyk can now have an API policy that manages access rules bound to the Client ID doing the accessing, if a bound policy ID is used when generating the OAuth client, when a token is generated for the client then Tyk will generate a token based on the policy data. This is especially useful in generative contexts such as the client_credentials grant.
Notifications
The notifications section is only required if you intend to use Authorization tokens or Refresh tokens (See the access token flow). If these are used, Tyk will attempt to send a notification to the oauth_on_keychange_url. It will attempt to send this notification 3 times until it receives a 200 OK response.
The notification that is sent to the webhook you specify is a POST request with an authentication header:
X-Tyk-Shared-Secret: your-shared-secret
And the POST body will have the following fields, they will be populated depending on the type of request that is being reacted to:
{
  "auth_code": "",
  "new_oauth_token": "",
  "refresh_token": "",
  "old_refresh_token": "",
  "notification_type": ""
}
The fields will be populated depending on the type of notification is being sent - the two types being refresh and new, a new request will have an auth_code (this will be the auth code that requested access), new_oauth_token (the key to store against your user ID, based on the auth_code) and refresh_token (if enabled - this is the refresh token that can be used to generate a new access token without your API knowing).
A refresh type will send a new refresh_token, the old_refresh_token (to identify the key being changed) and thenew_oauth_token to update the identity record.
Notes on the Tyk OAuth 2.0 Flow
- Once a token has been generated, it uses the same machinery as standard access tokens, so quotas, limits and expiry can all be set as part of the key.
- Access tokens will use the Tyk access controls (versioning and named API ID’s) to grant and deny access to APIs, not the Client ID.
- OAuth access data is stored in Analytics records so that data can be grouped by Client ID.
Accessing multiple APIs with the same API token
OAuth 2.0 by design has a single authentication point. However you can configure Tyk to issue tokens which will have access to multiple APIs. In order to do that, create a policy which includes one OAuth 2.0 API which is used for authentication (e.g. issuing tokens), and the rest of the APIs inside the policy should use the standard Auth Token method.
