Webhooks
Set up an Event Webhook with an API Definition
In order to add extensibility and interoperability to Tyk, a new webhook event handler has been added. This allows a fixed payload (which can be customised) to be delivered to any open endpoint.
The webhook handler allows the configuration of the method, body, header values, and target URL and makes use of Go templates to expose the event metadata.
The webhook handler also features a timeout and checksum to ensure that events that are fired multiple times do not result in the endpoint being flooded.
Webhook Cooldown
For example, it is very likely that an AuthFailure event will fire on the same endpoint more than once if the requesting client is automated. However, if this event triggered a webhook that caused an email to be sent, then if this event occurred 10 times a second, the email recipient would be flooded with emails. In an attempt to mitigate against events such as this, you can set an event_timeout in seconds, in the webhook handler. This acts as a ‘cooldown’ timer for the event if a message with the same request signature has been fired within the time period specified.
Tyk will create the event request object, and then MD5 checksum the raw string value of it. If this MD5 value is found in the Redis store, it will not fire. However if it does not find it, the event will fire. The key is set once the event is fired and expires (is deleted) after the specified period in the event_timeout field.
Setup a Webhook in an API Definition
The webhook event handler metadata looks like this when added to the event handler section:
{
  "handler_name":"eh_web_hook_handler",
  "handler_meta": {
    "method": "POST",
    "target_path": "http://posttestserver.com/post.php?dir=tyk-event-test",
    "template_path": "templates/default_webhook.json",
    "header_map": {"X-Tyk-Test-Header": "Tyk v1.BANANA"},
    "event_timeout": 10
}
The configuration data is pretty straight-forward, but it is important that all elements are set, as Tyk will complain if it cannot initialise the handler on startup.
-
handler_meta.method: This can be any ofGET,PUT,POST,PATCHorDELETEand will be the method used to send the request. Request types that do not support an encoded BODY will not have the event metadata encoded as part of the request. We would advise usingPOSTwhere possible. -
handler_meta.target_path: This is the absolute URL that should be targeted by the webhook. -
handler_meta.template_path: By default Tyk will try to usetemplates/default_webhook.json, however it can be any text file, please examine the sample file for the tags to use to embed metadata into the request body. Currently a defaultPOSTwill look like:
{
  "event": "{{.Type}}",
  "message": "{{.Meta.Message}}",
  "path": "{{.Meta.Path}}",
  "origin": "{{.Meta.Origin}}",
  "key": "{{.Meta.Key}}"
}
So if your endpoint takes XML input or prefers CSV as a format, then this is equally acceptable so long as Tyk can parse the template correctly.
-
handler_meta.header_map: The header map will bind the set headers that are defined in this hash table to the request. If your endpoint requires some form of ID via header it can be set up here. -
handler_meta.event_timeout: This is the cooldown period for duplicate events in seconds. Set this to offset flooding of endpoints when multiple events are fired in quick succession.
Set up an Event Webhook with the Dashboard
To add a webhook to an event with the dashboard requires two steps:
- Create the webhook.
- Add it to your API configuration.
Webhooks can be re-used, and so are named entities in a dashboard setup.
Step 1: Create a Webhook
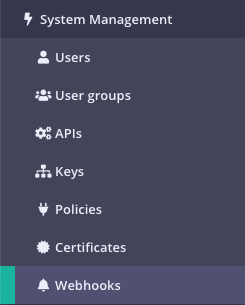
Select Webhooks from the System Management Menu:

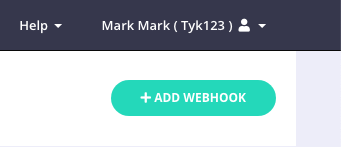
Click Add Webhook.

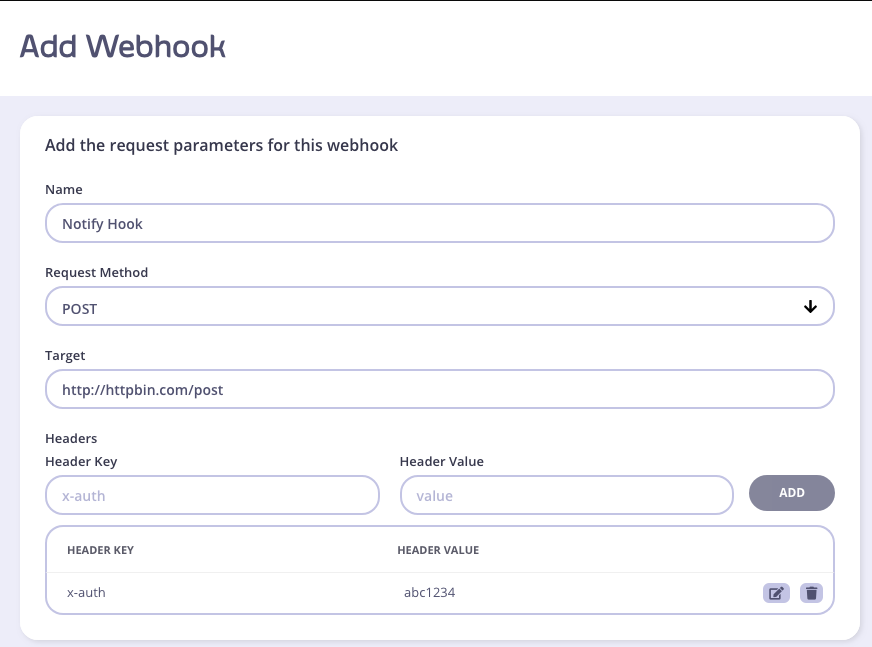
Step 2: Set up your Webhook Target
Now you need to tell Tyk how and where to send the request. You can include custom headers to ensure that the webhook comes from a Tyk instance:

Click Add to save it.
Step 3: API Advanced options
From your API list, click Edit, then select the Advanced Options tab from the API Designer:

Step 4: Add the Webhook to your API
Scroll down to the Webhooks panel:

Here you will be able to select the event to fire on and what webhook to use for the event. Since you can re-use webhooks, simply select it from the Webhook to use drop-down list, and set the cooldown period (in seconds) that sets the period between webhook notifications.
Click Add to save your webhook to the API definition.
Example Webhook Payload
{
    "event": "AuthFailure",
    "message": "Auth Failure",
    "path": "/my-auth-api/",
    "origin": "99.242.139.220",
    "key": "123"
}
