Prerequisites
Before beginning the installation and setup process for Tyk Governance, ensure your environment meets the following requirements:License Requirements
- Valid Tyk license with Governance feature enabled
System Requirements
For Tyk Governance Hub:- No local system requirements as Tyk Governance is fully hosted and managed by Tyk in the cloud
- Minimum 1 CPU core
- 512MB RAM
- 1GB available disk space
- Linux-based operating system (Ubuntu 18.04+, CentOS 7+, or equivalent)
- Docker (if using containerized deployment)
- Kubernetes (optional, for orchestrated deployments)
Permission Requirements
For Agent Installation:- Read access to your API providers (Tyk, AWS API Gateway, etc.)
- Ability to create and manage containers or services in your environment
- Network configuration permissions to establish outbound connections
- Permission to create and manage secrets for storing API credentials
Network Requirements
For Tyk Governance Agent:- Inbound access from the Tyk Governance Hub (default 50051 for gRPC)
- Outbound access to your API providers
- Outbound HTTPS (port 443) access to the Tyk Governance Hub
- If API Provider gateways run on different networks, network routes must allow the agent to communicate with those networks
Running on Podman, containerd, or another container runtime? See Container Runtimes.
System Architecture
Tyk Governance follows a cloud-hosted service model with customer-deployed agents, creating a secure and flexible architecture that respects your network boundaries while providing centralized governance.High-Level Architecture
Deployment Models
Tyk Cloud with Automatic Agent
When to use this model:- You exclusively use Tyk Cloud for API management
- You want the simplest possible setup with minimal configuration
- You don’t have any APIs on other platforms that need governance
Tyk Cloud with Customer-Deployed Agents
When to use this model:- You use self-managed Tyk deployments (not Tyk Cloud)
- You use AWS API Gateway or other supported providers
- You need to govern APIs across providers that aren’t in Tyk Cloud
Hybrid Deployment
When to use this model:- You use a combination of Tyk Cloud and other API platforms
- You have a mix of cloud and on-premises API deployments
- You need comprehensive governance across your entire API ecosystem
Installation
The installation process for Tyk Governance varies depending on whether you’re an existing Tyk Cloud customer and which deployment model you use.Requesting Access to Tyk Governance
-
Contact Tyk for Access
- Reach out to your Tyk Account Manager or visit tyk.io/contact-book-a-demo
- Specify that you’re interested in access to Tyk Governance
- Provide information about your current API management environment
-
Receive Access Credentials
- After your request is processed, you’ll receive an email with:
- URL to access the Tyk Governance Hub
- Admin credentials for initial login
- Instructions for next steps
- After your request is processed, you’ll receive an email with:
-
Initial Login
- Navigate to the provided Governance Hub URL
- Enter the admin credentials from the email
- You’ll be prompted to change your password on first login
Enabling Governance Feature for Cloud Control Planes
For existing Tyk Cloud managed control planes, enabling governance is straightforward:-
Log in to Tyk Cloud Dashboard
- Navigate to your Tyk Cloud dashboard
- Ensure you have administrative privileges
-
Access Control Plane Settings
- Select the Control Plane you want to enable governance for
- Click on “Edit Details” button
-
Enable Governance Feature
- Locate the “Governance Agent” toggle
- Enable the feature
- Save your changes
-
Verification
- An agent will be automatically deployed for your Tyk Control Plane
- You can now access the Governance dashboard via “Governance” in the Cloud UI sidebar
Installing a Local Agent
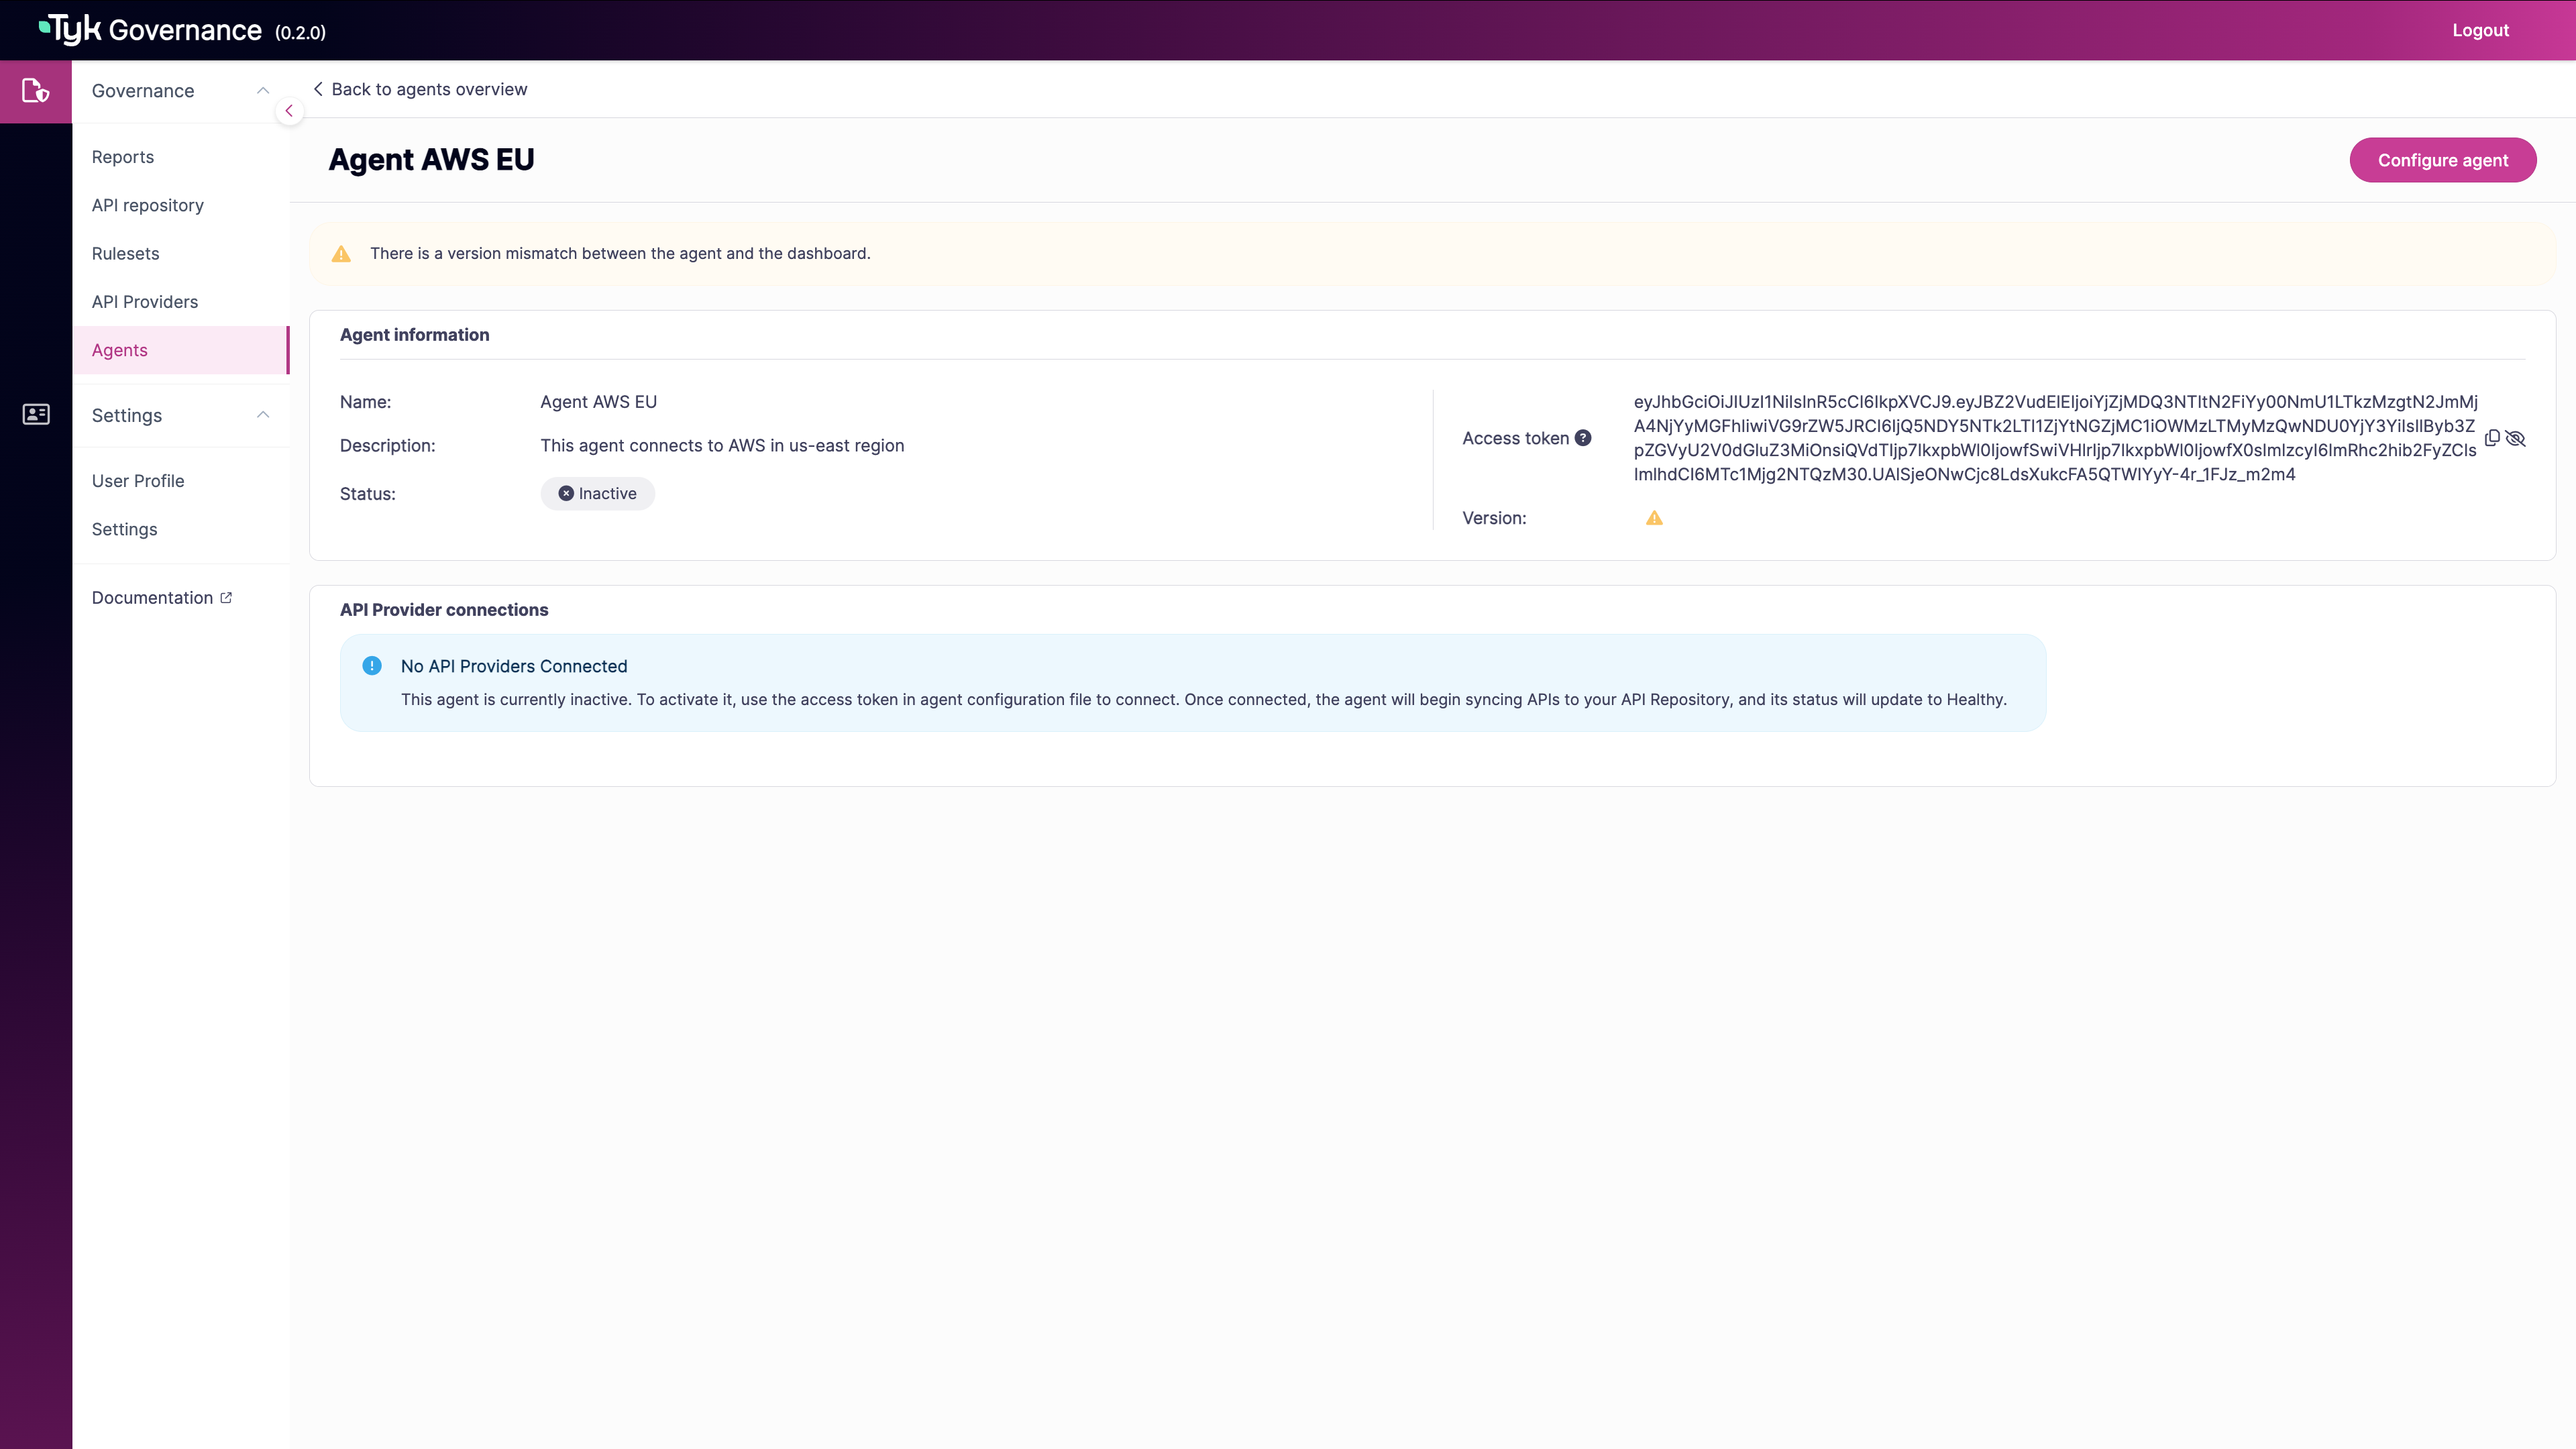
For environments where you need to install agents manually (non-Tyk platforms or on-premises deployments), follow these steps: Prerequisites for Agent Installation:- Access to the Governance Hub to generate agent tokens
- Network connectivity between the agent and both the Governance Hub and your API provider
- Docker or Kubernetes for container-based deployment (recommended)
Generate Agent Token from Governance Hub UI
- From the Agents page, click the New agent button in the top-right corner.
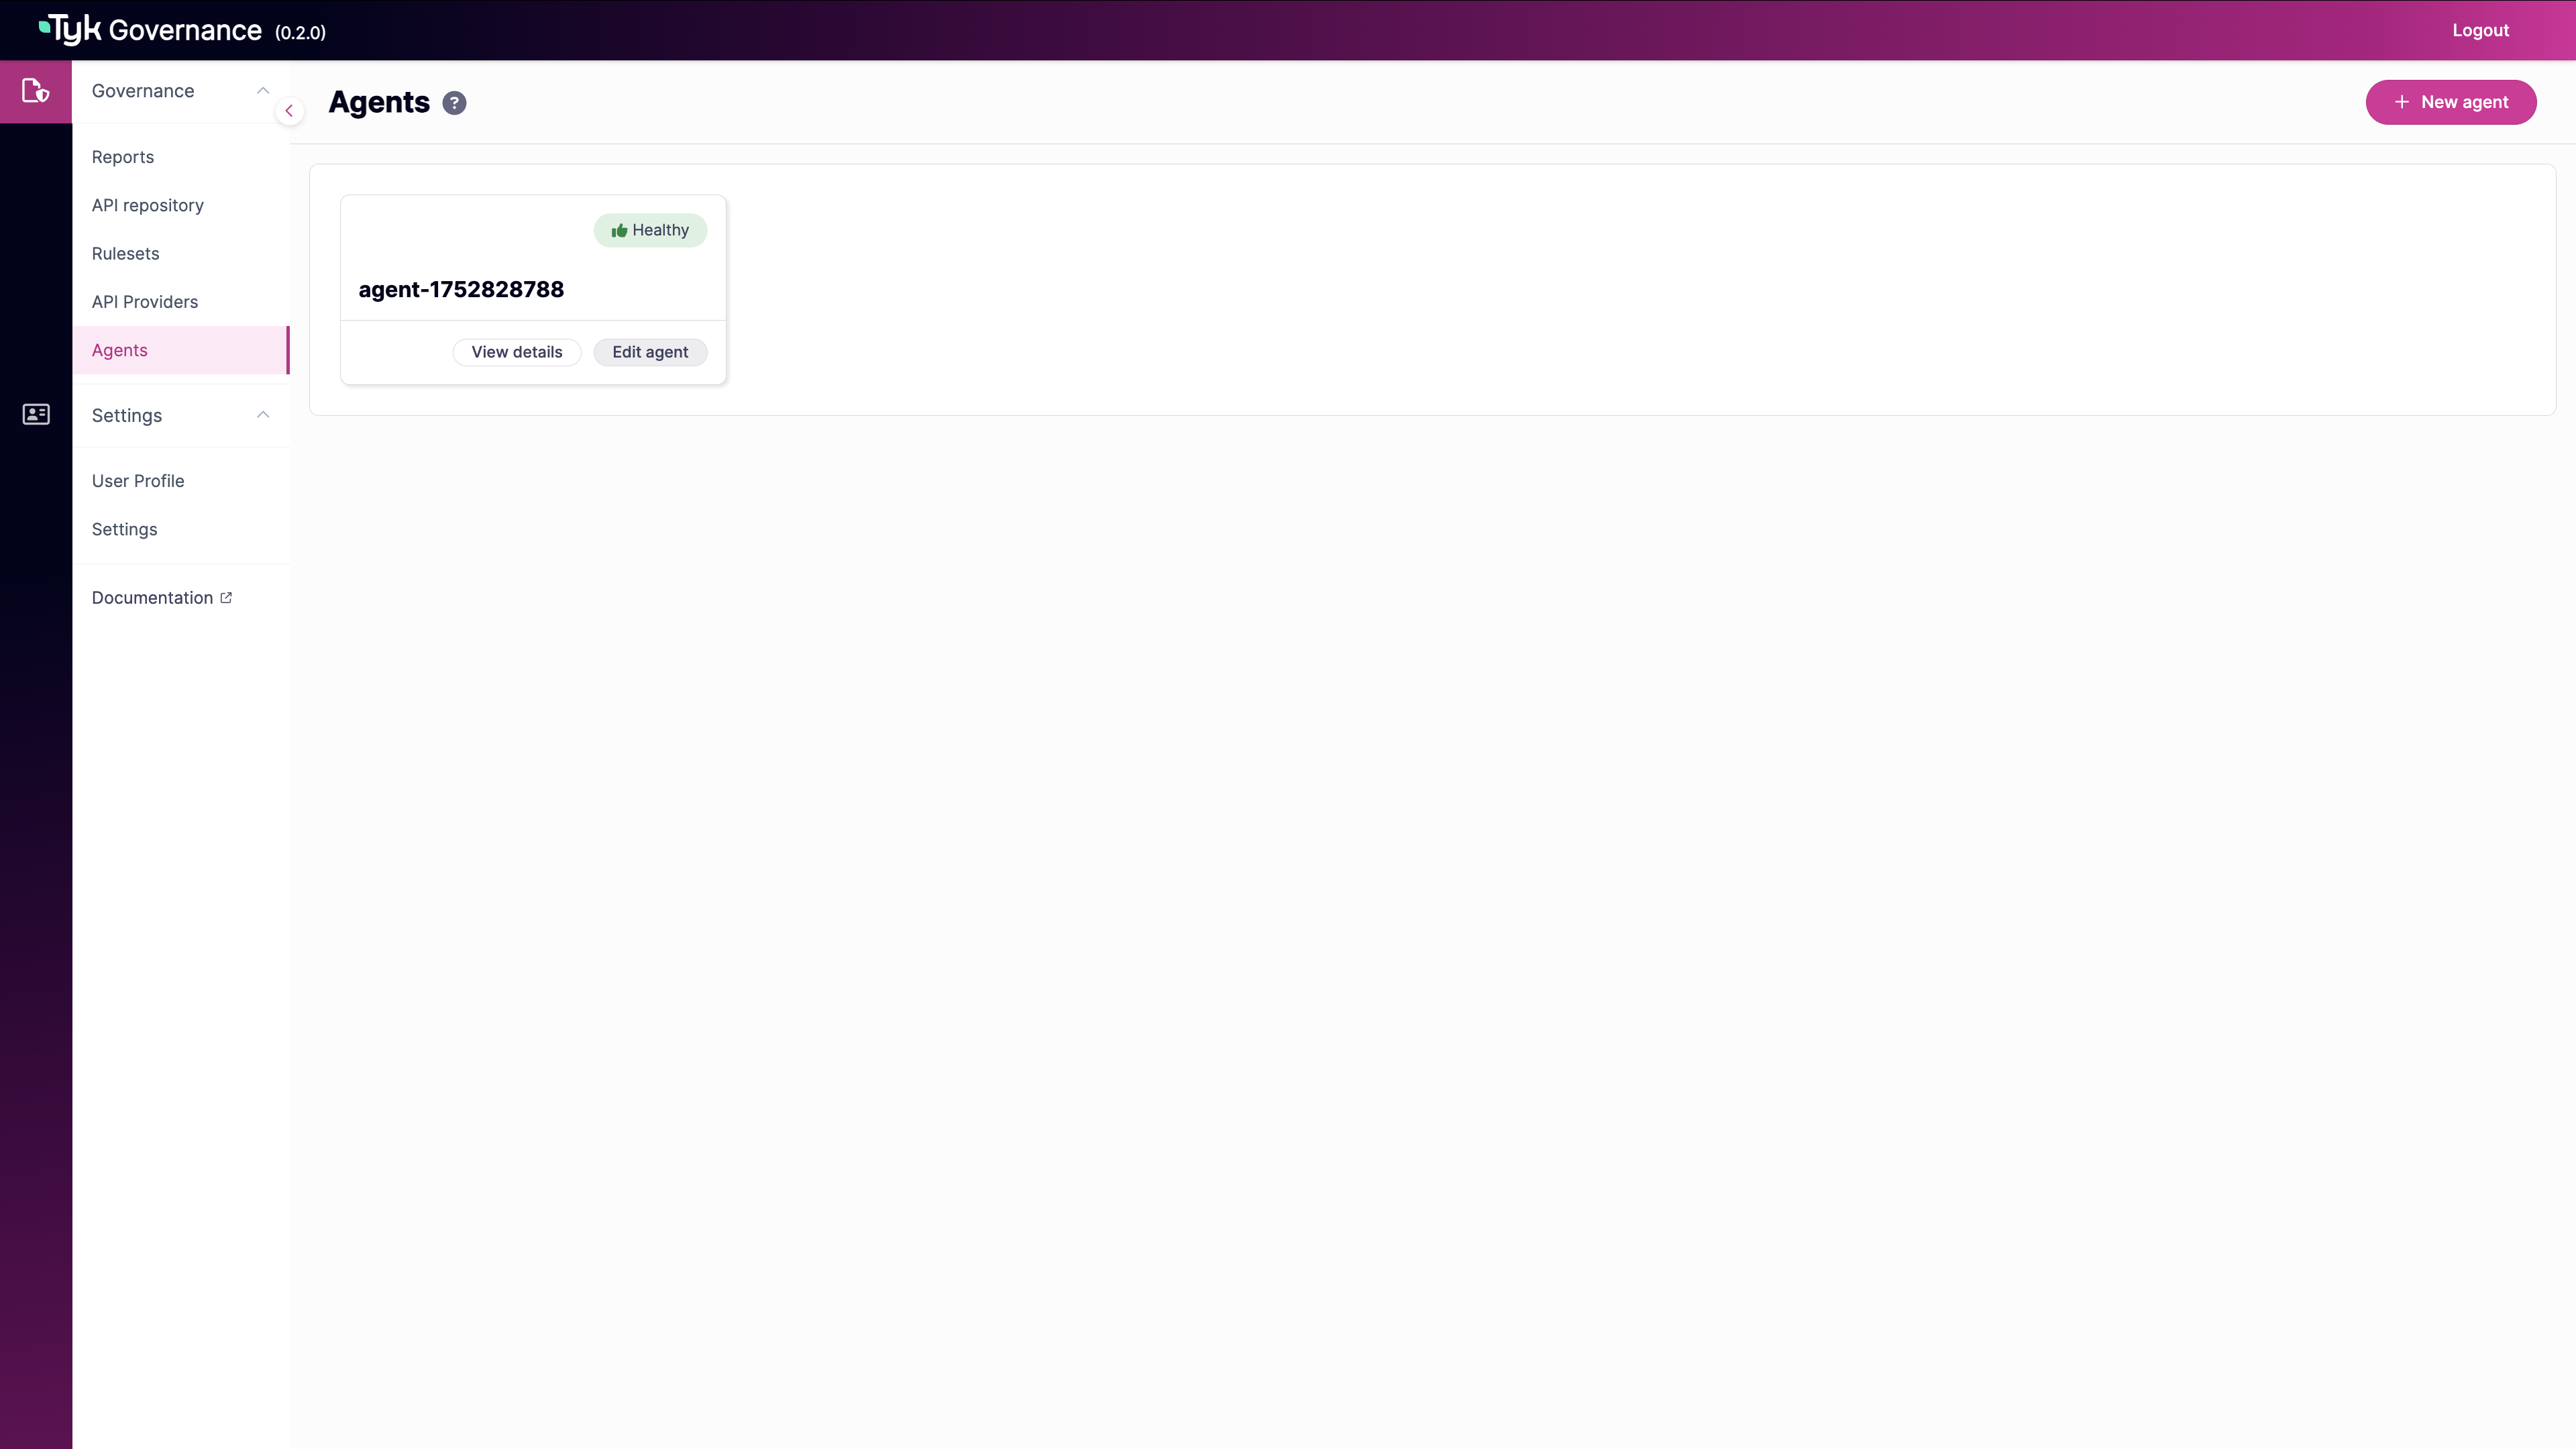
-
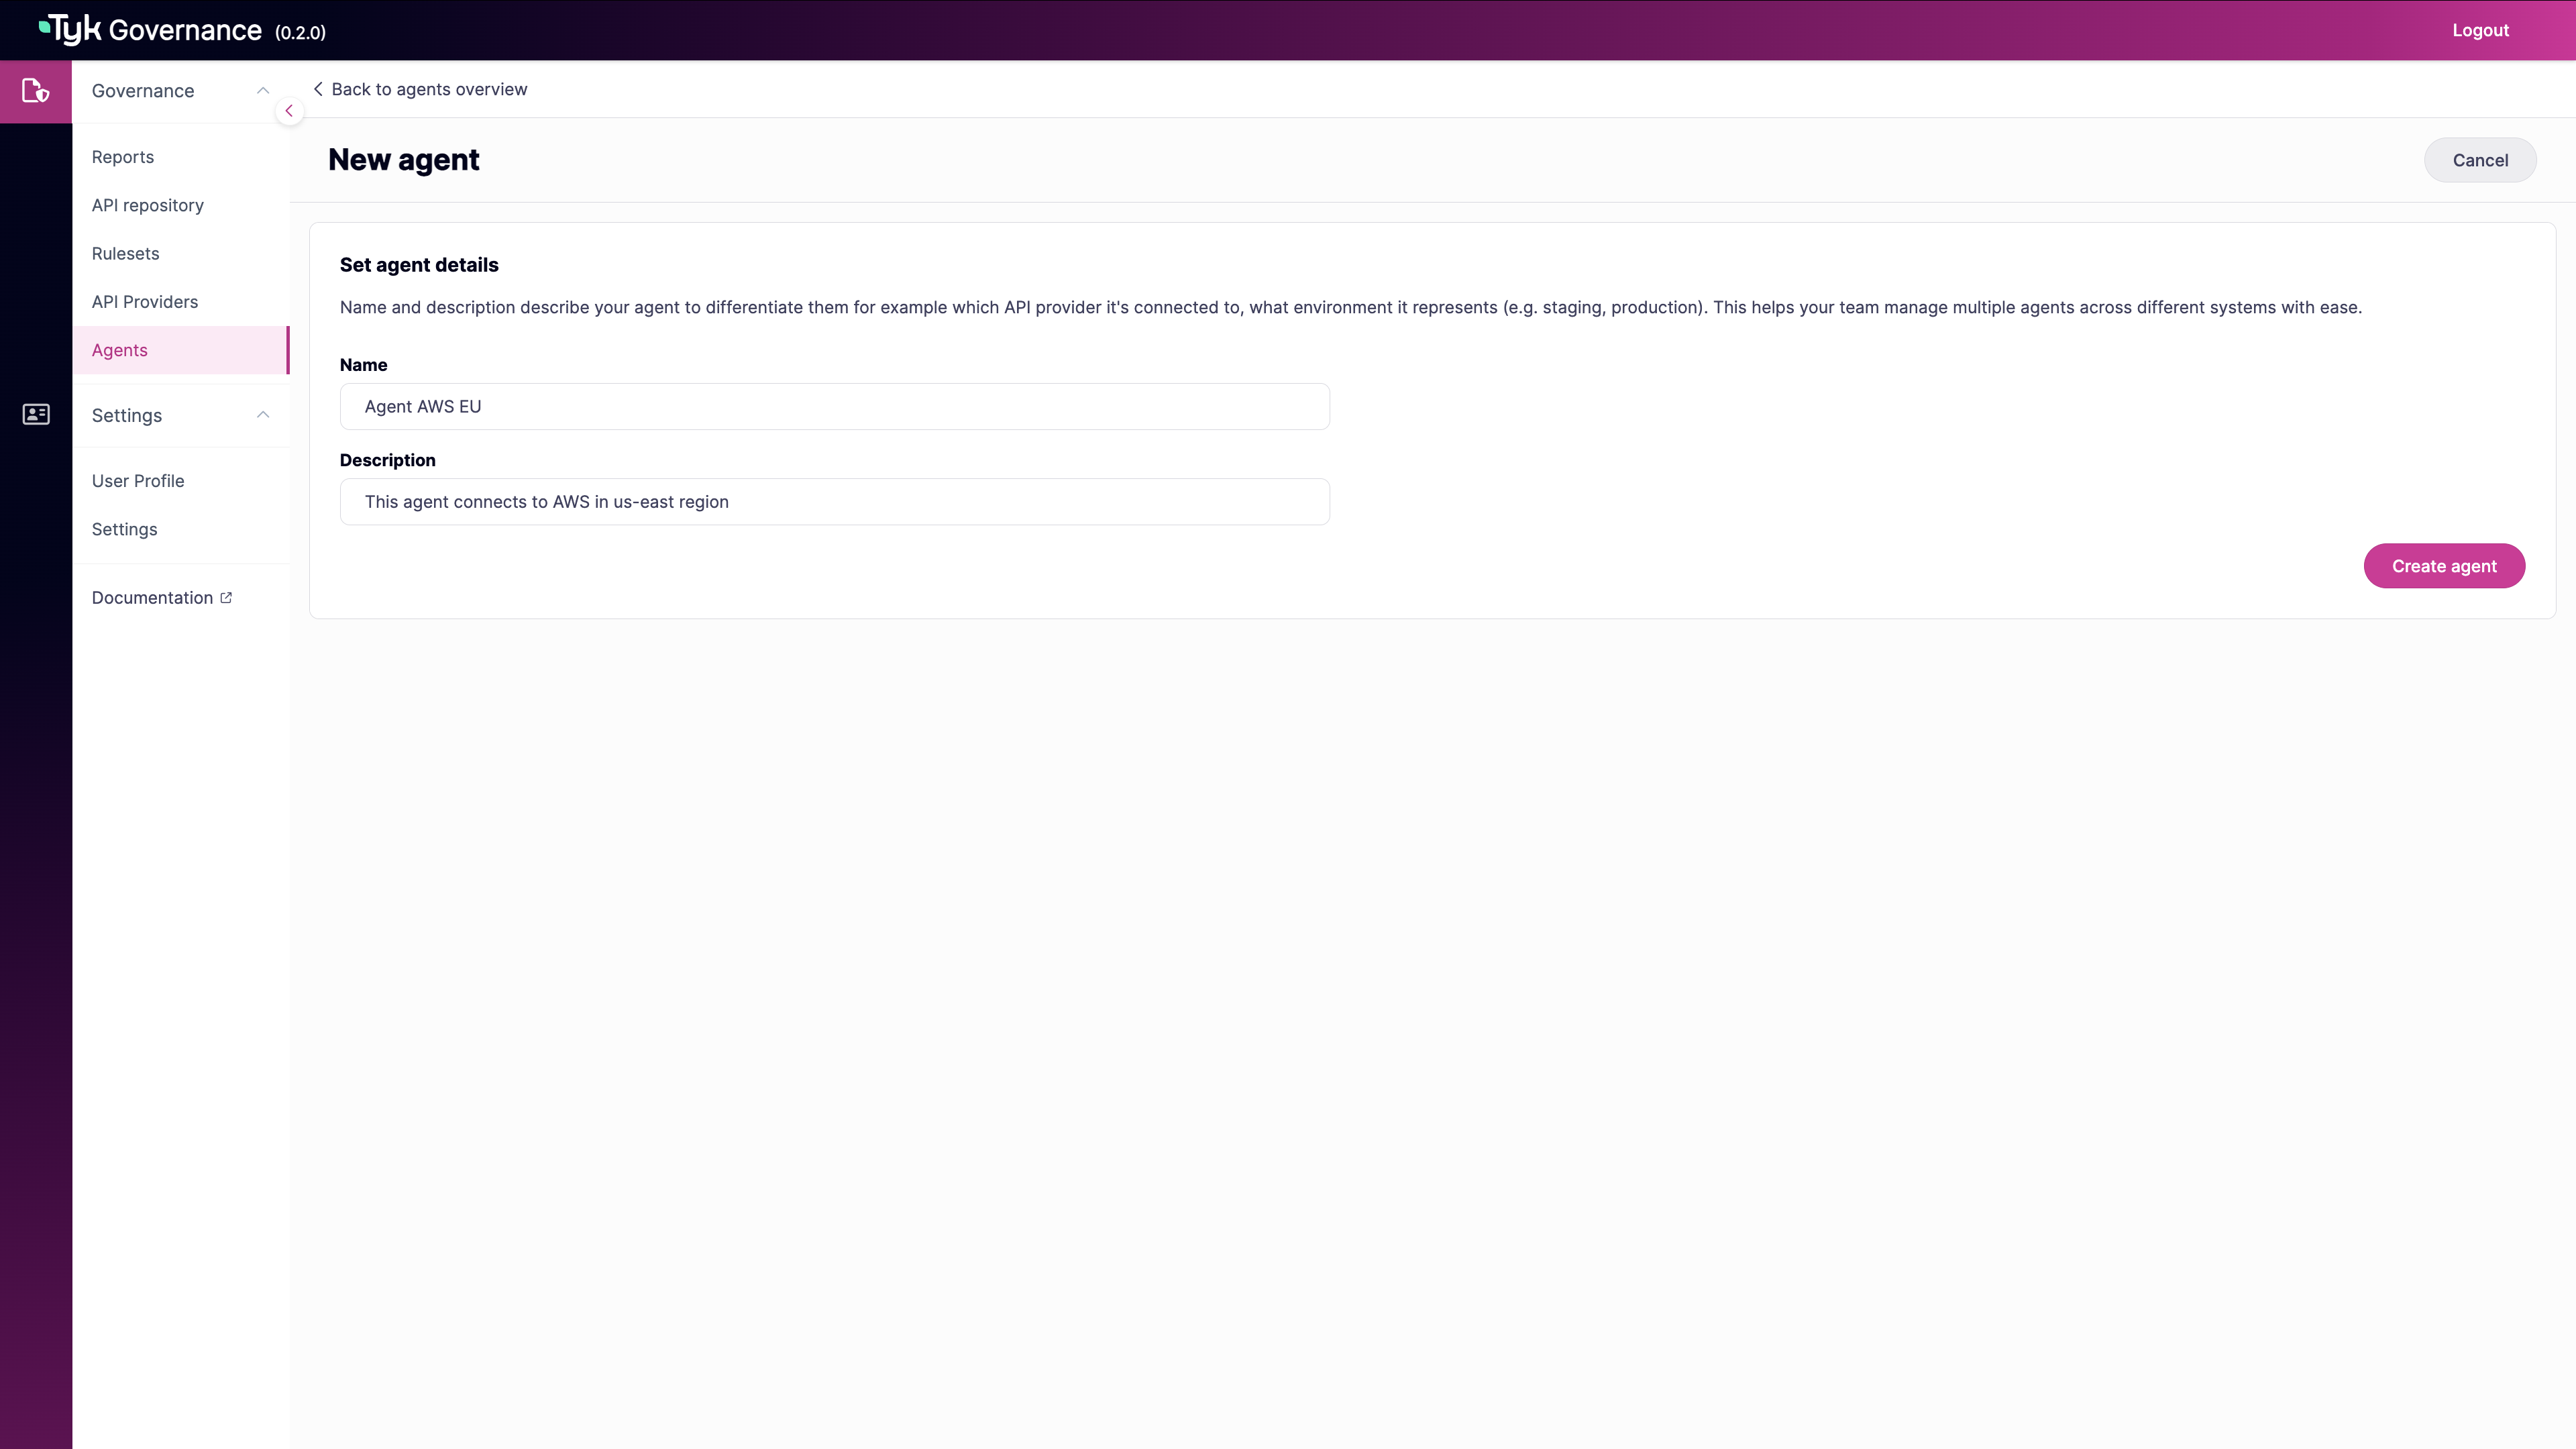
In the New agent form, enter:
- Name: A descriptive name for the agent (required)
- Description: Details about the agent’s purpose or location (required)
-
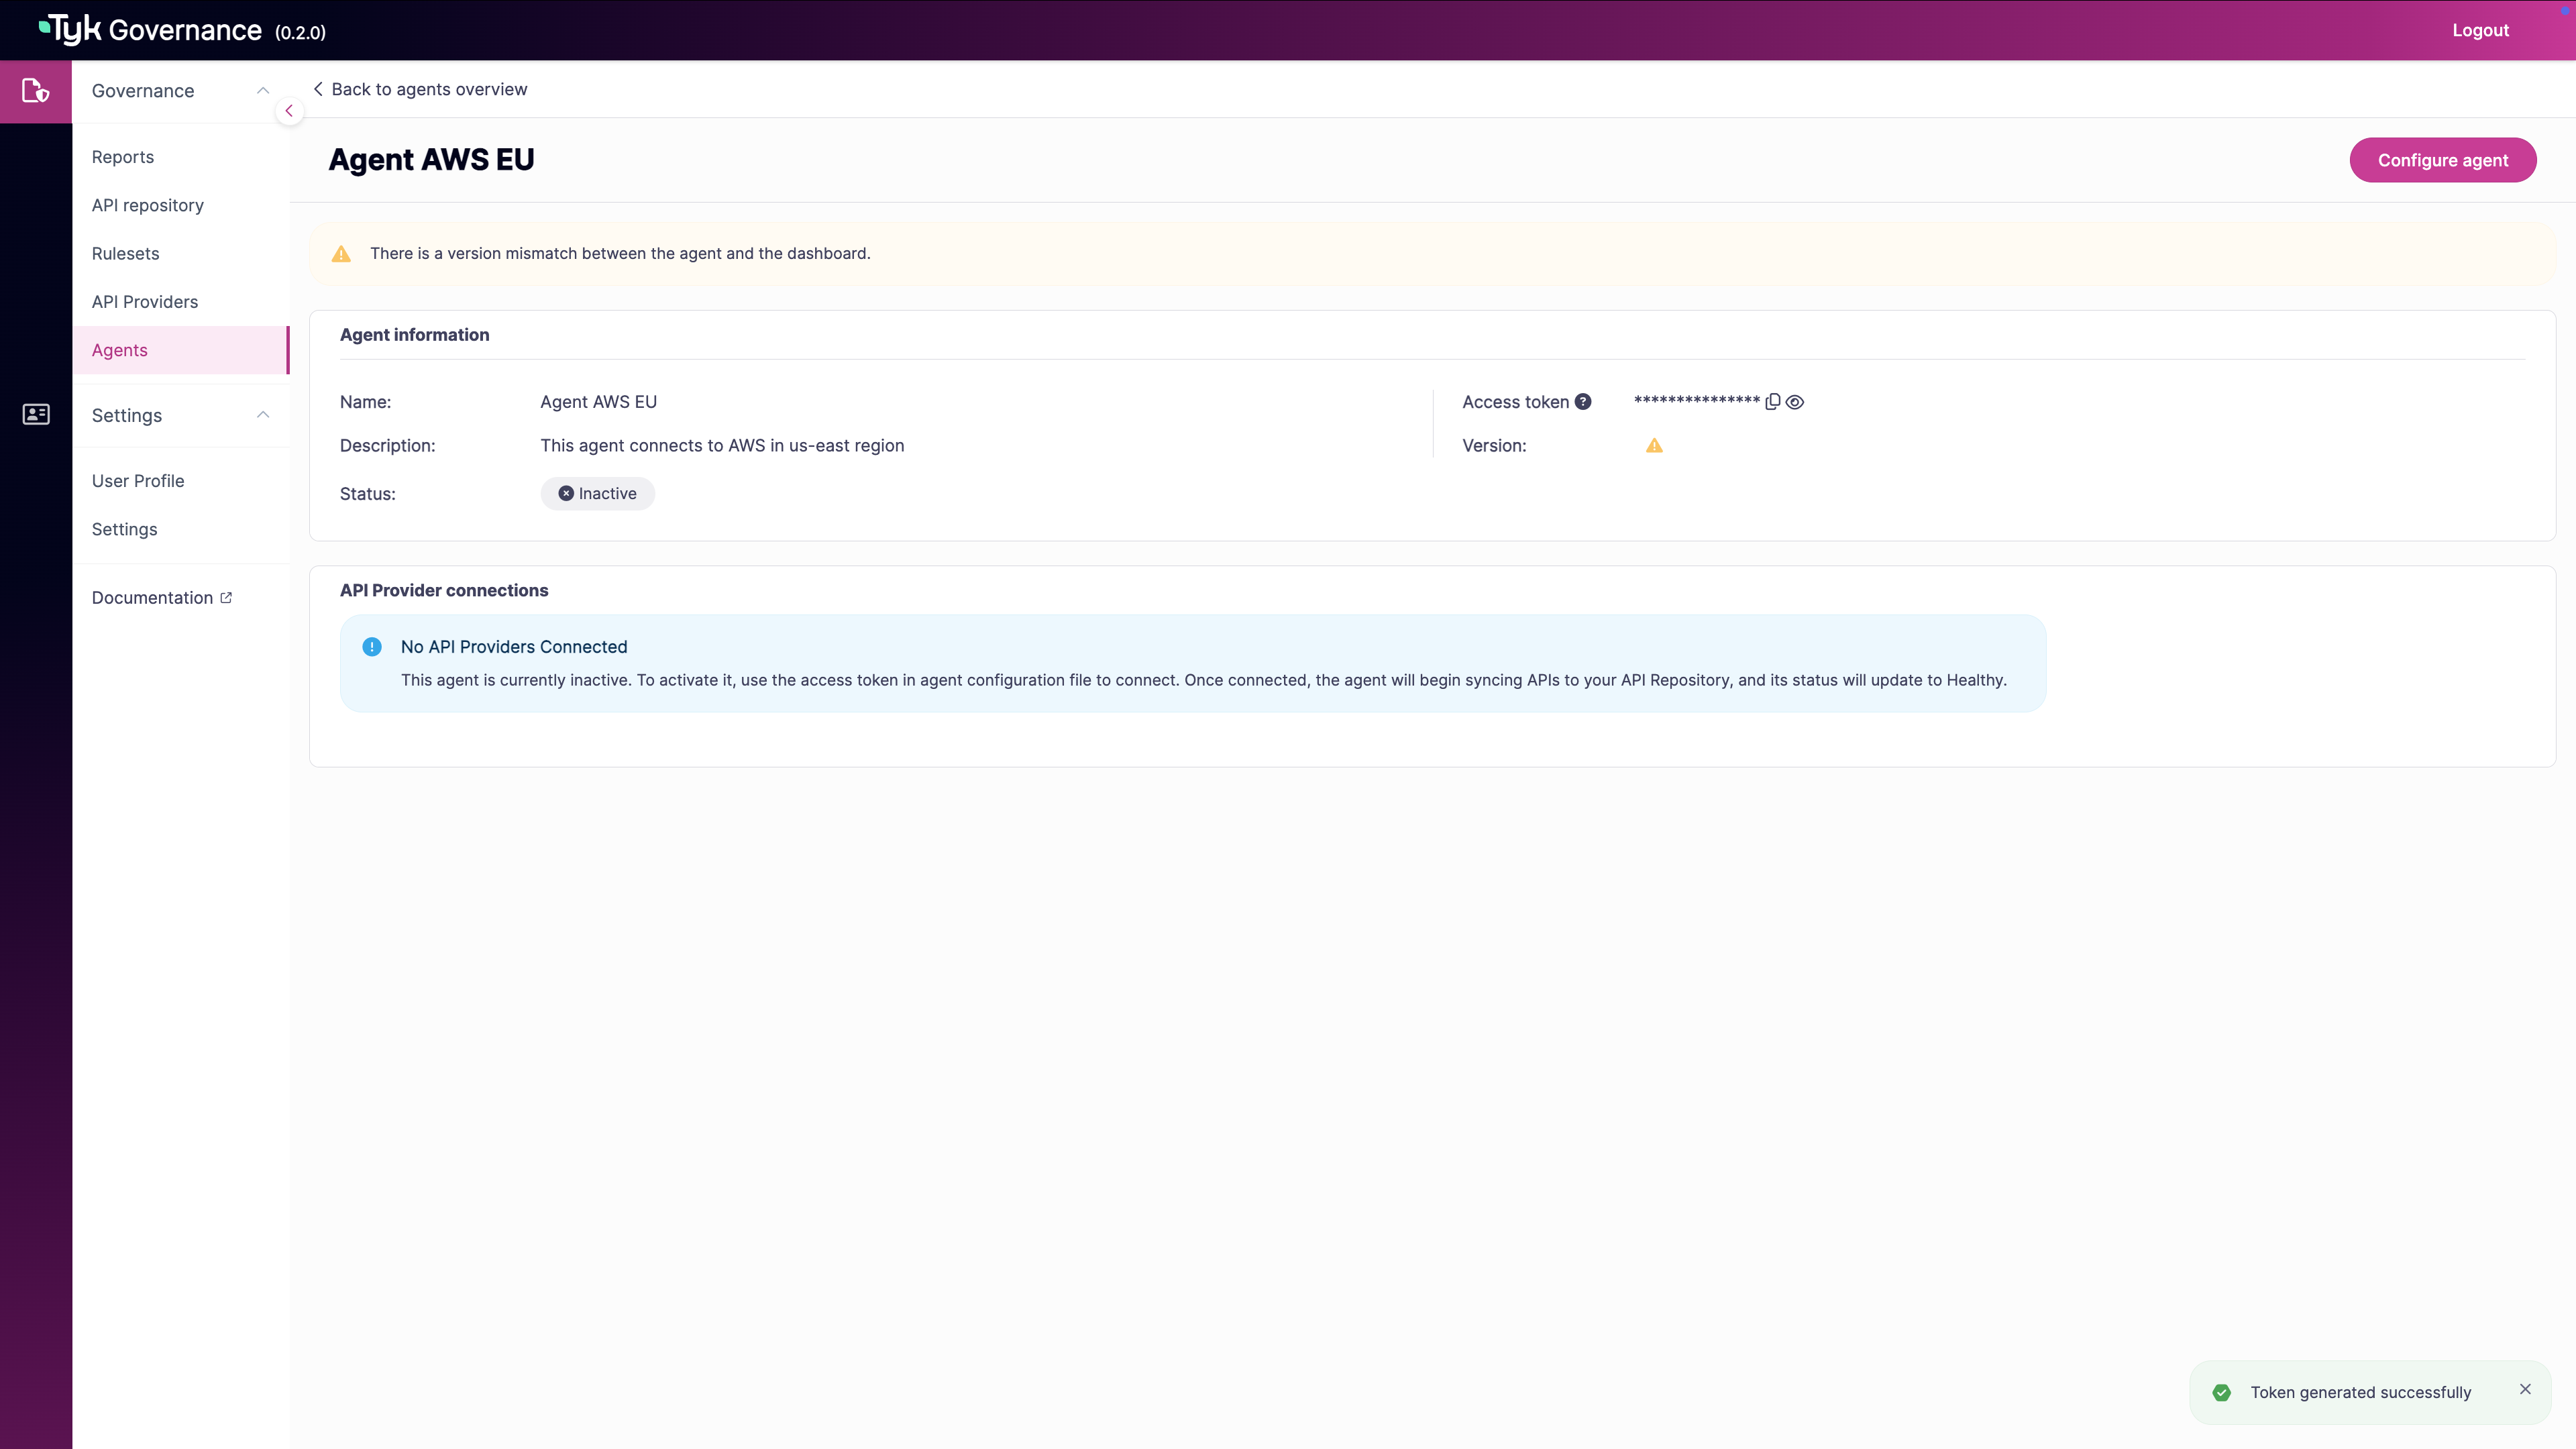
Click “Generate new access token”
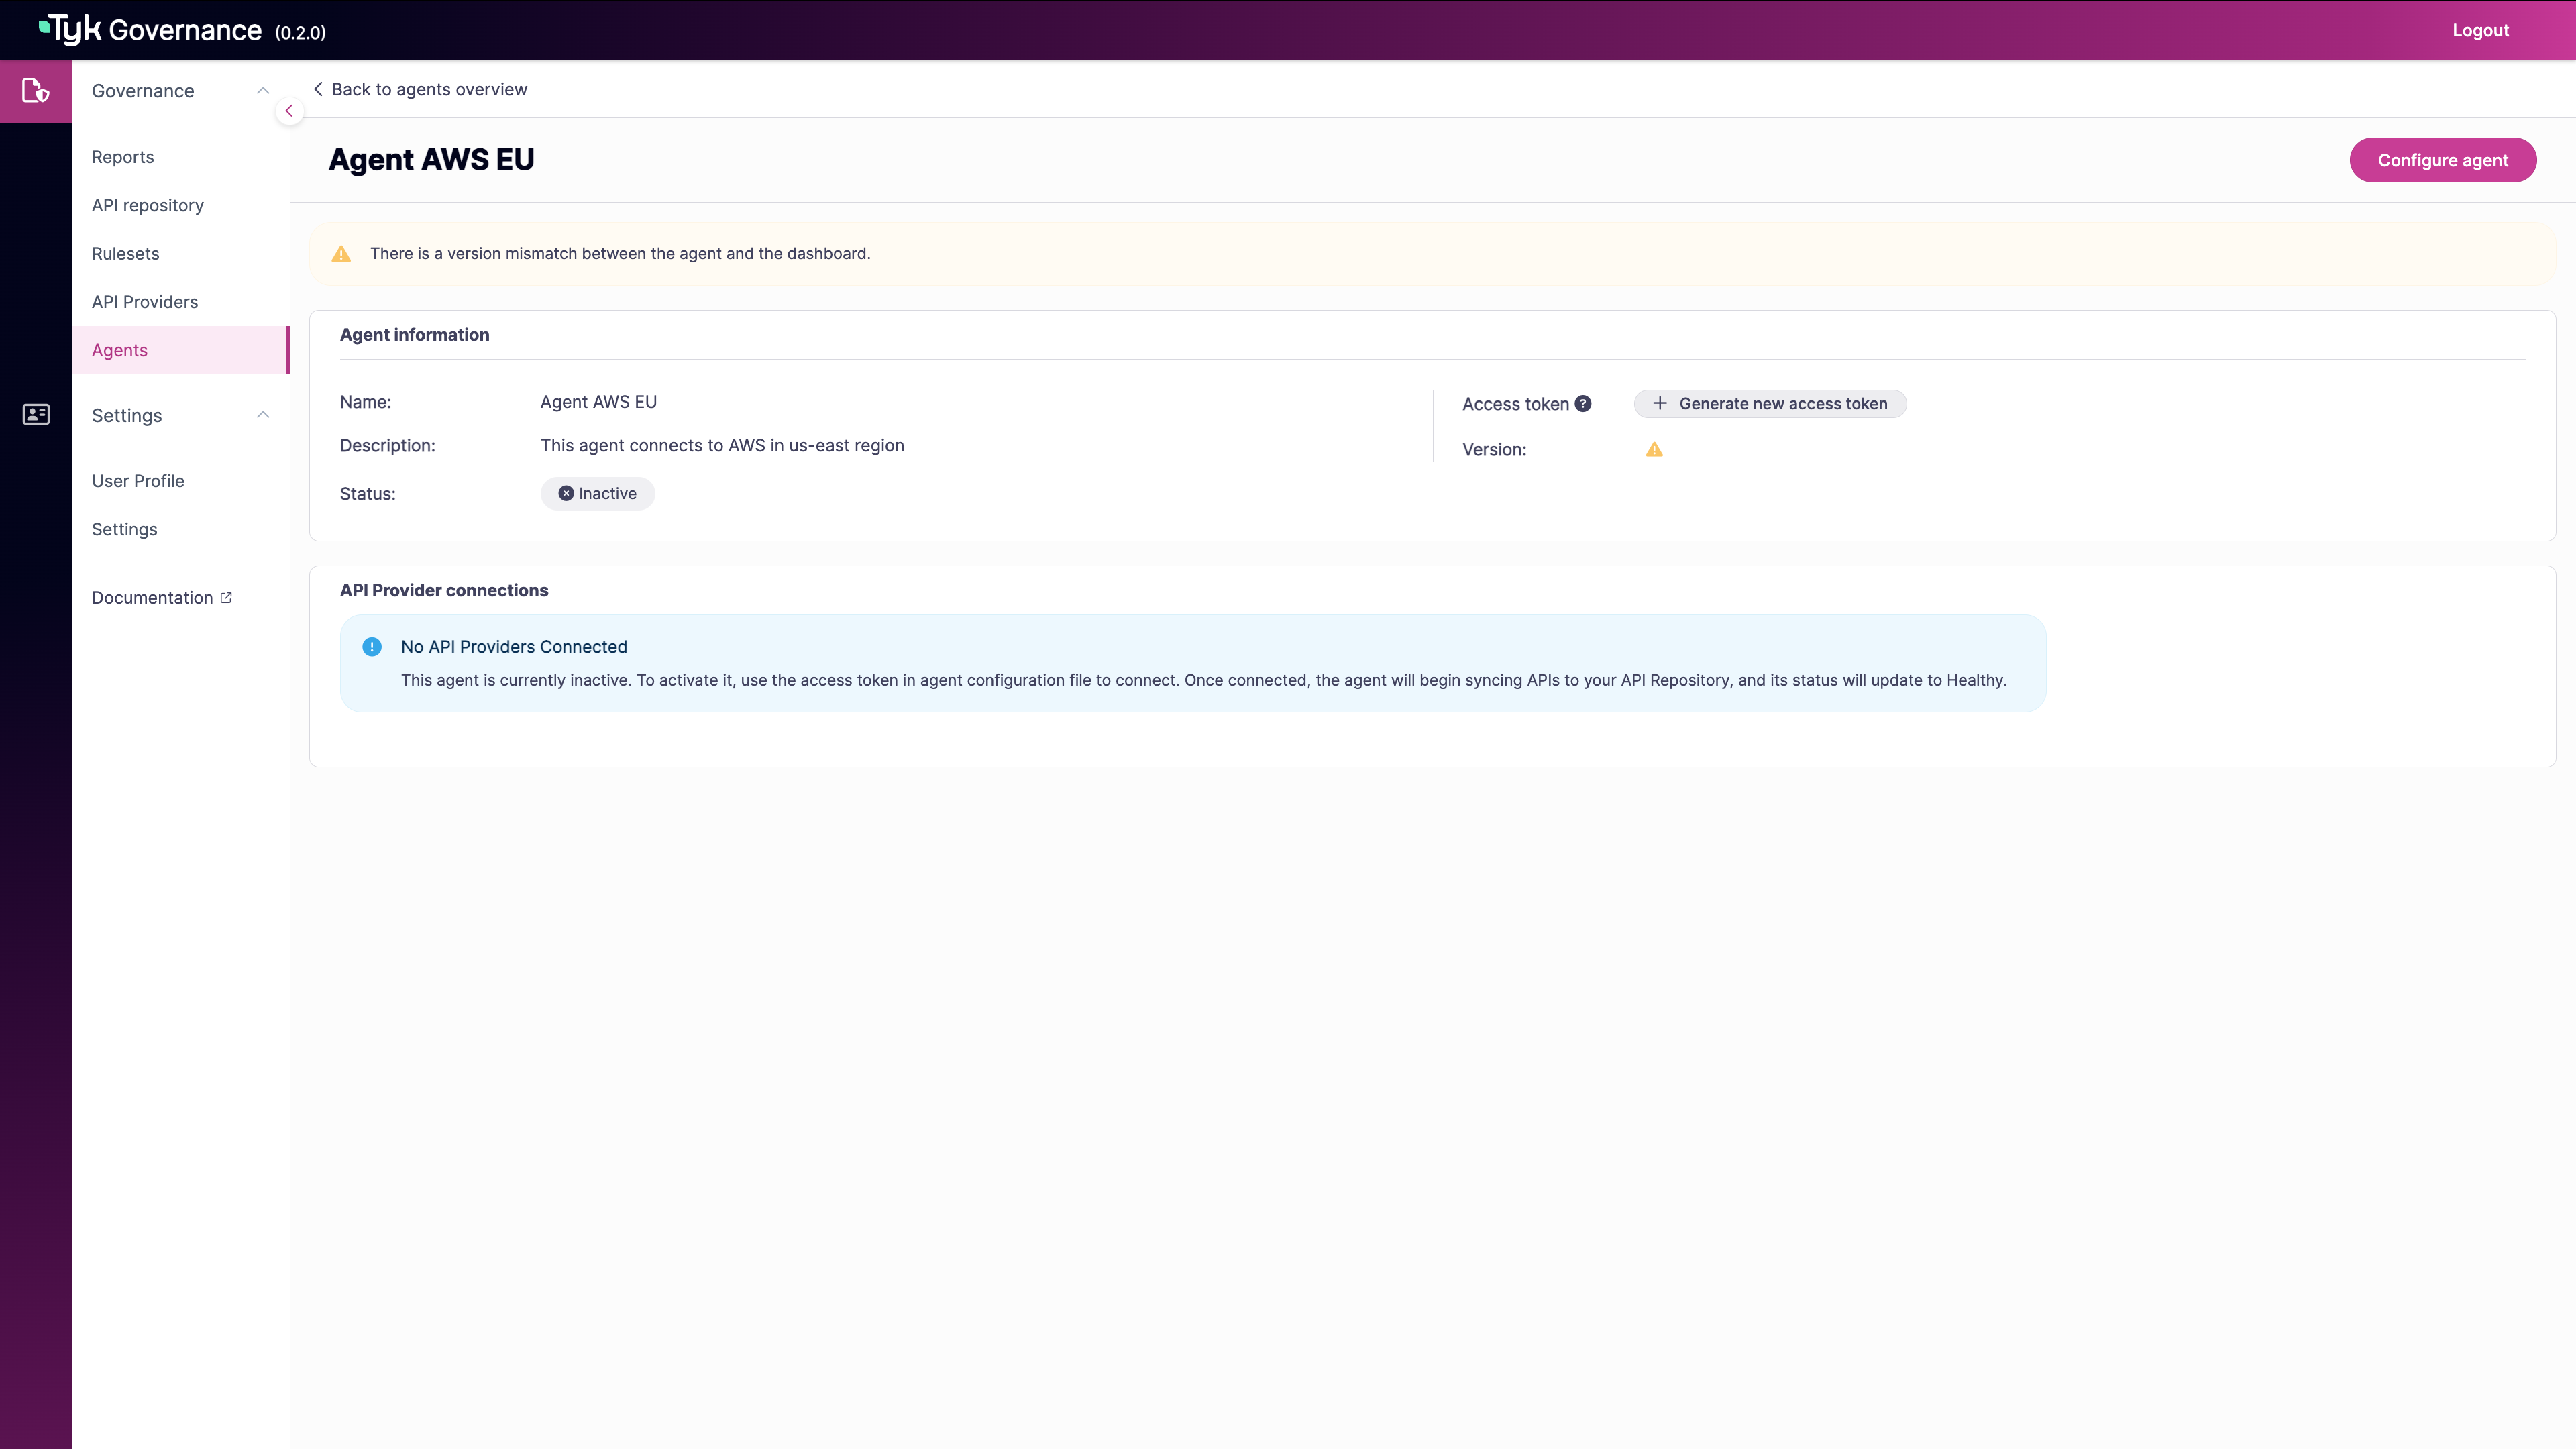
-
Use the copy icon to copy the token to your clipboard
Generate Agent Token using API
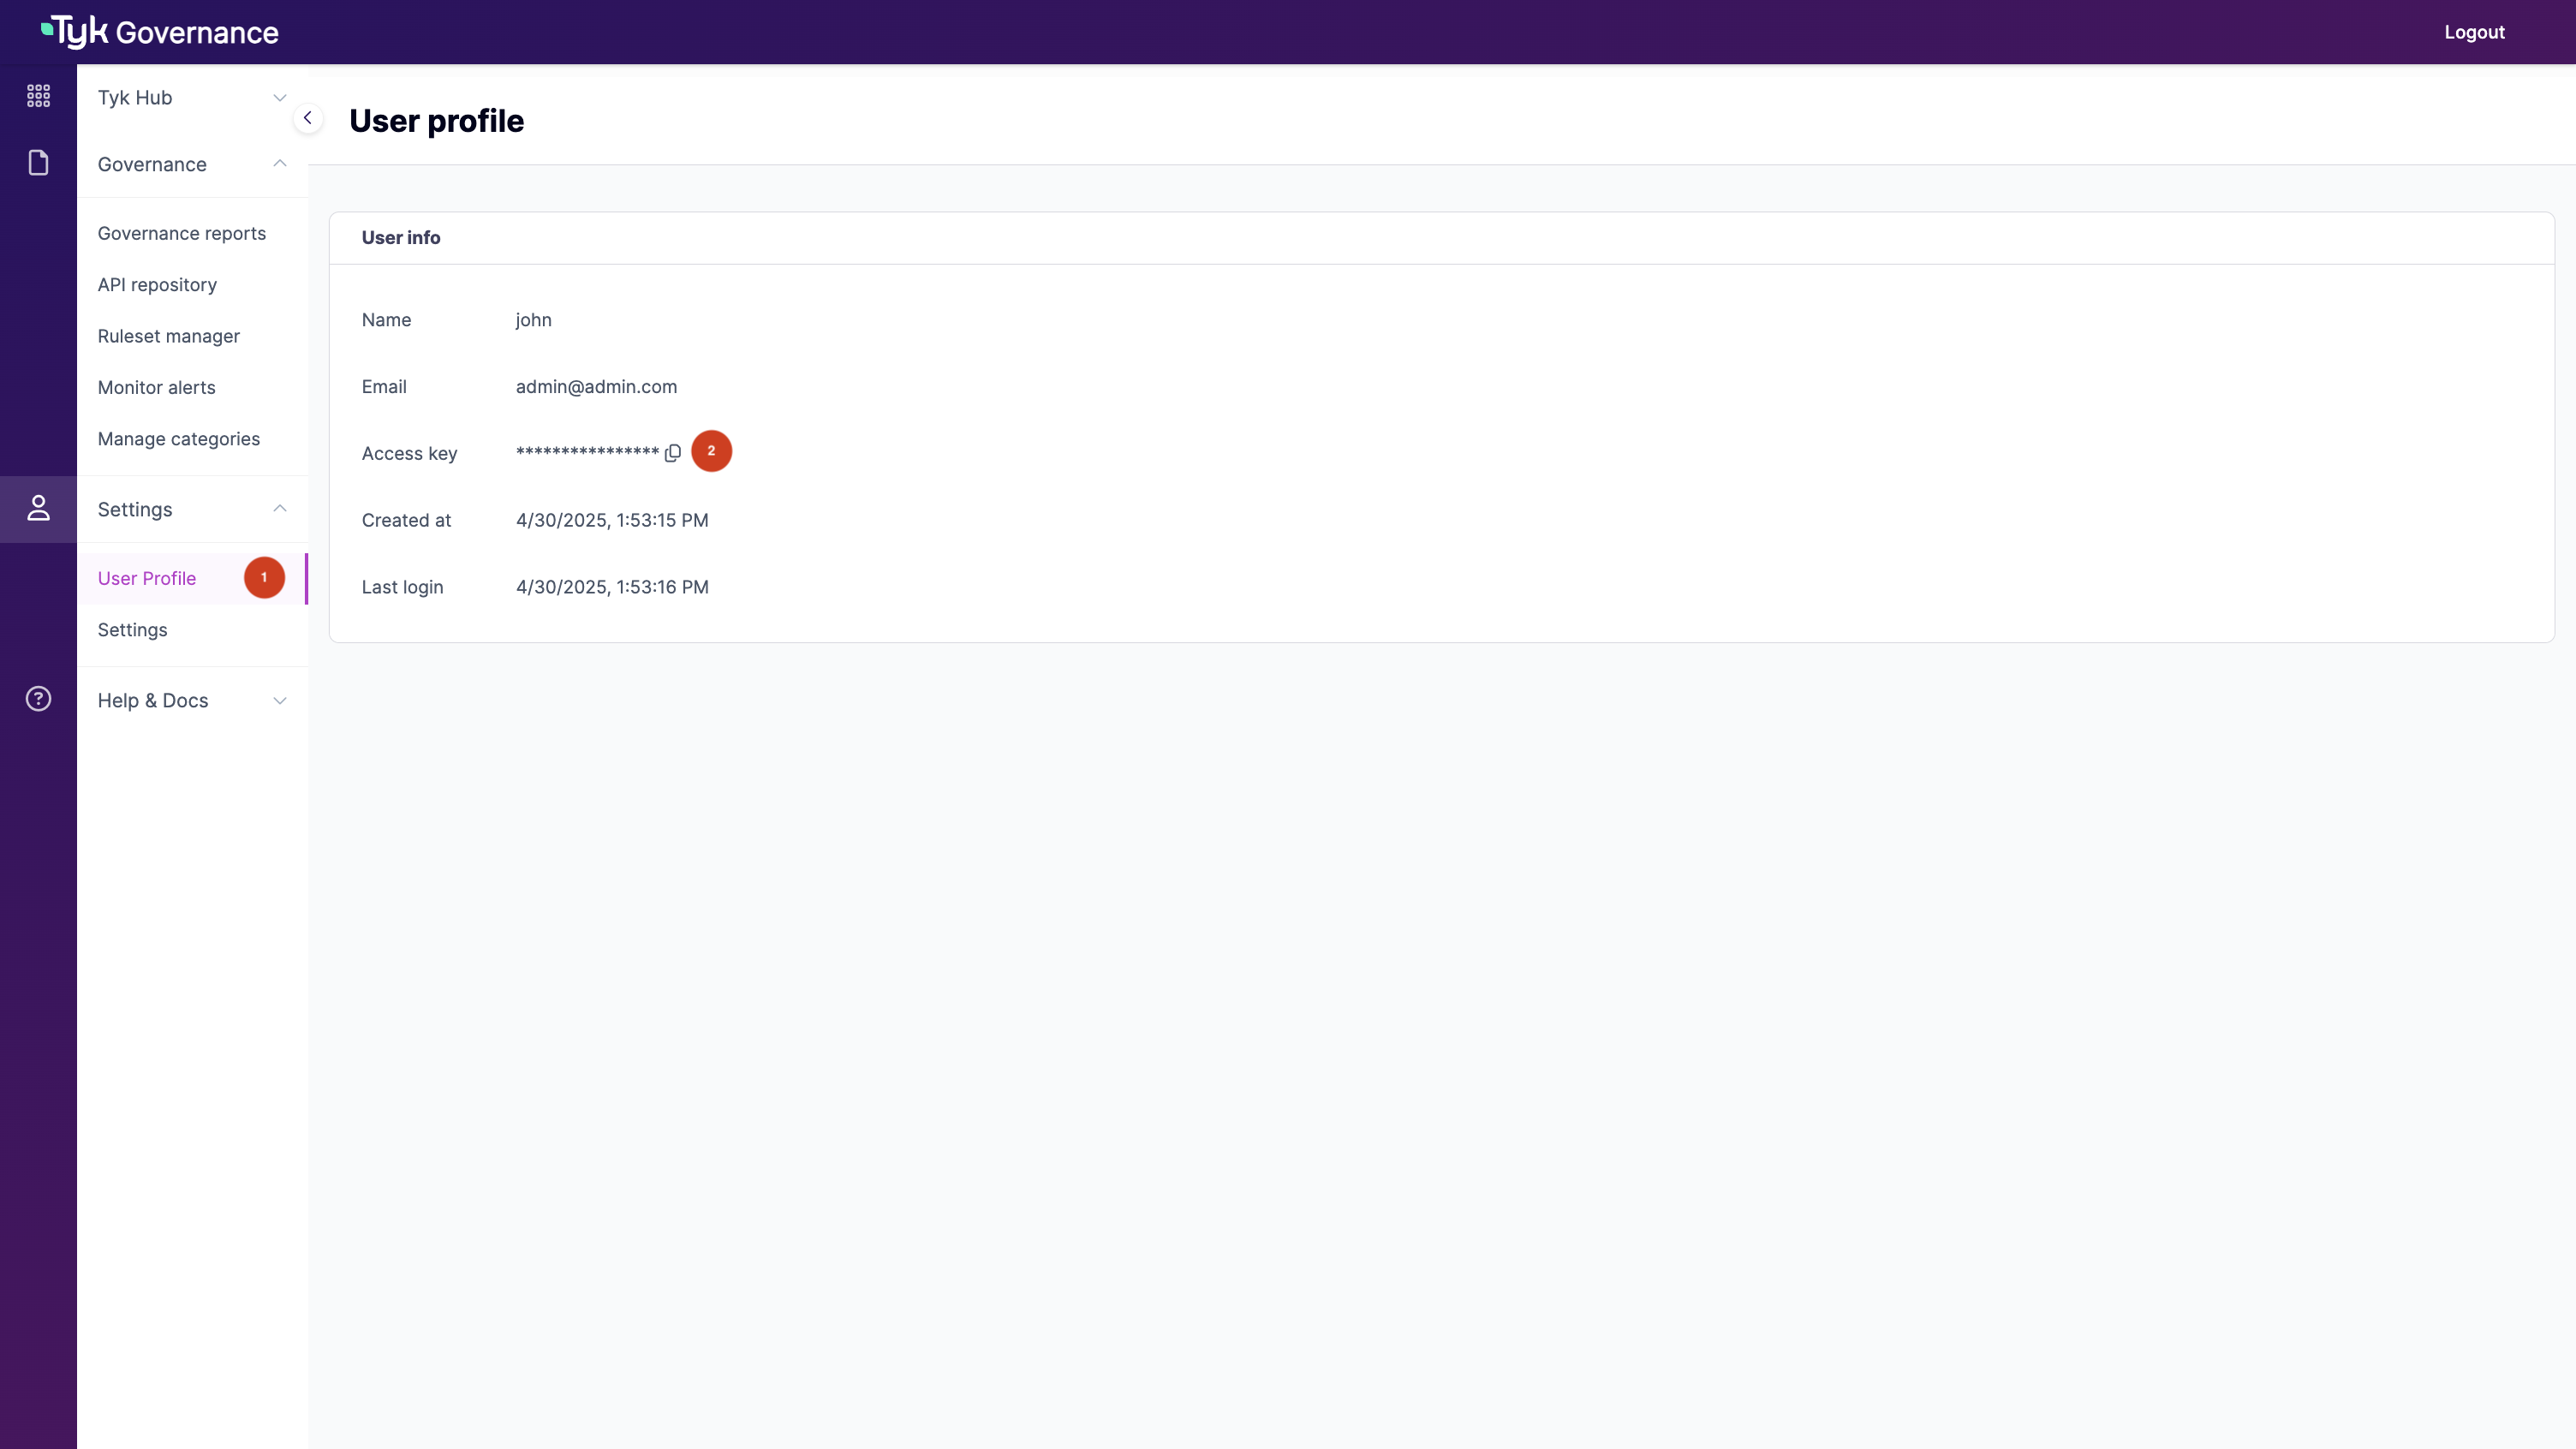
You can also use API to create a token. After receiving your Governance Hub credentials, follow these steps:-
Obtain an API Key:
- Log in to the Governance Hub using the credentials provided in your welcome email
- Check your Access key under the “Settings > User Profile” section
-
Create an Agent using the API:
Example response that shows an agent is created in INACTIVE state:
-
Generate an Agent Token using the API:
Now you can generate an access token for the agent.
Example response:
-
Save the token securely:
- Copy the
tokenvalue from the response - Store it securely, as you’ll need it for agent configuration
- Note: This token cannot be retrieved later, so make sure to save it
- Copy the
Prepare Configuration
Create a configuration file namedagent-config.yaml with the following structure:
Deploy the Agent
Docker Deployment:- Create a Kubernetes secret for the configuration:
- Apply the following manifest:
Verify Agent Connection
-
Check if the agent is running properly:
-
Look for log messages indicating a successful connection:
Trigger Initial Sync
- In the Governance Hub, navigate to “API Repository”
- Click the “ReSync” button to initiate synchronisation
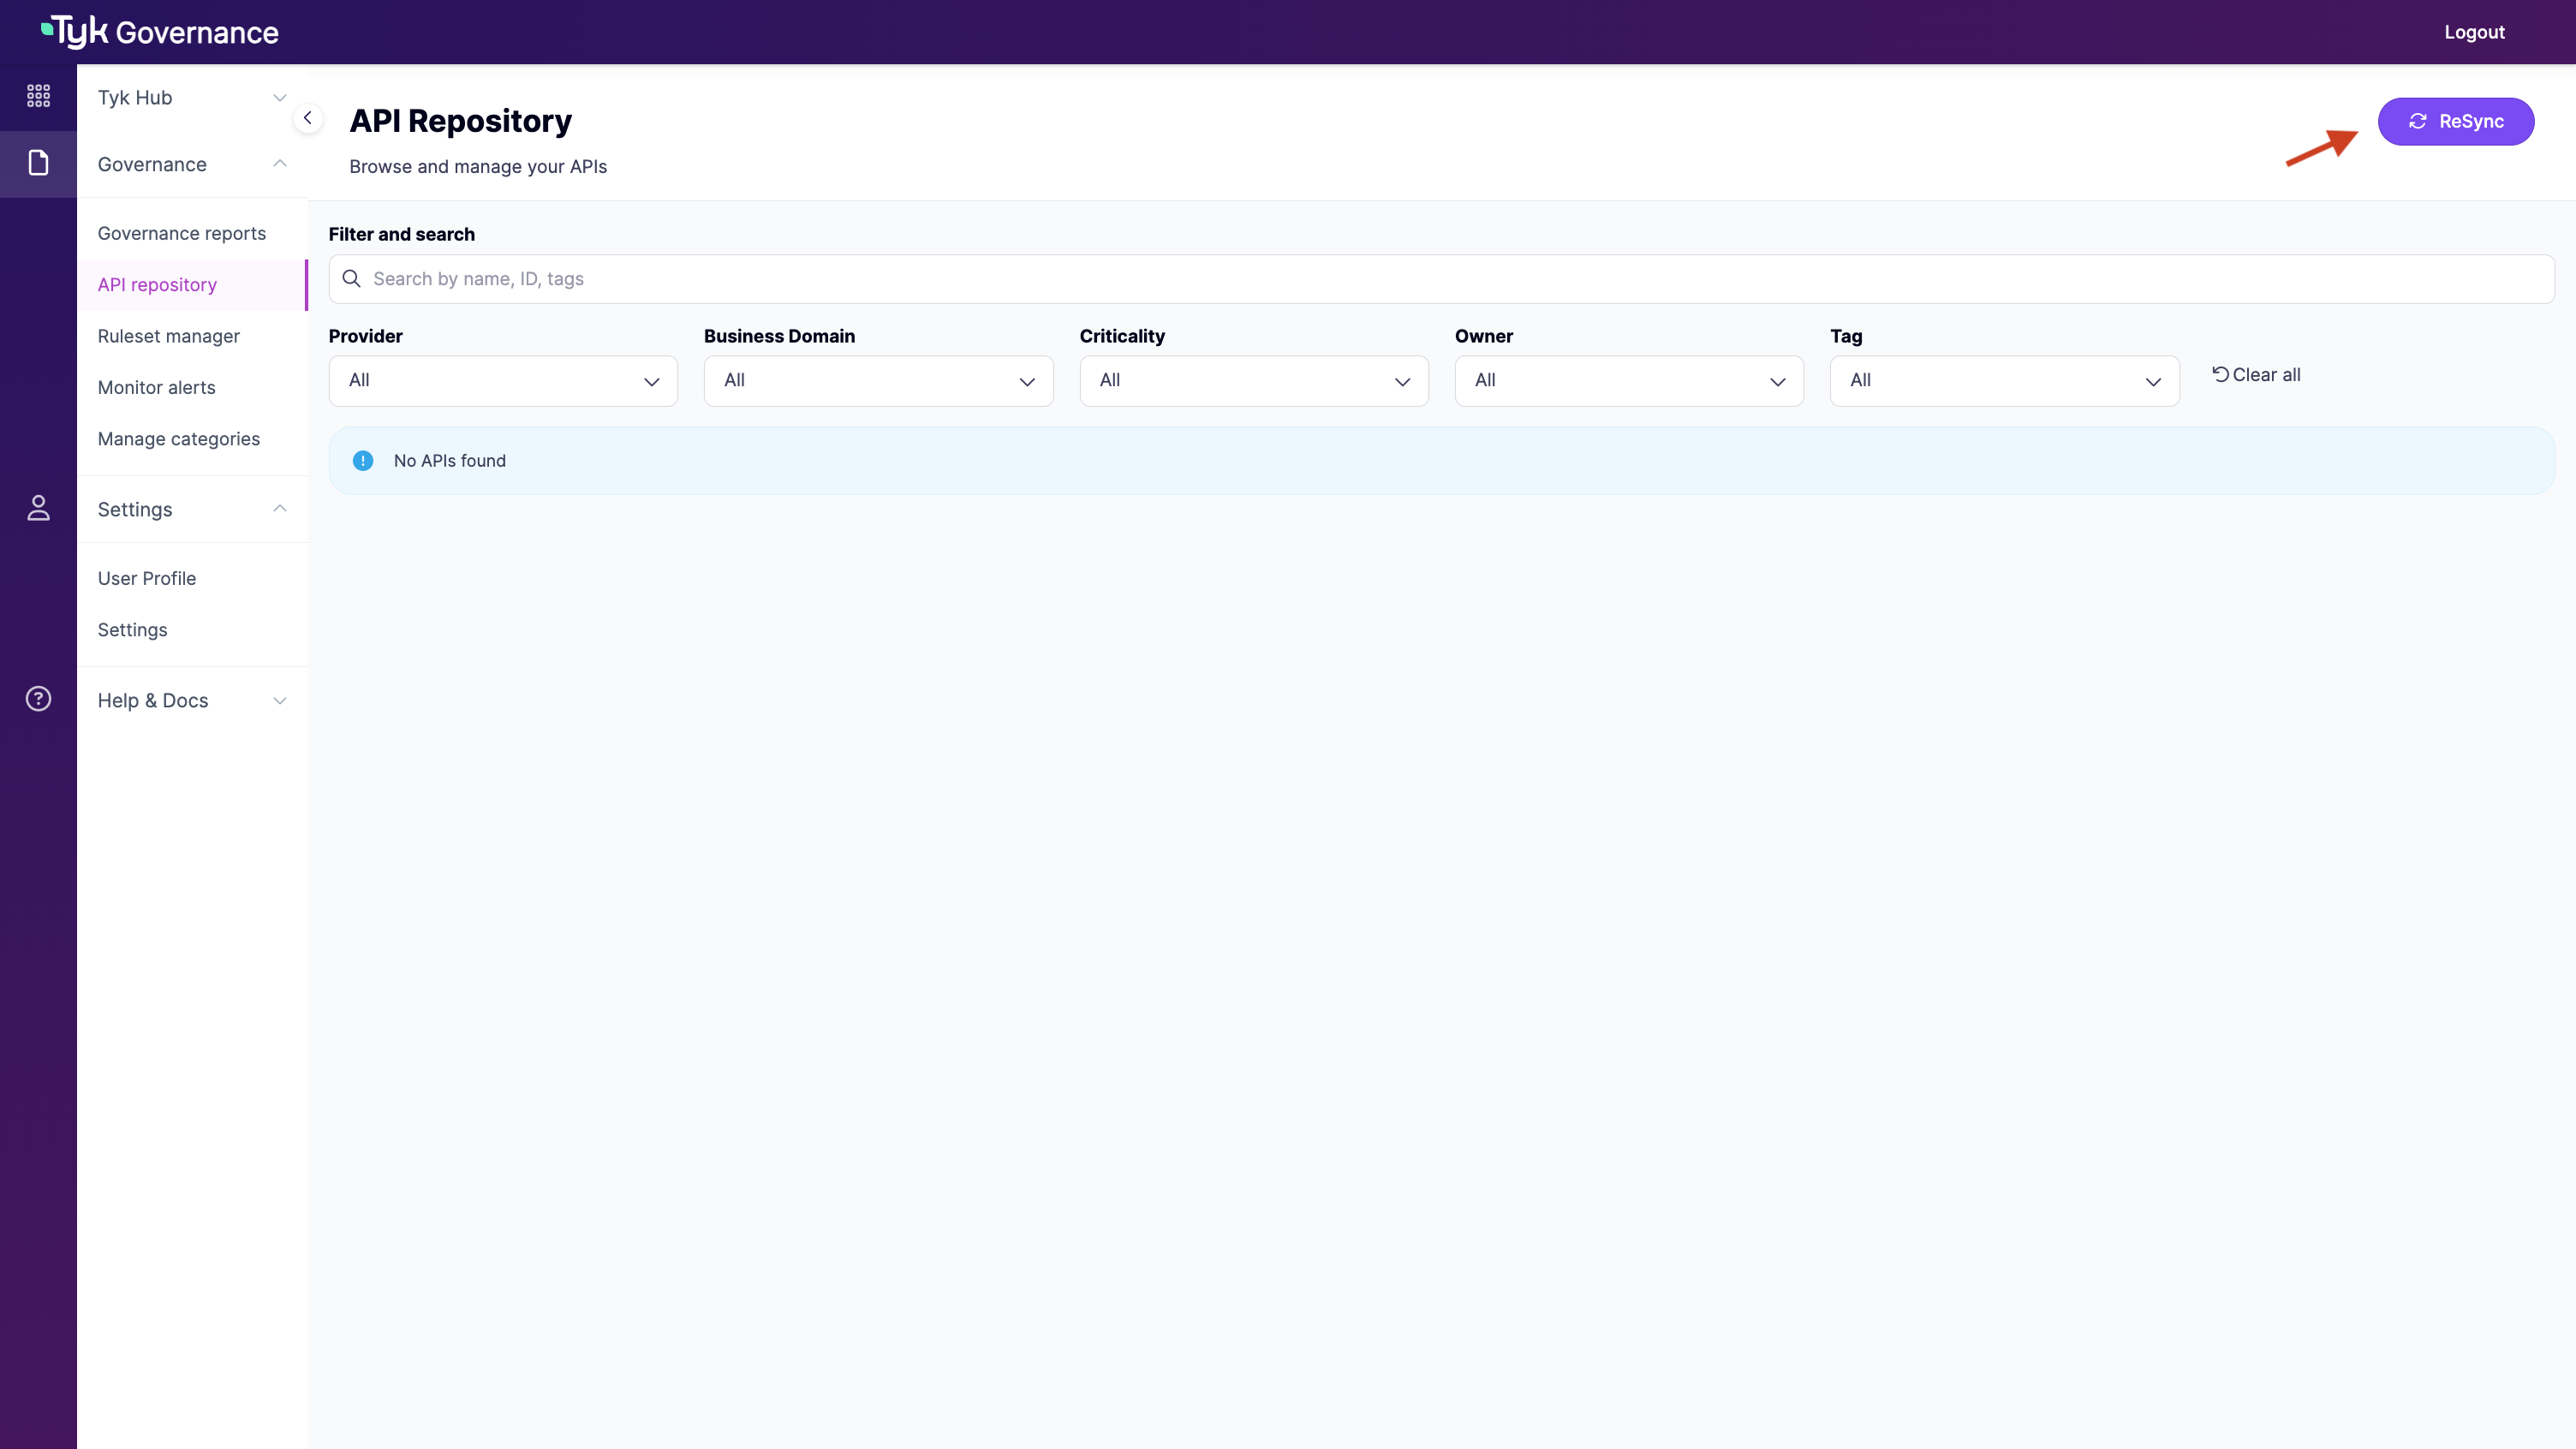
- Monitor the sync progress in the UI or refresh the page manually.
Examples
The following examples demonstrate common deployment scenarios and configurations for Tyk Governance.Example 1: Tyk Cloud with Automatic Agent
This is the simplest deployment model for existing Tyk Cloud customers. Configuration Steps:- Requesting Access to Tyk Governance
- Enable the Governance feature in Tyk Cloud Control Plane as described in Enabling Governance Feature for Cloud Control Planes
- Wait for automatic agent deployment
- Access the Governance Hub from the Cloud UI sidebar
- Navigate to “API Repository” to view your automatically discovered APIs
- Trigger “ReSync” to pull updates from the control planes
- All APIs from your Tyk Control Plane will be automatically discovered and displayed in the API Repository
Example 2: Multi-Platform Governance with Custom Agents
This example demonstrates how to set up governance across multiple API providers. Configuration Steps:- Requesting Access to Tyk Governance
- Generate agent tokens for each provider as described in Installing a Local Agent
- Create configuration files for each agent
- Deploy each agent using Docker or Kubernetes as described in Installing a Local Agent
- Verify agent connections
- Access the Governance Hub with the provided URL
- Navigate to “API Repository” to view your automatically discovered APIs
- Trigger “ReSync” to pull updates from all agents
- APIs from all providers will be discovered and displayed in a unified repository