

tyk-data-plane chart provides the default deployment of a Tyk data plane for Tyk Self Managed MDCB or Tyk Cloud users. It will deploy the data plane components that remotely connect to a MDCB control plane.
What components are deployed with Tyk Data Plane Chart?
It includes the following components:- Tyk Gateway: An open source Enterprise API Gateway, supporting REST, GraphQL, TCP and gRPC protocols.
- Tyk Pump: An analytics purger that moves the data generated by your Tyk gateways to any back-end storage.
To enable or disable each component, change the corresponding enabled flag.
Also, you can set the version of each component through
image.tag. You can find the list of version tags available from Docker hub.
For a quick start guide, please see deploy hybrid gateway.
Prerequisites
- Kubernetes 1.19+
- Helm 3+
- Redis should already be installed or accessible by the gateway.
- Connection details to remote control plane. See below for how to obtain them from Tyk Cloud or Tyk Control Plane chart.
Obtain Remote Control Plane Connection details from Tyk Cloud
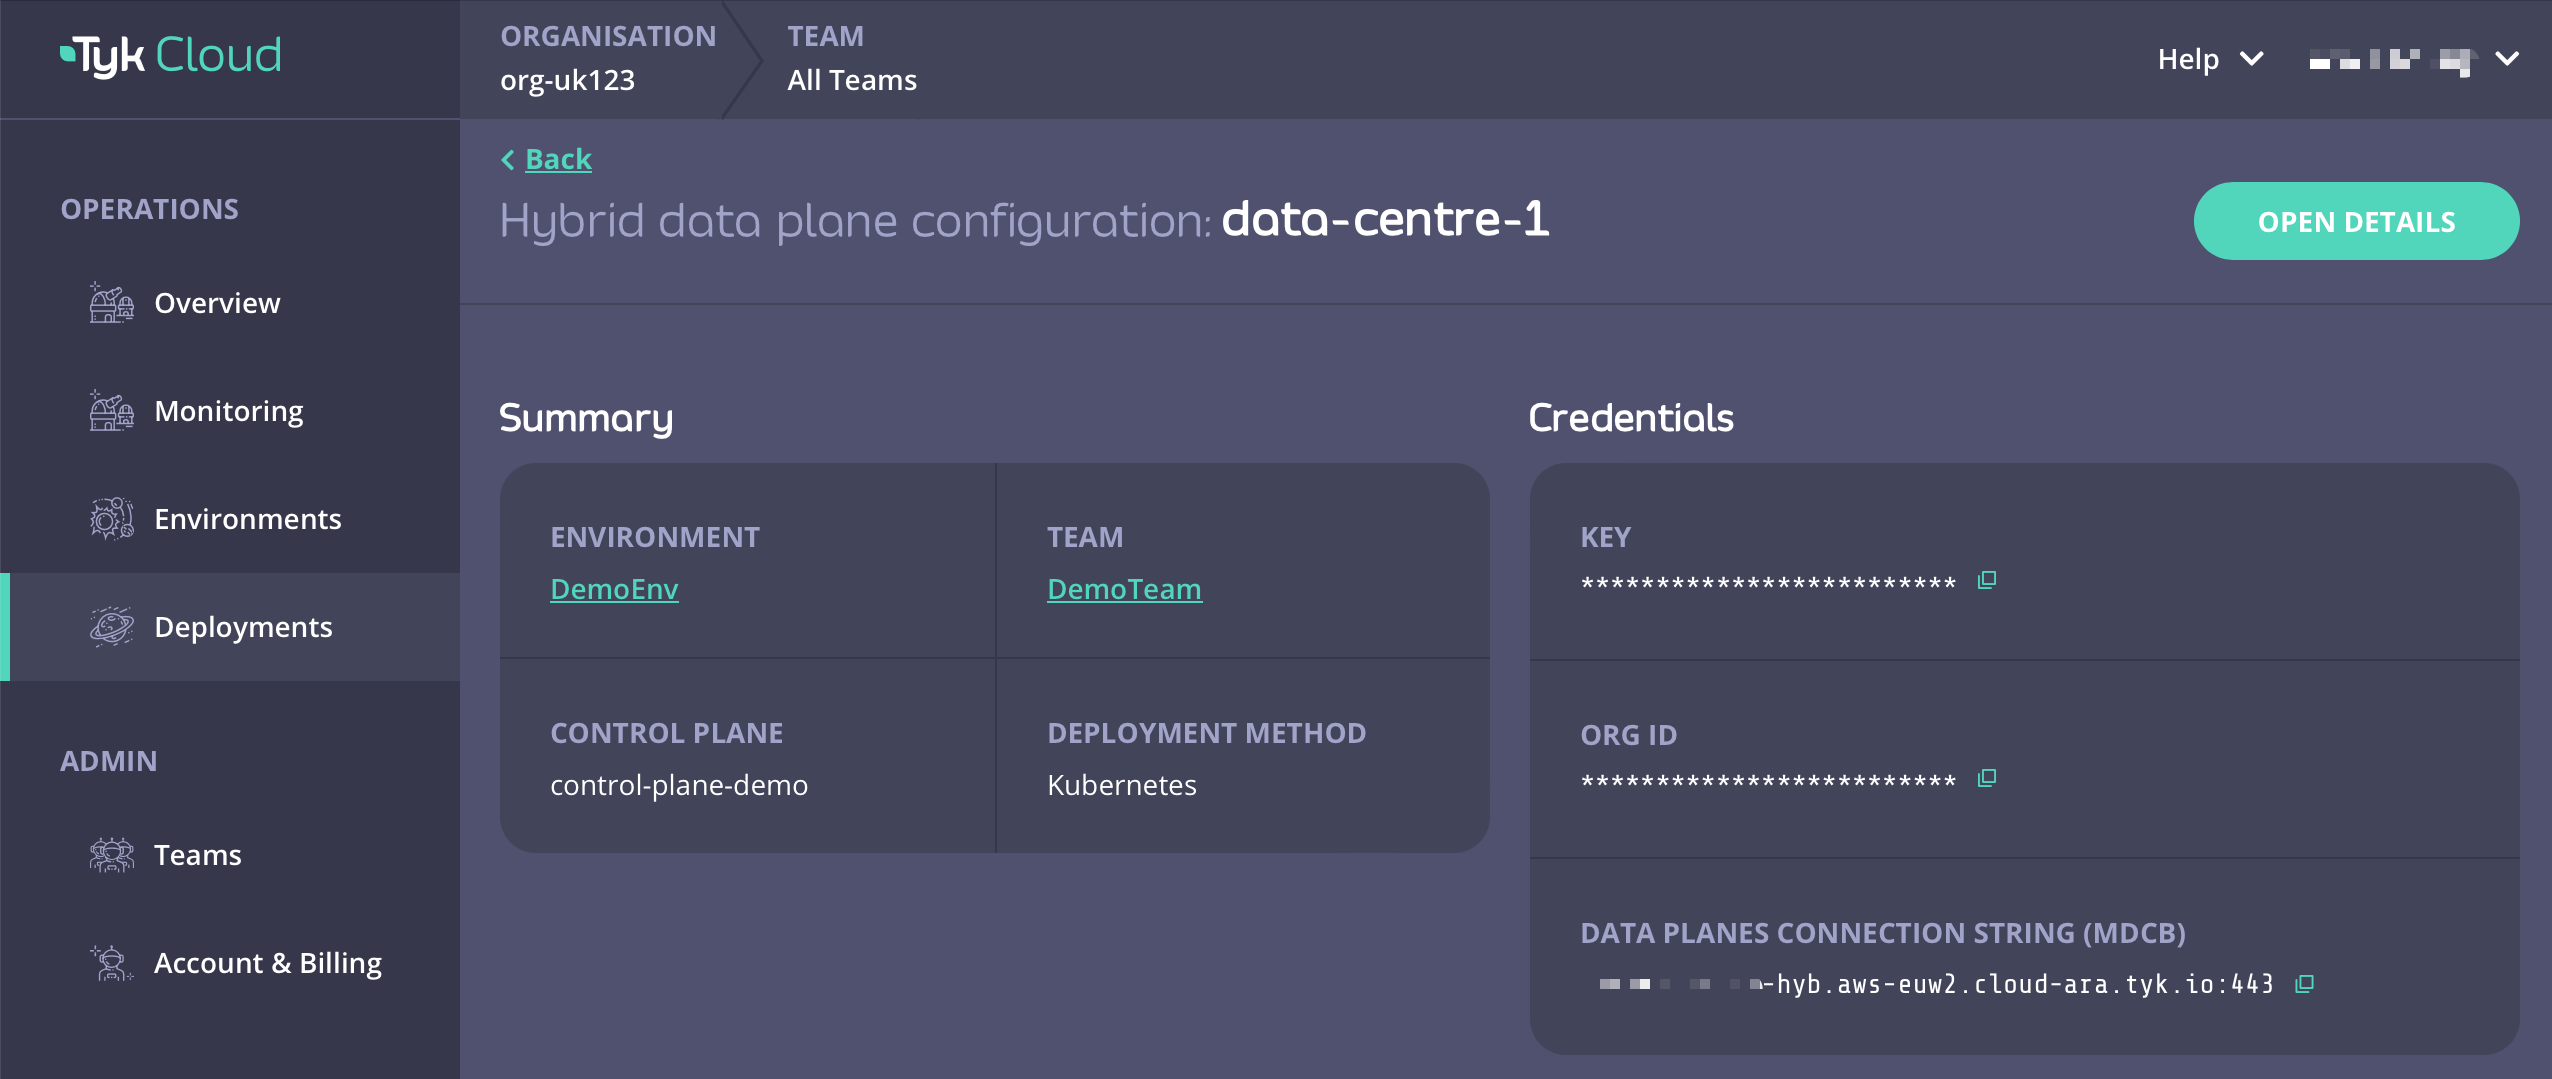
For Tyk Cloud users who want to deploy hybrid data planes, you can easily obtain your remote control plane connection details on Tyk Cloud.- Go to Deployment tab and create a Hybrid data plane configuration. You can also select from an existing one.
- Copy Key, Org ID, and Data Planes Connection String (MDCB) as
global.remoteControlPlane’suserApiKey,orgId, andconnectionStringrespectively.
Obtain Remote Control Plane Connection Details from tyk-control-plane Chart
For Tyk Self-Managed MDCB users who want to deploy data planes, you can obtain MDCB connection details from the notes of tyk-control-plane installation output, as listed below.-
Follow installation output to export USER_API_KEY, ORG_ID, and MDCB_CONNECTIONSTRING. The values can be used to set
global.remoteControlPlane’suserApiKey,orgId, andconnectionStringrespectively. - Also verify that the SSL connection configuration is set correctly:
Tyk Data Plane Chart Installations
Installing the Chart
To install the chart from the Helm repository in namespacetyk-dp with the release name tyk-data-plane, issue the following commands:
values.yaml file accordingly. Then install the chart by issuing the following command below:
Uninstalling the Chart
Upgrading Chart
Configuration
To list all configurable options with detailed comments, issue the following command:values.yaml file and use -f [filename] flag to override default values during installation.
Alternatively, you can use --set flag to set it in Tyk installation.
To configure Tyk components, users can utilize both config files and environment variables. Notably, environment variables take precedence over config files. To maintain simplicity and consistency, the Tyk Helm Charts deploy components with an empty config file while setting container environment variables based on user-defined values. This approach ensures seamless integration with Kubernetes practices, allowing for efficient management of configurations. For a comprehensive overview of available configurations, please refer to the configuration documentation.
Setting Environment Variables
Should any environment variables not be set by the Helm Chart, users can easily add them under theextraEnvs section within the charts for further customization. Values set under extraEnvs would take precedence over all configurations.
Example of setting extra environment variable to gateway:
SECRET_USERNAME will be added to the Gateway container, with a value of backend-username associated with the secret backend-user. It is useful if you want to access secret data from Tyk Gateway configuration file (tyk.conf) or API definitions.
Set Redis Connection Details (Required)
Tyk uses Redis for distributed rate-limiting and token storage. You may use the Bitnami chart to install or Tyk’ssimple-redis chart for POC purpose.
Set the following values after installing Redis:
Recommended: via Bitnami chart
For Redis you can use these rather excellent charts provided by Bitnami.
Copy the following commands to add it:
Please make sure you are installing Redis versions that are supported by Tyk. Please refer to Tyk docs to get list of supported versions.
tyk-redis-master.tyk.svc.cluster.local:6379
You can reference the password secret generated by Bitnami chart by --set global.redis.passSecret.name=tyk-redis and --set global.redis.passSecret.keyName=redis-password, or just set --set global.redis.pass=$REDIS_PASSWORD.
simple-redis in the same namespace by default. You do not need to set Redis address and password in values.yaml.
Protect Confidential Fields with Kubernetes Secrets
In thevalues.yaml file, some fields are considered confidential, such as APISecret, connection strings, etc.
Declaring values for such fields as plain text might not be desired for all use cases. Instead, for certain fields, Kubernetes secrets can be referenced, and the chart will define container environment variables using secret data.
This section describes how to use Kubernetes secrets to declare confidential fields.
APISecret
The global.secrets.APISecret field configures a header value used in every interaction with Tyk Gateway API.
It can be configured via global.secrets.APISecret as a plain text or Kubernetes secret which includes APISecret key in it. Then, this secret must be referenced via global.secrets.useSecretName.
orgId, userApiKey, and groupID) can be set via
Kubernetes secret.
Instead of explicitly setting them in the values file, just create a Kubernetes secret including orgId, userApiKey and groupID keys and refer to it in global.remoteControlPlane.useSecretName.
- Create a secret that contains
orgId,userApiKeyandgroupIDkeys in it:
- Refer to it in
global.remoteControlPlane.useSecretName.
global.redis.passSecret.name and global.redis.passSecret.keyName field, as follows:
Tyk MDCB Synchroniser (Optional)
If control plane MDCB has enabled Synchroniser feature, the following fields should be set accordingly:Gateway Configurations
Configure below insidetyk-gateway section.
Update Tyk Gateway Version
Set version of gateway attyk-gateway.gateway.image.tag. You can find the list of version tags available from Docker hub. Please check Tyk Release notes carefully while upgrading or downgrading.
Enabling TLS
Enable TLS We have provided an easy way to enable TLS via theglobal.tls.gateway flag. Setting this value to true will
automatically enable TLS using the certificate provided under tyk-gateway/certs/.
Configure TLS secret
If you want to use your own key/cert pair, please follow the following steps:
- Create a TLS secret using your cert and key pair.
- Set
global.tls.gatewayto true. - Set
global.tls.useDefaultTykCertificateto false. - Set
tyk-gateway.gateway.tls.secretNameto the name of the newly created secret.
Enabling gateway autoscaling
You can enable autoscaling of the gateway by--set tyk-gateway.gateway.autoscaling.enabled=true. By default, it will enable the Horizontal Pod Autoscaler resource with target average CPU utilization at 60%, scaling between 1 and 3 instances. To customize those values you can modify the tyk-gateway section of values.yaml as shown below:
tyk-gateway.gateway.autoscaling.averageCpuUtilization for CPU utilization (set by default at 60%) and tyk-gateway.gateway.autoscaling.averageMemoryUtilization for memory (disabled by default). In addition to that you can define rules for custom metrics using tyk-gateway.gateway.autoscaling.autoscalingTemplate list:
Accessing Gateway
Service port Default service port of gateway is 8080. You can change this atglobal.servicePorts.gateway.
Ingress
An Ingress resource is created if tyk-gateway.gateway.ingress.enabled is set to true.
tyk-gateway.gateway.control.enabled to true will allow you to run the Gateway API on a separate port and protect it behind a firewall if needed.
Sharding
Configure the gateways to load APIs with specific tags only by enablingtyk-gateway.gateway.sharding.enabled, and set tags to comma separated lists of matching tags.
OpenTelemetry
To enable OpenTelemetry for Gateway setgateway.opentelemetry.enabled flag to true. It is disabled by default.
You can also configure connection settings for it’s exporter. By default grpc exporter is enabled on localhost:4317 endpoint.
To enable TLS settings for the exporter, you can set gateway.opentelemetry.tls.enabled to true.
Liveness and readiness probes
Gateway liveness probes can be customised viagateway.livenessProbe field. All fields from PodLivenessProbe object can be added here. If set to empty or nil, the default health check on /health will be performed.
Gateway readiness probes can be customised via gateway.readinessProbe field. All fields from PodReadinessProbe object can be added here. If set to empty or nil, the default health check on /health will be performed.
For further details for configuring Tyk Gateway, please consult the Tyk Gateway Configuration Options guide.
Pump Configurations
To enable Pump, setglobal.components.pump to true, and configure as detailed below inside tyk-pump section.
Prometheus Pump
Addprometheus to tyk-pump.pump.backend, and add connection details for prometheus under tyk-pump.pump.prometheusPump.
We also support monitoring using Prometheus Operator. All you have to do is set tyk-pump.pump.prometheusPump.prometheusOperator.enabled to true.
This will create a PodMonitor resource for your Pump instance.
Hybrid Pump
Addhybrid to tyk-pump.pump.backend, and add remoteControlPlane details under global.remoteControlPlane.
Other Pumps
To setup other backends for Pump, refer to this document and add the required environment variables intyk-pump.pump.extraEnvs