- An API with its corresponding security policy is created in Tyk. It is then added to the Developer Portal Catalog.
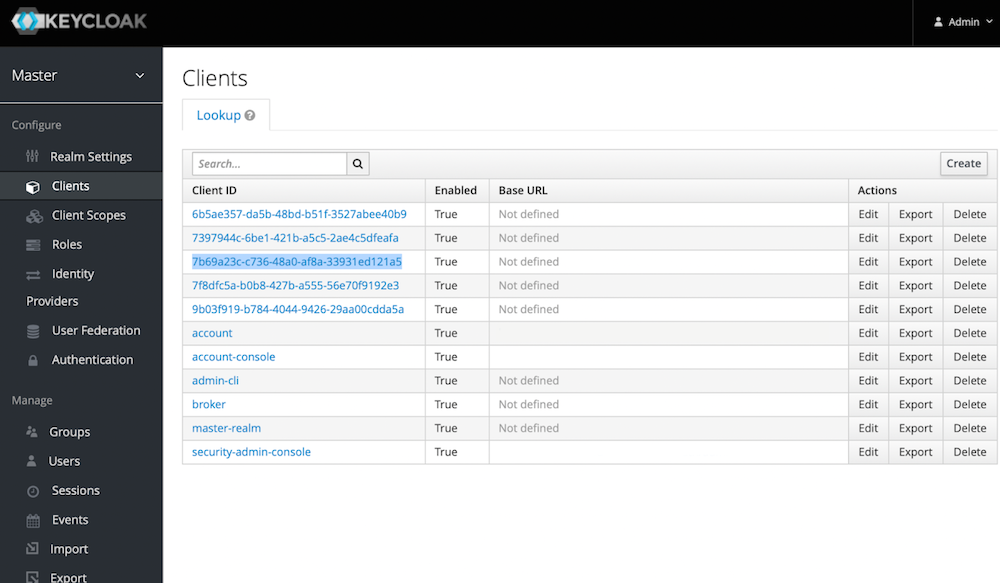
- A developer signs up and creates a Dynamic Client Registration provider using the Developer Portal. Tyk sends the Dynamic Client Registration call to your . The IDP replies with the client ID and secret.
- Using the previous information, the developer (or your application) triggers a call to the token endpoint of the IDP. The developer (or your application) then triggers a call to Tyk, using the token that was generated by the IDP. Tyk validates this token using the provided by the IDP.
Requirements
- A Keycloak instance.
- A Tyk Self Managed installation (Gateway + Dashboard).
Getting started with Keycloak
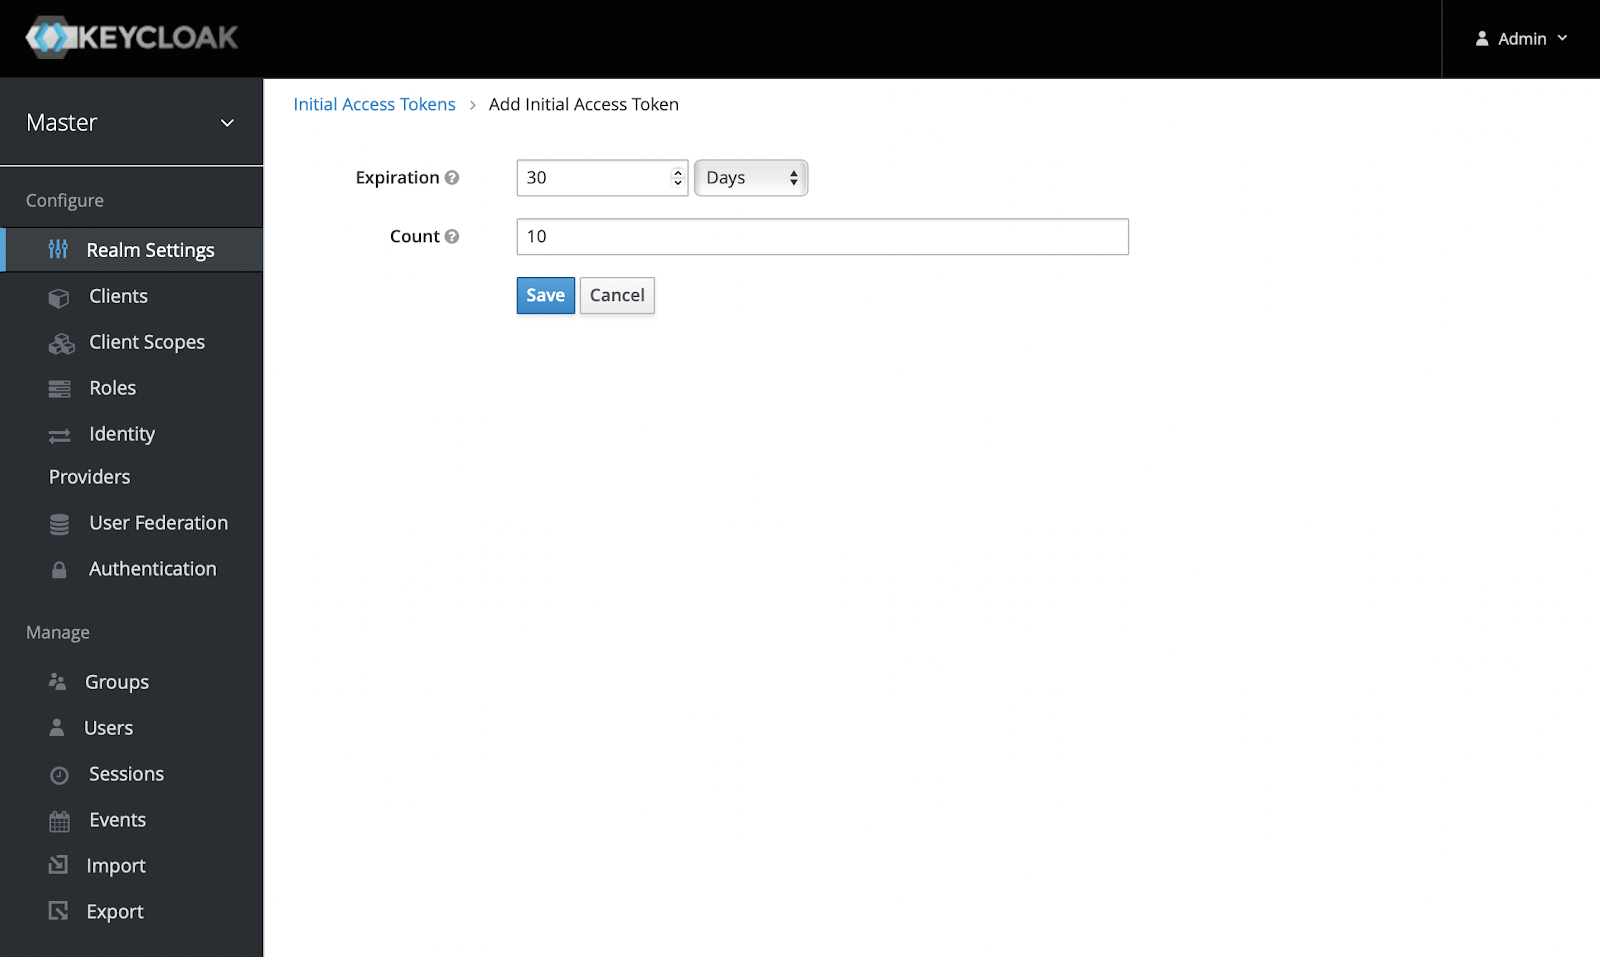
To get started with Dynamic Client Registration in Keycloak you’ll need to generate an initial access token using the Keycloak Administration Console. After logging in, click Realm settings under Configure and select the Client Registration tab: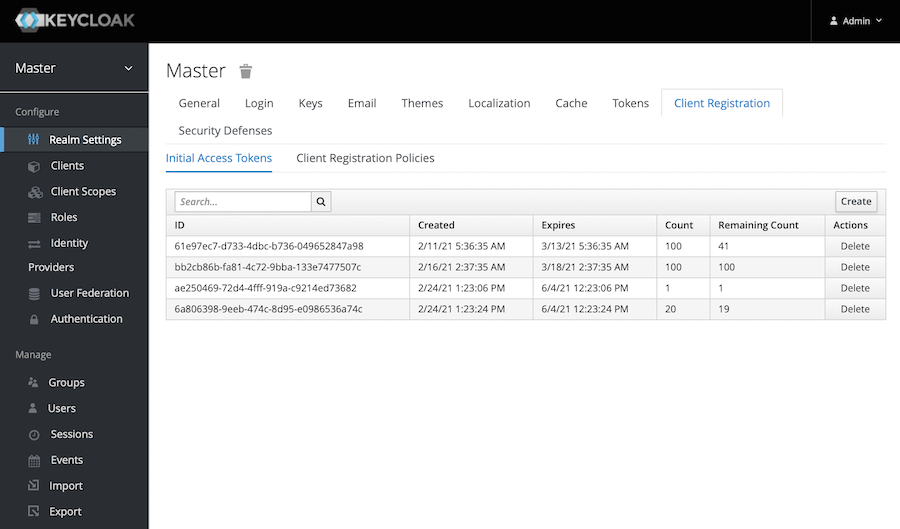
Setting up Tyk
Now you’re ready to set up Tyk. For compatibility reasons, check yourtyk_analytics.conf and make sure that a proper oauth_redirect_uri_separator parameter is set. You may use the following value:
tyk_analytics.conf:
tyk.conf, this will instruct the gateway to skip SSL verification when the JWT middleware is in use, particularly when JWKS are retrieved from your IDP:
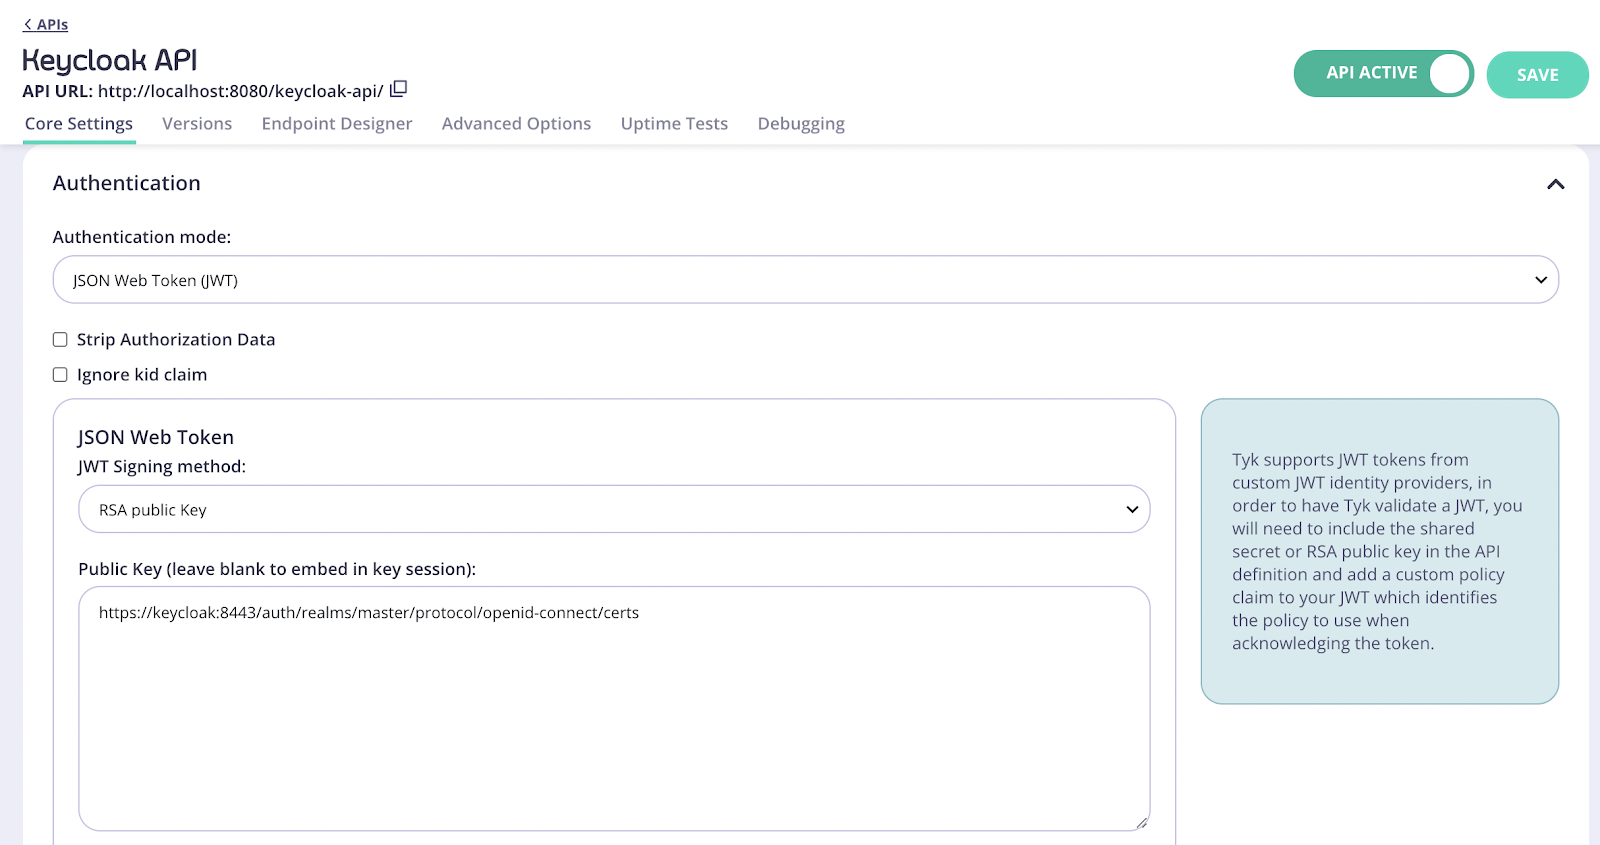
Where do I get the proper JWKS URI for my Keycloak environment?The JWKS URI is a required field in the
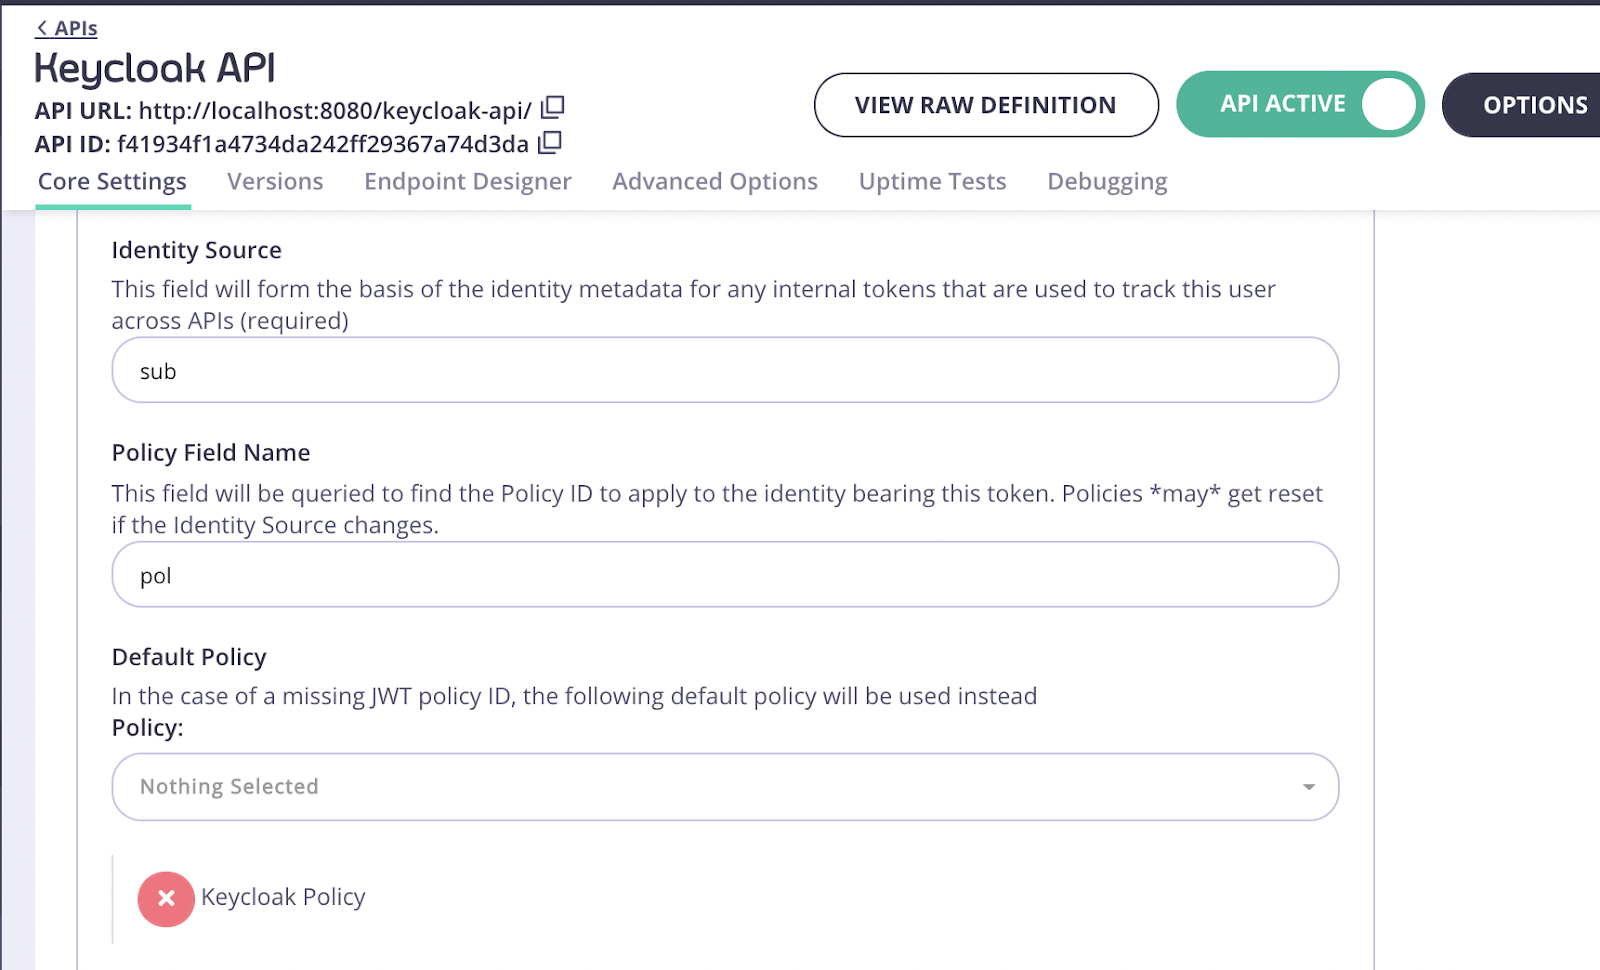
.well-known/openid-configuration endpoint of your OpenID Connect Provider metadata. Please see the OpenID spec for further information."sub" and for Policy Field Name use "pol".
- Click Save
- Select Policies under System Management
- Click Create a Policy and call it Keycloak Policy. Use the default values for this policy.
- In the Access rights section, select your previously created Keycloak API. You will also need to enter an expiration setting for your keys.
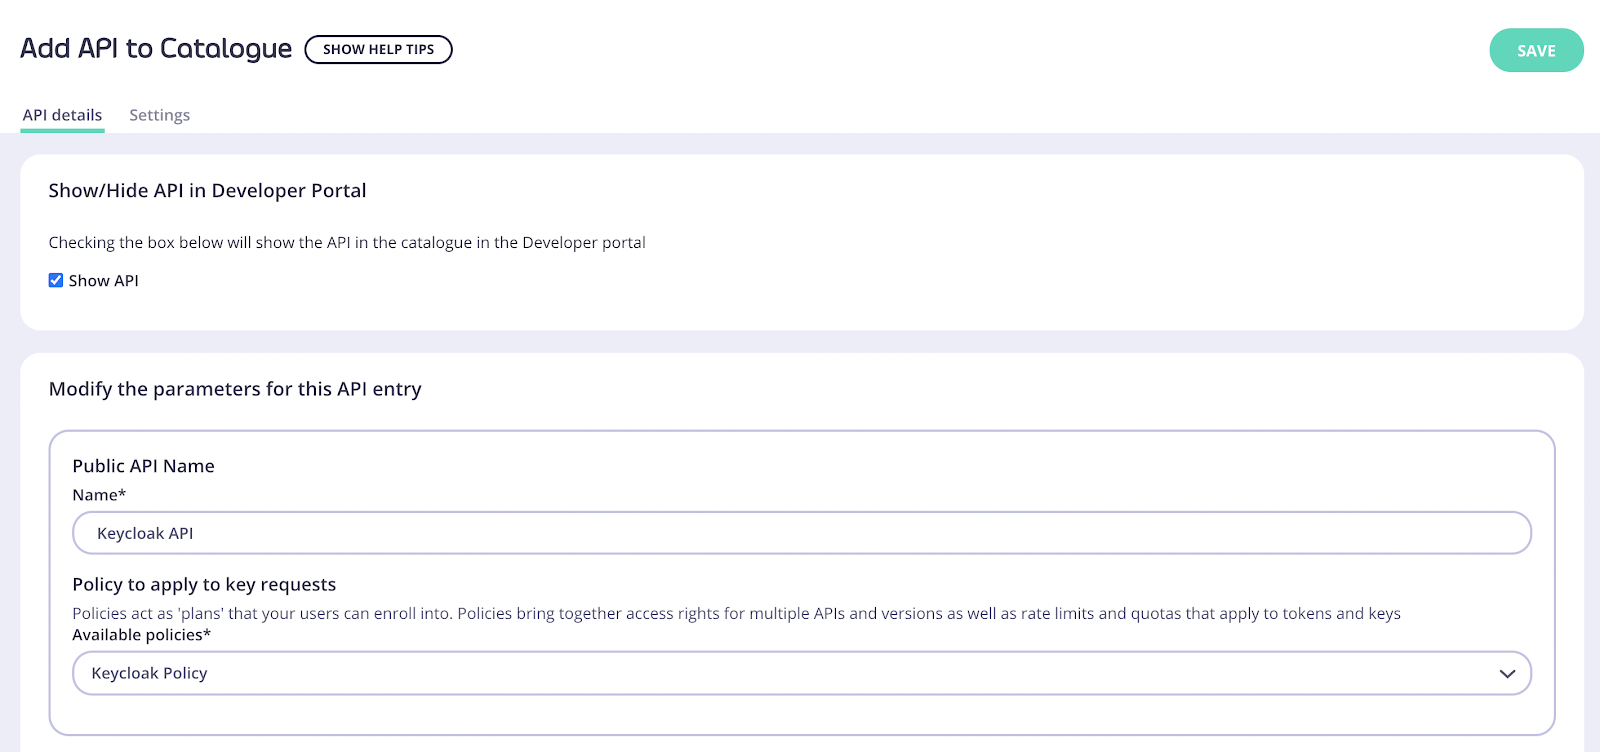
- Click Catalog under Portal Management on the navigation menu.
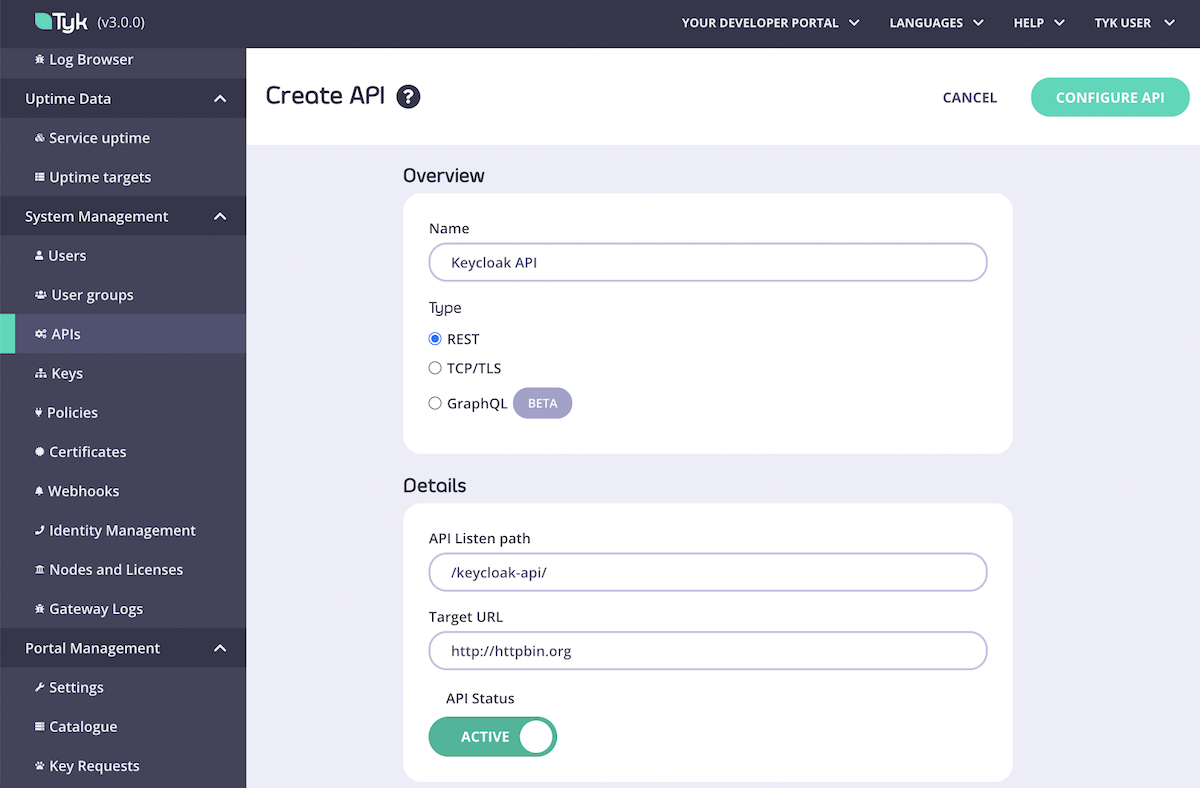
- Click Add New API, enter a name for it and select the newly created policy. Again, you will use Keycloak Policy:
- Click Save then open the API added again
- Open the Settings tab.
-
In API Details select the Override global settings option.
Tyk lets you set global portal settings that apply to all portal-listed APIs, in this guide we assume you’re enabling and setting up DCR for a single API. In case you want to enable DCR for all the APIs, you should go to the Settings section under Portal Management, and in the API Access tab you can enter your DCR settings there.
- Scroll down to the DCR section and enter the following settings:
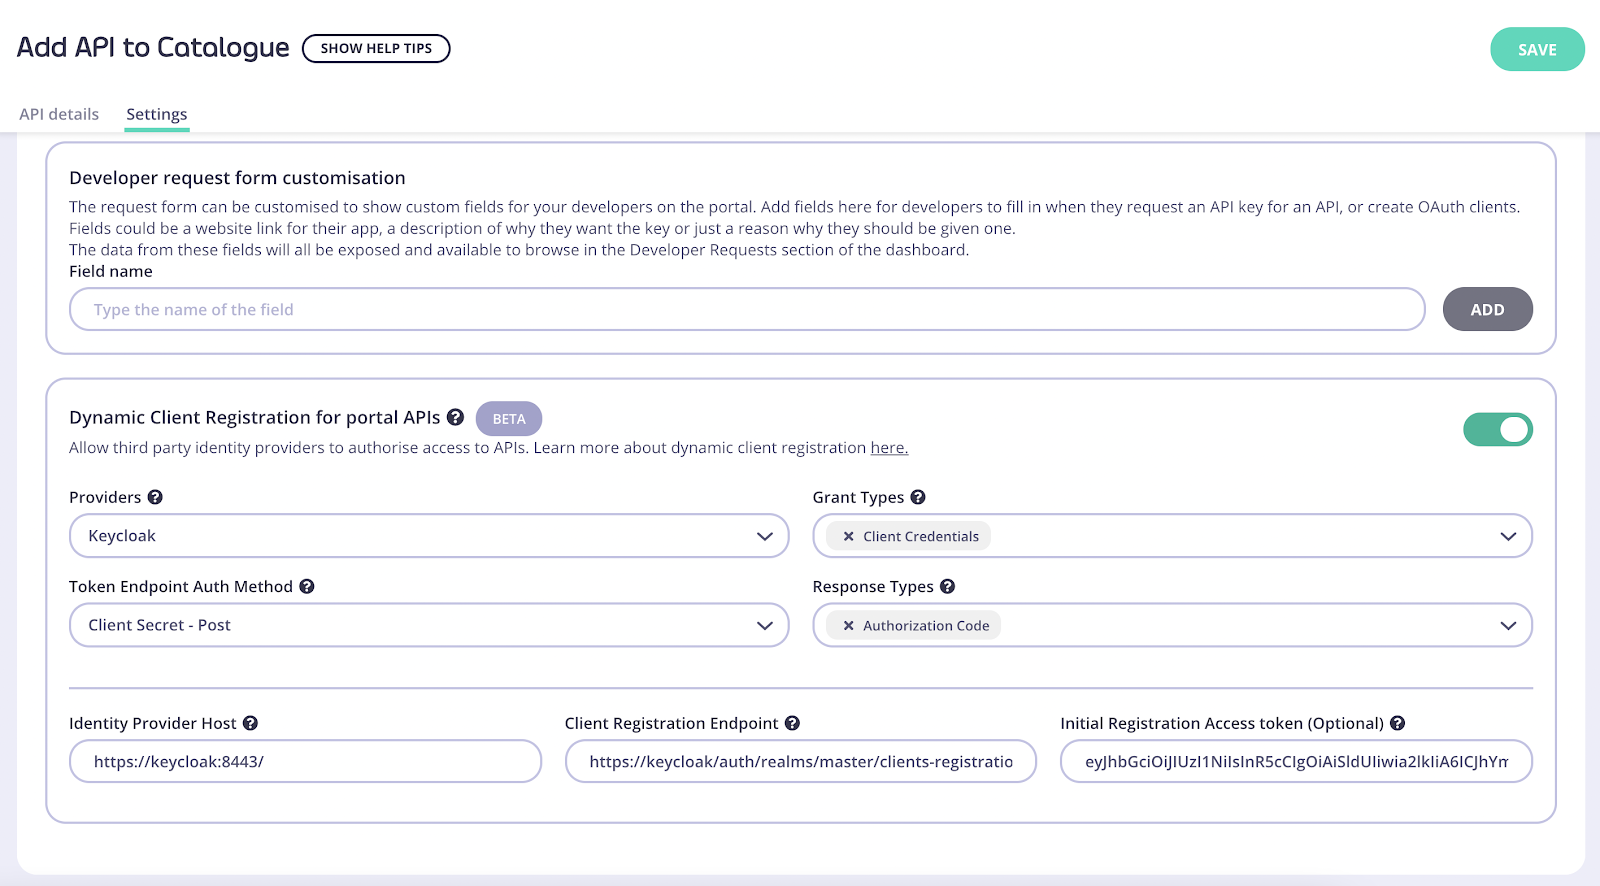
https://keycloak:8443/
Client Registration Endpoint: OpenID Connect client registration endpoint. This value is found in your well-known discovery document as registration_endpoint. The well-known location URL is typically https://keycloak:8443/.well-known/openid-configuration
Initial Registration Access Token: the token that’s used to register new clients, this was generated in the early steps of the guide.
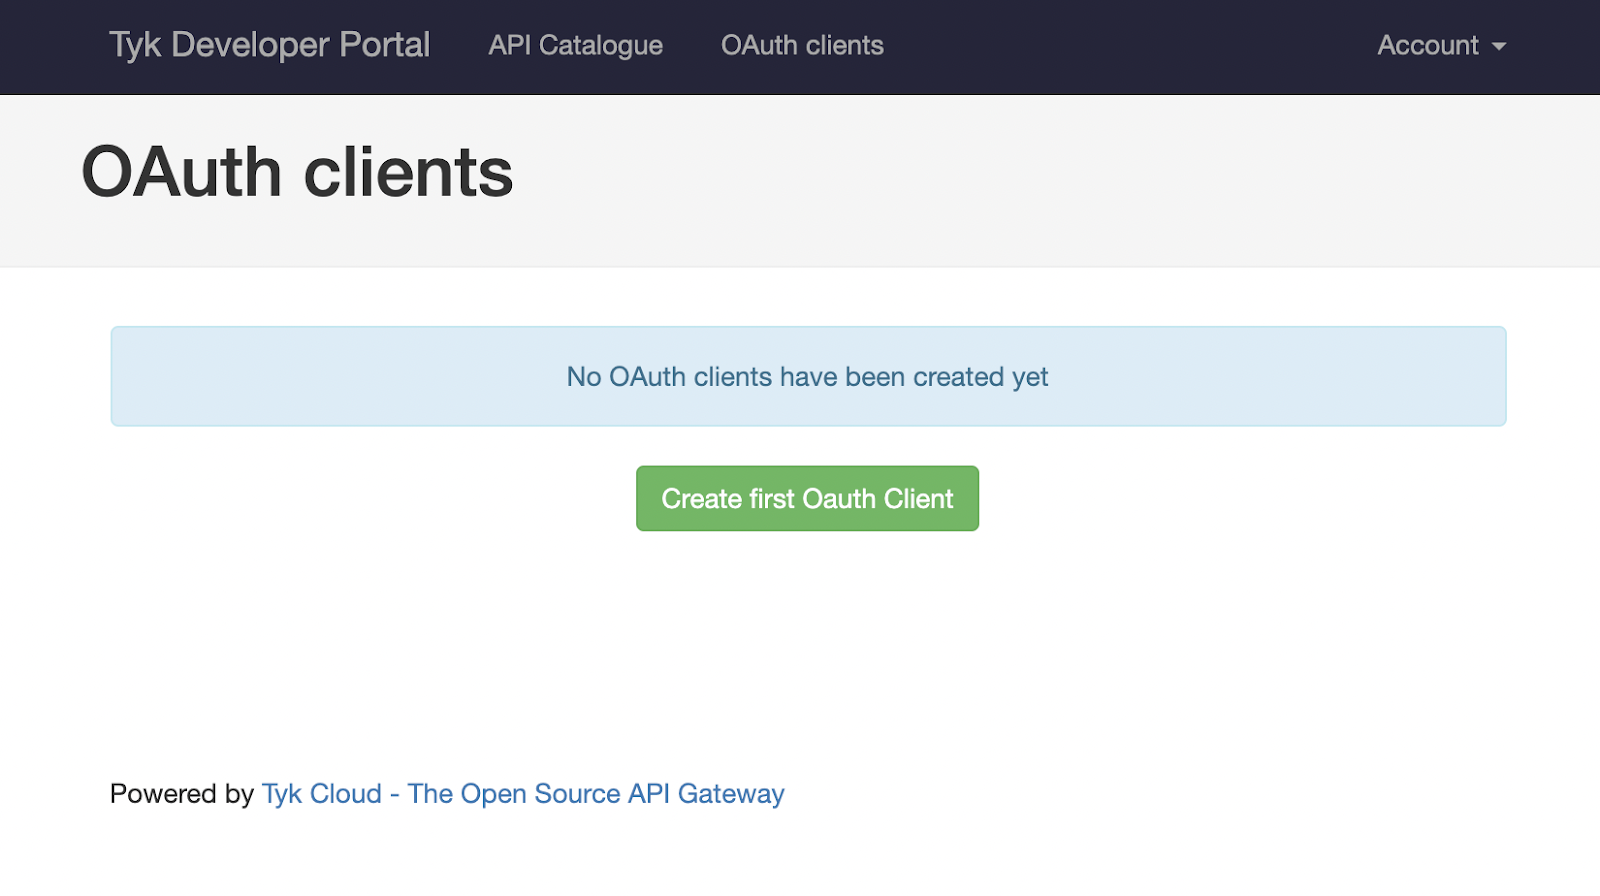
Testing the flow
Now that both Tyk and Keycloak are ready we can test the complete flow.- Click Developers under Portal Management
- Click on Add developer and create a developer user.
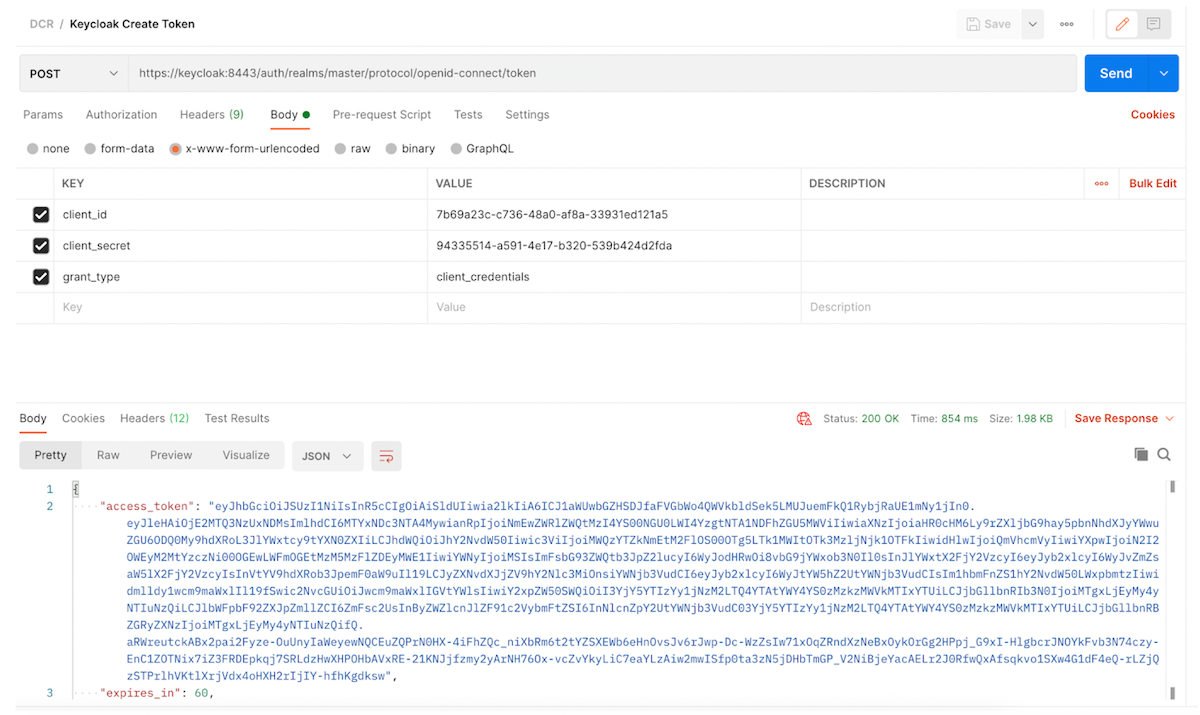
https://keycloak:8443/auth/realms/master/protocol/openid-connect/token
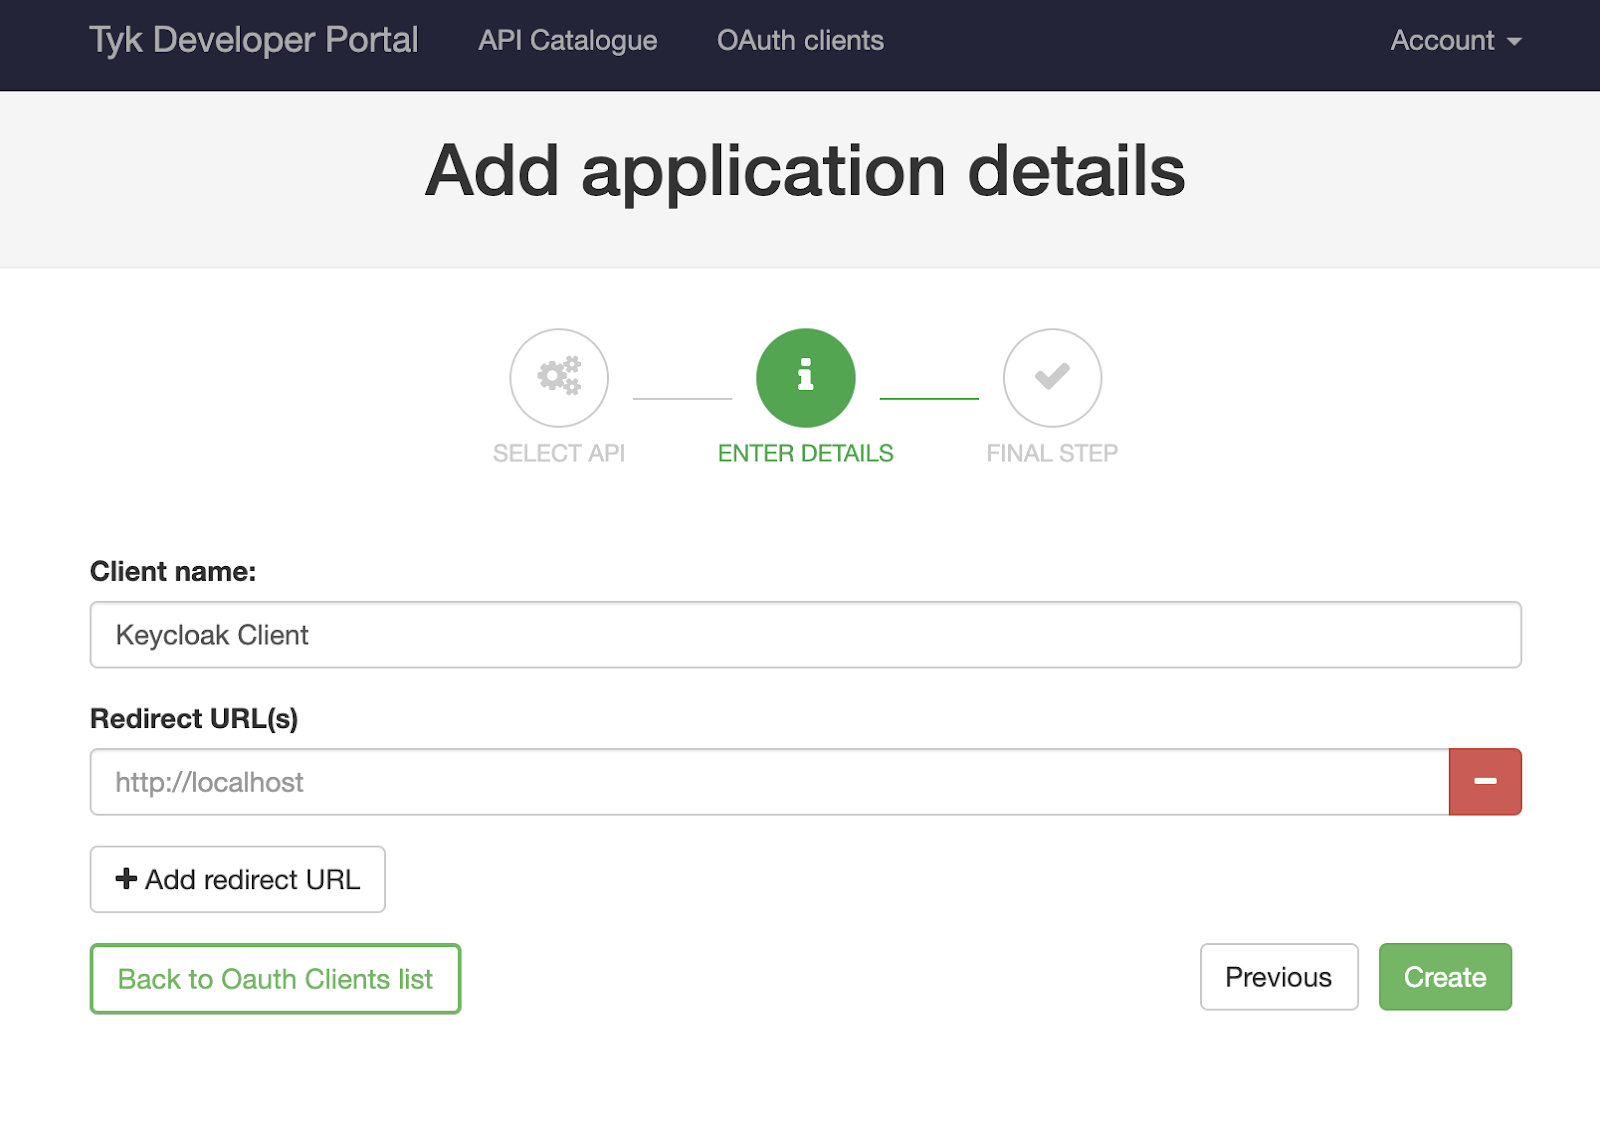
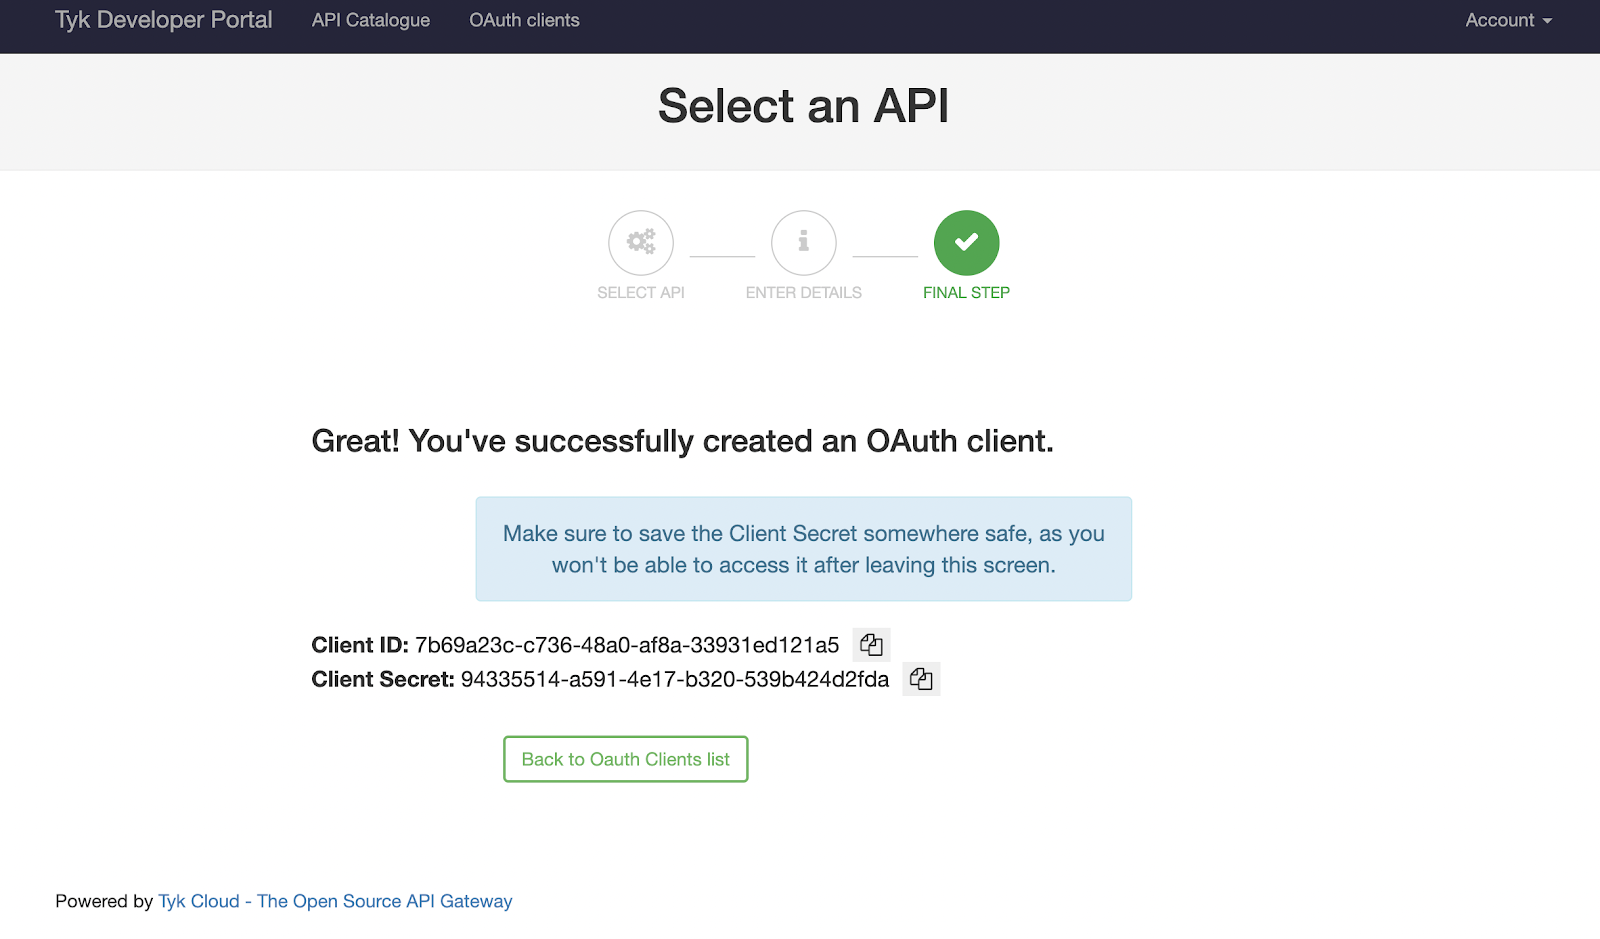
Your Postman request should contain the following body, where "client_id" and "client_secret" are the credentials you got from the developer portal:
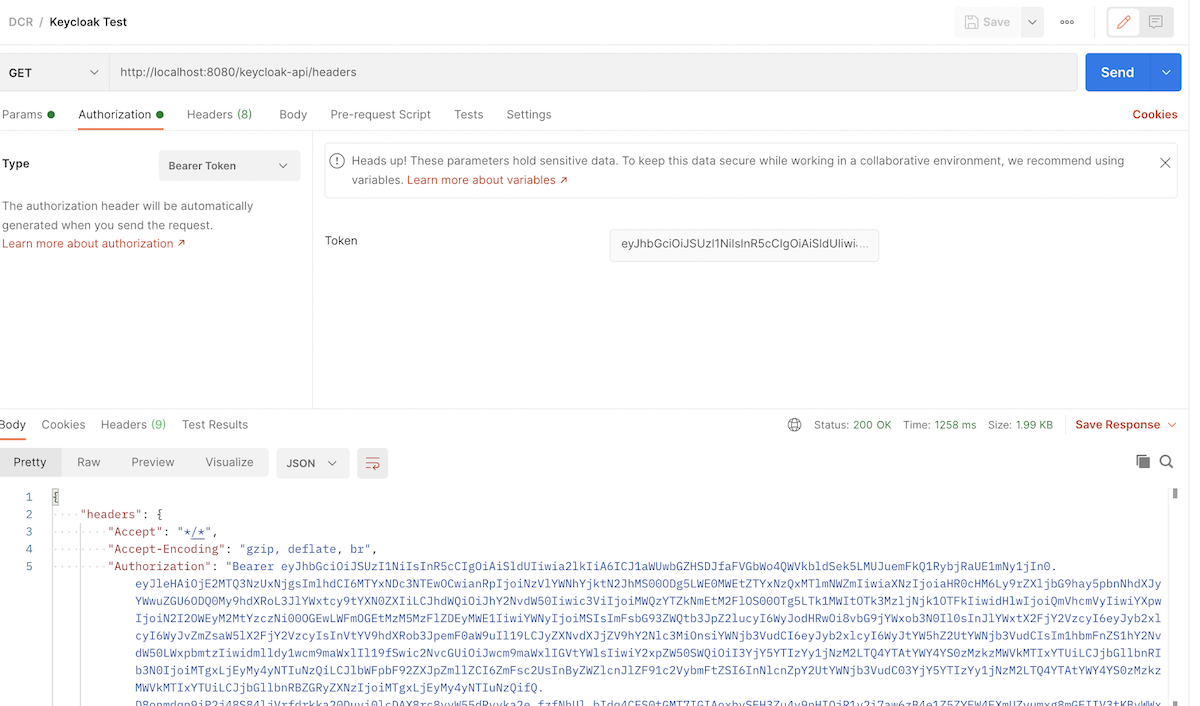
"access_token" and use it to access our Keycloak API, this request will be proxied by Tyk: