Documentation Index
Fetch the complete documentation index at: https://tyk.io/docs/llms.txt
Use this file to discover all available pages before exploring further.
| Edition | Deployment Type |
|---|---|
| Enterprise | Self-Managed, Hybrid |
This page is for installing Tyk Self-Managed. If you are looking to use Tyk as part of Tyk Cloud, please refer to the Tyk Cloud documentation.
Architecture
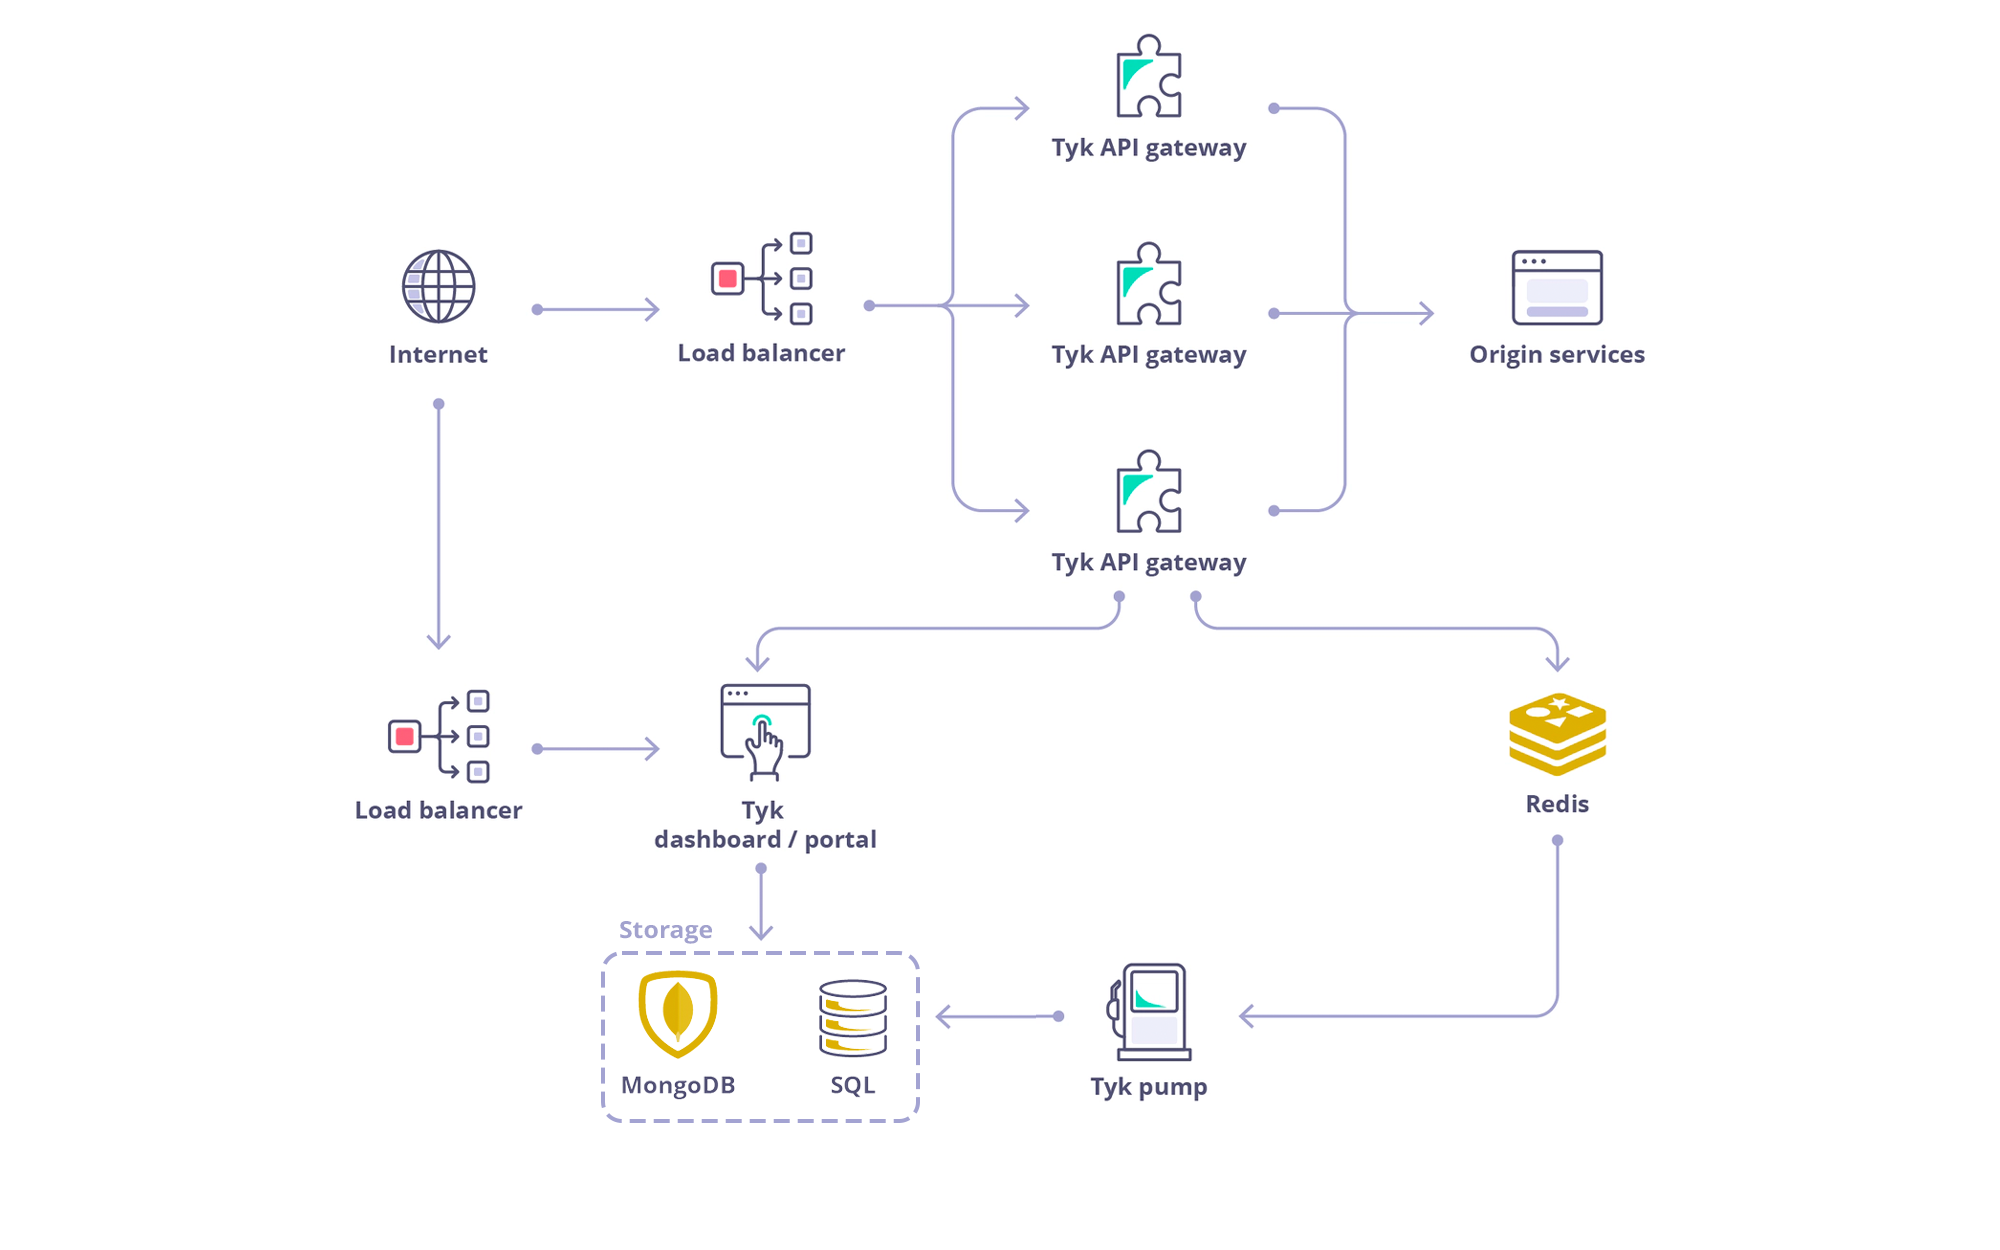
Requirements
Tyk Dashboard requires a persistent datastore for its operations. By default MongoDB is used. From Tyk v4.0, we also support PostgreSQL.PostgreSQL
| Tyk Version | PostgreSQL Version |
|---|---|
| From 4.X | PSQL 14.x |
| From 5.X | PSQL 15.x |
| From 5.X | PSQL 16.x |
| From 5.9 | PSQL 17.x |
MongoDB
| Tyk Version | MongoDB Version |
|---|---|
| From 5.X | MongoDB 5.0 (EOL) |
| From 5.X | MongoDB 6.0 |
| From 5.X | MongoDB 7.0 |
| From 5.9 | MongoDB 8.0 |
Redis
Tyk Gateway requires Redis for its operations. Here is the list of supported versions:| Tyk Version | Redis Version |
|---|---|
| From 3.x.x | 2.8.x, 3.x.x, 4.x.x, 5.x.x, 6.x.x |
| From 4.x.x | 2.8.x, 3.x.x, 4.x.x, 5.x.x, 6.x.x |
| From 5.0.x to 5.8.x | 6.2.x, 7.x |
| From 5.9.x onwards | 6.2.x, 7.x, 7.4.x |
Recommended Installation: Docker
For development, testing, and proof of concept purposes, we recommend using our Docker installation, which allows you to quickly spin up a full Tyk stack on your local machine.
Install with Docker
Alternative Installation Methods

Install on K8s

Install with Ansible
Install on Red Hat

Install on Ubuntu

Install on Amazon AWS
Install Tyk on Heroku

Install on Microsoft Azure