> ## Documentation Index
> Fetch the complete documentation index at: https://tyk.io/docs/llms.txt
> Use this file to discover all available pages before exploring further.
# Install Developer Portal
> Install Tyk Developer Portal using Docker, Kubernetes, or Linux packages. This page explains the architecture, requirements, and how to install and bootstrap the portal.
export const ResponsiveGrid = ({children}) => {
return
{children}
;
};
| Edition | Deployment Type |
| :--------- | :------------------- |
| Enterprise | Self-Managed, Hybrid |
This page is for installing the **Tyk Developer Portal** (self-managed). If you are looking to use the Developer Portal as part of **Tyk Cloud**, please refer to [the Tyk Cloud documentation](/tyk-cloud/initial-portal-config).
## Architecture
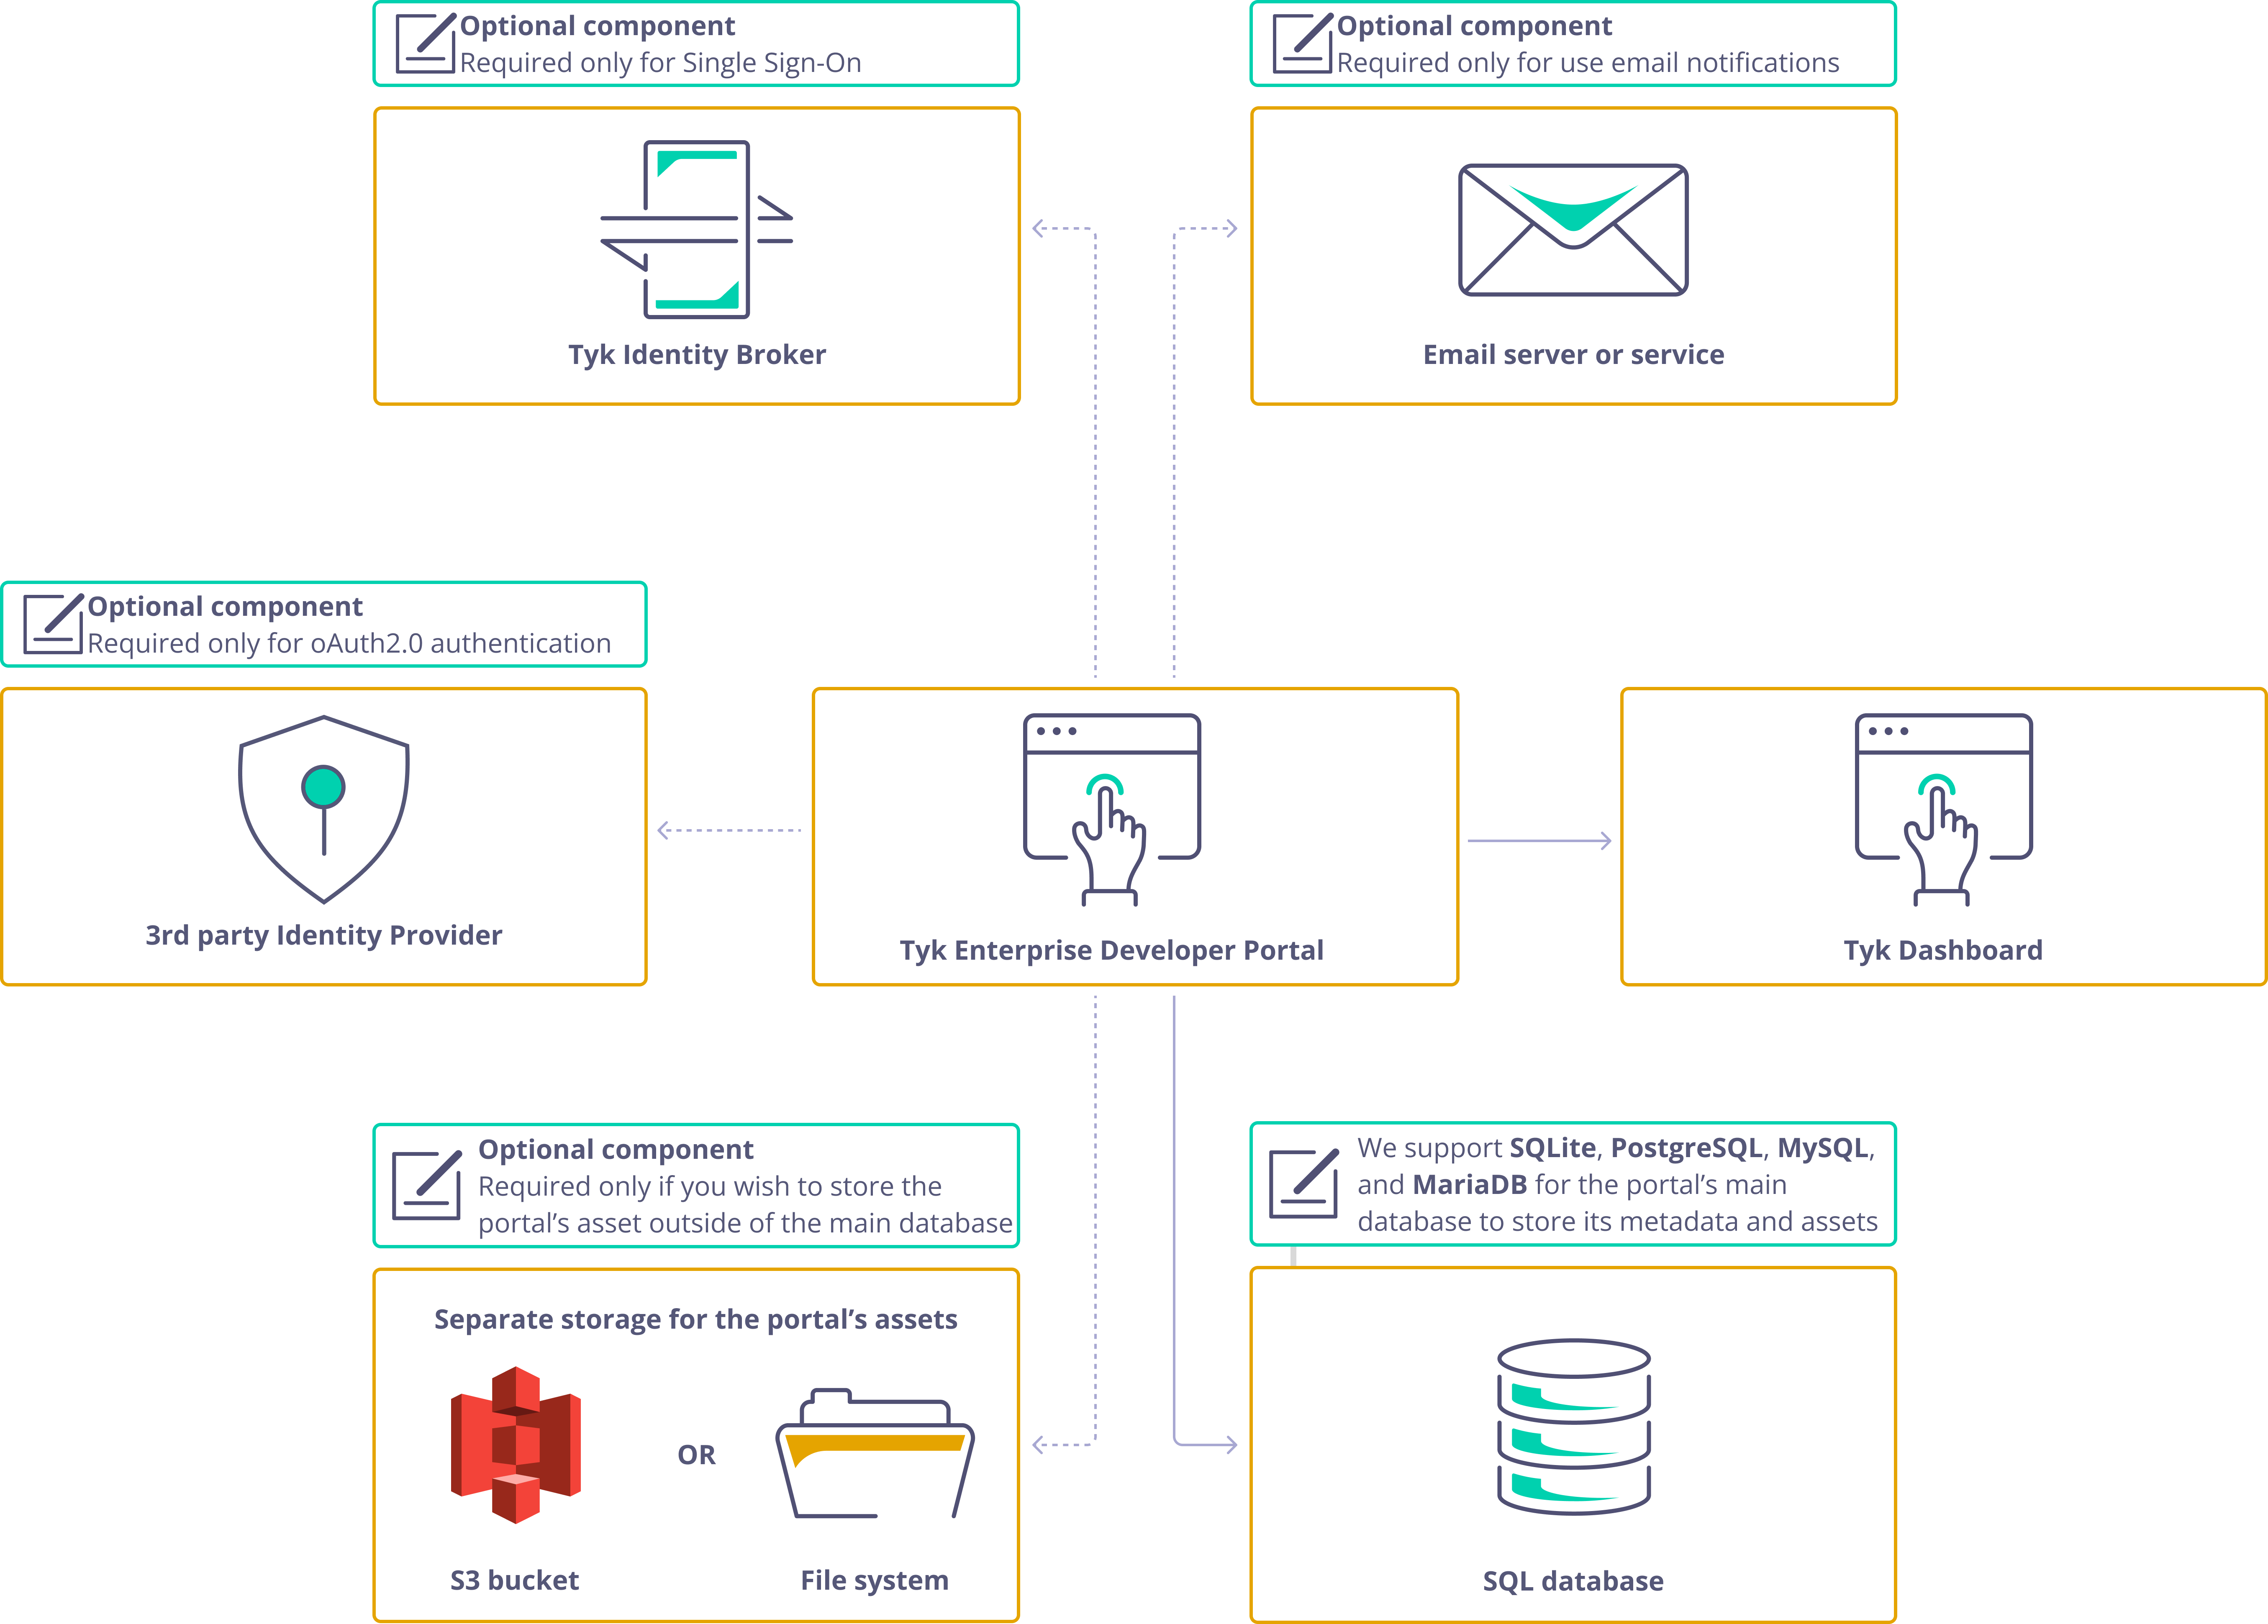
The portal deployment comprises three main components:
* **Portal application** - The main portal service
* **Database** - Stores metadata including API products, plans, developers, applications, and more
* **Asset storage** - Stores CMS assets such as images, themes, and OpenAPI specification files. Assets can reside in the database or separately in an S3 bucket or filesystem volume.
Optionally, there could be three additional components:
* **3rd party identity provider.** To [enable oAuth2.0 for your API Products](/tyk-stack/tyk-developer-portal/enterprise-developer-portal/api-access/dynamic-client-registration), you'll need to utilize an OpenID-compliant third-party identity provider.
It's essential to note that the [Tyk Stack](/tyk-stack) doesn't include third-party identity providers, so you should refer to your Identity Provider's documentation for instructions on configuring and deploying it.
This component is optional and required only for enabling oAuth2.0
* **[Tyk Identity Broker](/tyk-identity-broker/overview)**. You only need this component if you want to configure Single Sign-On for the Tyk Developer Portal.
For more guidance on this topic, please consult [the Single Sign-On section](/tyk-stack/tyk-developer-portal/enterprise-developer-portal/managing-access/enable-sso) of the documentation
* **Email server**. The portal is capable of sending notifications to both admin users and developers when specific events happen within the portal.
To enable this feature, you need to specify a connection configuration to an email server or service, and configure other email settings.
You can choose to use a server that is installed on your premises or an SMTP-compatible SaaS product.
For step-by-step instructions, please refer to [the Email Settings section](/portal/customization/email-notifications)
## Database Requirements
The portal requires a database to store metadata. Supported databases:
| Database Type | Version |
| ------------- | ----------------------- |
| PostgreSQL | 14.x, 15.x, 16.x, 17.x |
| MySQL | 4 or later |
| MariaDB | 10.6, 10.11, 11.4, 11.8 |
**Note: SQLite support**
Tyk Developer Portal no longer supports SQLite as of version 1.14.0. Please use PostgreSQL or another supported database.
## Installation Process
The portal installation process comprises two steps:
1. **Install the portal application.** To install the portal and launch it in the bootstrap mode, you need to configure your portal instance by specifying settings such as TLS, log level, and database connection.
For further guidance on launching the portal, please refer to one of the installation options: [Docker container](/portal/install/docker#docker), [Docker Compose](/portal/install/docker#docker-compose), [Helm chart](/portal/install/kubernetes#legacy-helm-chart), or [RPM package](/portal/install/linux#red-hat-rhel-%2F-centos).
2. **[Bootstrap the portal](#bootstrapping-enterprise-developer-portal)** After you've launched the portal, it will wait for you to provide credentials for the super admin user before it starts accepting traffic.
Once you've created the super admin user, the portal will complete its installation process by creating the necessary database structure and initialising the required assets for its operations. You can [bootstrap](#bootstrapping-enterprise-developer-portal) the portal either through the UI or using the bootstrap API.
Please refer to [the Bootstrapping section](/portal/install#bootstrapping-developer-portal) for implementing this step.
## Recommended Installation: Docker
For development, testing, and proof of concept purposes, we recommend using our Docker installation, which allows you to quickly spin up developer portal on your local machine.
Install with Docker
Install with Docker Compose
## Alternative Installation Methods
Install on Kubernetes
Install on Linux Distributions
## Bootstrapping Developer Portal
When launching the Tyk Developer portal for the first time, it starts in a special bootstrap mode, which is required to create the first admin user who will act as the super admin.
After launching the portal, you can bootstrap it using either the portal UI or the bootstrap API.
This section explains how to bootstrap the portal using both the portal UI and the bootstrap API.
### Bootstrapping the Portal via the UI
After launching the portal for the first time, you can use its UI to bootstrap it. The portal will display a form that allows you to create a super admin user and set their password.
Navigate to the portal UI in your browser to start bootstrapping the portal. You should see the following:
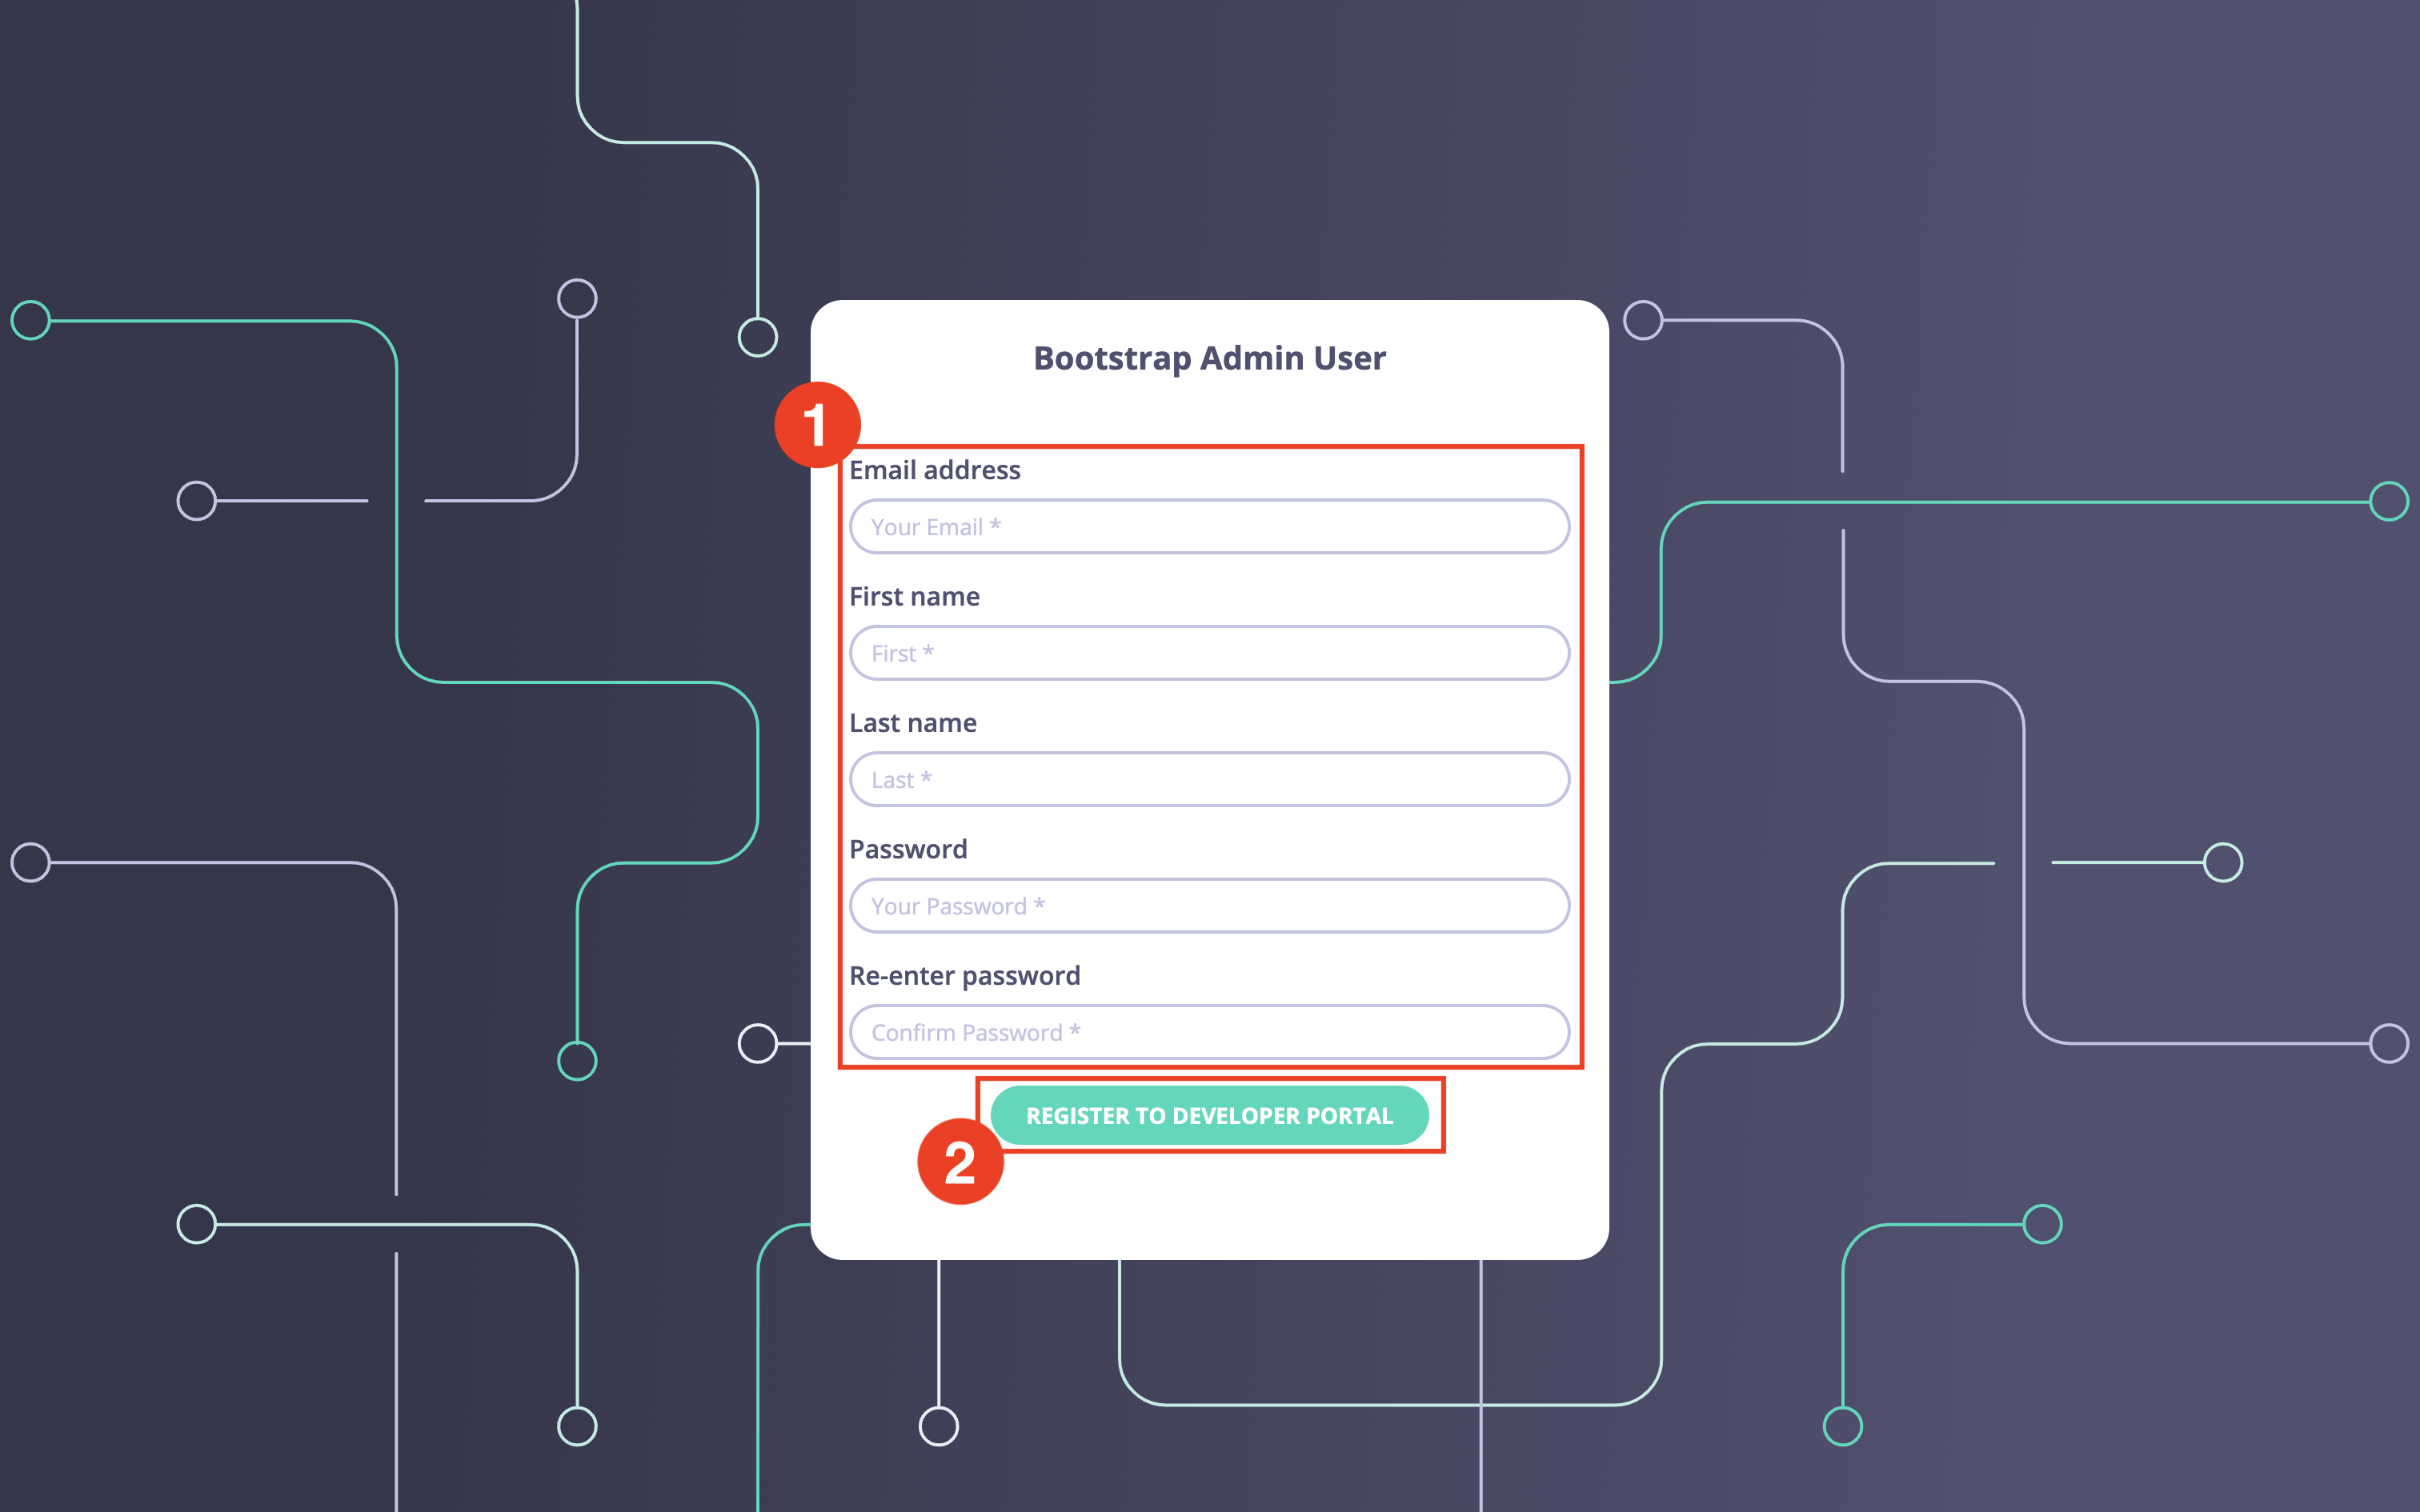 Enter the admin email, password, first name, and last name. Then click on the `Register to Developer portal` button to complete the bootstrapping process.
The bootstrap process should take no longer than a couple of seconds, so almost instantly the portal will display the following page, which confirms the successful bootstrap.
Enter the admin email, password, first name, and last name. Then click on the `Register to Developer portal` button to complete the bootstrapping process.
The bootstrap process should take no longer than a couple of seconds, so almost instantly the portal will display the following page, which confirms the successful bootstrap.
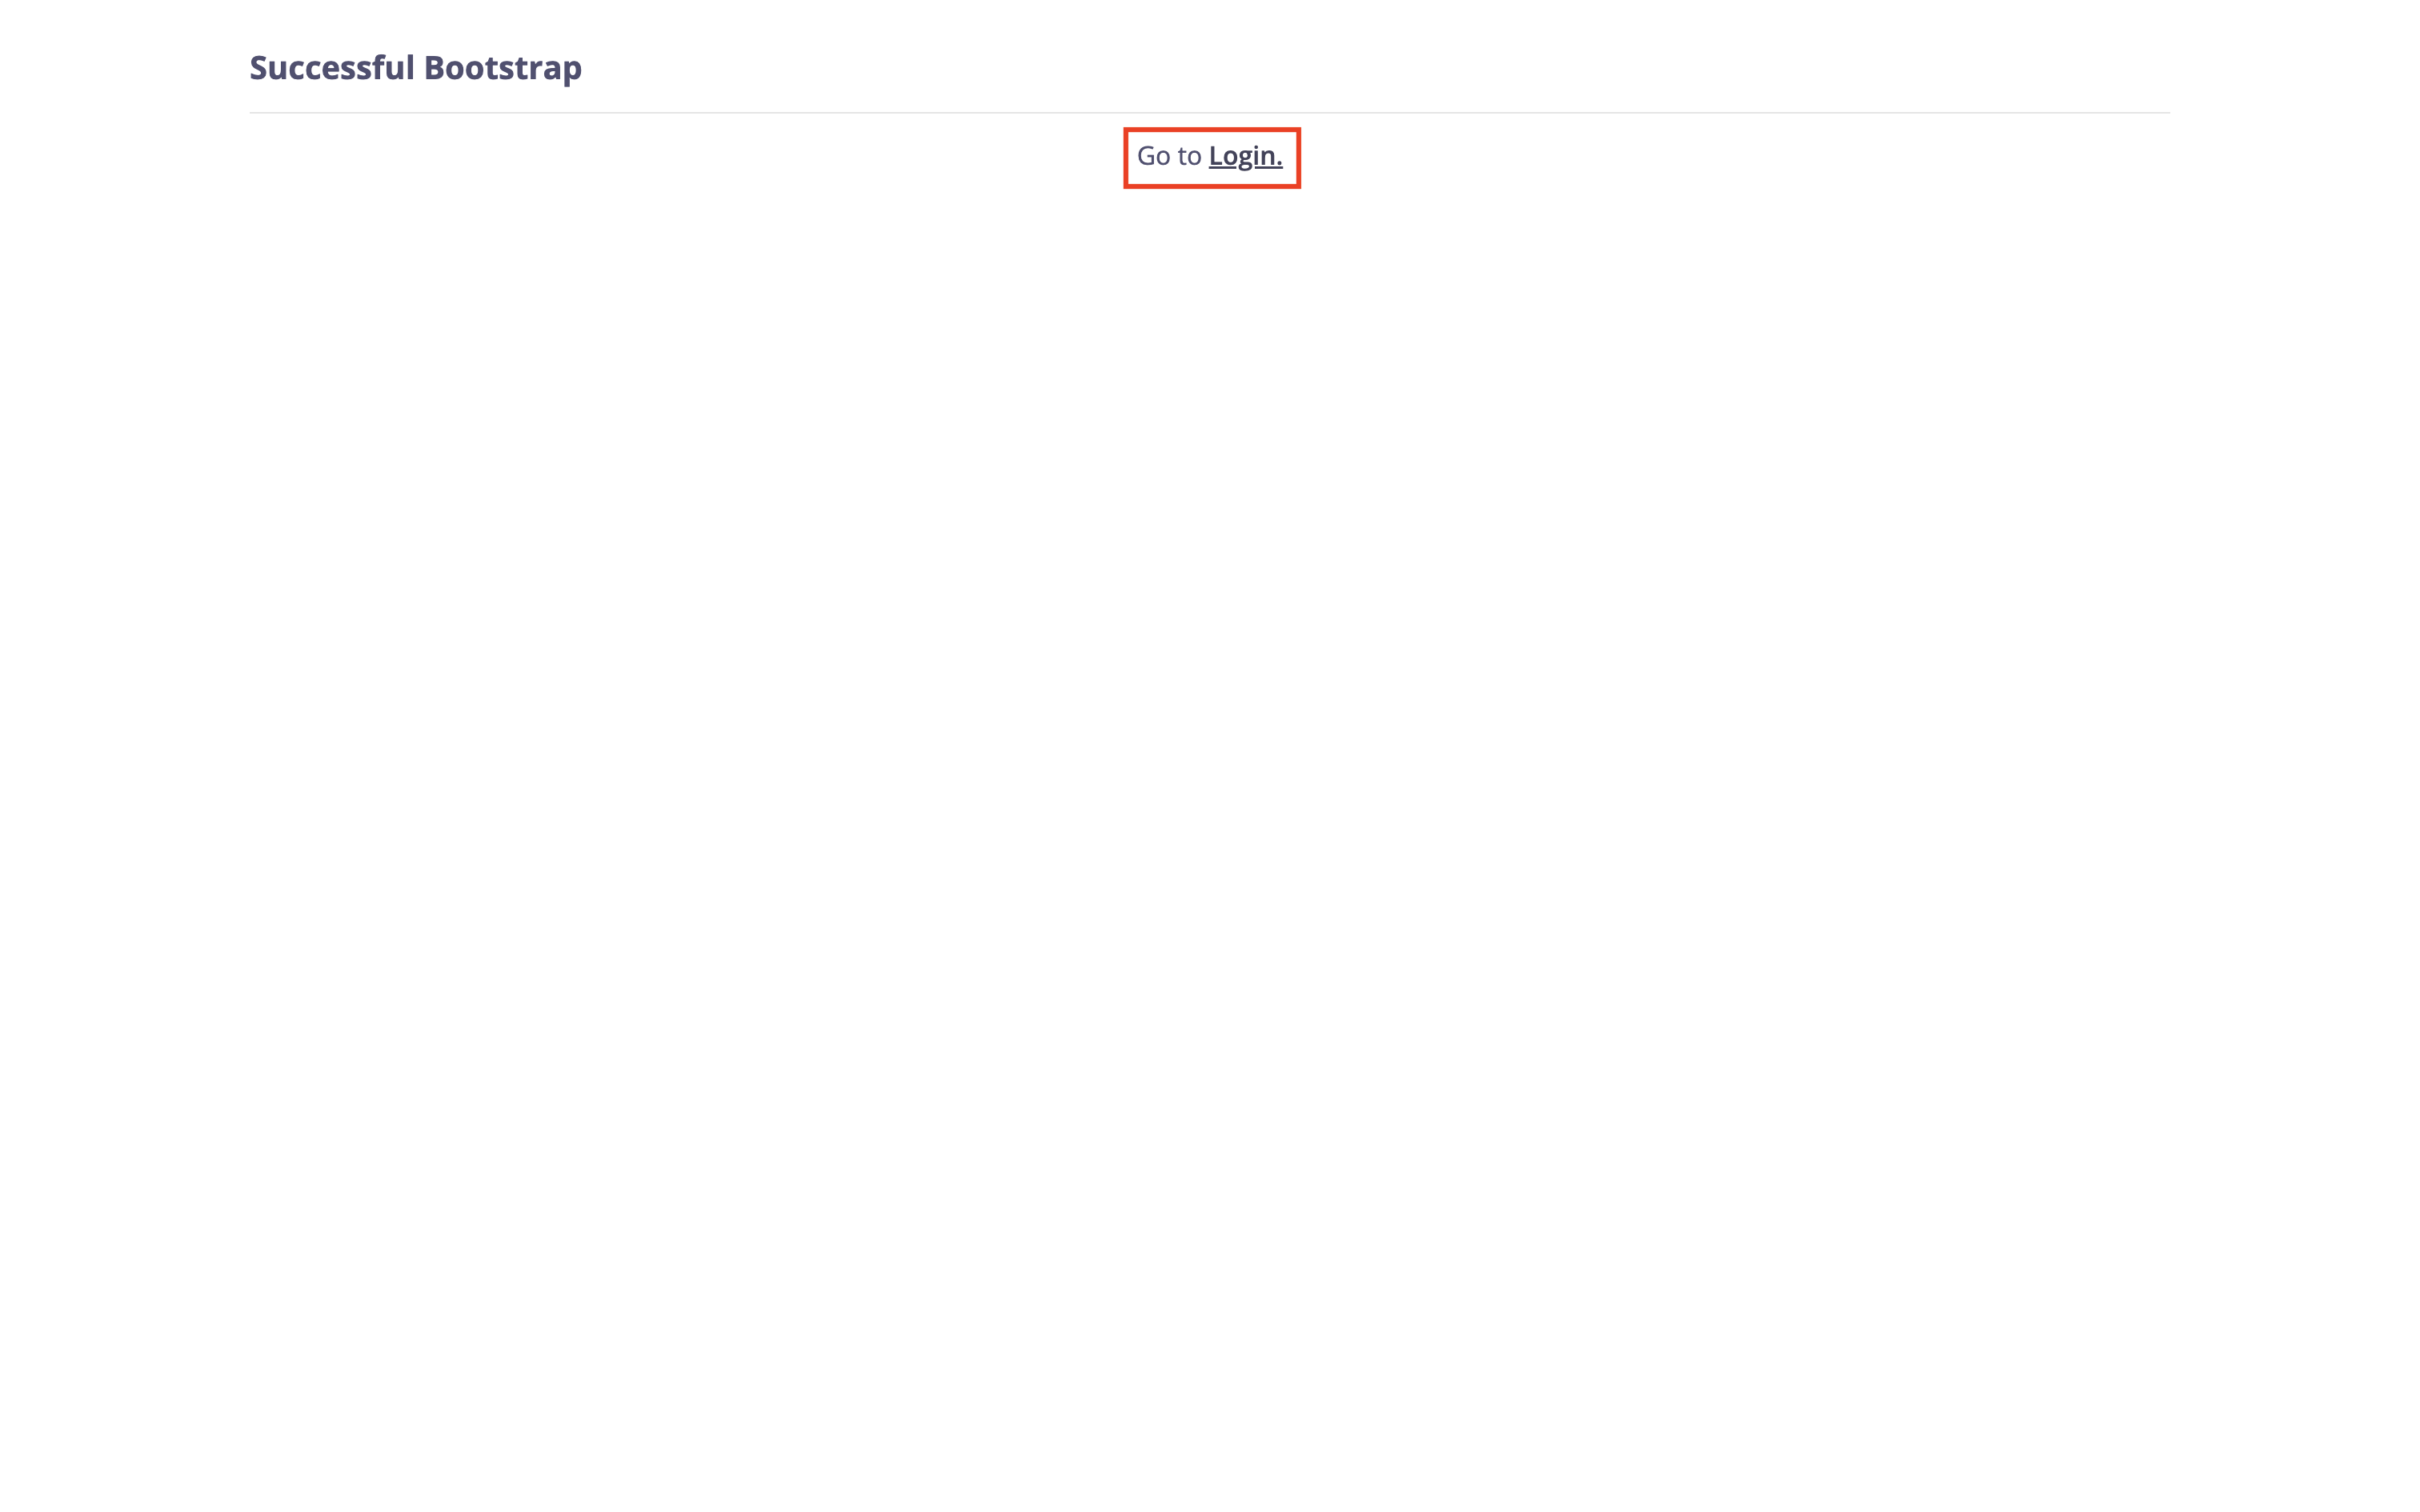 Click on the `Login` button to proceed to the login page, where you can use the newly created super admin credentials to log in to the portal.
### Bootstrapping the Portal via the API
The second approach to bootstrap the portal is through the bootstrap API, which allows you to programmatically bootstrap the portal.
To bootstrap the portal via an API call, call the bootstrap API:
```shell theme={null}
curl --location 'http://:/portal-api/bootstrap' \
--header 'Content-Type: application/json' \
--data-raw '{
"username":"super-admin@tyk.io",
"password": "tyk123",
"first_name":"John",
"last_name":"Doe"
}'
```
The bootstrap API accepts the following parameters:
* **username** - email of the super admin, it is also used as their login
* **password** - the super admin login password
* **first\_name** - first name of the super admin
* **last\_name** - first name of the super admin
The bootstrap process should take no longer than a couple of seconds. You will receive the following response as a confirmation of the successful bootstrapping:
```json theme={null}
{
"code": "OK",
"message": "Bootstrapped user successfully",
"data": {
"api_token": "eyJhbGciOiJIUzI1NiIsInR5cCI6IkpXVCJ9.eyJQcm92aWRlciI6Im5vbmUiLCJVc2VySUQiOiIkMmEkMTAkREF0czZhZTY0ZEZXSkFTbnR2OS8yLmMxcS91VTFhbTRGYk53RVJhTE1Ed2c0NHFsSXJnMkMifQ.ExTNl6UvjQA6WqrPE-7OkSNCBBixc2NGMnh3dnlk5Nw"
}
}
```
**Take a note of the api\_token field**
You will need this to call other Portal APIs.
### Login as the super admin
After you have bootstrapped the portal, either via the UI or the bootstrap API, you can use the super admin's login credentials to log in to the portal.
Open the portal UI in your browser and click on the 'Login' button to open the login page.
Click on the `Login` button to proceed to the login page, where you can use the newly created super admin credentials to log in to the portal.
### Bootstrapping the Portal via the API
The second approach to bootstrap the portal is through the bootstrap API, which allows you to programmatically bootstrap the portal.
To bootstrap the portal via an API call, call the bootstrap API:
```shell theme={null}
curl --location 'http://:/portal-api/bootstrap' \
--header 'Content-Type: application/json' \
--data-raw '{
"username":"super-admin@tyk.io",
"password": "tyk123",
"first_name":"John",
"last_name":"Doe"
}'
```
The bootstrap API accepts the following parameters:
* **username** - email of the super admin, it is also used as their login
* **password** - the super admin login password
* **first\_name** - first name of the super admin
* **last\_name** - first name of the super admin
The bootstrap process should take no longer than a couple of seconds. You will receive the following response as a confirmation of the successful bootstrapping:
```json theme={null}
{
"code": "OK",
"message": "Bootstrapped user successfully",
"data": {
"api_token": "eyJhbGciOiJIUzI1NiIsInR5cCI6IkpXVCJ9.eyJQcm92aWRlciI6Im5vbmUiLCJVc2VySUQiOiIkMmEkMTAkREF0czZhZTY0ZEZXSkFTbnR2OS8yLmMxcS91VTFhbTRGYk53RVJhTE1Ed2c0NHFsSXJnMkMifQ.ExTNl6UvjQA6WqrPE-7OkSNCBBixc2NGMnh3dnlk5Nw"
}
}
```
**Take a note of the api\_token field**
You will need this to call other Portal APIs.
### Login as the super admin
After you have bootstrapped the portal, either via the UI or the bootstrap API, you can use the super admin's login credentials to log in to the portal.
Open the portal UI in your browser and click on the 'Login' button to open the login page.
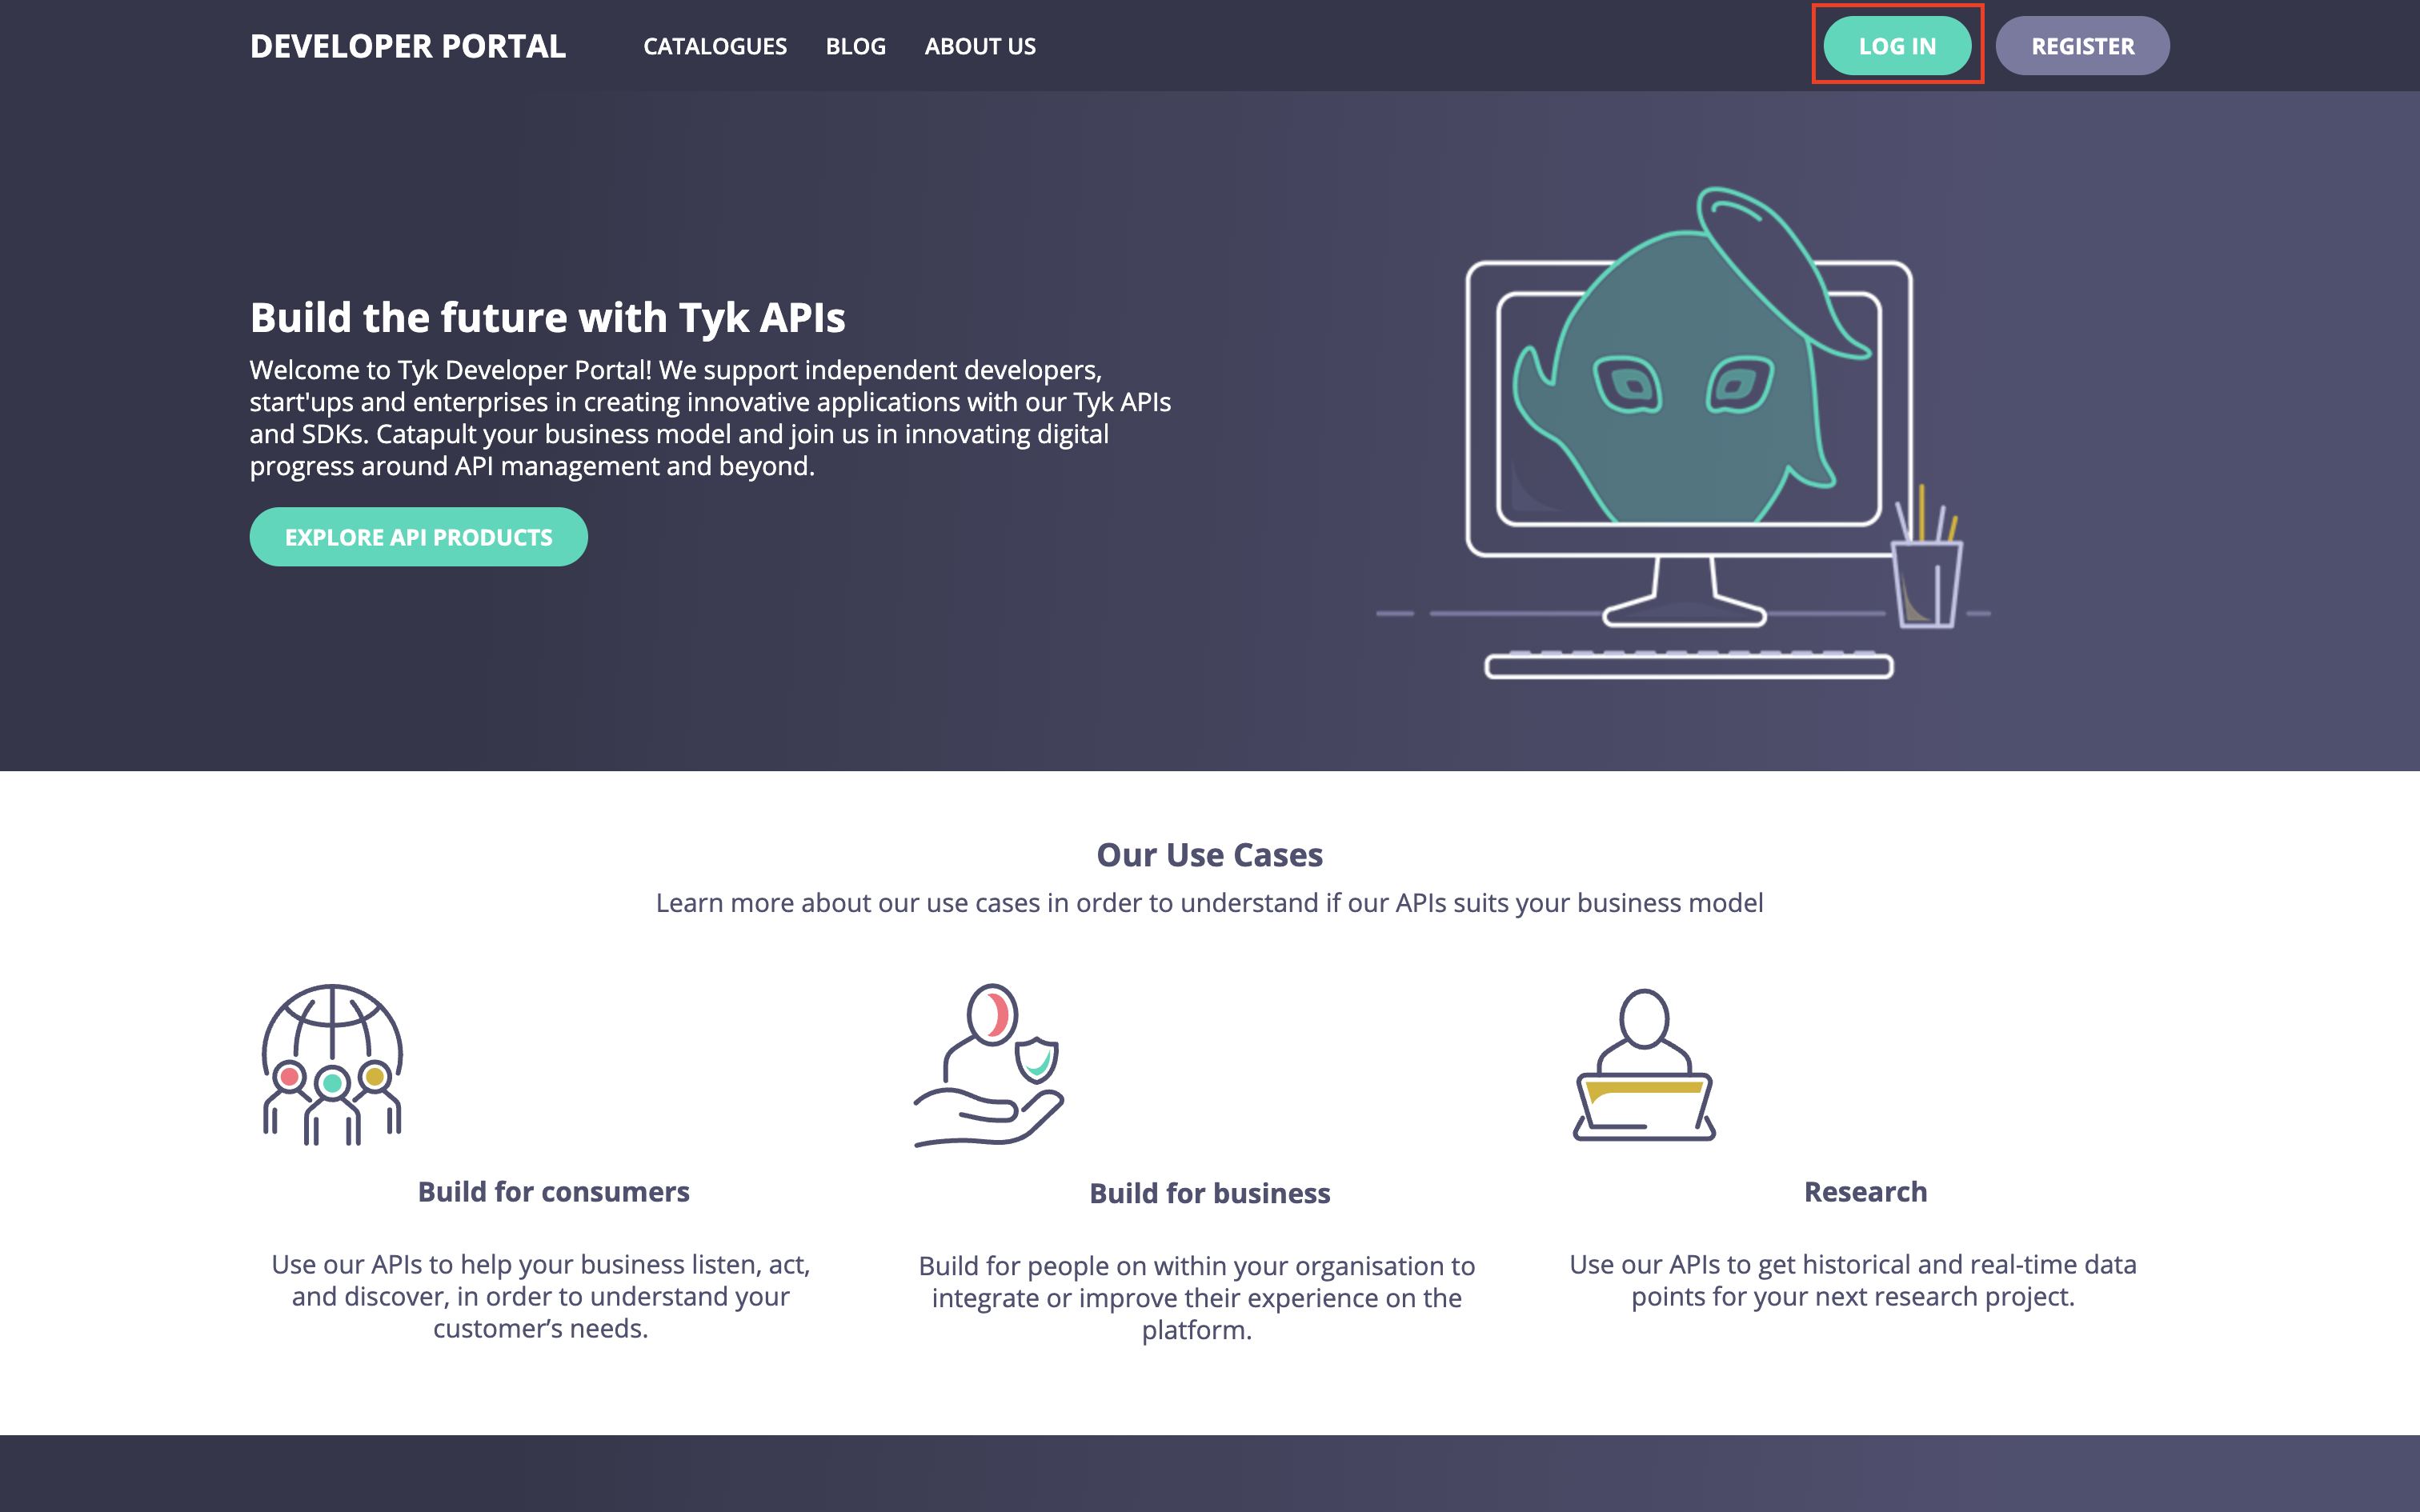
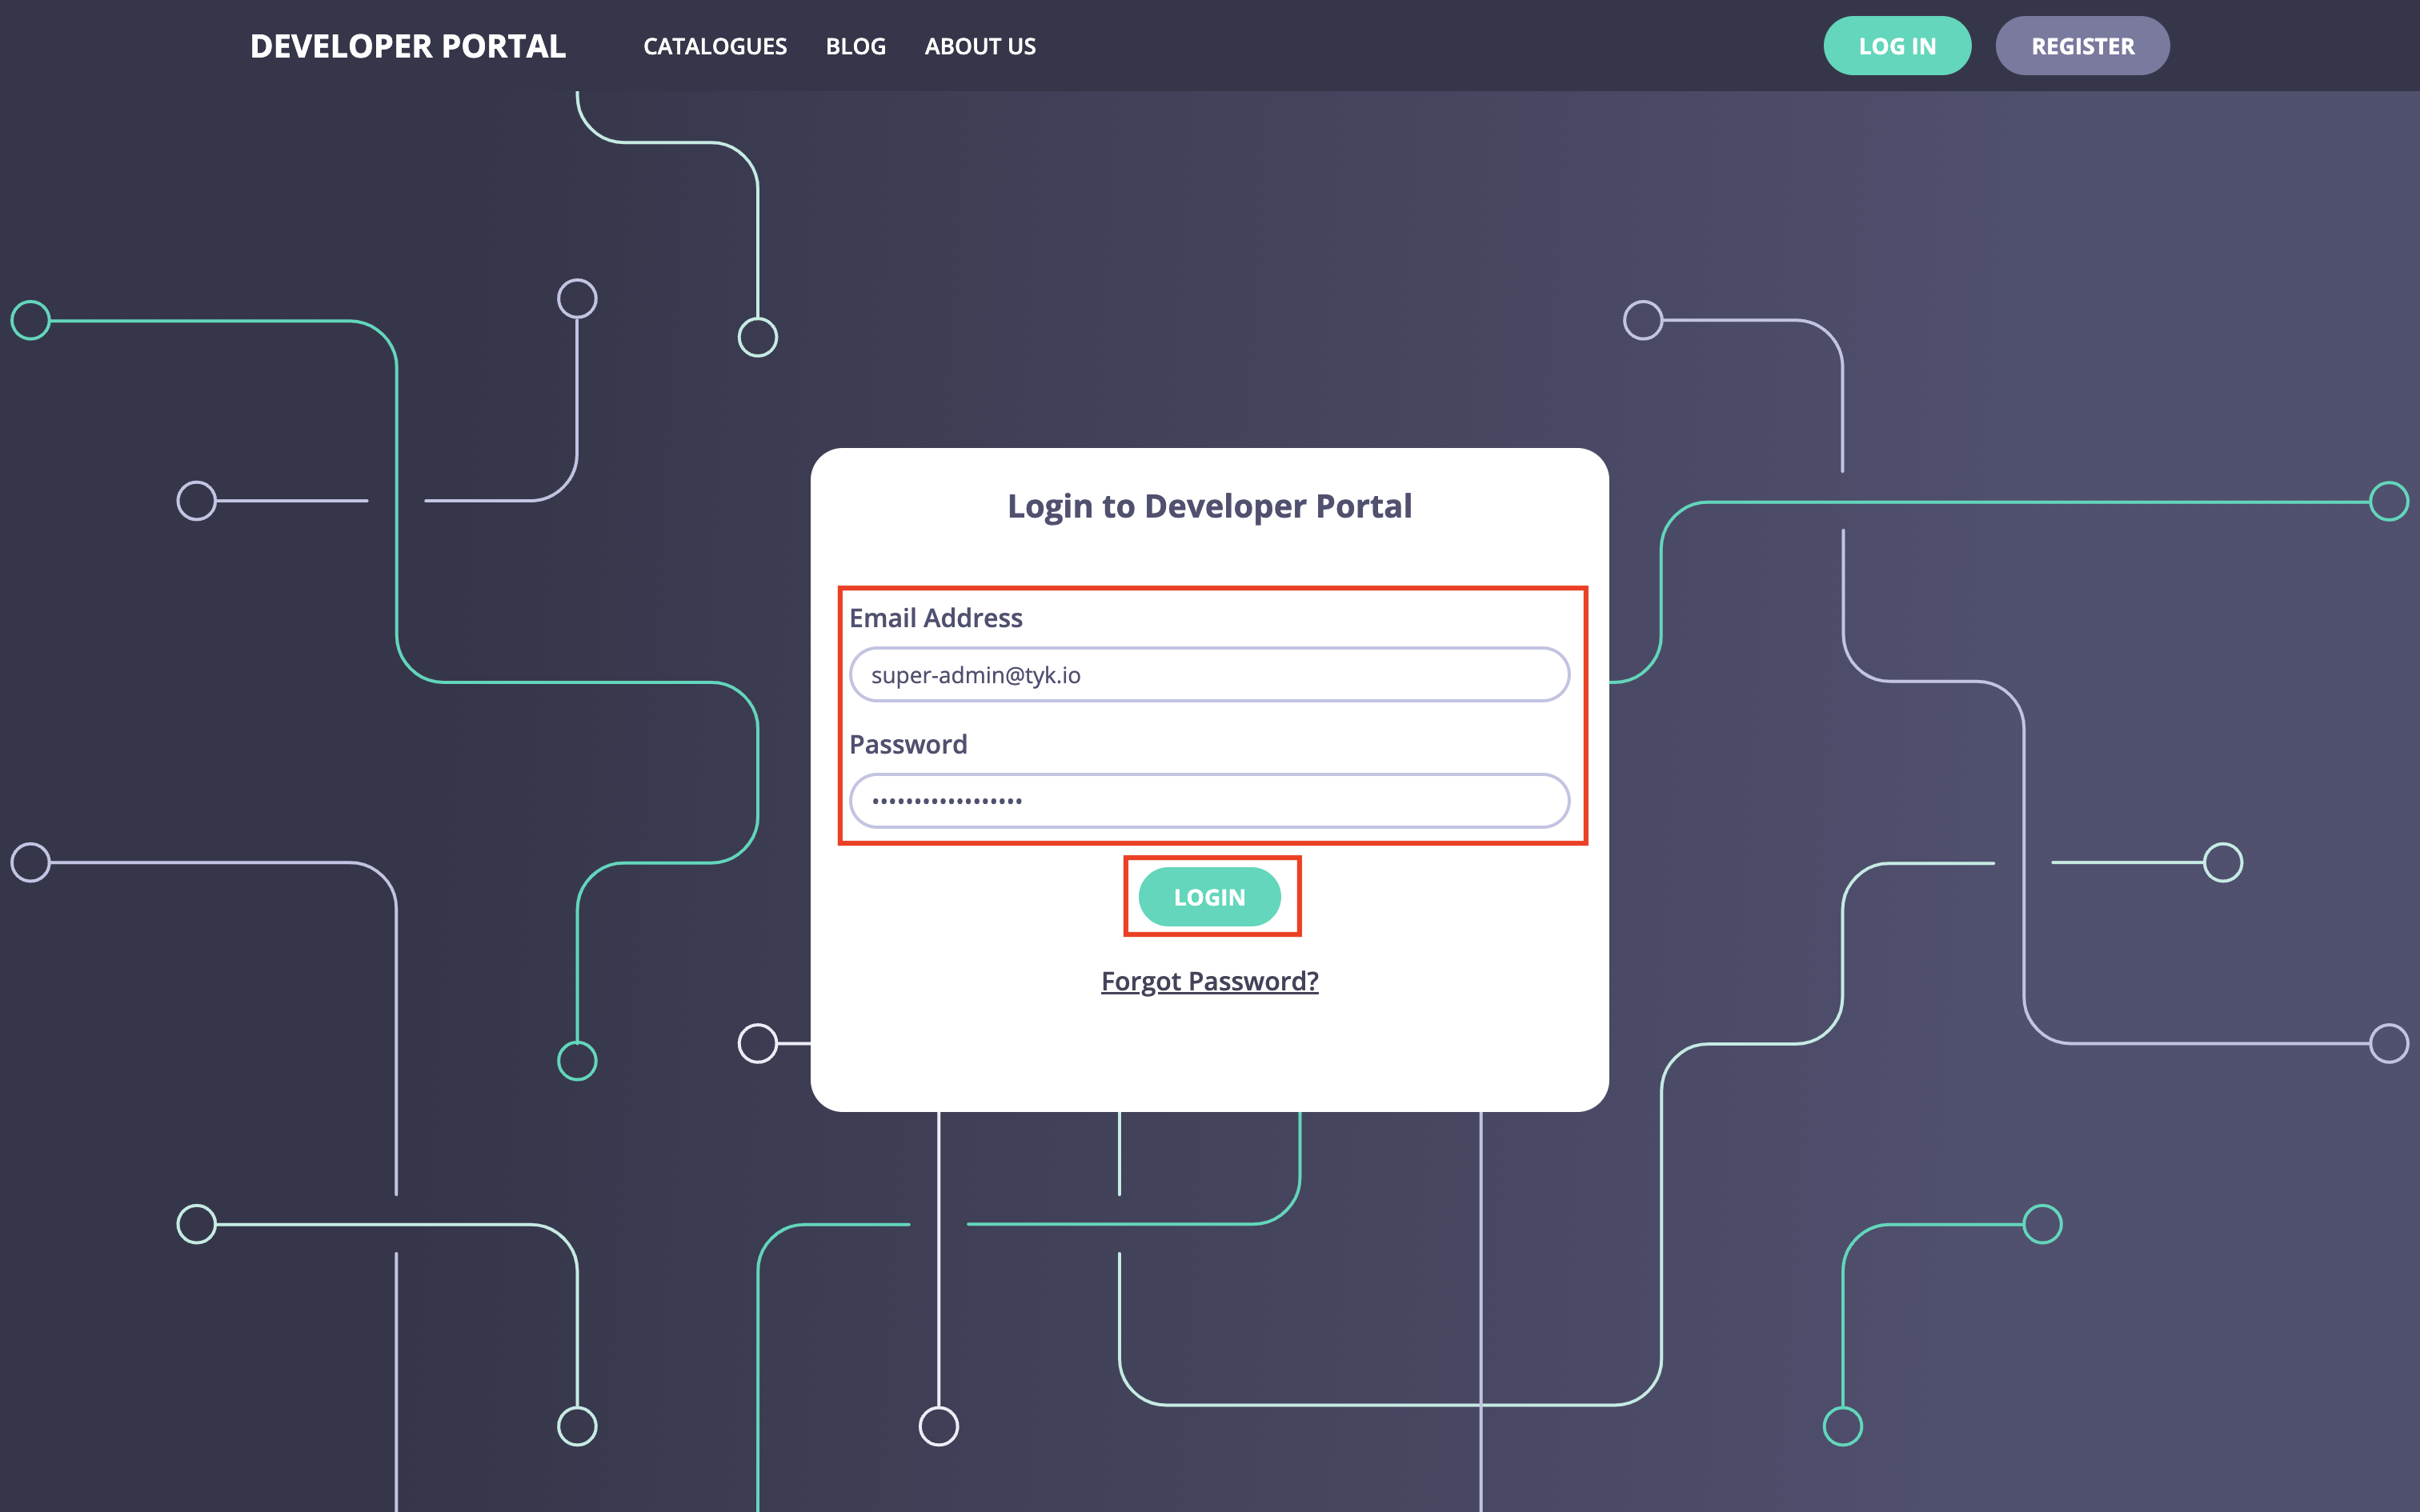
On the login page, enter the super admin credentials for logging into the portal:
**Congratulations!**
Now you have a fully functional portal.
You can continue configuring and customizing it either via the UI or the portal admin API. Please refer to [the Tyk Developer Portal Concepts section](/portal/overview/concepts) for further guidance.
## Configuration Reference
For detailed configuration options, see the [Environment Variables Reference](/product-stack/tyk-enterprise-developer-portal/deploy/configuration).
## API Documentation
The Developer Portal exposes an [API](/product-stack/tyk-enterprise-developer-portal/api-documentation/tyk-edp-api) for programmatic management.