> ## Documentation Index
> Fetch the complete documentation index at: https://tyk.io/docs/llms.txt
> Use this file to discover all available pages before exploring further.
# Customize Sign Up Form in Developer Portal
> How to customize sign up form in developer portal
In this section, you will learn how to customize the sign-up form for your API Consumers and extend the data stored in the user profile.
To achieve that, you will need to:
* Add a new attribute to the user profile and make it available in the sign-up form.
* Optionally, add a description and set other parameters that suit your requirements.
## Navigate to the Custom Attributes menu
To customize the sign-up form, you need to add new data attributes to the user model so that when a user profile is being created, those attributes will be recorded against the user profile.
To start customizing the user sign-up form, navigate to the **Custom attributes** menu and the select the **User** model. Currently, it is possible to extend only the user model. In future releases we will add the same capabilities to other models.
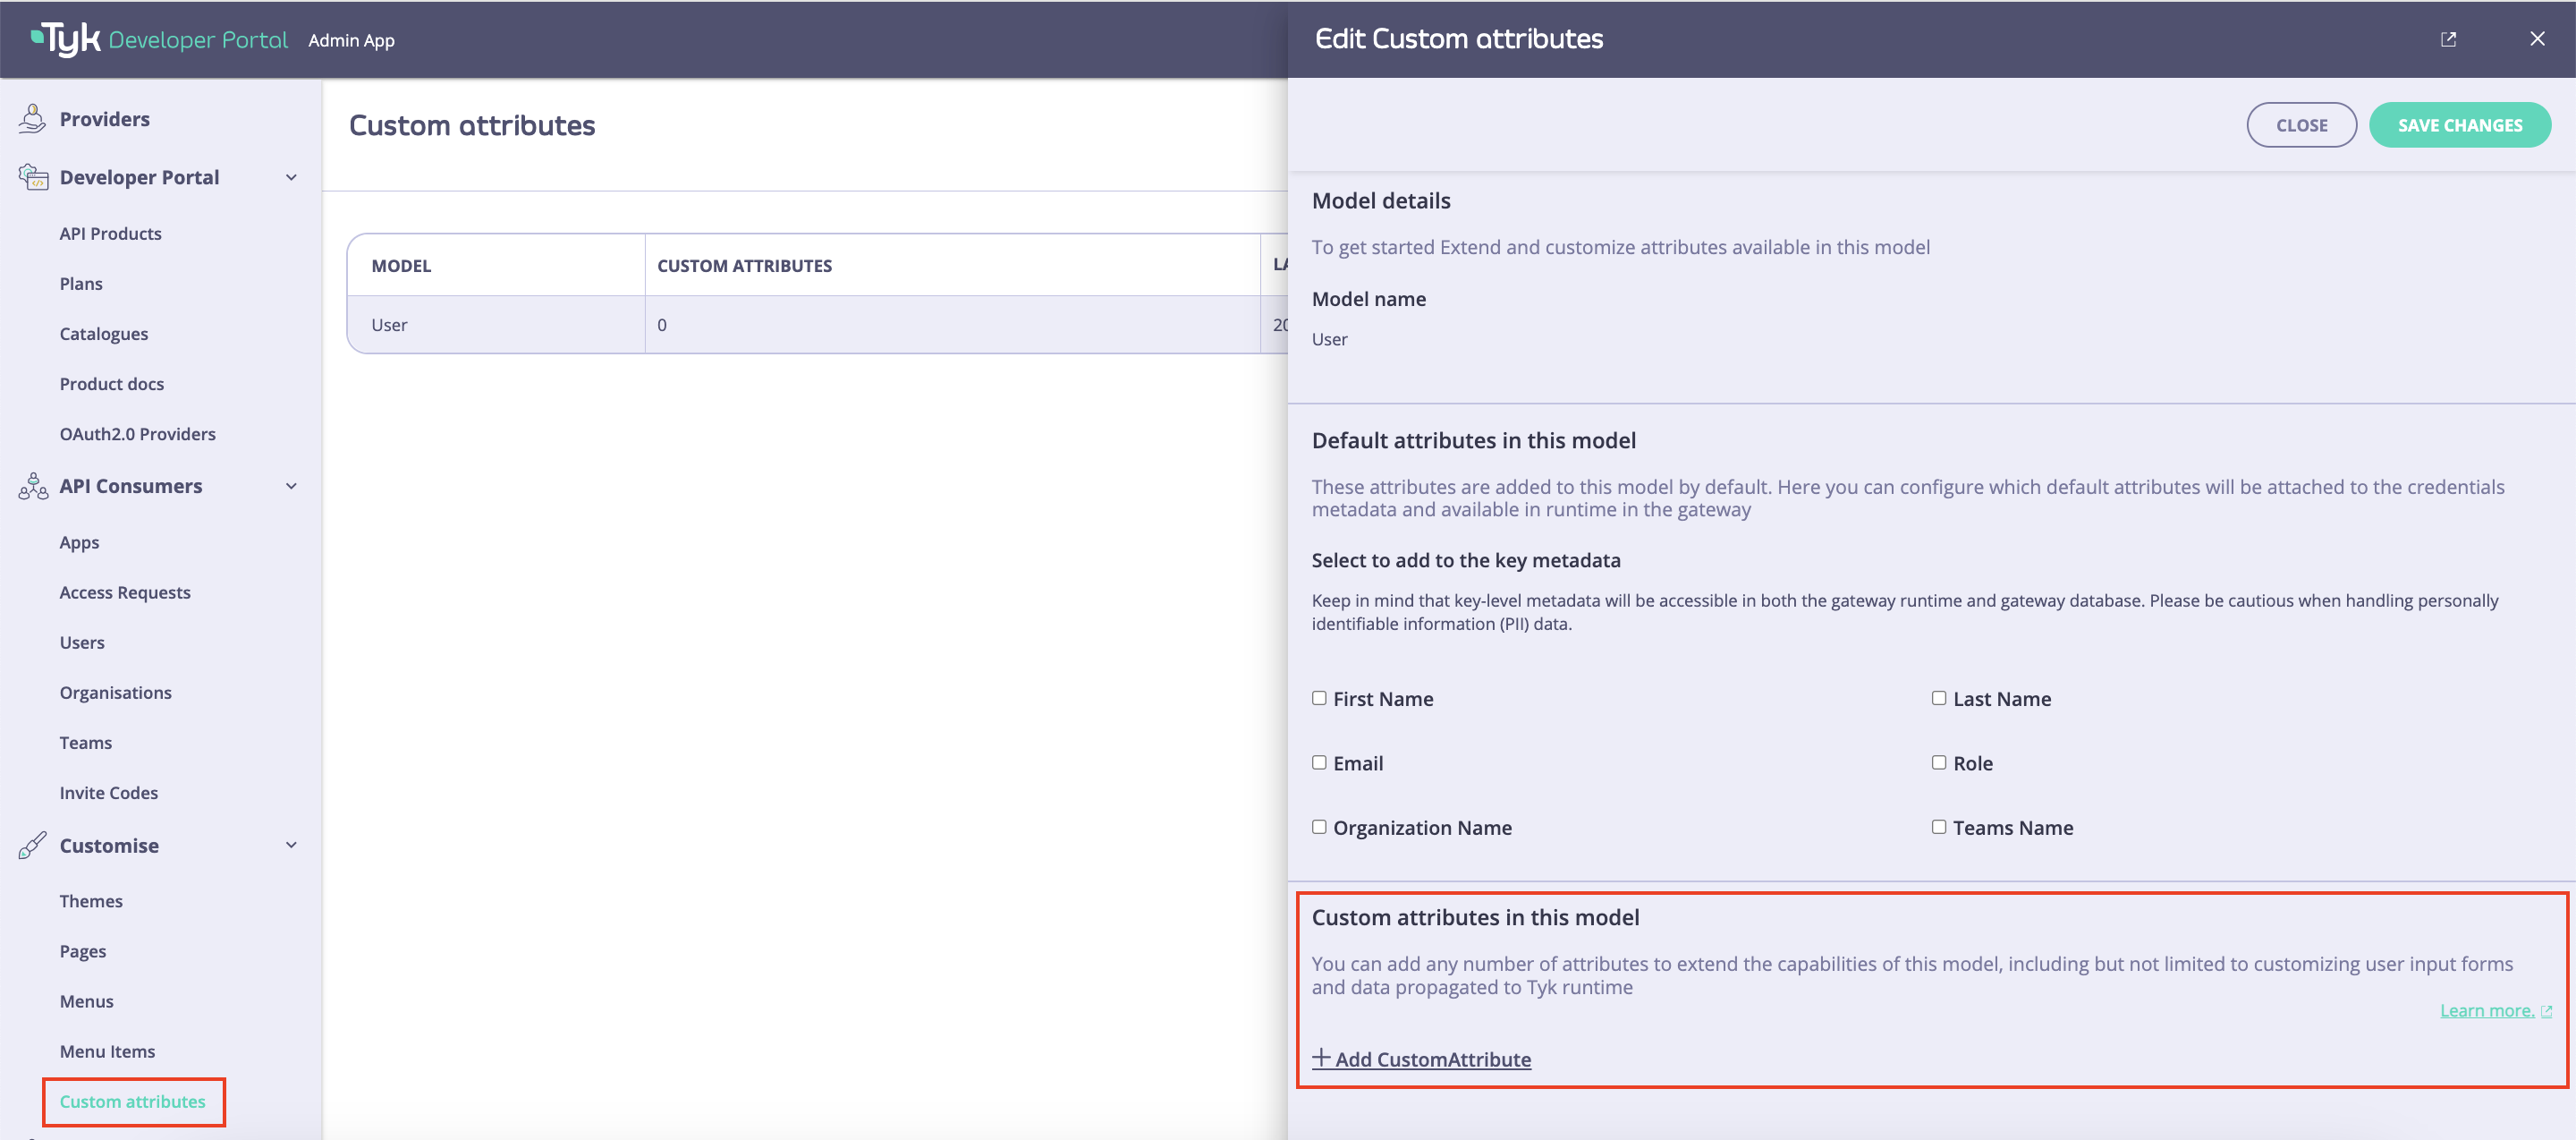 ## Add a new attribute to the user model
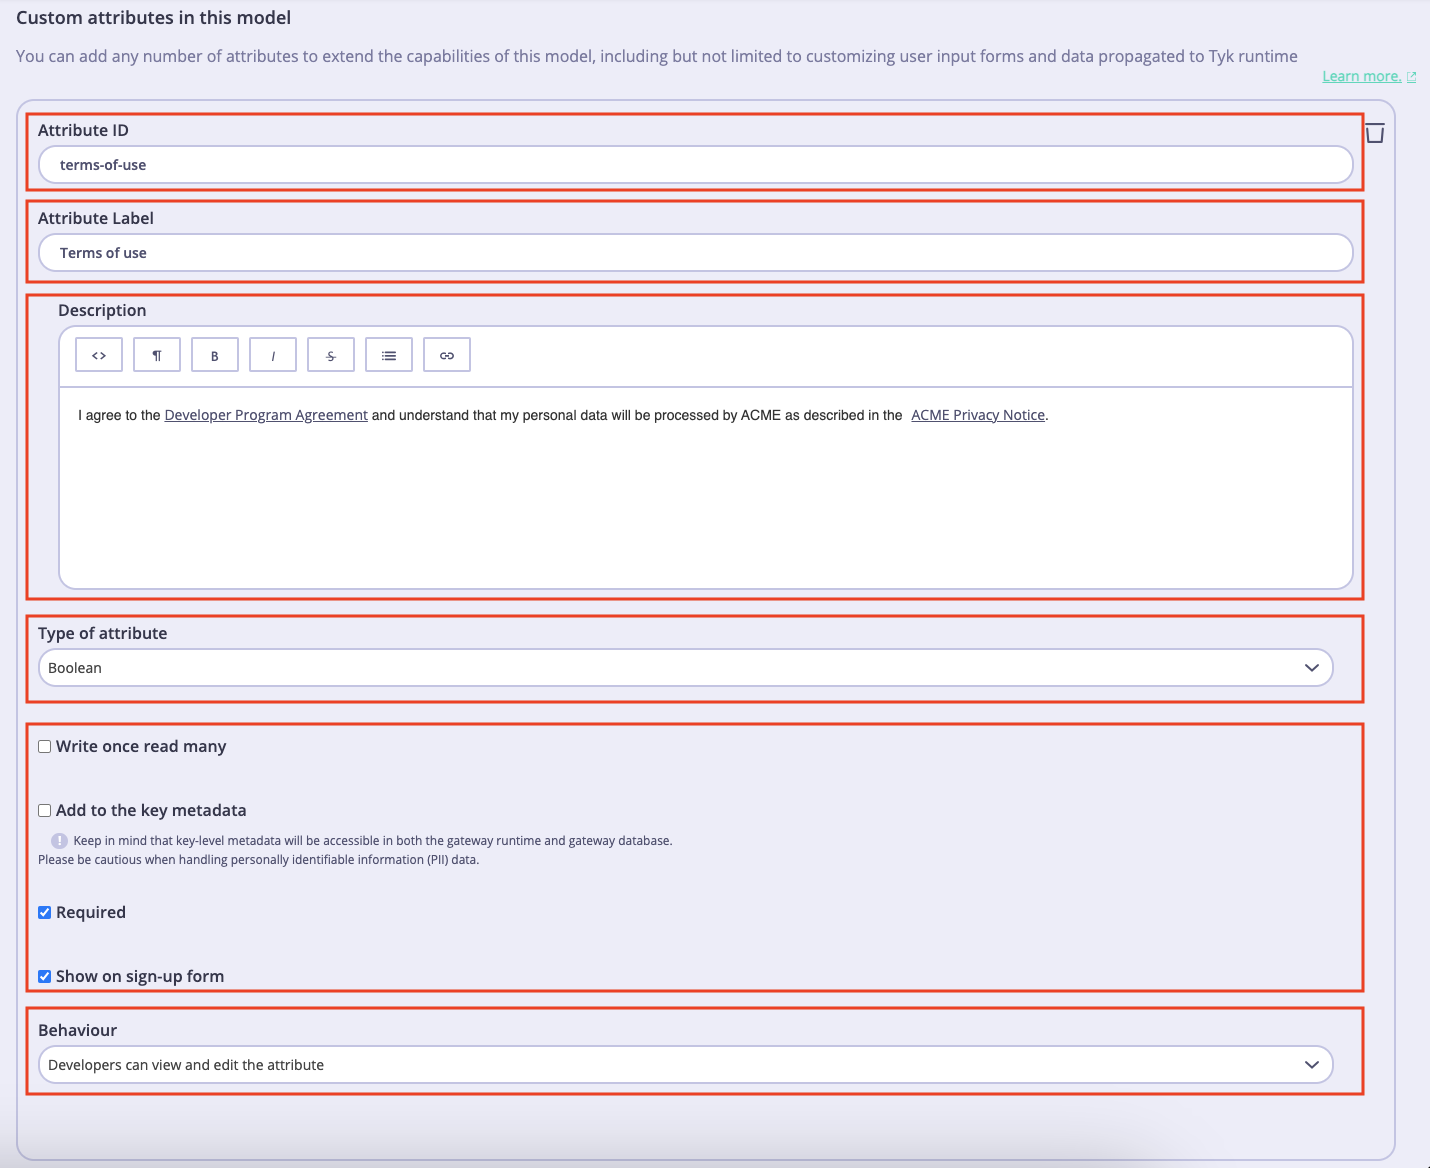
To add a new attribute to the user model, click on the **Add Custom attribute** button and then fill in properties of the new attribute:
* **Attribute ID**: A string that consists of letters (a-zA-Z), numbers (0-9), dashes, and underscores. This is used to reference the attribute in the [Admin APIs](/product-stack/tyk-enterprise-developer-portal/api-documentation/tyk-edp-api) screen.
* **Attribute Label**: The attribute's name that is displayed in the UI.
* **Description**: Explains the intended usage of this attribute. It is also displayed in the UI.
* **Type of attribute**: The type of data that can be stored in this attribute. You cannot change the value of this field once the attribute is created. The following data types are acceptable:
* Boolean (true or false).
* Dropdown (a list of values).
* String.
* Number.
* **Validation Reg Exp**: A regular expression that is used to validate the value of this field. It is available for the **String** data type only.
* **Enable validation**: Determines if the portal should apply the regular expression defined in the **Validation Reg Exp** to validate the value of this attribute when creating or updating a user profile. It is available for the **String** data type only.
* **Dropdown Values**: A list of values for the attribute. It is available for the **Dropdown** data type only.
* Fields that define the attribute's behavior:
* **Write once read many**: Determines if the value of the attribute can be changed after a user profile is created.
* **Add to the key metadata**: Determines if the value of the attribute should be added to the metadata of Auth keys or OAuth2.0 clients when a user creates them. Keep in mind that credential-level metadata will be accessible in both the gateway runtime and gateway database. Please be cautious when handling personally identifiable information (PII) data.
* **Required**: Determines if this attribute is required to create a user profile.
* **Show on sign-up form**: Determines if this attribute should be visible in the sing-up form.
* **Behavior**: Determines if developers can view or edit this attribute. Possible values are:
* Developers can view and edit the attribute.
* Developers can only view the attribute.
* Developers cannot see the attribute.
For the purpose of this guide, make sure to tick the **Required** and **Show on sign-up form** checkboxes and select the **Developers can only view the attribute** option.
## Add a new attribute to the user model
To add a new attribute to the user model, click on the **Add Custom attribute** button and then fill in properties of the new attribute:
* **Attribute ID**: A string that consists of letters (a-zA-Z), numbers (0-9), dashes, and underscores. This is used to reference the attribute in the [Admin APIs](/product-stack/tyk-enterprise-developer-portal/api-documentation/tyk-edp-api) screen.
* **Attribute Label**: The attribute's name that is displayed in the UI.
* **Description**: Explains the intended usage of this attribute. It is also displayed in the UI.
* **Type of attribute**: The type of data that can be stored in this attribute. You cannot change the value of this field once the attribute is created. The following data types are acceptable:
* Boolean (true or false).
* Dropdown (a list of values).
* String.
* Number.
* **Validation Reg Exp**: A regular expression that is used to validate the value of this field. It is available for the **String** data type only.
* **Enable validation**: Determines if the portal should apply the regular expression defined in the **Validation Reg Exp** to validate the value of this attribute when creating or updating a user profile. It is available for the **String** data type only.
* **Dropdown Values**: A list of values for the attribute. It is available for the **Dropdown** data type only.
* Fields that define the attribute's behavior:
* **Write once read many**: Determines if the value of the attribute can be changed after a user profile is created.
* **Add to the key metadata**: Determines if the value of the attribute should be added to the metadata of Auth keys or OAuth2.0 clients when a user creates them. Keep in mind that credential-level metadata will be accessible in both the gateway runtime and gateway database. Please be cautious when handling personally identifiable information (PII) data.
* **Required**: Determines if this attribute is required to create a user profile.
* **Show on sign-up form**: Determines if this attribute should be visible in the sing-up form.
* **Behavior**: Determines if developers can view or edit this attribute. Possible values are:
* Developers can view and edit the attribute.
* Developers can only view the attribute.
* Developers cannot see the attribute.
For the purpose of this guide, make sure to tick the **Required** and **Show on sign-up form** checkboxes and select the **Developers can only view the attribute** option.
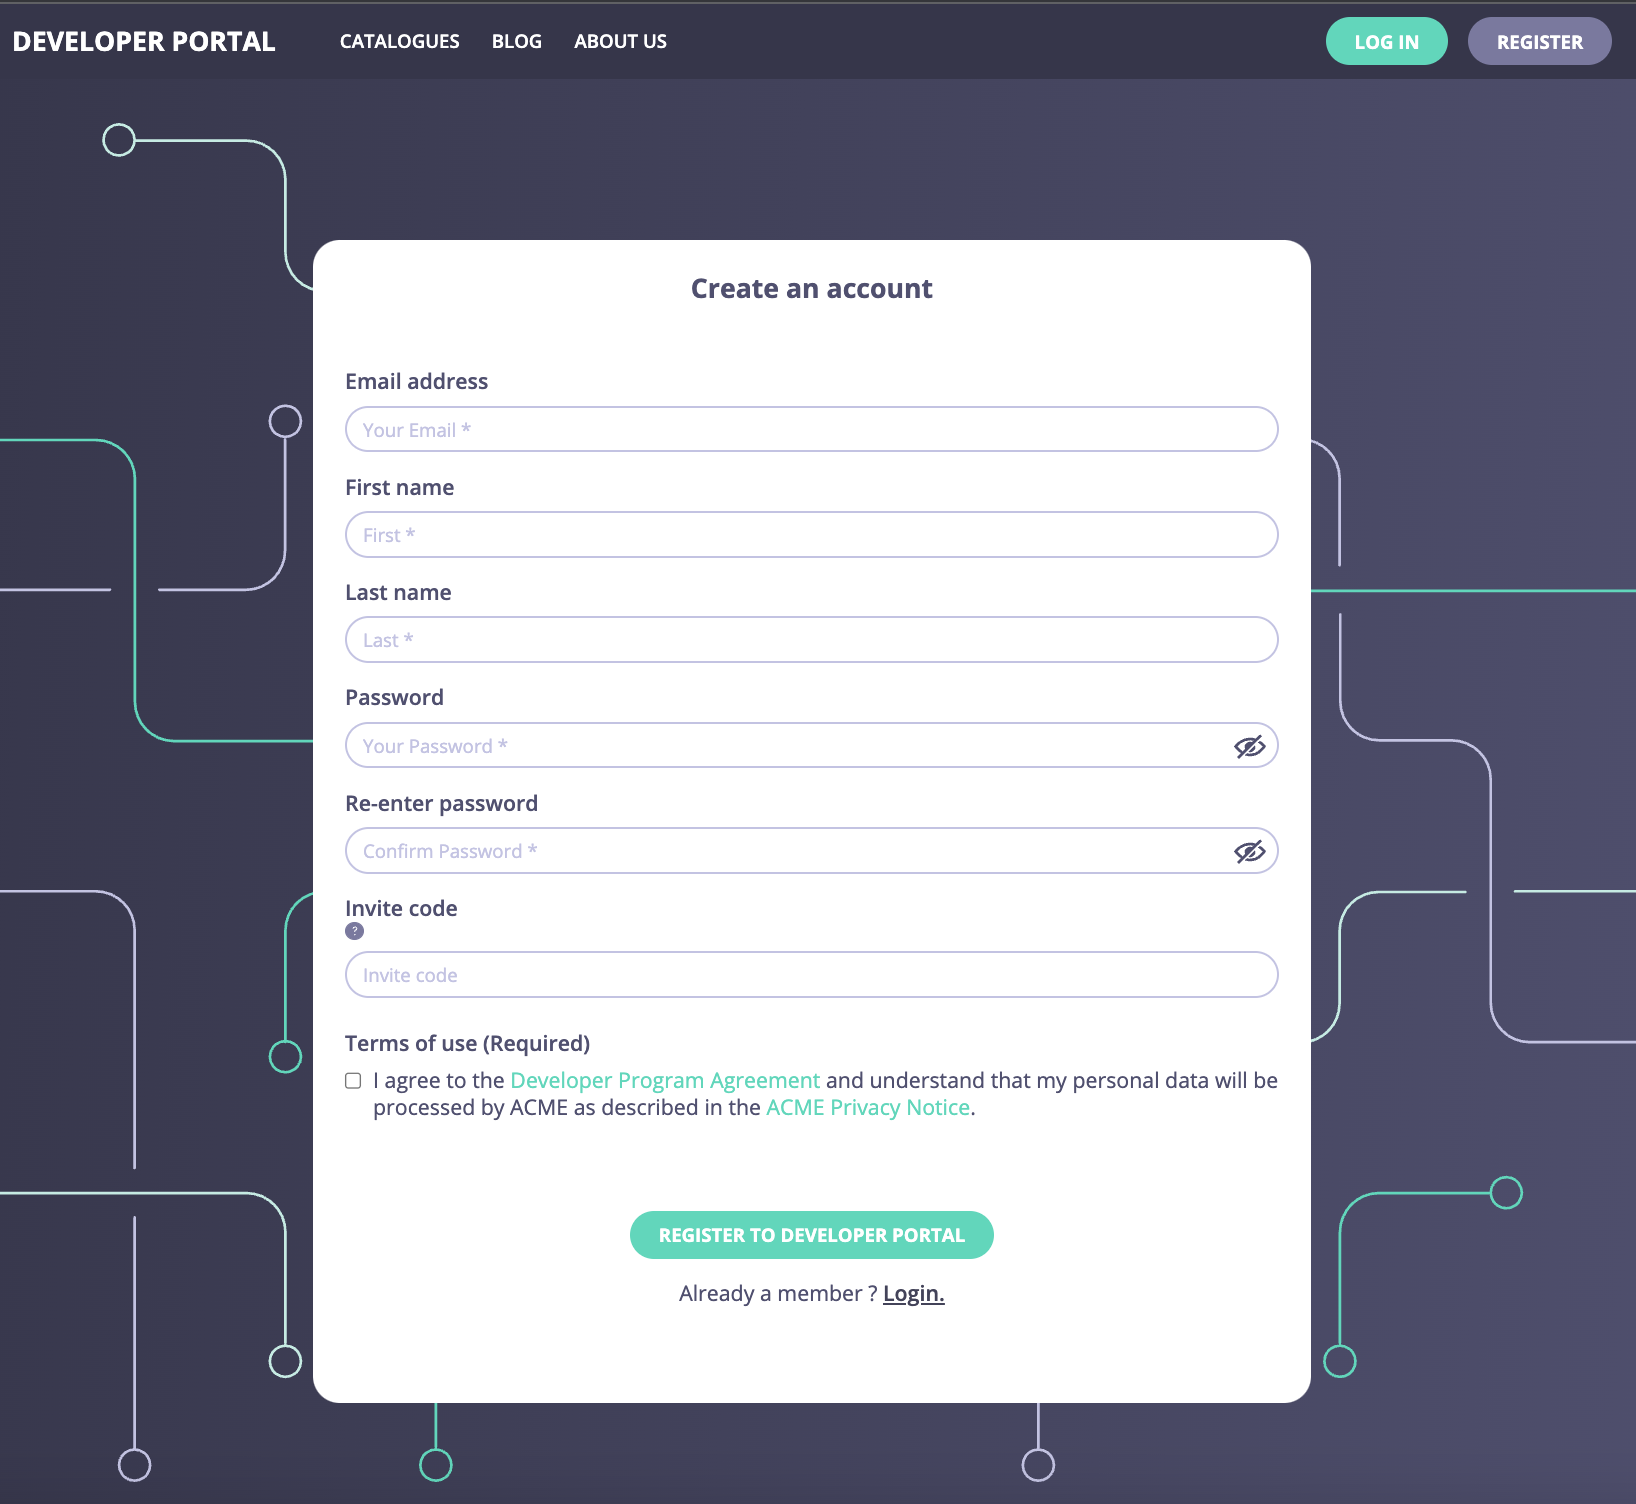
 The new attribute will be added to the user sign-up form, once you have created a new custom attribute and saved changes to the user model by clicking on the **Save** button.