Introduction
Tyk Dashboard provides you with the ability to manage Users, Teams and Permissions enabling organizations to maintain robust control over access and visibility. These capabilities empower teams to manage large-scale API portfolios, mitigate risks of unauthorized access, and reduce operational complexity. In this section, we delve into the following key topics:- Managing Users: Streamlining user administration by creating, updating, and deactivating accounts within the Tyk Dashboard using both the UI and API.
- Managing User Permissions: Configuring and enforcing role-based access control for users within the Tyk Dashboard, using both the API and UI.
- Managing User Groups/Teams: Organizing users into groups or teams to simplify role assignment, permissions management, and collaborative workflows within the Tyk Dashboard.
- Managing Passwords and Policy: Establishing and enforcing password policies, including complexity and expiration settings, to secure user accounts.
- Configuring API Ownership: Applying role-based access control to APIs to govern visibility and manageability for specific teams or users.
- Managing Users across Multiple Tyk Organizations: Administering user access and roles across multiple organizations, ensuring consistent and secure management in multi-tenant setups.
- Single Sign-On: Integrating and configuring Single Sign-On (SSO) solutions to streamline authentication and enhance security across the Tyk Dashboard.
The availability of some features described in this section depends on your license.
For further information, please check our price comparison or consult our sales and expert engineers:
For further information, please check our price comparison or consult our sales and expert engineers:
Understanding “User” in Tyk
In the context of Tyk, a User refers to an individual responsible for managing, configuring, and maintaining the Tyk API Gateway and its related components. These users interact with the Tyk Dashboard and API to control various aspects such as API management, user permissions, security policies, and organizational settings. This term does not refer to end-users or consumers of the APIs managed through Tyk but specifically to administrators and developers operating the Tyk ecosystem.Initial Admin User Creation
When you start the Tyk Dashboard the first time, the bootstrap process creates an initial “user” for you with admin permissions, which allows them access to control and configure everything in the Dashboard (via the UI or Tyk Dashboard API).Manage Tyk Dashboard Users
Dashboard users have twofold access to the dashboard: they can access both the Dashboard API and the dashboard itself, it is possible to generate users that have read-only access to certain sections of the dashboard and the underlying API. Dashboard users are not the same as developer portal users (a.k.a. developers). The credentials are stored independently and have different mechanics relating to registration, management and access. For example, it is not possible to log into the developer portal using a dashboard account.Using Dashboard UI
To create a dashboard user from the GUI:-
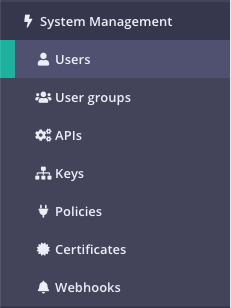
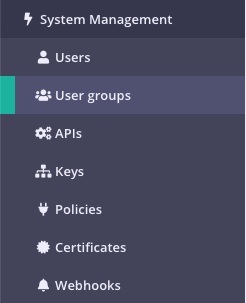
Select “Users” from the “System Management” section
-
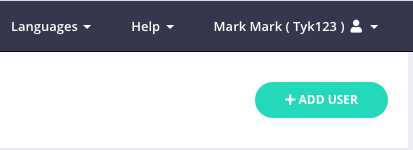
Click “ADD USER”
-
Add the user’s basic details
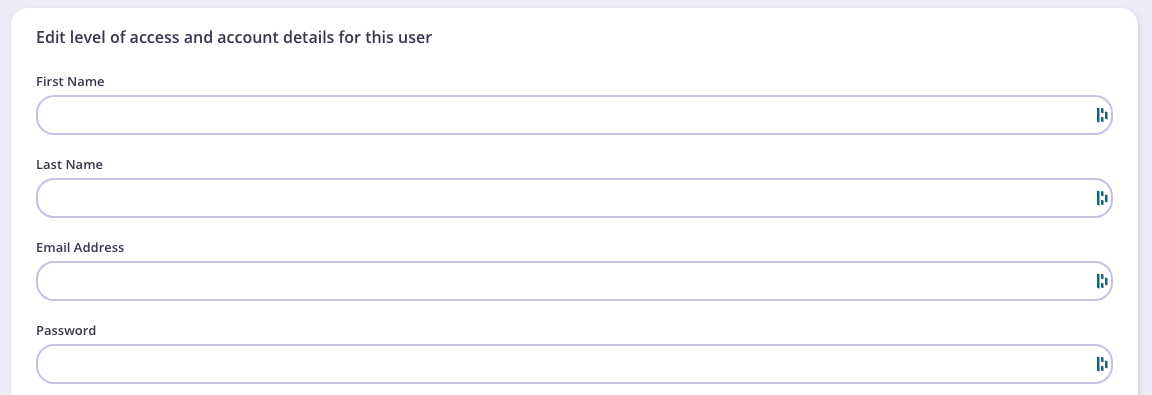
- First Name: The user’s first name.
- Last Name: The user’s last name.
- Email: The email address of the user, this will also be their login username.
- Password: The password to assign to the user, this will automatically be hashed and salted before storing in the database. NOTE you need to inform the user about the password you have created for them.
- Active: Must be true for the user to have access to the dashboard or the dashboard API.
-
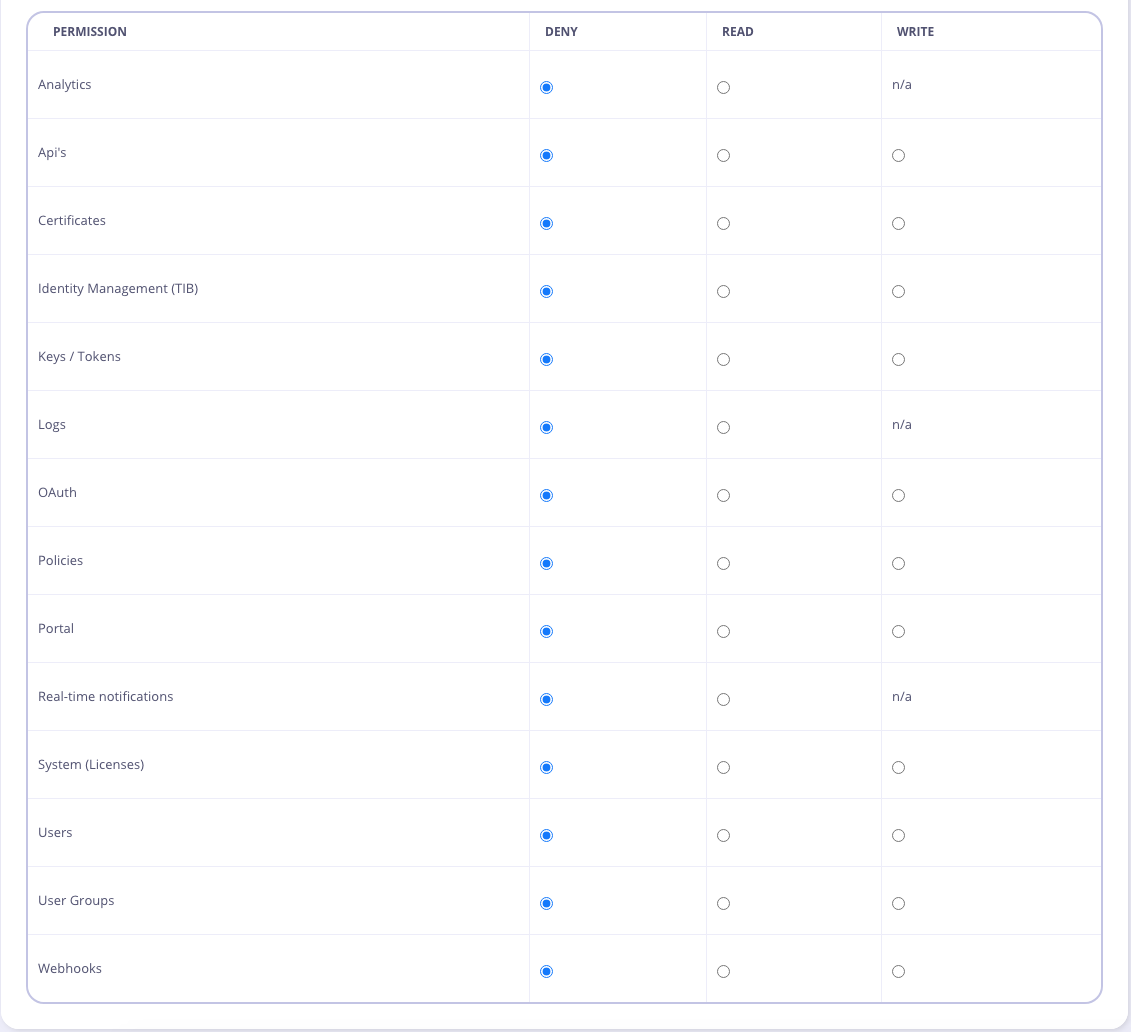
Set the user permissions
-
Click “Save”
Using Dashboard API
To authenticate requests to the Tyk Dashboard API, you will need to provide an API Key in theAuthorization header.
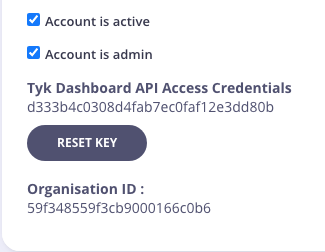
This is your Tyk Dashboard API Access Credentials, which can be found on the user detail page:
POST /api/users endpoint, for example:
Manage User Passwords
You can change your password in these circumstances:- If you have forgotten your password
- If you wish to change your password
Forgotten Your Password?
If you have forgotten your password, you can request a password reset email from the Dashboard Login screen: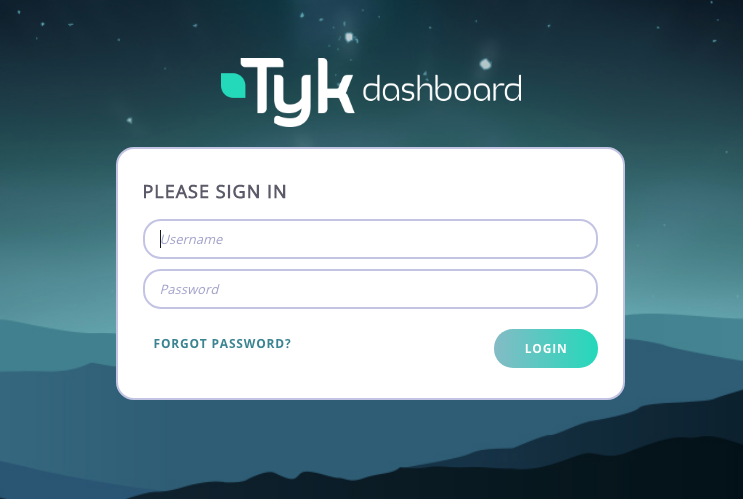
This link will only be valid for 1000 seconds
You will need to configure your outbound email settings to enable this feature.
You will need to configure your outbound email settings to enable this feature.
Change Your Password
If you wish to change your current password, from the System Management > Users screen, select Edit for your Username.You will not be able to change the password for other Dashboard users.

Manage Tyk Dashboard User Groups
Tyk has a flexible user permissions system that provides Role Based Access Control (RBAC) for your Tyk Dashboard. When you have a large number of users and teams with different access requirements, instead of setting permissions per user, you can create a user group and configure the permissions for all users in the group. For example, if you only want certain users to access the Tyk Logs, you could create a “Logs Users” user group, then give those users the Logs Read permission and add them to your Logs Users group. Note that a user can only belong to one group. You must have either admin or user groups permission to be able to modify user groups. This also works for Single Sign-On (SSO), as you can specify the user group ID when setting up SSO.The availability of this feature depends on your license.
For further information, please check our price comparison or consult our sales and expert engineers:
For further information, please check our price comparison or consult our sales and expert engineers:
Using Dashboard UI
-
Select “User Groups” from the “System Management” section
-
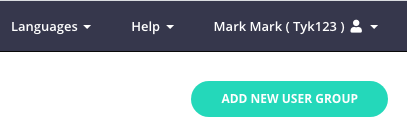
Click “ADD NEW USER GROUP”
-
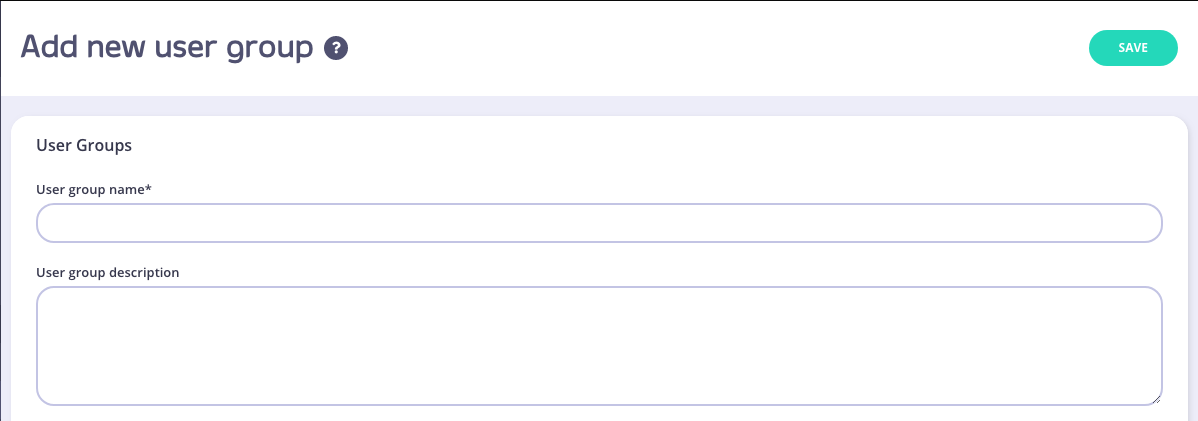
Add User Group Name
Enter the name for your User Group, and an optional Description.
-
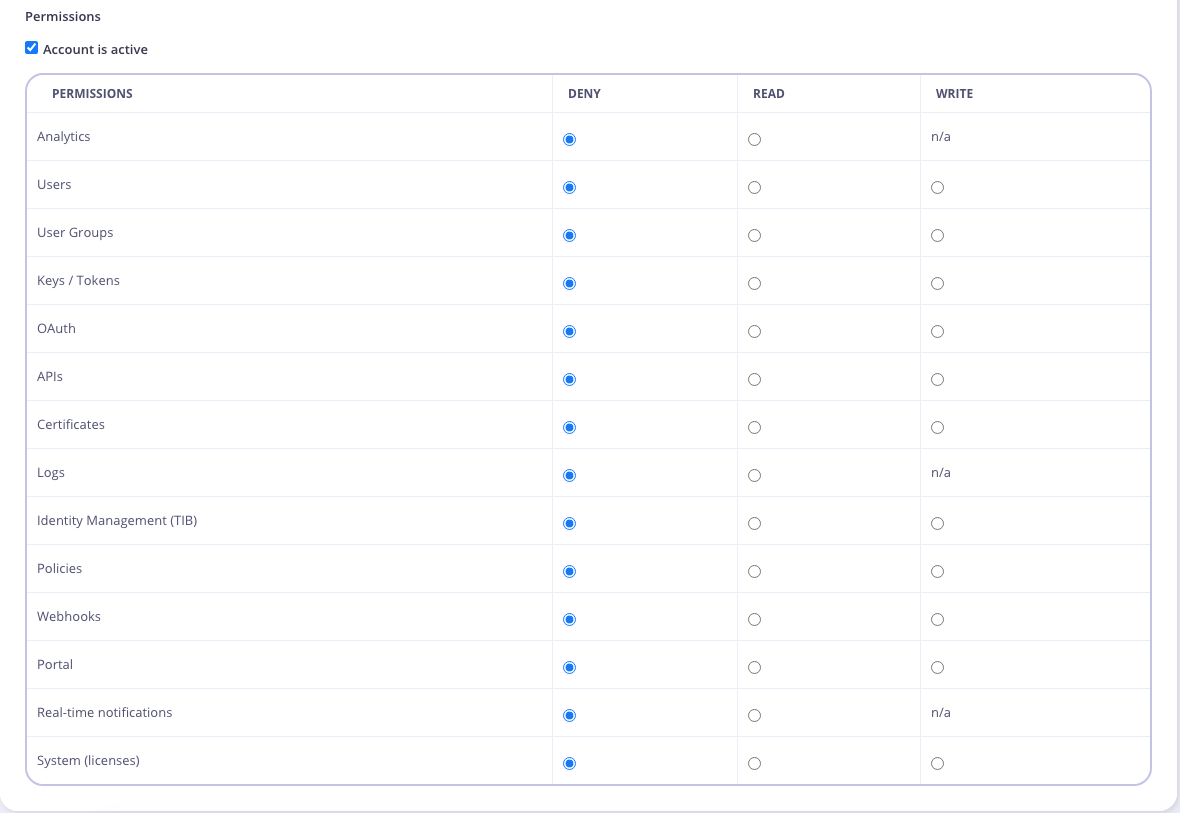
Set User Group Permissions
Selet the User Group Permissions you want to apply.
-
Click “Save” to create the Group
-
Add Users to your Group
- From the Users menu, select Edit from the Actions drop-down list for a user to add to the group.
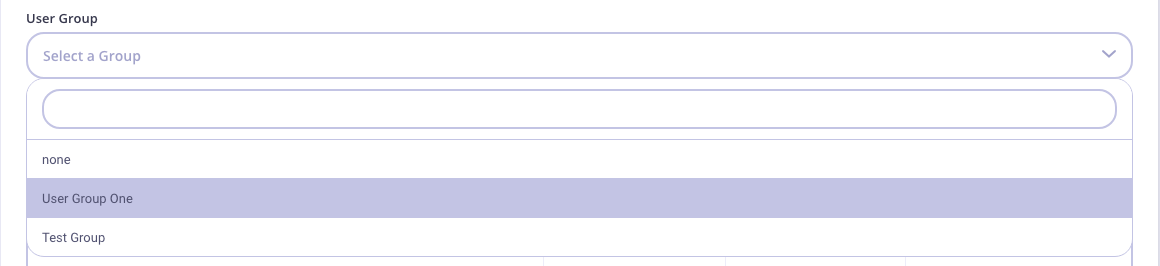
- Select your group from the User group drop-down list.
Using Dashboard API
You can also manage User Groups via our Dashboard API. The following functions are available:- List all User Groups
- Get a User Group via the User Group ID
- Add a User Group
- Update a User Group
- Delete a User Group
Search Users
You can search for a user (by email address) by entering the address in the search field. The user list will automatically refresh with that user being displayed.
Password Policy
Tyk allows you to control password requirements for Dashboard users, developers (i.e. users registered to the developer portal) and basic auth keys. Please note: This configuration is enforced by the Tyk-Dashboard and as such is not available in the Tyk Open Source Edition. Also, since it requires access to the Tyk Dashboard installation folder, it is currently not available for Tyk Cloud clients. There are other security options available from the Dashboard config file. See the security section for more details. You can find the configuration files in theschemas directory of your Tyk Dashboard installation folder, as follows:
- For Dashboard users you define policy in
schemas/password.json - For developers you define policy in
schemas/developer_password.json - For basic auth keys you define policy in
./schemas/basic_auth.json
minLength- sets minimum password lengthmultiCase- boolean, upper and lower case characters are requiredminNumeric- minimum number of numeric charactersminSpecial- minimum number of special characters, like@,$,%etc.disableSequential- boolean, disable passwords which include at least 3 sequential characters. For example:abc,123,111,xxxetc.
password.json file, with all options turned on:
User Permissions
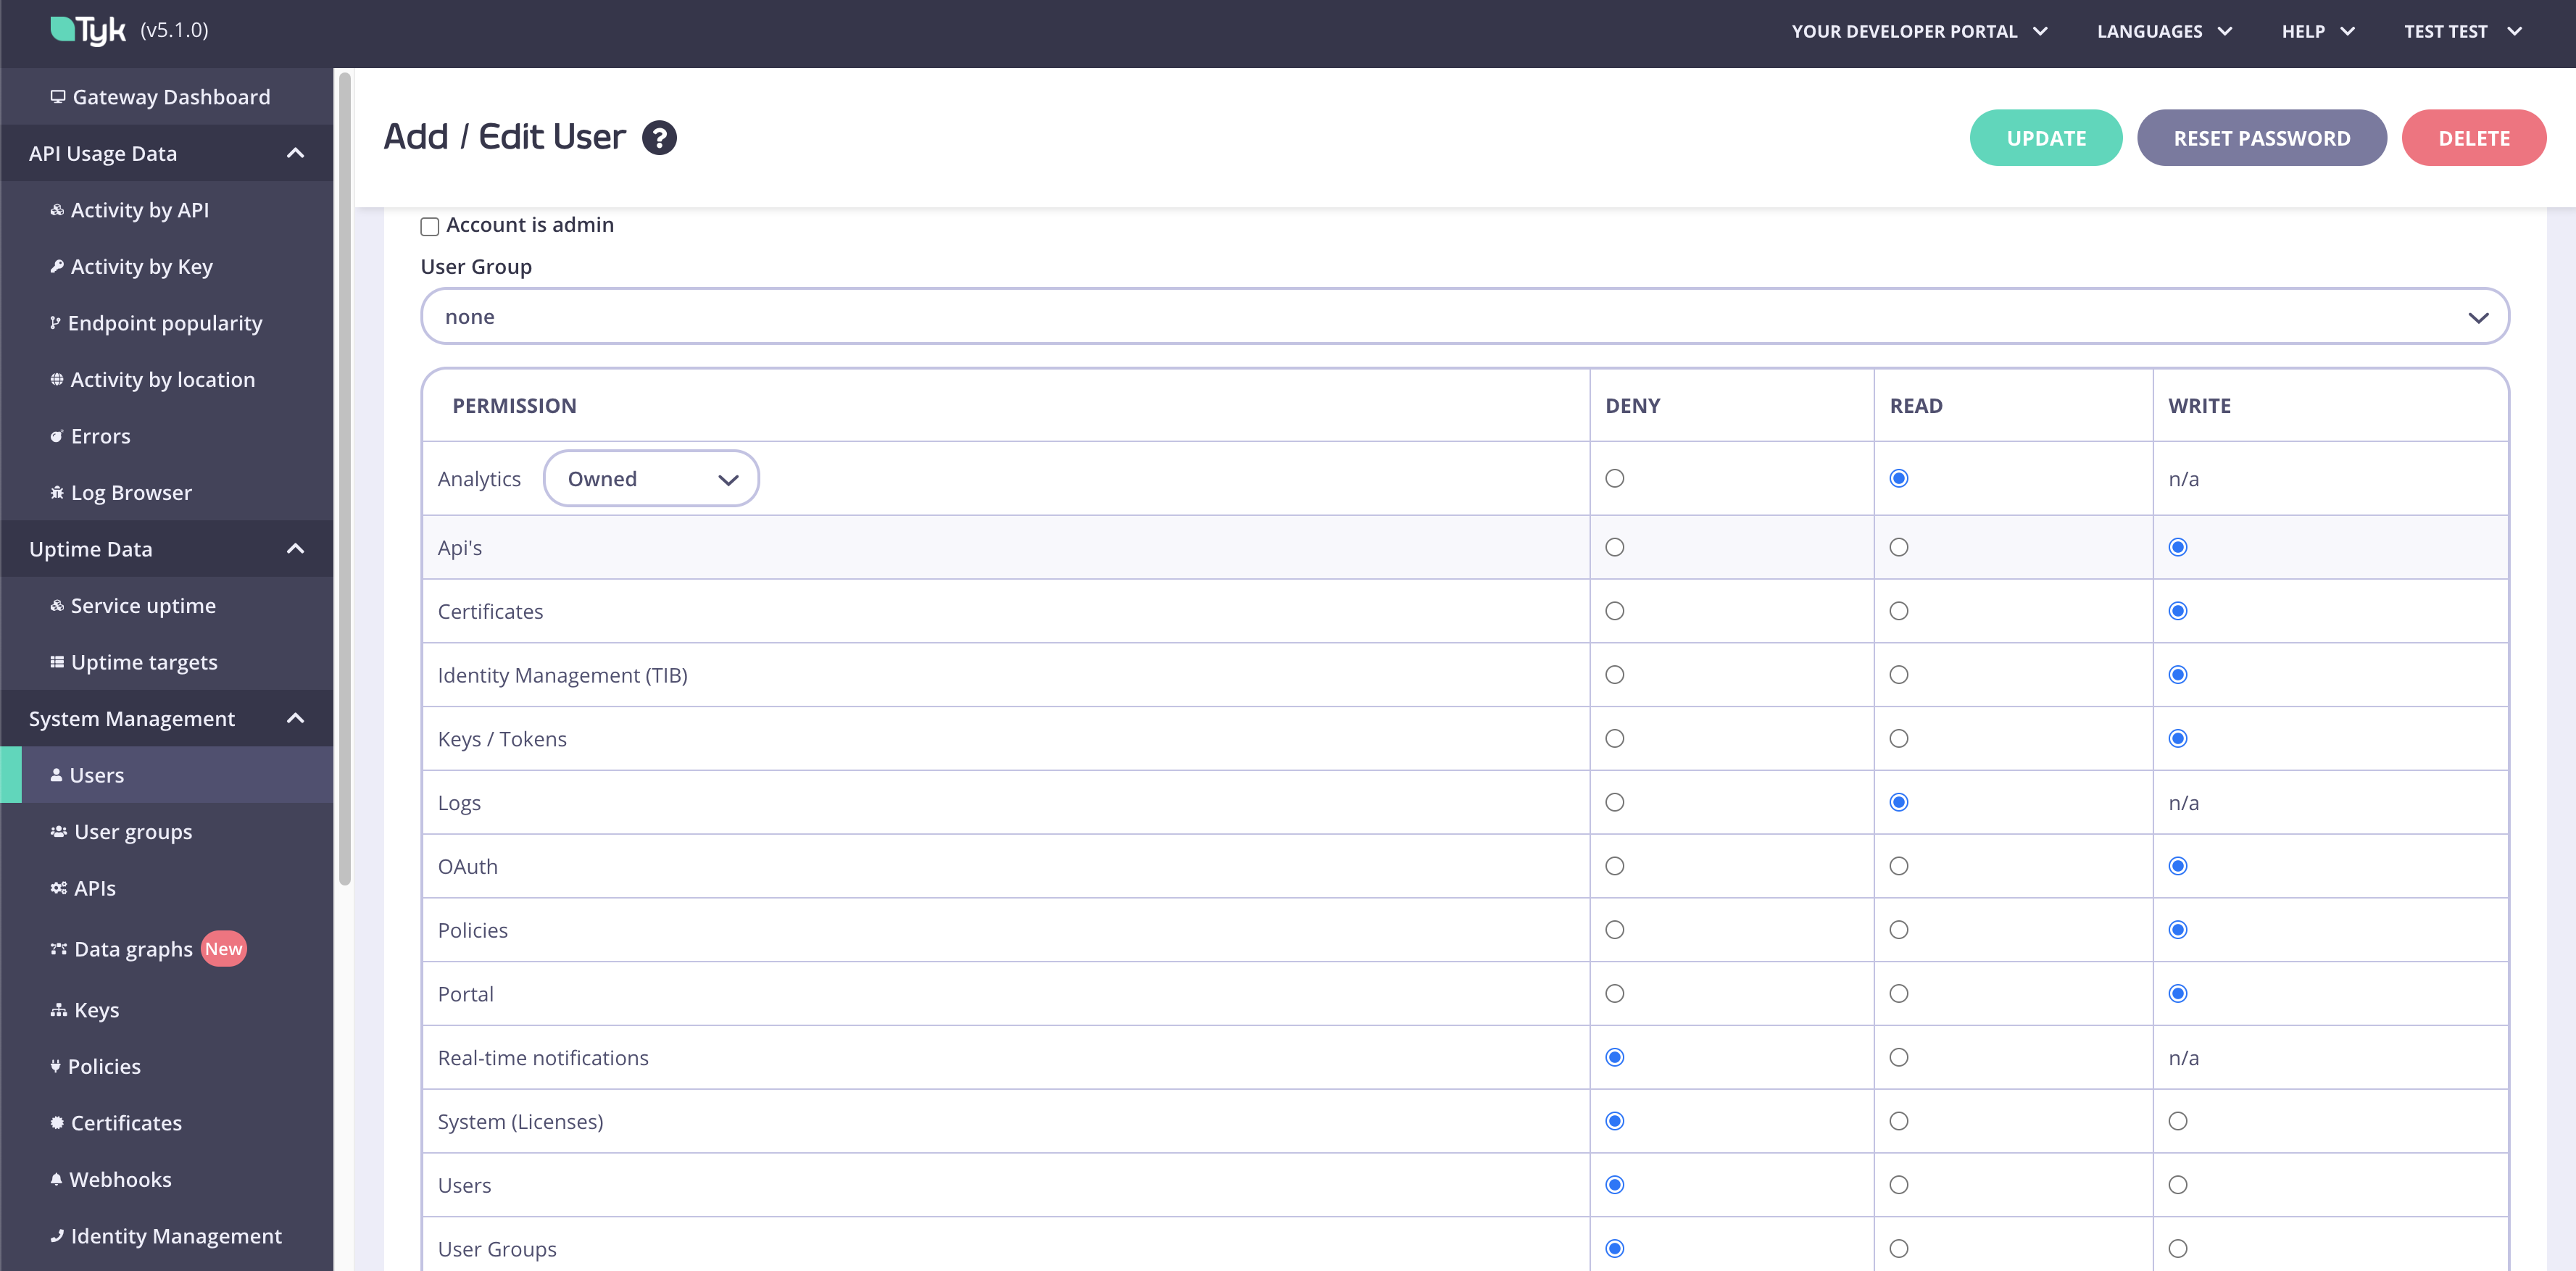
The Tyk Dashboard is multi-tenant capable and allows granular, role based user access. Users can be assigned specific permissions to ensure that they only have very specific access to the Dashboard pages, and to the underlying API. It is important to note that all user roles are defined and enforced at the Dashboard API level, and the UI is merely reactive.Admin Users
An admin user has read and write access to all properties. The initial user created during the dashboard’s bootstrapping process is automatically assigned the admin role. There are two configuration parameters that restrict the admin user’s capabilities. For enhanced security, both of these values should be set totrue:
- security.forbid_admin_view_access_token: This parameter restricts admin users from viewing other users’ Dashboard API Access Credentials, both in the API and the UI.
- security.forbid_admin_reset_access_token: This parameter prevents admin users from resetting the access tokens of other users.
User permissions in the Tyk Dashboard API
The permissions object, which is provided to the Dashboard API has this structure:- if it contains
"IsAdmin":"true", the user is an admin - if it contains no properties, the user is assumed to be an admin
- if it contains even just one property, it acts as an allow-list: only the listed properties are allowed
- any non-listed properties are denied
- permissable values for each section (other than
IsAdmin) are:readorwrite; to deny access to a property you must remove the property from theuser_permissionsobject
IsAdmin to true or by setting no properties in the user_permissions object.
User permissions in the Tyk Dashboard UI
User permissions are configured in the user detail view:denied sections or screens hidden or disabled. Note that some side-effects can occur if pages that make use of multiple APIs to fetch configuration data cross over e.g. policies and API Definition listings.
Selecting the Account is Admin checkbox from the Dashboard gives the user full access (it has the same effect as the IsAdmin property).
Custom User Permissions
You can create your own custom permissions for use with the Open Policy Agent (OPA) using the Additional Permissions endpoint in the Tyk Dashboard Admin API. This allows you to add and delete (CRUD) a list of additional (custom) permissions for your Dashboard users. Once created, a custom permission will be added to standard list of user permissions. You can also configure these custom permissions in thesecurity.additional_permissions map in the Tyk Dashboard configuration file.
API Ownership
API Ownership is the concept of Role Based Access Control applied to the portfolio of APIs deployed on your Tyk Gateways and managed from your Tyk Dashboard. If you have multiple teams, where each team maintains its own APIs and you want to limit access of the dashboard to the team level. For each API, you can assign owners, where an owner can be either an individual user or user group. Only owners have access to these APIs, and objects created based on them like policies or analytics.Multi-team setup using API Ownership
The availability of this feature depends on your license.
When to use API Ownership
Governing a multi-team API portfolio
API ownership is a key capability when you have multiple API development teams each working on their own suite of APIs. You can use API Ownership to simplify the experience of those developers when accessing Tyk by reducing the “clutter” of APIs that they are not working with, and also to avoid the risk of users accidentally or maliciously interfering with another team’s APIs.Avoiding data leakage between users
The user owned analytics feature allows you to prevent users from seeing the traffic to (and existence of) APIs for which they are not responsible. This reduces the opportunity for data leakage within your business.How API Ownership works
By default, APIs and associated objects (such as policies and Dashboard analytics) are visible to all Tyk Dashboard users. A Dashboard User (or User Group) can be assigned as the owner of an API, granting that user (or user group) exclusive visibility of and - given appropriate permissions - the ability to manage all the Tyk objects relating to that API, such as policies, key requests and Dashboard analytics. Once an API has been assigned an owner, all non-owning users will lose visibility of - and access to - that API in the Tyk Dashboard. Where there is a conflict, for example when a policy is associated with multiple APIs and the user owns only one of those APIs, the user will have access to the object (though not the other APIs themselves).API Ownership example
Imagine that you have two APIs: API1, API2. You have three teams which have different roles and responsibilities as follows:- TeamA which must have access to configure API1
- TeamB which must have access to configure API2
- TeamAnalytics which should only have access to view the analytics for both API1 and API2
- TeamA requires
"apis": "write" - TeamB requires
"apis": "write" - TeamAnalytics requires
"analytics": "read"
- API1 - TeamA, TeamAnalytics
- API2 - TeamB, TeamAnalytics
write access only to API1
TeamB will have API write access only to API2
TeamAnalytics will have Analytics read access to both APIs
Enabling API Ownership
API Ownership must be enabled in your Tyk Dashboard configuration, which you can do using either of the following approaches:- set
enable_ownershiptotruein yourtyk_analytics.conf - set the
TYK_DB_ENABLEOWNERSHIPenvironment variable totrue
Owned Analytics
Access to Tyk Dashboard’s traffic analytics is controlled via theanalytics permission in the user or user group access control configuration. The default behavior of this control is to grant or restrict access to all traffic analytics and does not take into account API ownership.
The additional owned_analytics permission was added in Tyk Dashboard v5.1 (and LTS patches v4.0.14 and v5.0.3) to provide more granular access to traffic analytics. By configuring this permission, the user (or user group) will gain visibility only of those analytics that can be filtered by API (due to the method Tyk Pump uses to aggregate the analytics records).
Currently, only API Usage and Error Counts are available to users with the owned_analytics permission.
Note that the owned_analytics permission depends upon the analytics permission being granted (set to read) - without this, the more granular control is ignored and the user will not have visibility of any Tyk Dashboard analytics.
In the Dashboard UI, the control for owned_analytics is implemented as a drop-down option (all or owned) on the analytics permission.
Managing API owners using the Dashboard UI
The Dashboard UI provides a simple method for managing ownership for your APIs, where you can select from the lists of users and user groups that have been created in the Dashboard. Users and user groups are managed in separate lists for ease of use.Using Tyk OAS APIs
When using Tyk OAS APIs, the option to assign owner(s) to an API is provided on the Access tab in the API Designer. You simply select the owner (or owners) that you wish to assign to the API from the drop-down boxes: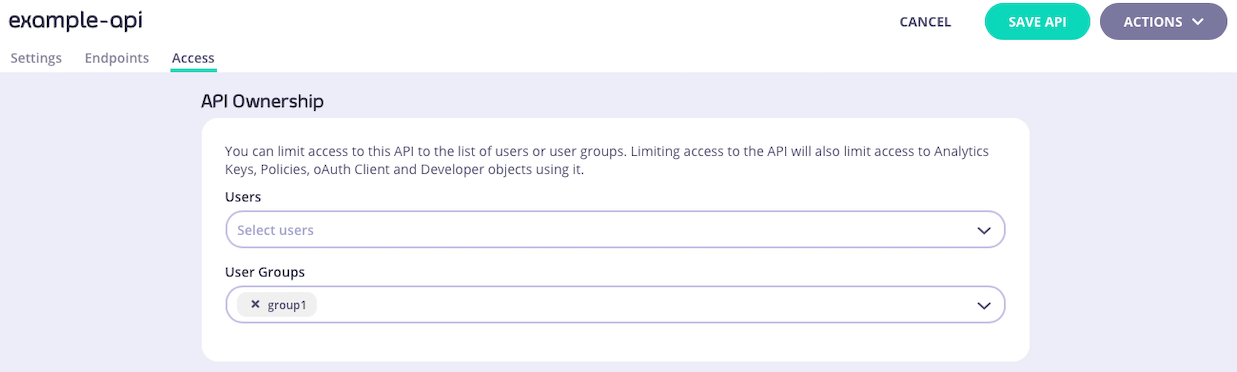
x next to their name in the drop-down/selection box.
Using Tyk Classic APIs
When using Tyk Classic APIs, the option to assign owner(s) to an API is provided on the Core Settings tab in the API Designer. You simply select the owner (or owners) that you wish to assign to the API from the drop-down boxes: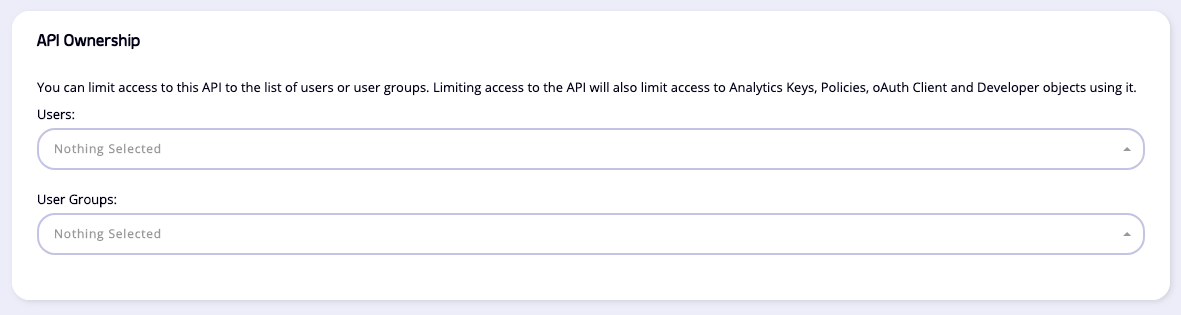
Managing API owners using the Dashboard API
The Tyk Dashboard API provides endpoints to manage API ownership directly, if you are not using the API Designer.Using Tyk OAS APIs
When working with Tyk OAS APIs, you can manage owners for an API using these endpoints:
For each of these endpoints, the payload consists of two string lists: one for user IDs, the other for user group IDs.
Using Tyk Classic APIs
When working with Tyk Classic APIs, you manage owners for an API by modifying theuser_owners and user_group_owners fields in the API definition and then updating the API in Tyk with that using these endpoints:
Manage Tyk Dashboard Users in Multiple Organizations
If you have deployed multiple Tyk Organizations, you may have users that need access to more than one Organization (known as a “multi-org user”). This functionality requires a specific Tyk license. To support multi-org users, you must first enable the feature in your Dashboard configuration by setting either of the following totrue:
"enable_multi_org_users"intyk_analytics.confTYK_DB_ENABLEMULTIORGUSERSenvironment variable
A user that does not belong to an Organization is sometimes referred to as an unbounded user. These users have visibility across all Organizations, but should be granted read-only access.